Tag: Muscle Gain

9 of Arnold Schwarzenegger’s Timeless Bodybuilding Tips
Before he was the Governor of California or a record-setting box office actor, Arnold Schwarzenegger was a seven-time Mr. Olympia winner, five-time Mr. Universe, and the most recognizable bodybuilder in the world. He’s … Read more
The post 9 of Arnold Schwarzenegger’s Timeless Bodybuilding Tips appeared first on BarBend.
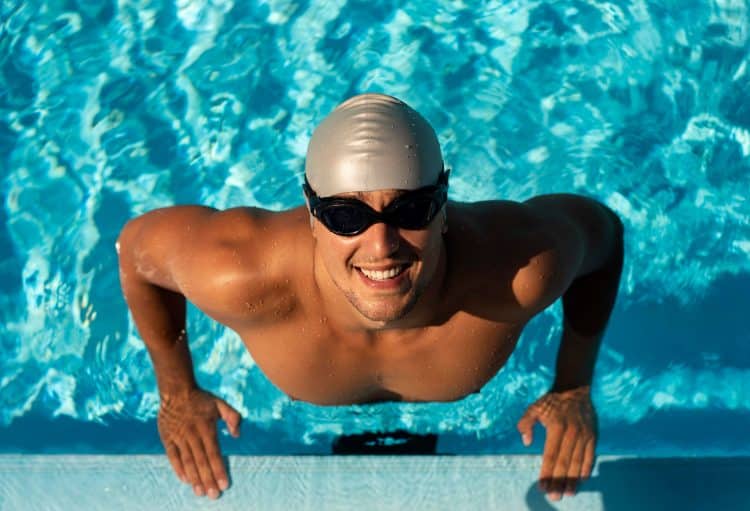
Swimming Body Transformation: Tips & Drills To Build Muscle & Lose Fat
Swimming is an excellent low-impact cardiovascular exercise that will improve your lung capacity and allow your heart to beat more powerfully. But will it help you transform your body?
The answer to that question is a resounding yes! Not only is swimming a fantastic fat-burning form of workout, but it also helps build strength, endurance, and muscles. To transform your body in the pool, though, you’ve got to know how to do it right.
In this article, we’ll explore how swimming can help you lose unwanted body fat and gain muscle and provide you with the ideal in-the-water workouts to achieve those goals.
Why Swimming is Good For You
Swimming delivers all-around fitness benefits. It will improve a person’s strength, stamina, and suppleness all at the same time. Let’s break down the benefits of swimming regularly:
Improves Cardio Fitness
Swimming at a moderate pace for an extended period gives you an aerobic workout. Better still, it does it in a way that does not stress your joints. Regular swimming will improve your cardiac efficiency so your heart can pump more blood with every beat.
Because swimming works all the body’s major muscle groups, it promotes better blood flow and circulation. Improved circulation will transport oxygen and nutrients to your muscle cells more efficiently.
The controlled rhythmic breathing needed for swimming will boost your lung capacity so that you can take in more oxygen with each breath. [1]
Total Body Workout
Swimming provides a total body workout. Because water is around 800 times more dense than air, your muscles are more engaged, and your heart and lungs have to work harder. It’s also a great way to increase your metabolism and has an extremely low impact on the joints.
Swimming is a challenging form of exercise. It also works different muscles, depending on the stroke. If you do a mixture of back-stroke, freestyle, and breaststroke, you will exercise all major muscle groups, including abdominals, biceps and triceps, glutes, hamstrings, and quadriceps.
Swimming also helps keep joints flexible, especially in the neck, shoulders, hips, and groin, as you move your body through the water. So, it truly does provide a total body workout. [2]
Joint Friendly
Swimming is less taxing on your joints than most exercises. This is because your body’s natural buoyancy on the water helps avoid the jarring and bouncing that can lead to injury. When you are in the water, your weight is about one-tenth of your actual weight. You also get a much greater range of motion than on land. In addition, the water will support the weight of your limbs.
That makes swimming a fantastic choice for people that experience joint pains during land-based exercises. This may include people who suffer from arthritis, have back problems, are overweight, or are pregnant. An additional bonus for people with asthma is that the air around a swimming pool is usually very humid, making breathing easier. [3]
Ideal for Rehab
Swimming is excellent for people with injuries. The low-impact nature of swimming provides an option that you don’t get with most exercises — it provides a cushion for your injured body parts. The zero gravity environment allows you to slowly and safely strengthen your muscles and cardiovascular system as you rebuild from an injury. [4]
Safe During Pregnancy
Swimming can be done by most women during any stage of pregnancy. We’ve already covered the low-impact nature of swimming that makes it ideal for pregnant women. The water’s weightlessness and buoyancy can also help relieve pressure on the spine and pelvic area during pregnancy.
Swimming will boost a pregnant woman’s blood circulation and heart health. This will benefit both mother and baby. [5]
Improves Sleep
The combination of physical and mental effects of swimming will enhance your sleep. Swimming has a calming effect on the mind. It helps you relax and lower your stress levels, which can help you unwind before bed.
Swimming in water that is below your core body temperature helps alleviate the overheating that is common with land-based workouts. After a swim, your body temperature will gradually return to normal, which promotes sleep. Add in the physical exhaustion that results from a decent swim session, and you will definitely receive the sleep-enhancing benefits of this exercise. [6]
Boosts Mood
Swimming has a peaceful and calming effect on the psyche. The water’s rhythmic movements and the sense of weightlessness reduce stress and anxiety levels. Swimming encourages the release of endorphins, which are organic mood enhancers. These “feel-good” hormones can promote well-being and serve as a natural stress reliever.
Physical exercise like swimming can enhance cognitive performance and mental clarity. The increased blood supply to the brain encourages improved focus and concentration. Swimming is also a kind of mindfulness and meditation practice because it allows you to concentrate on your breathing and movements. This mindfulness can calm the mind and help reduce mental chatter. [7]
Reaching such swimming goals as improving stroke technique or extending swimming distance can help enhance self-esteem and give swimmers a sense of achievement. Finally, swimming can help develop mental toughness and discipline, particularly during demanding sessions.
Swimming for Weight Loss
People try all sorts of things to lose weight. They run, they skip, and they lift weights. But you rarely hear of people who swim to lose weight. Swimming simply doesn’t register with most people as an effective fat-loss mechanism. The reality is that swimming may just be one of the most effective ways of losing fat.
Can swimming help you lose belly fat?
Yes, swimming most definitely can help you to lose belly fat. Plus, it has a very low impact on your joints and tendons.
Swimming is a great full-body exercise. Unlike jogging or cycling, it incorporates the entire body’s musculature. It also delivers a very effective cardiovascular workout. The heart will be forced to pump oxygen faster to reach all corners of the body. This, in turn, will increase your metabolic rate.
A swimming workout is also very relaxing. A swim in the morning can set you up for a great day. This in itself will help you to lose weight. Stress increases your cortisol levels. This is a hormone that forces the body to store more fat. Swimming will lessen this effect.
What are Some Good Ways To Lose Fat While Swimming?
Let’s take a look at the two exercise approaches that are recognized as among the best when it comes to losing weight on the water:
Mid-Intensity Swimming
Mid-intensity swimming involves swimming at a pace you can maintain for 15-45 minutes. The key to getting the most fat-burning benefit here is to swim uniformly without stopping for the duration of the workout. Aim to work up to 45 minutes of non-stop swimming.
When you perform this type of constant mid-intensity cardio work at sixty percent of your maximum heart rate, your body will be forced to call on its stored body fat for energy. Your metabolism will also speed up, further enhancing the calorie burn.
If you are new to swimming, begin with five minutes of continuous swimming, then slowly build up your time. You will be surprised at how quickly your strength and stamina improve.
High-Intensity Interval Training (HIIT)
High-intensity interval training is well established as an effective way to lose fat fast. The same HIIT fat loss benefits you get in the gym can be achieved on the water. Here’s how to do it:
Begin with a slow five to 10-minute swim. Then swim for one minute at 90 percent of your maximum speed. Now recover for a minute at a very slow speed. Repeat the cycle five to ten times. If you can complete ten cycles (good luck!), then your training duration will be twenty minutes.
Alternatively, you can do two laps at high speed, followed by two slow laps, and repeat this cycle.
HIIT training will burn fewer calories than medium-intensity work while you are doing the workout. However, it will significantly accelerate your metabolism 24 hours after your workout. It will also release hormones into your system that will assist in the fat-burning process. This enhanced fat-burning process will continue for 48 hours. [8]
HIIT workouts can be very demanding. But they are within your capability. Just remember to start slowly and build up your intensity over time. For your first session, you might do just one sprint and one recovery for a total of two minutes of work time (don’t forget the 5-10 minute easy swim warm-up). Keep pushing yourself until you can complete between 5 and 10 cycles.
How much do you have to swim to lose weight?
Try to work four mid-intensity swim workouts into your schedule per week. However, you should limit HIIT workouts to once or twice weekly as it is very demanding. Any other swimming you do that day should be very low intensity.
Swimming Weight Loss Tips
If you are a beginner, consider training under the supervision of a swimming teacher.
Drink a minimum of two liters (70oz) of water per day
Do not eat within an hour of getting into the water
Reduce your carbohydrate intake
Reduce your caloric intake to maintain a daily caloric deficit
Join a club to increase your motivation
How many calories does swimming burn?
Medium-intensity swimming can burn an average of 0.1 and 0.14 calories per kilogram of body weight per minute. In other words, a 150-pound person will burn about 200 calories after 30 minutes of swimming. This compares to about 190 calories for 30 minutes of running.
From the above comparison, we can see that swimming burns slightly more calories than running over the same period. At the same time, swimming is far less taxing on your joints. So, if you have the choice, you should choose swimming over running.
Swimming is a fantastic way to lose weight. Follow our guidelines to build swimming into your weight loss program, combine it with a sensible nutrition program, throw in a dose of consistency, and you will be well on the way to achieving your weight loss goals.
Check Out: Calories Burned Swimming Calculator
Does Swimming Make You Hungry?
Have you noticed that you tend to get hungry after a session in the pool? There are some physiological reasons for those hunger pangs. One reason is that your body is warming up to return to your core body temperature. That requires energy in the form of calories. You have already burned off many calories in the pool, so combining the two will increase your appetite by stimulating the release of ghrelin, known as the hunger hormone.
Ghrelin release after exercise doesn’t just occur after a swimming workout. It’s common to all forms of exercise. But it is exacerbated by the need to warm the body up. The stimulation of the hunger hormone post-exercise is a reason why many people fail to lose weight. It’s very easy to choose the wrong types of post-workout food and/or to consume too many calories in your post-workout meal.
Research has shown that when you swim in a pool that is close to the ideal body temperature of 37 degrees Celsius (98 degrees Fahrenheit), you won’t feel as hungry after the session as if you were in a colder pool. Most pools, however, are at around 28 degrees Celsius (82 degrees Fahrenheit). [9]
One way to counter the cooling effect that causes you to feel hungry after swimming is to spend 10 minutes in a sauna or hot tub after you get out of the pool. A warm shower can have a similar effect, allowing you to return to your core body temperature quickly. Having a hot drink will also help.
We also recommend being prepared for your post-swim hunger pangs by packing some healthy snacks you can consume after you’ve changed.
Here a half a dozen great snack choices:
Greek yogurt with berries
Hard-boiled eggs
Cottage cheese with pineapple
Protein smoothie
Tuna salad
Rice cakes with nut butter
Swimming for Muscle Gain
Look at the physiques of top-class swimmers, and it quickly becomes obvious that it can help you build muscle. While they may not possess a bodybuilder’s physique, pro swimmers have an athletically muscled body with a great V-taper and a tight midsection. That sort of body, though, doesn’t happen automatically.
To build muscle through swimming, you have to combine your in-the-water work with time in the gym and nail your nutrition.
Can You Build Muscle from Swimming Alone?
Even though swimming is mainly thought of as a cardiovascular exercise, you are actually working against resistance in the pool. That is due to the viscosity of water. Water is 784 times more dense than air. So, every stroke you take is a form of resistance training.
With swimming, you have limited options for progressively increasing the resistance level. When you are in the gym, you can simply add more weight to the bar. You obviously can’t do that in the pool. However, because swimming is a weight-bearing activity, you can do it for a long period. It is also far safer than doing an exercise on land, allowing you to do it more often with less chance of injury.
Due to the limited potential for progressive resistance, a non-trained person can build strength and muscle mass when they begin swimming. However, this will peter out when their muscles become accustomed to the resistance provided by the water. From that point on, they will continue to develop muscular endurance, but there will be little in the way of hypertrophy.
Muscle Building Swimming Drills
Here are seven drills that will help you create the extra resistance in the water you need to build muscle:
1. Kickboard Resistance
Here’s a drill to help build strength and size in your quads, glutes, hip flexors, glutes, shoulders, and lats. You’ll need a kickboard for this exercise.
Lie in the water with your feet against the wall, with a kickboard in front of you at arm’s length, held vertically, with half of it under the water.
Push off the wall, keeping your arms locked in front of you.
Kick as hard as you can to swim the length of the pool
2. Pool Pulls
This drill focuses on strengthening and developing your arms and shoulders. You will cut out your lower body involvement by placing a pool buoy between your legs. This foam or inflatable device you hold between your thighs helps prevent you from kicking.
Stand in the pool with your back against the wall and a pool buoy between your thighs. If you tend to flutter kick with your ankles, you can also place a band around your ankles.
Swim the length of the pool, using only your upper body to propel you forward.
To progressively increase the resistance, you can wear paddles. This will increase the surface area of your hands, providing more load for the arms and shoulders.
3. Vertical Kicks
Vertical kicks are a leg-focused drill that works the quads, glutes, and hamstrings.
Move into an area of the pool where you cannot touch the bottom.
In an upright position, cross your hands over your chest.
Kick as hard as you can with the goal of driving your body up so that your upper body lifts out of the water.
Continue for 20 seconds.
Rest for 20 seconds, then repeat. Do this four to five times.
To add resistance, wear fins.
4. Pool Jumps
This drill provides an effective glute, core, quad, and upper body workout.
Get into the pool in an area where your feet are touching the bottom and stand facing the wall with your hands on top of it.
Push through your thighs as you pull yourself up to bring your feet out of the water to land on the pool’s edge.
Reverse the motion to return to the pool.
Do three pool jumps in a row.
Rest for 20 seconds and then repeat.
Do three sets of three pool jumps.
5. Dolphin Kick
The dolphin kick is a great move to work your core. Add this to the mix to strengthen and develop your entire core region. To add resistance, do dolphin kicks while wearing fins.
The dolphin kick is a challenging swimming technique that will take some time to master.
Start with your torso long and straight, your arms extended over your head, and your hands clasped together. This is known as a streamlined position. Your face should be staring toward the bottom of the pool, and your head and spine should be aligned.
Just before beginning the dolphin kicks, take a deep breath. Since kicks are usually done underwater, you won’t be able to breathe while performing them.
Bring your feet together and slightly bend your knees to begin the dolphin kick. Instead of merely using your legs, use your hips and core muscles to generate power. The motion must be smooth and wavy, like a dolphin’s tail.
Keep your body line straight by pressing your hips up and your chest down. As your hips rise, your legs should begin to travel down. This downward motion produces the impetus that carries you forward. Keep your ankles supple and your feet close together.
You must use your full body, not just your legs, to do the dolphin kick. A coordinated effort between your core, chest, and shoulders should produce a continuous wave-like movement. Your strength and the length of your swim determine how quickly you kick. Longer, more powerful kicks are typically employed for longer distances, while short, rapid kicks are frequently used for shorter distances. How long you can hold your breath underwater determines the time you do the movement.
6. L-Shape Kick
Here’s another exercise that will get your core firing.
Enter the water with a kickboard. Position yourself as if sitting in a chair, hugging the kickboard to your chest. Your head and shoulder should be out of the water.
Maintaining an upright torso, straighten your legs to a horizontal position. You have now created an ‘L’ shape out of your body.
Begin kicking with your legs to propel yourself backward down the length of the pool.
7. Upright Skull
This is an upper-body-focused drill that makes a good counterpart to the vertical kick, which is lower-body dominant.
Move into an area of the pool where you cannot touch the bottom.
Place your arms just below the water’s surface in an upright position.
Move your arms from side to side in a sculling action to move the water.
Continue this action for 20 seconds.
Pause for 20 seconds, just kicking lightly to stay afloat.
Repeat the drill four more times.
Adding Drag
To increase resistance, you can make use of a pool parachute. This lightweight mini parachute you attach to your body with a harness or belt. The parachute will catch the water as you swim to create drag resistance. This helps to build strength and muscle size in the core and upper body.
Another way to add drag and resistance is to use a bungee cord. The cord is attached to a starting block on one end and clipped to your waist on the other end. You swim out until the cord is fully extended. Now continue swimming against the resistance for 20 seconds, even though you will go nowhere. Then allow the cord to pull you back in.
How to Breathe While Swimming
It wouldn’t be going too far to say that breathing technique is the most critical aspect of successful swimming. Learning to breathe correctly in the water can be challenging. Being anxious about getting enough air without swallowing water is normal.
Let’s break down the key things you need to do to master the art of breathing while swimming.
Whenever you are face down in the water, you need to exhale. This rids your lungs and bloodstream of carbon dioxide. As a result, when you rotate to breathe, you have more time to inhale as you don’t have to exhale first. Yet exhaling into the water is very unnatural for many people. Here is an exercise to help you with this:
Sink Down Drill
Tread water and breathe before bringing your arms down by your side and exhaling into the water. Your aim is to sink straight down to the bottom without any pauses or delays. Experiment between exhaling from your mouth and nose to see which is most natural for you.
When you exhale, you may find that you struggle to sink or that you sink a bit and then come back to the surface. This is a sign that you are not exhaling quickly enough and are subconsciously holding onto your breath.
If you sink a little but immediately return to the surface, do not give up. Keep exhaling. You will soon pass through a tipping point and then start to sink back down again.
Once you can sink to the bottom of the pool with a nice, controlled, and relaxed exhalation, try some easy laps of freestyle swimming, focusing on a smooth exhalation into the water using your normal breathing pattern to whichever side you feel most comfortable.
Using the Bow Wave
When you use a good stroke technique, your head will be low in the water when breathing. Lifting the head into the air excessively causes the whole upper torso to lift and the legs to sink, creating a lot of drag.
The secret to keeping your head low in the water is to breathe into the trough of air formed by the bow wave created around your head. The bow wave is formed as the head pushes forward through the water. This creates a small rise in the water in front of the head and then a trough alongside the chin and neck. This is a convenient channel to breathe beneath the main surface level of the water.
The bow wave forms off the top of your head. It is just deep enough to breathe into by the time it passes the level of your mouth. If you lift your head all the way out of the water to breathe, then the bow wave will not form off the top of your head, and there will be no trough.
On the other hand, if you bury your head in the water to improve your body position, this will also prevent the bow wave from forming.
To develop an effective bow-wave breathing technique, think about keeping the top of your head low in the water. Try to breathe just slightly behind you. Do not crane your head forward, as the bow wave will not be as deep. This will make it much harder to breathe.
Bilateral Breathing
Bilateral breathing is the ability to breathe to the left and the right, swapping sides regularly as you swim. This is good practice as it helps to keep your swim stroke symmetrical. Many people think of bilateral breathing as every three strokes alternately side to side. But there are other patterns, such as :
Breathing 2-3-2-3: This means breathing twice to one side in a row and then performing three strokes to swap to the other side for two breaths in a row. This is the method used by many competitive swimmers.
Breathing 5’s: Breathing every five strokes can be good for those with a fast stroke who find that breathing every three strokes makes them breathe too often.
Swapping Sides Every Lap of the Pool: This is often done in competition to keep an eye on competitors in other lanes.
Many swimmers find it quite a challenge to adapt to bilateral breathing. They find it very unnatural to breathe on their non-dominant side. But, most people find that if they persevere with it for six weeks, they will adapt to it.
Timing Your Breathing
It is important that when you rotate to breathe, your head should rotate with the body at the same time. Yet, swimmers often turn the head slightly later once the body is already rotated. So, if you are breathing to the right, the right arm will already be in the recovery phase over the top of the water before you start breathing. When seen from the side of the pool, this can look like the swimmer will knock their nose with the right shoulder as the arm comes over. Late breathing reduces the time available to inhale, making the breathing feel a little tense and hurried.
Think of turning your head away from your arm as you breathe. So, if you are about to breathe to your left, turn your head smoothly away from that arm as your right-hand passes your head and extends forward. This should happen in one fluid motion, with the head rotting as the hand enters the water.
Most people will find that their breathing timing is better on one side than the other. Interestingly, it is often the preferred breathing side that has late timing.
Swim Breathing FAQs
Why is it sometimes hard to breathe underwater properly?
It is sometimes hard for people to breathe properly underwater because most of us feel anxiety when underwater. This is made worse when it comes to the idea of breathing underwater. We fear that we will be unable to breathe. There is a worry about getting a mouth or nose full of water. So, the first step in breathing underwater is learning to relax.
What is the Alexander breathing technique?
The Alexander technique is a method of breathing that connects posture with breathing ability. Alexander stated that working on one’s poise is more likely to have a positive effect than doing breathing exercises. This principle applies equally to swimming. You can prove this to yourself by doing the following:
Sit forward on a chair with both feet on the ground. Rock forward from the hips, maintaining the length of the neck, and your body is 45 degrees with the eyes looking forward and down.
Gently say ‘Aah’ and see how long you can comfortably sustain this sound.
Now, without altering your position, take a breath and pull the head back so your eyes look ahead. Say ‘Aah’ again, and note the changes in the duration or quality of the sound. You will see a reduction in time because your breathing has been strained.
You can, therefore, improve your swimming breathing by improving your posture.
A Dozen Tips to Improve Your Swimming Technique
Swimming does not come naturally to most people. Here are a dozen practical tips to help improve your swimming form:
Tip #1: Master Your Freestyle Stroke Technique
Freestyle is also known as the flutter kick because the feet seem to flutter at the water’s surface. Keep the legs relaxed and begin the movement at the top of the legs. The legs should flex slightly at the knee on the downbeat and straighten on the upbeat.
Hand entry must be smooth, with a high wrist and elbow action. Entry should be made on the shoulder line, with the index finger and thumb entering the water first. After the entry, the hand slides forward and slightly downward.
The catch is made following the entry of the hand, with the wrist slightly flexed.
At the completion of the catch, the elbow begins to flex, and the hand begins a downward and outward path. As the hand approaches its deepest point, the down sweep is rounded into an up sweep.
The push phase begins at the end of the down sweep, with the hand moving outward and up.
The recovery phase starts with a high elbow action initiated by a shoulder roll with the hands passing close to the side of the body. The hand travels upward, slightly outward, and forward during the first half of recovery, with the palm facing either inward or backward.
Tip #2: Practice Your Power Stroke Technique
The power stroke is a continuous arm stroke style where the arms move almost opposite each other. When one arm is in front, the other is at the back. At no time should both hands be seen in front of the head. Practice short distances at first, with the face in all the time. Then slowly move to longer distances, adding breathing.
Tip #3: Practice ‘Chicken Wings’
This drill is used to develop a high elbow style. On recovery, the elbow is lifted high, with the thumb drawn along the side of the body until the thumb reaches the armpit.
Tip #4: Evaluate Your Freestyle Technique
Look out for:
Smoothness as one arm takes over from the other for the pull
High in the water body position
Good body alignment, first on one side, then on the other
Balanced movements
Economical use of legs
Tip #5: Perfect Your Breathing Technique
The following drill will help you to develop an efficient breathing pattern:
Hold a kickboard with one hand, thumb, and fingers on top and the elbow extended.
Bend the knees to allow the shoulders under the water, turn the head to the side and place the face flat onto the water.
Breathe naturally and gently rotate the head until the eyes face the pool’s bottom. Without a pause, gently rotate the head out again.
Tip #6: Master Your Backstroke Technique
Develop confidence in gliding on your back in a streamlined position with the body slightly angled in the water.
The depth of the head determines the position of the body. The ears should be just under the surface, the eyes looking up at about a 70-degree angle, and the body straight and relaxed.
Keep a continuous kick action going while learning the stroke. The toes should make a splash on the surface while the knees remain below.
The feet should be smooth, as ankle flexibility is very important. The toes should be turned naturally inward.
Breathe naturally and avoid holding your breath.
Follow a down-up-down arm recovery action. The body should rotate from side to side to assist the entry and recovery of the hands and arms.
During the upward, backward, and inward arm movement, the hand should begin to accelerate.
Once the shoulder is level with the hand, the palm begins a downward and outward motion until the hip passes the hand.
The shoulder lifts, followed by the arm and then the hand. The back of the hand of the recovery arm is uppermost as the hand leaves the water.
When the recovery arm reaches the vertical position, the palm faces outwards, ready for a smooth, turbulence-free re-entry with the little finger entering first.
Tip #7: Evaluate Your Backstroke Technique
Look for:
Head back, chest up, streamlined position
Continuous kicking action
Breathing naturally
Arm recovery starting with the little finger leading
Straight arms during the recovery phase
Down-up propulsive arm action
Body rotates on the long axis, but the head remains still
Tip #8: Do the Periscope Drill
With one hand held by the side (palm down), the other arm is raised to a near-vertical position, with the wrist relaxed and the back of the hand uppermost. Maintain a good body position and kick strongly over a distance of 10 meters (33 feet).
Rise and lower the arms alternately through 90 degrees to a count of ‘right-2-3-left-2-3.’
This drill will help you develop a vertical movement pattern in the recovery, with the arm reaching up and straight, except for a relaxed wrist.
Tip #9: Master Your Breaststroke Technique
From gliding, rotate the hands out to catch the water.
Bend the arms and forcefully pull them back to shoulder level. Make sure the elbows are pointed forward.
Bring the arms together under the body. Bend the legs, pull the heels slightly, and breathe deeply and quickly through the mouth.
Rotate the feet out and pull the toes toward the knees. The knees are about hip-width apart, the feet a little wider. The head should go back into the water.
A quick and powerful kick comes during the arm extension. Push the shoulders forward. Exhale through the mouth and nose as you glide.
Tip #10: Evaluate Your Breaststroke Technique
Look for:
Shoulders and body straight, hips flexed
Butt under the water
Eyes fixed straight ahead
Pull both heels to the rear simultaneously — do not jerk them!
Do not pull your knees under your stomach
Turn the toes out and upward toward the knees
Lower legs kick back quickly and forcefully
Push off the water with the bottoms of your feet
Fully extend the legs. Move the legs in a semicircle
Bend the arms as you pull back
Fully extend the arms, pushing the shoulders forward
Inhale deeply as you bring your arms together under your body
Kick as you extend your arms
Tip #11: Master Your Crawl Technique
After catching the water, the bent arm is pulled through the water under the body
The arm is bent the most when it reaches shoulder level. The legs move continuously, six kicks to one arm movement
The extended arm enters the water in front of the head. The head turns to the opposite side.
The other arm quickly and forcefully pulls back towards the thigh. This is when you should inhale.
Once the hand has left the water at the thigh, the relaxed arm again swings forward above the water. The face turns into the water to exhale.
Tip #12: Evaluate Your Crawl Technique
Look for:
Shoulders are up and straight
Don’t rock
The body is straight and hips are flexed
Eyes are level with the water surface
Place your feet on the water
Leg movements are the same as the backstroke, but in a prone position
Ankles are relaxed, toes extended
Bottoms of the feet break the water surface
Leg movements are round
Arms move continuously
Arms move alternately
The extended arm enters the water in front of the head
The fingers are together, and the palms are straight
Inhale quickly and deeply and the hand passes the thigh
Only turn your head to the side as you breathe; the shoulders stay straight
Exhale long and completely underwater through the mouth and nose
Alternate sides for breathing
Wrap Up
Swimming is a terrific form of exercise that combines aerobic and anaerobic effects like no other. It can also help transform your body, both in terms of losing fat and gaining muscle. In this article, we’ve covered several drills, strategies, and training methods that will help you burn fat and build muscle faster.
We recommend combining this pool work with weight training in the gym, and a nutrition plan designed to complement your goal. If your goal is to lose body fat, reduce your caloric intake by 500 calories below your maintenance level. To gain muscle mass, increase by 500 calories. Add two or three-hour-long sessions in the pool per week and watch your body transform.
References
Tanaka H. Swimming exercise: impact of aquatic exercise on cardiovascular health. Sports Med. 2009;39(5):377-87. doi: 10.2165/00007256-200939050-00004. PMID: 19402742.
Lee BA, Oh DJ. Effect of regular swimming exercise on the physical composition, strength, and blood lipid of middle-aged women. J Exerc Rehabil. 2015 Oct 30;11(5):266-71. doi: 10.12965/jer.150242. PMID: 26535217; PMCID: PMC4625655.
Alkatan M, Baker JR, Machin DR, Park W, Akkari AS, Pasha EP, Tanaka H. Improved Function and Reduced Pain after Swimming and Cycling Training in Patients with Osteoarthritis. J Rheumatol. 2016 Mar;43(3):666-72. doi: 10.3899/jrheum.151110. [4] Epub 2016 Jan 15. PMID: 26773104.
Marinho-Buzelli AR, Zaluski AJ, Mansfield A, Bonnyman AM, Musselman KE. The use of aquatic therapy among rehabilitation professionals for individuals with spinal cord injury or disorder. J Spinal Cord Med. 2019 Oct;42(sup1):158-165. doi: 10.1080/10790268.2019.1647935. PMID: 31573458; PMCID: PMC6783731.
Juhl M, Kogevinas M, Andersen PK, Andersen AM, Olsen J. Is swimming during pregnancy a safe exercise? Epidemiology. 2010 Mar;21(2):253-8. doi: 10.1097/EDE.0b013e3181cb6267. PMID: 20110815.
So BCL, Kwok SC, Lee PH. Effect of Aquatic Exercise on Sleep Efficiency of Adults With Chronic Musculoskeletal Pain. J Phys Act Health. 2021 Jun 30;18(9):1037-1045. doi: 10.1123/jpah.2020-0476. PMID: 34193628.
Bashiri H, Enayati M, Bashiri A, Salari AA. Swimming exercise improves cognitive and behavioral disorders in male NMRI mice with sporadic Alzheimer-like disease. Physiol Behav. 2020 Sep 1;223:113003. doi: 10.1016/j.physbeh.2020.113003. Epub 2020 Jun 6. PMID: 32522682.
Schaun GZ, Alberton CL, Ribeiro DO, Pinto SS. Acute effects of high-intensity interval training and moderate-intensity continuous training sessions on cardiorespiratory parameters in healthy young men. Eur J Appl Physiol. 2017 Jul;117(7):1437-1444. doi: 10.1007/s00421-017-3636-7. Epub 2017 May 9. PMID: 28488137.
King JA, Wasse LK, Stensel DJ. The acute effects of swimming on appetite, food intake, and plasma acylated ghrelin. J Obes. 2011;2011:351628. doi: 10.1155/2011/351628. Epub 2010 Oct 3. PMID: 20953411; PMCID: PMC2952805.
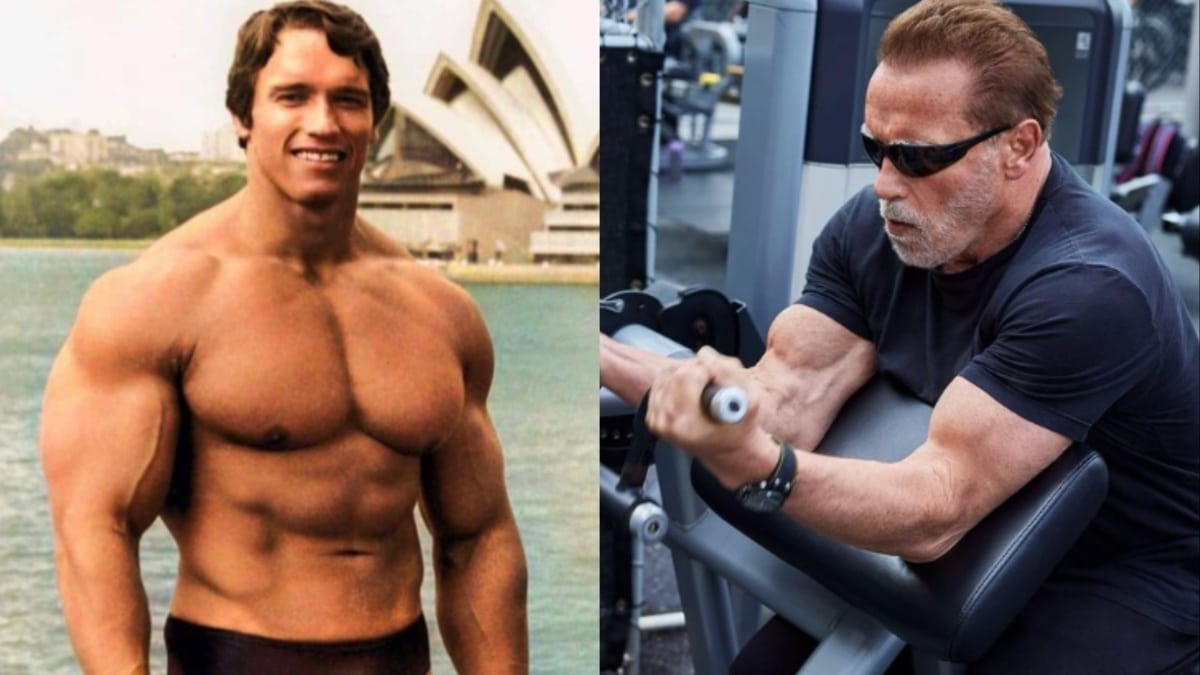
Arnold Schwarzenegger Unveils His 3-Tier ‘Hierarchy of Muscle Gains’
Arnold Schwarzenegger is a living legend who credits much of his success to health and fitness. He’s a former seven-time Mr. Olympia champion who graced bodybuilding’s biggest stages throughout the 1970s and 80s. In a recent edition of his newsletter, Arnold’s Pump Club, Schwarzenegger shared a ‘hierarchy of muscle gains’ which consisted of three tiers.
As one of the greatest bodybuilders of all time, Arnold Schwarzenegger still carries a deep passion for the sport. In retirement, he hosts the Arnold Sports Festival every year, an invite-only bodybuilding event, exclusive only to the most famous names in the IFBB Pro League. In addition to hosting these huge competitions, Schwarzenegger maintains an exceptional level of fitness at 75 years old.
Schwarzenegger was widely respected for his size, symmetry, and proportions throughout his bodybuilding career. He possessed huge arms, a slim waist, and a commanding chest, which helped him stand out on stage against competition. Before calling it a career, Schwarzenegger pushed himself against greats Franco Columbu, Frank Zane, and Sergio Oliva.
Given his status as one of the world’s best-built men, Schwarzenegger admits it’s been difficult to accept his physique as he’s gotten older. He’s also been more open about other sensitive aspects of his career, such as performance-enhancing drug use. According to Schwarzenegger, he utilized a two-compound cocktail of Dianabol and testosterone for most of his Olympia reign.
From governing the state of California to philanthropy and acting, Schwarzenegger has done it all. His love for working out and bodybuilding has persisted for decades despite his busy schedule. One of the last tips he offered fans was suggestions on achieving more youthful skin. This time, he’s teaching us how to extract the most out of consistent training sessions.
Arnold Schwarzenegger Breaks Down Hierarchy of Muscle Gains
When mapping out a workout plan, Schwarzenegger emphasized the importance of locking down a goal. The bodybuilding legend also underlined that consistency and compliance are most crucial for those aiming to build muscle or strength by working out.
“Scientists found that if you’re stressing about optimizing the number of workouts, days per week, or specific exercises, you’re missing the forest from the trees. Consistency and compliance are the most important variables for building more strength and muscle.
The researchers found that the weight you can lift and the number of sets you perform are not the main drivers of muscle growth. First, it’s consistency, and then it’s total volume. In other words, if you did ten sets of 10 reps using 20 pounds (10 reps x 20 pounds x 10 sets = 2000 pounds of total volume), it would be more effective at building muscle than three sets of 3 reps using 100 pounds (3 reps x 100 pounds x 3 sets = 900 pounds of total volume)…assuming the ten reps at 20 pounds was near failure.”
While glorifying heavy weights is easy, consistency is most important, and volume pushes your muscles to their limit. If ten reps of 20 pounds are easy, then that won’t force your muscles to work towards their capacity, which means even though you have high volume, you won’t grow. So if you wanted to create a hierarchy of muscle gains, it would be
1. Build consistent habits for training.
2. Push your body as hard as possible at each training session (most people don’t push themselves hard enough, and that’s why they don’t grow).
3. Focus on total volume.
Schwarzenegger mentioned that the frequency of training sessions can also have a dramatic impact on gains, whether for strength or muscle growth.
“If your goal is increasing strength, the variables change. You’re ability to become stronger is determined by progressively using more weight, the frequency of your training sessions (three times per week appears to be the sweet spot), and exercise order influences muscular strength.
Focus on your habits, make them automatic, and then you can figure out how to push yourself hard enough to see the desired results.”
Schwarzenegger’s impact on the sport is undeniable. Olympia judge Terrick El Guindy recently assessed his legacy on a special YouTube appearance. During the video, El Guindy called Arnold an ‘icon of modern times’ with a legacy that will last forever. El Guindy also examined Schwarzenegger’s physique before and after he became a Mr. Olympia winner.
READ MORE:
Similar to Joey Swoll’s mission, Arnold Schwarzenegger wants to see the world embrace fitness. He hopes to inspire and motivate people around the world with his workouts, recipes, techniques, and personal stories from his newsletter.
Published: 27 July, 2023 | 11:03 PM EDT
Progressive Overload: The Science Behind Maximizing Muscle Growth
If you have been in the iron game for a while, “progressive overload” might not be something new. It’s a common phrase to help explain what is needed for effective training.
The idea is pretty simple. Training must present progressively larger stressors over time for continued progress. However, as straightforward as it is, there are a ton of misconceptions. Progressive overload is about more than just adding weight to the bar. Yes, lifting heavier is part of it, but it is not the only way to progressively overload the muscles.
In this article, we will address some common fallacies and more as we dig into progressive overload and the science behind maximizing muscle growth.
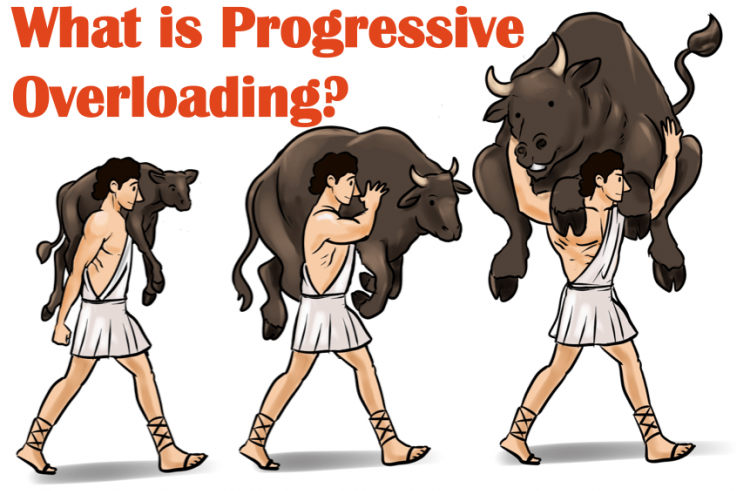
What is Progressive Overload?
All talk on progressive overload, for better or worse, starts with the story of Milo of Croton. Milo was an ancient Greek wrestler who was known as quite the stud. As legend has it, Milo began lifting a tiny calf on his shoulders daily. As the calf grew, Milo k
ept lifting it until one day, the baby calf grew into a full-grown bull. As a result, Milo grew too.
The story is more myth than fact, but it does help illustrate the concept of progressive overload. In simple terms, progressive overload means training must get progressively more challenging over time to continue stimulating adaptation.
But let’s take a step back.
The human body is a well-balanced machine controlled by homeostasis. It’s like the body’s built-in thermostat. Blood pressure, body temperature, and blood sugar are examples of homeostasis within the body. If the body detects any changes, it takes action to return to balance. It’s why we sweat in the heat and shiver in the cold.
Building muscle is no exception.
The process of building muscle can be described as stimulus, recovery, and adaptation. Or, in a practical sense — train, recover, and then get stronger and more muscular. Lifting weights is the first domino, but the entire process must repeat for continued progress.
The key is the stimulus must represent an overload. Overload is a workload beyond what the lifter is accustomed to.
The adaptation (getting more jacked) is only a result of the overload forcing the body out of homeostasis. This is why doing the same weight for the same reps is eventually a dead end. Progress slows or stops as soon as the workout is no longer challenging, and your body can maintain homeostasis.
Bottom line: Training must get progressively challenging for the workout to continue to deliver results.
Why Progressive Overload Is Essential
The importance of progressive overload comes down to mechanical tension. Mechanical tension is the stress applied to a muscle from external resistance. It’s what happens to the muscle when we lift weights. Although there are many factors for initiating muscle growth, mechanical tension is widely considered the primary factor.
To illustrate how critical tension is for building and maintaining muscle, look no further than astronauts in space. Whether we realize it or not, we are always resisting the force of gravity. Of course, gravity on earth is a low level of tension, but its tension nonetheless.
When astronauts are up in space, they don’t have gravity, so tension is removed. In fact, minimal muscle contraction is needed. According to NASA, astronauts experience up to a 20% loss of muscle mass during spaceflights. In a weightless environment, the body doesn’t require additional muscle mass. If you don’t use it, you lose it.
You may wonder what this has to do with progressive overload and muscle-building.
The reason astronauts lose muscle in space helps explain why progressive overload is essential for progress. The body only wants as much muscle and strength as it needs to carry out daily functions.
Lifting boxes, carrying our kids, and climbing stairs are examples of enough tension to create a hypertrophy stimulus, just a minuscule amount. Once we have enough muscle and strength for these daily functions, they no longer stimulate growth.
To grow additional muscle beyond what is needed for daily functions, we must introduce the body to higher levels of mechanical tension. At first, all forms of resistance training satisfy that requirement. This is why when you first start training, progress is easy. You get bigger and stronger if you show up to the gym a few times per week, give a reasonable effort, and eat halfway decent. But, the newbie gains only last for a brief period.
The body is very good at adapting. Eventually, just showing up will not deliver results. The body adjusted to the workouts the same way it did daily activities. Most of us have experienced this as we transitioned from beginner to intermediate. It’s often called a training rut or plateau.
You must continue overloading the body to break the plateau and stimulate progress.
How to Build Progressive Overload into Your Program
So far, we have talked a lot about the concept of progressive overload but have yet to learn how to implement it. There are many ways to build progressive overload into the training plan. Here are the most common:
Increase the weight lifted: Adding weight to the bar is the easiest way to build progressive overload into any training program. Accomplish this by increasing the weights lifted over time while maintaining the same reps and sets.
Increase the repetitions performed: Another option for progressive overload is adding repetitions over time while keeping the weights and sets performed the same.
Increase the number of sets: One of the most overlooked ways to build progressive overload into your program is by increasing sets. Do this by adding sets over time while maintaining weight and reps. Adding sets is a great way to increase training volume.
Increase the number of exercises performed: Adding exercises is another way to increase training volume and progressive overload. For example, you have implemented progressive overload if you usually do three chest exercises per week and bump it up to four.
Decrease rest periods: Training density refers to the work you can do in a given time. Completing your workouts faster is another form of progressive overload. You can accomplish this by decreasing rest periods between sets. That said, be careful not to reduce rest periods too much that it limits performance. For optimal performance, rest for 1-3 minutes between sets.
Progressive Overload Misconceptions
On the surface, this all seems straightforward. However, there are some common misconceptions we need to address.
Misconception #1: Progress is Linear
Okay, so we have established that doing more work overtime leads to progress. Awesome. Let’s do the math. If you can bench 135 pounds for five reps today and add five pounds to the bar each week for the next two years, you will be benching well over 600 pounds!
We all know it doesn’t work like that. But why?
Progressive overload is the observation of increased performance based on the adaptations that have already occurred. Put another way; you must earn the right to progressively overload your training. It’s not just the act of doing more work. It’s the result, too. Overload is limited by the positive adaptation that results from training. It can’t be forced. The limitations of muscle growth are beyond the scope of this article, but they exist.
Misconception #2: You Need to Progressively Overload Every Workout
Progressive overload does not need to occur in every training session. Beyond the beginner and early intermediate stages, this is unrealistic. However, growth will be limited if you do not add weight to the bar over time. The goal is to keep the big picture in mind.
The more advanced you get, the longer it takes to see meaningful progress. Sometimes you have to do the same thing for a couple of weeks before you can up the ante. The goal is not to do more in each workout but to push for more in each workout. Results will come if the programming is well-designed and the effort is there.
Misconception #3: It’s All About Going Heavy
The biggest misconception about progressive overload is that it’s all about lifting as heavy as possible. Yes, adding weight to the bar is an excellent way to progressive overload, but it’s not the only way. In fact, adding reps is highly effective. Research shows muscle growth occurs with low and high reps [1]. The key is pushing each set close to failure.
Misconception #4: It’s All About Volume
Over the past few years, training volume has received much attention as a primary driver of muscle growth. On the surface, this is true. Research comparing one, three, and five sets per exercise shows that multiple sets are more effective for muscle growth than a single set [2].
However, the response to volume follows an inverted “U” shape curve. What this means is, adding more volume works until it doesn’t. Eventually, volume increases to a point where it exceeds the body’s ability to recover. At that point, progress stalls and, if continued, starts to backslide. Besides, who has all day to spend in the gym?
The right amount of volume will be slightly different for everyone. Based on the current literature, ten sets per muscle group per week is a great spot to build muscle [3]. This doesn’t mean you can’t go beyond ten sets per week. You can. However, once you get beyond ten sets per week, start looking at other ways to build progressive overload into your program to facilitate progress.
Three Examples of Progressive Overload
The key to taking advantage of progressive overload is not leaving it up to chance. Here are three ways to build progressive overload into your program.
Example #1: Increase Weight
The first example is adding weight each week. Don’t be tricked by the simplicity of this setup. A basic linear load progression can be highly effective.
Week 1: 3 sets of 10 reps at 66% of 1RM
Week 2: 3 sets of 10 reps at 68% of 1RM
Week 3: 3 sets of 10 reps at 70% of 1RM
Example #2: Increase Sets
In example two, the number of sets increases weekly while the weight stays the same. Adding sets is a great way to increase volume without lifting heavier each week. Advanced lifters respond well to this style of overload.
Week 1: 3 sets of 10 reps at 68% of 1RM
Week 2: 4 sets of 10 reps at 68% of 1RM
Week 3: 5 sets of 10 reps at 68% of 1RM
Example #3: Increase Reps
The third example involves adding a rep each week while maintaining the sets and weight on the bar. Increasing reps each week is sometimes more feasible than increasing the weight.
Week 1: 3 sets of 8 reps at 70% of 1RM
Week 2: 3 sets of 9 reps at 70% of 1RM
Week 3: 3 sets of 10 reps at 70% of 1RM
Progressive Overload Principles
There are three progressive overload principles you must keep in mind.
Principle 1: Only change one variable at a time
The first principle of progressive overload is only to change one variable at a time. It’s easy to assume that if a bit of progression is good, more must be better. With progressive overload, that muddies the waters, making it hard to know what is driving progress.
Additionally, changing more than one variable at a time can cause you to push beyond your recoverability. For example, if you try adding weight and reps simultaneously, you can outpace your progress and miss reps.
Principle 2: Always maintain good technique
For progressive overload to work, we need natural progression. You can’t use a lousy technique to force weekly advancements that are not there. Adding weight or reps but allowing your form to break down differs from actual progression.
Principle 3: Keep a Training Journal
The key to progressive overload is knowing what you have done during your workouts in previous weeks. Keep a training journal and track the exercises, weights you used, sets, reps, etc. Before each training session, review the journal to know what numbers you need to beat.
Benefits of Using Progressive Overload
Regardless of your goals, there are many benefits to using progressive overload in your training.
Avoid Muscle Building Plateaus:
Once you get past the beginner stage, continuing to build muscle becomes harder. If you don’t have a strategy to build progression into your program, it’s easy to get caught in a muscle-building rut. Eventually, you will stop progressing if you continuously do the same exercises for the same weight, sets, and reps. By constantly planning ahead and building ways to stress the muscles to greater degrees, you can mitigate stalls in progress.
Gain Strength:
To gain strength, you need to lift heavy weights. There is no way around it. That said, you can’t just go to the gym and max out every time and expect to get the best results. Part of quality strength programming is gradually increasing the weights used systematically.
Save Time:
Chances are you live a busy life and can’t spend all day in the gym. Well, using progressive overload is the most time-efficient way to train. One of the problems with training programs that don’t use progressive overload is they end up with a lot of junk volume.
Junk volume is work that needs to be more challenging to stimulate muscle growth. Often this happens when working sets are not close enough to failure to produce enough tension in your muscles. People typically add more sets to make up for the abundance of junk volume. You can train for two hours at a time, but if the workout is 80% junk volume, it won’t deliver results.
Focusing on progressive overload and beating the logbook ensures your program has no wasted sets.
Frequently Asked Questions
What is an example of progressive overload?
There are many examples of progressive overload. You can increase the weight lifted, the number of sets performed, and do more reps or exercises.
Should I progressive overload every week?
In a perfect world, we could implement progressive overload every week. However, progress is only sometimes linear. As an advanced lifter, you can outpace your progress if you try to force weekly progressions. Think of progressive overload in the big picture. If week-to-week gains are too aggressive, aim for month-to-month.
Is progressive overload safe?
As long as you maintain good form, progressive overload is safe. That said, if you add weight too quickly, you can increase your risk of injury. Only use weights you can handle with good technique.
Can you grow muscle without progressive overload?
Yes, you can grow muscle without progressive overload, but only temporarily. Eventually, your muscles will stop growing unless you continuously apply more stress.
Wrapping Up
Progressive overload is one of the primary principles in strength training. Anyone can make progress for a short time, but as the iron game veterans know, long-term results are a different story. Whether you want to be as strong as possible or look great naked, your workouts must have built-in progressions.
That said, there is more to it than lifting heavier weights. Of course, always aim to get stronger, but don’t avoid the other methods of progressive overload, either. Using all the tools available is the key to long-term progress. Now all you have to do is put in the work!
References:
Schoenfeld BJ, Grgic J, Ogborn D, Krieger JW. Strength and Hypertrophy Adaptations Between Low- vs. High-Load Resistance Training: A Systematic Review and Meta-analysis. J Strength Cond Res. 2017 Dec;31(12):3508-3523. doi: 10.1519/JSC.0000000000002200. PMID: 28834797.
Radaelli R, Fleck SJ, Leite T, Leite RD, Pinto RS, Fernandes L, Simão R. Dose-response of 1, 3, and 5 sets of resistance exercise on strength, local muscular endurance, and hypertrophy. J Strength Cond Res. 2015 May;29(5):1349-58. doi: 10.1519/JSC.0000000000000758. PMID: 25546444.
Schoenfeld, Brad J, et al. “Dose-Response Relationship between Weekly Resistance Training Volume and Increases in Muscle Mass: A Systematic Review and Meta-Analysis.” Journal of Sports Sciences, vol. 35, no. 11, 2017, pp. 1073–1082, www.ncbi.nlm.nih.gov/pubmed/27433992, 10.1080/02640414.2016.1210197.
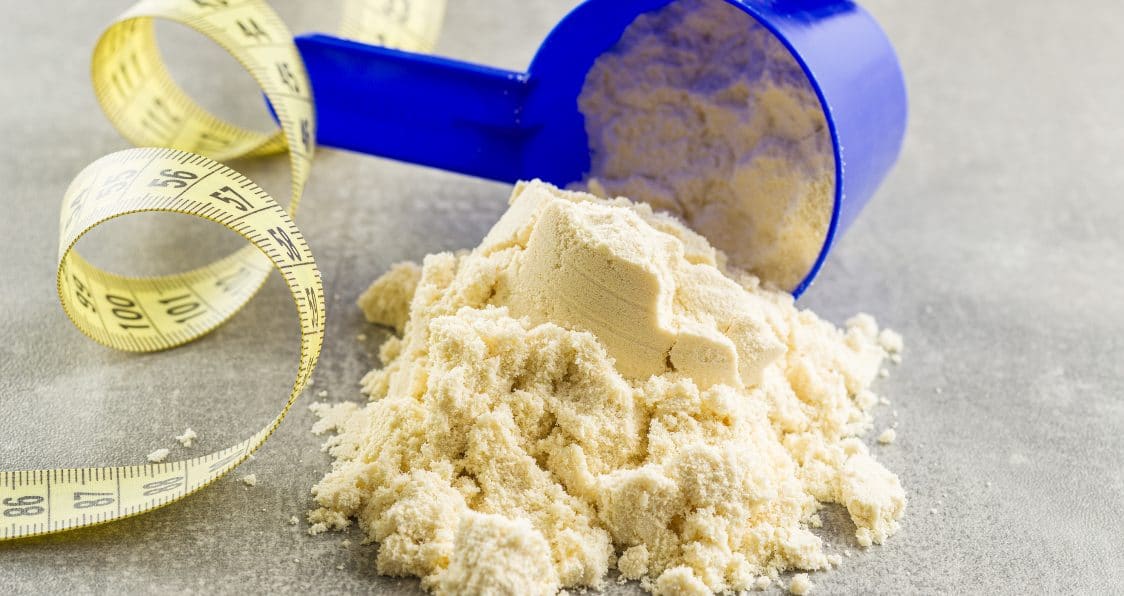
The Ins and Outs Of Protein Powder For Beginners
Protein powder is an incredible supplement that beginners need to know about.
We as experienced lifters may have an entire supplement shelf stacked with our favorites, but for those of us beginners who may not entirely know what to look for, start with protein powder. What these supplements can do are work wonders for your gains and allow you to thrive both inside and out of the gym.
As a beginner, you are still learning the ropes, and that is totally cool, but now it’s time to dive in and see what is out there to take your training to the next level. By putting an emphasis on protein and knowing just what protein can do for you, you will better set yourself up to see the best gains possible.
Let’s take a look at protein powder so you as a beginner know exactly what to do when it comes to building muscle and enhancing recovery. With the right approach as a beginner to all things protein powder, you will better set yourself up for the best gains possible.
What Is Protein Powder?
Protein powder is a supplement derived from either whey (dairy) or a plant-based form (brown rice, pea, etc.) used to increase muscle growth, enhance recovery, and aid in those weight loss efforts.
Since protein is the building block of all muscle, by putting this into your routine, what you will find is a great supplement able to tackle all of those lifting and recovery wants and needs (1).
Related: How To Eat More Protein
A highly effective and safe supplement, a protein powder is exactly what you need to see the best gains possible, and as a beginner, the right powder on your shelf can make all the difference. It just takes knowing the ins and out of what a good powder can do for your gains.
Benefits Of Protein Powder
The benefits of a protein powder are hard to ignore and it would be a disservice to do so. With the right supplement on your shelf, you will see the best gains in no time with no hassle or stress to you, your wallet, or your gains.
Benefits of protein powder include:
Great source of protein: Protein powders are packed with protein to give you that extra boost and serve as simple and convenient ways to get protein. This is with either a whey protein or a plant-based protein.
Serious muscle growth: Since protein is essential for muscle growth, having a powder that works to build muscle and enhance your gains is important as you look to build that shredded physique (2).
Enhanced recovery: Protein not only enhances growth but can help repair those damaged muscles. With a top tier protein powder, your recovery goals are right around the corner (3).
Help keep you full: These can help keep you full since protein does a great job with that. It will eliminate your desire to snack and help curb hunger by pumping you with other nutrients.
Aid in weight loss: By keeping you more full and curbing hunger, it will help with weight loss and enhance all those goals so you see that desired physique unfold. This can also help with your body composition as well (4).
The Ins and Outs of Protein Powder For Beginners
Let’s get into some of the finer details and potential questions a beginner would have on protein powders as they look to progress further into their training and recovery process.
Why Protein Powder Matters
Protein powder matters because it is a convenient way to get protein immediately after a workout. Those grueling workouts exhaust us but with the right approach to training, all of our gains will be covered in no time and protein powder can fix that. For those on-the-go needs, like heading home from the gym, a protein powder is something that you will absolutely love to have for what it can do for gains.
What To Look For
There are a few key factors to look for. The first is whether you want whey or plant-based powder. For those following certain diets, or who are sensitive to dairy, a plant-based powder is a perfectly fine option for your protein powder.
Also look for reputability and honesty in the company. With a saturated market, some companies may be out there looking to make a quick buck but there are plenty who pride themselves on the honesty and transparency of their product which can seriously increase growth.
Of course, look for price. These supplements can start to get expensive but looking to price and how many servings you get is important as you look to build that muscle and enhance recovery all while having it be affordable.
Related: How Whey Protein & Oats Work To Build Serious Muscle
Is It Safe?
Protein powder is a safe supplement to take but it is always best to read the label and consult a doctor is you have questions. A widely studied supplement, there is plenty of scientific backing to give you the option to read up on the safety, effectiveness, and overall ability of what protein powder can do.
When Should I Take It?
The best time to take a protein powder is right after a workout. You’ve depleted your body and now its time to pump those nutrients back in to see the best growth, recovery, and weight loss efforts. Somewhere in the ball park of 15-60 minutes after your workout is good.
Is It Worth It?
Overall, yes, protein powder is worth it. It is healthy, safe, effective, and can work wonders for your overall training and performance goals, as well as health and wellness. The right powder is exactly what you need to see the best gains possible.
Check out our list of the Best Protein Powders for more great muscle building and recovery supplements!
Wrap Up
Protein powder has the ability to help us greatly and with the right approach, all you need to do is find the right one and enjoy. Able to pump us with protein and enhance muscle growth, recovery, and weight loss, beginners will find this to more than helpful as they embark on their fitness journey today.
Let us know what you think in the comments below. Also, be sure to follow Generation Iron on Facebook, Twitter, and Instagram.
*Images courtesy of Envato
References
Cintineo, H.; et al. (2018). “Effects of Protein Supplementation on Performance and Recovery in Resistance and Endurance Training”. (source)
Pasiakos, S.; et al. (2015). “The effects of protein supplements on muscle mass, strength, and aerobic and anaerobic power in healthy adults: a systematic review”. (source)
Pasiakos, S.; et al. (2014). “Effects of protein supplement on muscle damage, soreness and recovery of muscle function and physical performance: a systematic review”. (source)
Leidy, H.; et al. (2015). “The role of protein in weight loss and maintenance”. (source)
10 Nutrition Tips To Increase Muscle Gain For A Shredded Aesthetic
These top tips can increase your muscle gain while optimizing your nutrition.
Seeing muscle gains are hard but knowing how to get there through nutrition can make all the difference for us. With the right approach, we can better build muscle and start to see that shredded aesthetic we want most. Don’t settle for average and work these tips into your routine.
Let’s take a look at these 10 nutrition tips to maximize muscle gains to see just how we can develop that shredded aesthetic through nutrition.
10 Nutrition Tips For Muscle Gain
For those looking to see muscle gain as a result of nutrition, it is imperative that you know what to look for and how to execute properly to see those great gains. Your nutrition, along with training, are the foundation and driving forces of serious gains and for those seeking a shredded aesthetic, it starts in the kitchen. These 10 tips will better prepare you to see increase muscle gain with the right gains for your physique.
1. Eating Enough
Too often do we hear the word diet and immediately think that means consuming less. While there is truth to that, it would be an incredible disservice to actually practice that. Sure, less calories in than out results in weight loss, but you want muscle gain. That requires adequate amounts of calories to fuel and power your workouts and that post-workout recovery so you see serious muscle gains. Consuming more protein than anything else is a great way to feel full while also supporting muscle growth, since protein is the foundation and building block of all muscle.
2. Set The Right Goal
Too often when we set goals that aren’t attainable. We seek the hardest thing to do, and while it isn’t impossible to do, starting small and hitting certain milestones is much more achievable. For building muscle, to set the goal of Olympia bodybuilder status in 6 months just doesn’t make sense. That doesn’t mean you can’t get there, but it just means you need more time and more realistic goals.
3. Smart With Supplementation
Supplements can be your best friend when it comes to seeing muscle gains and as powerful nutrition aids, supplement will give you the boost you need. Whether that be a pre-workout, protein powder, BCAA, fat burner, or a host of other great products, the right supplements for muscle gain can make or break your gains. Training and diet are of course essential but we need that extra boost at times and neglecting even just one supplement can be a real disservice to you.
4. Include Protein Shakes
Protein shakes are imperative and a great way to take in plenty of protein without feeling like you have to eat it all. These are convenient and versatile and allow you to mix protein with anything you want. The amount of ingredients are endless and can be a great tasting option for those post-workout gains or for an anytime snack (1). Finding the right protein powder can be challenging but knowing what companies out there are reputable can make all the difference for you.
5. Take In Antioxidants
Taking in plenty of antioxidants is imperative and will greatly affect all your gains. Essentially what antioxidants do are prevent oxidative stress by working to balance out the levels against free radicals. Oxidative stress leads to cell and tissue damage so making sure you have antioxidant rich foods in your diet is a must (2). Such foods include blueberries, dark chocolate, pecans, strawberries, beans, spinach, beets, kale, and cranberries.
6. Eat Carbs
Too often do we not eat carbs because we think our bodies will store these for fat. In reality, we need carbs in order to better tackle all of our energy needs and since carbs are a great source for this, we absolutely cannot totally avoid carbs. If carbs seem to be a real concern then potentially place them in the first half of your day so you can reap the benefits of energy, yet still burn them off and use them as you work out and perform daily tasks (3).
7. Protein Before Bed
Consuming protein before bed is an easy way to make sure you see muscle gains for this will aid in overnight repair and recovery and work to build muscle even as you sleep. Casein protein is a slow digesting protein used by bodybuilders and athletes for overnight repair and is a great supplement to try. Ensuring protein before bed allows you to maximize your gains for the better.
8. Include Fiber
Fiber is essential and can help keep you full while also working to keep you moving regularly. Putting an emphasis on fiber is important for gut health, and your overall health in general, and will serve you greatly in the long run (4).
9. Consider Various Diets
With so many bodybuilding diets out there consider trying one of them. Whether that be intermittent fasting, keto, paleo, carnivore, or one of the many others, it doesn’t hurt to give it a try. Not all diets will be for you so making sure you find the best for yourself is imperative. And if all else fails, eating healthy with a balance of macronutrients is sometimes all you need.
10. Make Sure To Take A Multivitamin
A multivitamin supplement is a great product to take for those looking to optimize their overall health and wellness. Packed with vitamins and minerals, a multi is exactly what you need to see huge gains by keeping you in the gym (5). Staying away from illness is one thing, but making sure your body has the necessary nutrients is another and focusing on the right multi can make all the difference for you.
Wrap Up
Seeing muscle gains are hard but knowing how best to get there through nutrition can make all the difference for you. These 10 tips are what you need to see effective growth and can really work wonders for you as you look to build real muscle gains. Give these tips a try and see your gains take off.
Let us know what you think in the comments below. Also, be sure to follow Generation Iron on Facebook, Twitter, and Instagram.
*Images courtesy of Envato
References
Pasiakos, S.; et al. (2015). “The effects of protein supplements on muscle mass, strength, and aerobic and anaerobic power in healthy adults: a systematic review”. (source)
National Center for Complementary and Integrative Health. “Antioxidants: In Depth”. (source)
Jequier, E. (1994). “Carbohydrates as a source of energy”. (source)
Lattimer, J.; et al. (2010). “Effects of Dietary Fiber and Its Components on Metabolic Health”. (source)
Kamangar, F.; et al. (2012). “Vitamin and Mineral Supplements: Do We Really Need Them?”. (source)

5 Muscle Growth Eating Strategies For Hardgainers
A skinny guy once told me he wanted to put on muscle, but in the way muscle stayed on permanently without him having to continue to workout. He believed trainers and bodybuilders kept a secret from everyone else forcing them to train and eat forever to maintain the muscle.
He disappeared after 6 workouts and a lot of excuses, only to resurface months later with a bag full of steroids. I shut down his shortcut to getting jacked. He wasn’t willing to do the work or eat the food. Without mastering the fundamentals, he had no business skipping to advanced and situational tactics.
For those willing to commit to the lifestyle, we can pave an easier path with practical eating strategies to pack on lean muscle. We can demystify the process and make it accessible. And while much of this may seem like common sense to the experienced lifter, it’s gospel for newcomers struggling to make progress or sift through conflicting information.
#1 Eat Every Three Hours
We’ve believed and discarded many nutrition myths over the years. Small frequent meals “stoking the metabolic furnace/fire”? Debunked. Can’t absorb more than 30 grams of protein per sitting? Mythical nonsense.
This doesn’t mean frequent meals aren’t useful under certain conditions. Notice how the restricted window of intermittent fasting sucks for building muscle? The sheer volume of food necessary to put on muscle can’t be restricted to a few meals. You need to eat a lot and often.
If we rely on our good intentions to eat more often, we default to eating when hungry. Half the problem with hard gainers is their tendency to eat like birds. Relying on hunger to motivate eating to gain muscle is about as reliable as a dieter trusting their hunger to guide significant fat loss. Instead, eat at pre-determined intervals. Every 3 hours should create enough waking hour meals to get all your needed protein and calories while spacing meals enough to alleviate feeling full from your last meal.
#2 Drink A Post Workout Shake
Sometimes the evidence based side of the fitness industry gets a little carried away with being right. The anabolic window is another antiquated belief. We don’t NEED to rush a shake or meal within 30 or 60 minutes post workout, depending on who you ask. The workout isn’t wasted and no gains are lost.
There’s also no downside to drinking a post workout shake. Not getting enough protein or calories is why some lifters struggle to grow. One quick, cheap, and easy way to hit your protein target is to have a shake ready post workout. Either protein alone, or with added carbs for those needing more calories, a shake squeezes in yet another meal. Your workout serves as a trigger and reminder for this extra feeding. It’s also a good way to remember to take creatine monohydrate, one of the safest and most effective over the counter supplements for building muscle.
Make a protein shake a habit and you never miss your post workout nutrition. While the anabolic window is more myth than fact, it’s still a bad idea to go several hours without eating post workout. The shake ensures you’re covered if life interferes with the next meal.
#3 Load Up On Cheap Sources Of Protein, Carbs, and Fats
In an era of $5 soy lattes and $1000 smart phones, it’s absurd to claim eating healthy is expensive. Nutrition is about priorities, whether focused on fat loss or muscle gain, people will spend their money where they want to. Otherwise they’re just making excuses to justify inaction. With all this being said, why spend more money than we need to build muscle?
Eating to gain muscle can still get pricy. Protein is the most expensive macronutrient per gram. Carbs and fats can been thought of as energy calories and consumed interchangeably as long as you avoid extreme ratios, but there’s no substitution for protein’s role in building muscle.
While optimal for health outcomes, grass fed ribeyes and fresh Pacific salmon don’t fit the bodybuilder on a budget. Long term, you’ll be healthier by avoiding processed meat than worrying if your salmon is wild or farmed. Nor does everything need to be free range organic. Buy organic if you want expensive marketing without strong evidence to support health benefits.
Fill in the gaps with eggs, whey or casein protein, lean ground beef, frozen chicken breasts, chicken thighs, tilapia, and codfish. Though a tub of protein seems expensive, you’re getting some of the best value per serving. Most supplement stores offer small discounts to regulars, so don’t hesitate to ask, and Costco often has brand name protein at great prices. Throw in greek yogurt and low fat cottage cheese if you can tolerate the texture.
Grab club sizes. Buy boxes of frozen chicken and fish, club packs of lean ground beef, and 5 dozen pallets of eggs. If you’re eating how you need to, you’ll go through it all and more. Cans of tuna are a convenient bodybuilding classic, just be considerate of who’s around when you crack open a can.
The same rules apply for carbs and fats. Finding cheap sources of carbs is easy., you just have to be willing to cook. Load up on potatoes(sweet, yams, or regular), rice(white is just as nutritious as brown), oatmeal, and pasta. Add inexpensive fruit like apples, oranges, bananas, and frozen berries(for smoothies).
Much of your needed fat intake will come from your protein sources and other dietary basics. Include fatty fish like salmon in your diet, supplement with Omega 3 fatty acids, and add avocados, olive oil, and nuts to round out your polyunsaturated and monounsaturated fat needs. Same as with protein, buy in bulk and don’t pay extra for organic stuff.
Don’t ignore a variety of inexpensive vegetables for added nutrients and fibre. Broccoli, cauliflower, carrots, asparagus, peppers, and spinach are all affordable, especially in large batches. Frozen veggies are killer value. Freeze spinach and toss it into smoothies.
#4 Don’t Restrict Yourself To “Clean” Food
Staying lean while adding muscle is easier if most of our food is whole, minimally processed, “healthy” food. But if you only eat chicken, brown rice, and broccoli, the effort to choke down the needed food volume will prevent most people from getting near a calorie surplus. Classic hardgainers, guys(and girls) with high metabolic rates and high levels of activity, and people with physical jobs can almost never meet their calorie needs with classic clean eating.
Ignore the archaic belief that no amount of clean food can cause fat gain, while the mere aroma of pie and ice cream swells fat cells. This doesn’t mean you should copy early career Lee Priest by crushing fried chicken all the way to a flabby 300 lbs at 5’4. It just means don’t be bound by clean eating dogma while enjoying some of the foods you love.
Don’t fear pasta, energy bars, subs and sandwiches, fruit, or even cereal, if these fit your calorie and macronutrient needs to fuel your training and recovery. Eating mostly high calorie, low protein, low fibre junk isn’t going to meet your macro or micro nutrient needs, leave you with good energy for training, or keep you lean while bulking. Add in enough extra high calorie food to get past your appetite’s limits on the clean stuff. This means some pizza, dessert, cheese, and other traditionally “unclean” foods are on the table.
Cutting liquid calories is a smart tactic for fat loss. Take the opposite road when fighting to eat enough to grow. Add smoothies, shakes, and milk(if you’re tolerant), as long as they’re filling gaps you otherwise struggle to meet with solid food. Favour high protein and nutrient dense liquid calories. Then enjoy a root beer or glass of wine as a treat.
#5 Cooking Efficiency
Often the greatest obstacle with eating to grow, or just to eat healthy in general, is the time and effort to prepare the right food. Virtually no one has the time to individually cook each meal. While Dwayne Johnson prides himself on his culinary skills, you can only occasionally smell what The Rock is cooking thanks to his access to a personal chef. The rest of us better rely on efficient cooking habits.
It takes similar time and effort to cook 6-8 portions as it does 1. Get in the habit of baking a tray of chicken breast or salmon fillets instead of cooking individual meals. Prepare big batches of pasta, casseroles, and chilli. Cook up to an entire week of meals in one shot.
Ignore social media posts about losing half a Sunday to meal prep. Even large batches of food can be turned around in 90 minutes of prep and cleanup. A lot of meals can be timed in the oven or on the stove so you can use the time on other productive efforts. Listen to podcasts or audio books while cooking. Hit up daily cardio or just enjoy a favourite show while waiting. Many influencers falsely portray meal prep as complicated and arduous. It’s not.
Find efficient macro friendly meals and snacks. Greek yogurt, protein shakes, cottage cheese, and smoothies make low effort feedings in between sit down meals. You’ll forever hate chicken breast and rice if you try to choke down 6 daily meals of them.
Some bodybuilders and busy professionals rely on professional meal services. They’re affordable, eliminate cooking time, and can be custom built to you macro and calorie goals. Weigh the added cost of the service above your cost for the groceries, against the value of the time you save. Consider how many people randomly and impulsively outsource their meals through food delivery apps. Much of what’s ordered is high calorie crap while being obnoxiously priced. The cost of a few Uber eats orders equals a full week of healthy meals.
Fitness industry dogma and tribalism be damned. The proven basic tactics work to put on muscle. Committing to the consistent behaviour needed to build and sustain muscle is challenging. It’s why you see so few lean muscular people walking around society once you step outside your gym. Apply these tactics to make your efforts easier and your results stand out. Share this with someone who needs to hear it.
Hardest Muscles To Build
The hardest muscles to isolate and build mass.
Everyone has that specific set of muscles that infuriates them. That one spot where no matter how hard you train – no matter how hard you push yourself, you just don’t see the results you want.
But if you ask around the gym you’d probably find that there are some muscles most people agree to have a problem with. Those universal complaints that most bodybuilders have even after years of hitting the gym.
As always, we are happy to help by breaking down these tricky muscles and hopefully providing you with a better way to deal with them – leading you on a more pleasant path towards maximizing your over all muscle gain.
First thing’s first though, there is something to be said about genetics. As in, some people just have a harder time with certain muscles because of the DNA coursing through their body. It can’t be helped and sometimes that just means you have to work harder than the person next to you.
Also, proper form is key for all of these muscle groups. It’s key for any workout really – but part of what makes these specific ones so hard is because most people do not use correct form. So keep that in mind as you move forward with isolating these muscles. Whatever you are doing, you always want your spine to be properly aligned and make sure that you perform the full range of motion for the muscles you are working out.
CALVES
These are big ones. Calves are often either the most complained about muscle to build mass or the most overlooked. Either way they often pose more of a problem compared to other muscle sets. And there’s an actually a reason behind why they are so challenging. The anatomical configuration of the calf muscles resists the act of hypertrophy. Aka – by nature they literally resist muscle synthesis.
What is often the problem is that most people treat calves as an extra at the end of a workout – but because the calves are so much harder to develop they actually need to be focused on intensely. They key is to not make your calves an afterthought.
Here’s a breakdown on the three major muscles that make up the calves:
1. The gastrocnemius muscle (this is what gives the calf its curved shape).2. The soleus (the long flat muscle underneath).3. The Tibialis Anterior (this is the large frontal muscle).
That third one, the Tibialis Anterior might have surprised you. That’s because it is often overlooked when it comes to building those calves – which in turn makes the calves such a challenge for most people.
You must create a well structured workout routine that focuses on all three of these muscles in order to actually see growth. If you can focus on those then you will start to see some changes coming your way.
Here are a few examples of exercises you can do to pinpoint those calf muscles.
Barbell Seated Calf Raises Reverse Calf Raises (These will hit those oft overlooked Tibialis Anteriors!) Standing Barbell Calf Raises
LATS
The Latissimus Dorsi is another muscle that can be a real stinger in your workout routine if you don’t know the best ways to isolate and use correct technique. The main problem is that it is almost impossible to truly isolate the lats. What’s most important is to cut back on the amount of weight in order to perform the reps at a full range of motion (remember?). This will build the foundation for your lats leading to building actual mass in that area.
Surprisingly chin ups and pull ups are very effective in building your lats. Often experienced bodybuilders will be able to perform these with such ease that they use a dip belt with extra weight to push themselves even further. Elbow position is one of the most important aspects behind this. If your elbows are out wide you’ll trigger your upper lats. If your elbows are in tight you’ll be hitting up those lower muscles. Keep this in mind when performing your workout routine.
Also make sure to keep your hands facing away or down in order to maximize the amount of lat involvement.
Here are a few other suggestions to help build those back muscles.
Straight-Arm Pulldown Close-grip front lat pull downs Kneeling high pully rows One-arm standing cable rows
There you have it. Everyone may be different – but hopefully you now have a better understanding on how to handle two of the more challenging muscles over all.
What is your most challenging muscle to build? Let us know in the comments or shout it out to us on Facebook and Twitter!
- 1
- 2