Tag: Training Tips
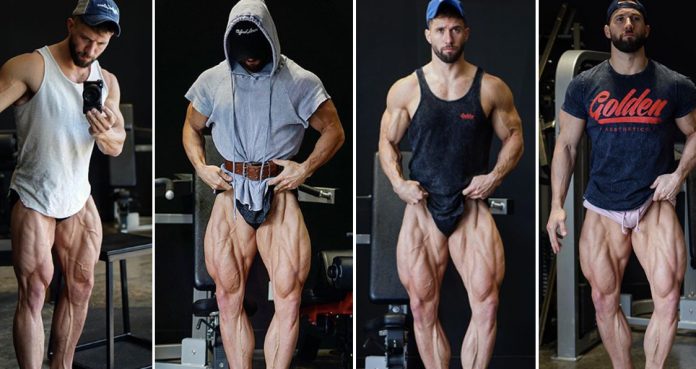
Instagram Athlete of the Week – Julian Smith
Julian Smith – The Quad Guy
Internet fitness celebrities don’t get any more humble and genuine than Julian Smith. Smith had a humble beginning in the fitness industry but has now amassed a mind-blowing 1 million followers on Instagram.
If you have been living under a rock and don’t know about Julian, let us introduce you to him. Julian Smith calls himself The Quad Guy and we would go as far as to say he should put this name on his driver’s license.
After Tom Platz, if someone comes to mind for having monstrous muscle mass on their legs, its Julian Smith. Just like Platz, Smith swears by the squats and consider all the other leg exercises secondary.
Julian isn’t your typical bodybuilder. Smith puts out original content with a lot of exercise variations which you could try in your workouts. The exercises Smith shares on his timeline will surely ignite some new gains in your muscles.
Smith trains at his personal gym. The Arms Race gym has great lighting and is a paradise for the selfie queens. Julian holds regular open gyms and you should check them out if you live around the area.
It’s Okay to be a Sissy
Notice that Julian doesn’t use any weights on some of his exercises. The size of his legs should be proof you don’t need to be lifting big weights to add muscle mass. Proper form and a complete range of motion should do the trick.
Julian Smith shares his daily workouts on his website as the “Daily Pumps”. Going by his Instagram stories, Smith has been getting a lot of love for the results his clients have been getting following his workouts routines.
Julian leaves no muscles untouched. He trains his neck, calves, and forearms (what others might think of as accessory muscles) the way he workouts all his other muscles. When was the last time you trained your neck?
The Golden Boy
Smith is a fan of the golden-era bodybuilding and trains for the old school aesthetics. Symmetry and muscle proportions are the cornerstones of Smith’s training. Smith with his golden-era V-taper has all the qualities of a classic physique.
You don’t have to perform the same exercises every time you train a muscle. You can come up with numerous new exercise variations with the same old machines in your gym. Smith will push you to think outside the box.
View this post on Instagram
The interaction that molded my personality. It’s story time my friends! – I’ve talked about this many times, but when I got into the sport at such a young age (before social media) besides the people in magazines that I strived to one day look like, the only people I could actually talk to/interact with was the local competitors. Who in my opinion back then, were gods. – Let me tell you something! There was one specific person that I looked up to locally, who turned out to being one of the biggest assholes I’ve ever met. He was super rude to me when I went into the local Vitamin Shoppe to ask questions during my first show prep. When I put out my hand to shake his hand and said “I’m a big fan and prepping for my first show, any pointers would mean the world” his response was “Dude, you serious? Can’t you see I’m eating?”. I was hurt and embarrassed and felt pressure in my face from tearing up. But this interaction set me up to be the person I am today. – I don’t care if you’re on my membership site, bought a Clifford Lenox belt/clothing , used one of my affiliate codes etc. All I have ever wanted from my Instagram page, was help people move forward with their fitness journey! If you have tried/learned something on my page that has benefited you in even the smallest way towards achieving your goal, that’s all I’ve ever wanted. – My dad told me at a young age that the definition of a gentleman was a person who made everybody around them feel as comfortable as possible at all times. Never to intimidate them and never to make themselves feel bad about who they are. – I may not be bringing home 1st place trophies.. But ANYONE who approaches me locally, at events etc will receive the interaction I was hoping for over a decade ago. – #oregon #fitnesslife #fitnesslifestyle #fitnessmodel #fitnessmotivation #progress #healthyeating #igfit #instagramfitness #body #aesthetics #igdaily #staypositive #gains #flexible #getfit #fitnessgoals #monday #mondaymotivation
A post shared by JULIAN MICHAEL SMITH (@smith.julian) on Apr 30, 2018 at 12:37pm PDT
Julian Smith is a Bodybuilding.com sponsored athlete and can be seen promoting their products on their websites and expos. One thing which separates Smith from many other athletes is that he only recommends the products he uses.
If you’re pumped up to train your legs after seeing all those quad shots, this is the video you should watch before you head out the door. Always remember, fads come and go, but the golden aesthetics stay forever.
Who is your favorite Instagram fitness celebrity? Let us know in the comments below. Also, be sure to follow Generation Iron on Facebook and Twitter.
*All images courtesy of Instagram

Moves to Build a Cobra Back
Training the Back for a V-Taper
If you’re wondering why is a chiseled back called a cobra back, it’s because the V-taper looks like the head of a cobra when a bodybuilder spreads out his lats.
A physique can’t be deemed complete and symmetrical without a V-taper. Building a cobra back isn’t easy and the workouts, if done right, can be as grueling and exhausting as the hardest of leg workouts.
Your back is the biggest muscle group after legs and developing it can take a lot of hard work, sweat, pain, and tears. A cobra back can make you look like a superhuman and gives you wings you could fly with.
Your back is a big muscle group and you need to target it from different angles to train it effectively. Each exercise targets the back in a different way and you need to perform a variety of moves to develop every muscle fiber in your back.
The overall development of the back needs a combination of compound and isolation exercises. We’ll break up the back into three major muscle groups and perform exercises to target each muscle.
Upper Back – Muscle Involved Rhomboids and Trapezius
Rhomboids
Breaking up the back into smaller muscle groups makes it easier to train and helps in building size and definition by focusing on any lagging parts. Rhomboids are placed at the top of your back right under your neck and at the sides of the posterior deltoids.
– Seal Rows
– Rope Face Pulls
– Incline Bench Dumbbell/Barbell Rows
You can best target the rhomboids by using isolation exercises. While performing the seal rows, bring the barbell to your chest and not your stomach. For the face pulls, hold and contract your back at the top and the bottom of the movement.
Trapezius
Some people like to train their trapezius muscles (or traps) on their shoulder day, but we will advise you to do so on your back day. Although rear delts too are a part of the back, we won’t train them in our back workouts.
– Barbell/DumbbellShrugs
– Behind the Back Cable Shrugs
Middle Backs – Lats (Latissimus Dorsi)
Most people in their back workouts train their lats and call it a day. All the rowing and pulling movements essentially target the latissimus dorsi (lats). The pulling movements help with adding size to your wings, and the rowing adds thickness to your middle back.
– Pull-Ups
– Lat Pulldowns
– Seated Cable Rows
– Dumbbell/Barbell Rows
Pull-ups are an essential for every back workout. In between your sets, stretch your lats by performing the lat spread pose. Posing between sets will rush more blood into your lats and will help you in establishing a better mind-muscle connection.
Lower Back – Thoracolumbar Fascia
Lower back is the smallest of the three muscle groups. A single exercise for the lower back in your back workout is enough to get the job done. It’s important to maintain a strict form while performing the lower back exercises.
– Weighted Hyperextensions
Use a small barbell for performing the hyperextensions and maintain a full range of motion. Performing this exercise to failure is the best way of getting the most out of it. After you hit failure, drop the barbell and do as many bodyweight reps as you can.
You Cannot Miss the Deadlifts
Deadlifts are a full body exercise and are essential to building a cobra back. Switch between high volume and low volume days while keeping the intensity high. Deadlifts are the mother of all back exercises and add size, width, and thickness to your back.
Who do you think has the best V-Taper in the bodybuilding world? Let us know in the comments below. Also, be sure to follow Generation Iron on Facebook and Twitter.
*Header image courtesy of Envato Elements.
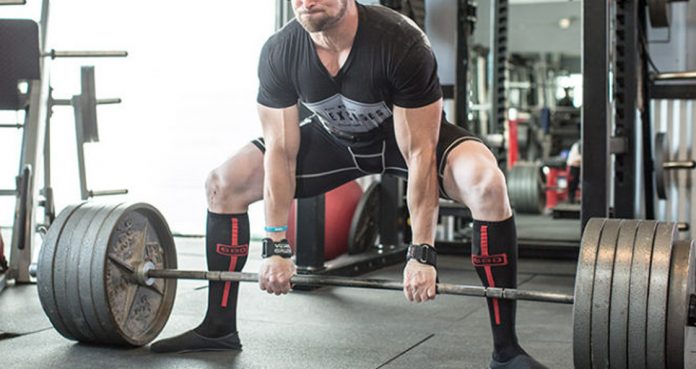
5 Tips To Master The Sumo Deadlift
Master the Sumo Deadlifts with these Five Tips
Deadlifts are some of the most brutal exercises which train your complete body. There are many variations of the deadlifts which will keep you from getting bored of the exercise. Sumo deadlifts have a greater impact on your hips, glutes and posterior chain.
Due to the limited range of motion, this variation of the deadlifts can enable you to lift heavier weights as compared to the traditional deadlifts. The sumo deadlifts are great for people who have a stronger lower body.
Since you get into a squatter stance while lifting the weights, your lower body does more work in this variation as compared to the traditional deadlifts. Sumo deadlifts are an advanced exercise and you need to perform them correctly to get the most out of them.
1. Find a Stance Which Works For You
There are no hard or fast rules when it comes to the sumo deadlift stance. The stance will vary for people based on their height and mobility. Some people have a false notion that the wider your sumo deadlift stance, the better it is. Most people need a moderate sumo stance to lift heavy weights while maintaining the correct form.
The sumo deadlifts are harder at the bottom. It is harder to move the weights off the floor than it is to lock our your hips and back at the top of the movement. Take a stance which makes it easy for you to lift the weights off the ground.
2. Get Your Body Behind the Bar
Some people make the mistake of ducking out their toes, doing this automatically puts the bar an inch in front of them. On the other hand, some people stand on top of the bar which is not the best position to start either because the bar can bump into your knees on the concentric movement.
Standing right behind the bar with your shins touching the barbell is the best position to start the lift. Keeping your head and chest behind the bar at the start of the movement will help you in locking out your hips and knees at the top of the movement.
3. Point the Toes Out
Feet placement is where most people go wrong with the sumo deadlifts. You neither want your feet to be pointing all the way out nor should they be pointing straight ahead. You want the barbell to be as close to you as possible while performing the sumo deadlifts.
If you stand with your feet completely “ducked” out, the bar will be an inch in front of you which can make it harder to lift it off the ground. Turn your feet slightly out as doing this will make the lift shorter and easy.
4. Generate Torque and Push Your Hips Through
As mentioned above, the sumo deadlifts are the hardest at the bottom of the movement. You need to generate a lot of torque to crack the bar off the floor. Make sure you push your knees out so they don’t come in the way of locking out your knees.
If you’re a competitive powerlifter, you will need to stand with your knees and back locked out at the top of the movement. Drive your hips into the bar to finish with a smooth lockout. Some people make the mistake of overextending their lower back which can unlock their knees.
5. Hand Placement
The hand placement while performing the sumo deadlifts can be tricky. Some people like to have a wider than shoulder width grip while the others like to keep their hands close to each other. A shoulder-width hand placement can prove to be the most optimal.
Holding the bar too wide can put extra tension on your lower back while a close grip can make it hard for you to balance the bar.
What is your sumo deadlifts PR? Let us know in the comments below. Also, be sure to follow Generation Iron on Facebook and Twitter.
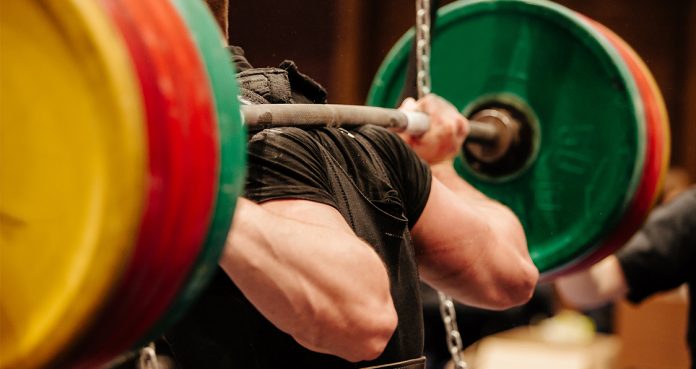
Front Squat Without Wrist Pain Or The Risk Of The Barbell Sliding
Vital Front Squat Grip Variations
The traditional back squats work your quads, hamstrings, and glutes while the front squats primarily target your quads. The front squats can be harder to perform as compared to the back squats. The front squats can put a lot of pressure on your lower back, wrists, and forearms.
If this wasn’t enough, there is always the possibility of the bar sliding forward while you perform a front squat. There are two variations of the front squat which can put varying degrees of pressure on your wrists and forearms.
The Weightlifter Grip
The weightlifter grip is also known as the full grip. A full grip involves holding the barbell with an overhand grip right outside shoulder-width. You need to keep your elbows pointed up so your upper arms are at least parallel to the floor.
The weightlifter’s grip requires mobility in your wrists, forearms, shoulders and lower back, and is the harder of the two variations to perform. The full grip can help you keep the weights pinned to your shoulders so you can lift heavier weights.
The Bodybuilder Grip
The bodybuilder front squat grip involves holding the barbell with a crossed-arm grip. The crossed-arm grip is used by people who have limited mobility in their wrists and forearms. You can only hold the barbell in place with the bodybuilder front squat grip.
You can’t actively push the bar into your shoulders while you perform a front squat with this grip. It is even more important to keep your elbows pointed up with the bodybuilder’s grip as the chances of the bar sliding forward are significantly higher.
Get Rid of Wrist Pain During Front Squats
If you use the weightlifter’s grip, you can encounter wrist and forearm pain while performing the squats. You will be in a better position if you perform a couple of warmup exercises and stretches for your wrists before going into the squats.
Extended Arm Wrist Stretches
The extended arm wrist stretches are the simplest warmups for the front squats. Extend your right arm with your palm facing the ceiling. Gently pull the fingers of your right arm towards your body with your left hand. Hold the stretch for 10-30 seconds.
Repeat the process with your left arm as the base arm. After you’re done with two sets of this exercise, point your palm towards the floor and repeat the stretching exercise. Doing this will warm up your upper and lower forearms.
Open Chest Stretches
The open chest stretching will help get your shoulders, chest, and wrists get warmed up for the front squats. Stand beside a squat rack with your arm extended and keep your elbow locked out.
Place your fingers on the squat rack and slowly start rotating away from the squat rack. After you’re done with the extended arm and open chest stretch, you’ll feel improved mobility in your wrists, forearms, and shoulders.
Avoid the Risk of the Bar Sliding Forward During Front Squats
Most people avoid performing the front squats because they can’t keep the bar steady on their shoulders. The bar sliding problem persists with both the weightlifter and bodybuilder grips. Before placing the bar on your shoulders, push your shoulders and arms forward so the bar can rest in the hole formed in the shoulder joints.
The best way to get rid of the bar sliding problem is to actively push your elbows upwards while you’re performing a front squat. Doing this will also help you keep your back straight which will put more tension on your quads.
At any point during the front squats, your elbows should not go below parallel to the floor. Looking at the roof while performing the squats can help you in keeping your elbows pointed up and your back straight.
Which grip do you use while front squatting? Let us know in the comments below. Also, be sure to follow Generation Iron on Facebook and Twitter.
*Header image courtesy of Envato Elements.
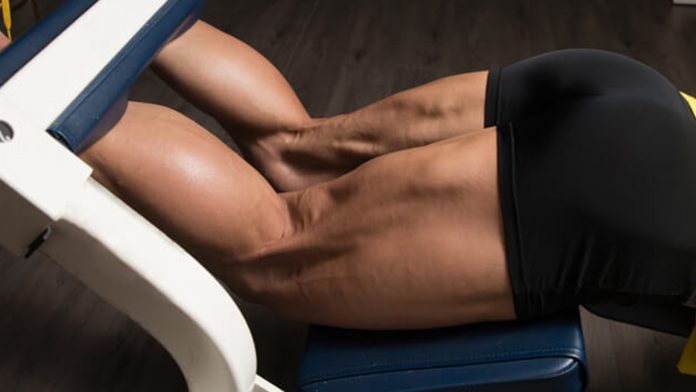
The Ultimate Workout for Building Shredded Hamstrings
Build Mass and Definition in Your Hamstrings
Most people have a love-hate relationship with training legs. They love to hate training their legs. Shredded legs are what separate the men from the boys. If you think building quads is hard, wait until you get serious about training your hamstrings.
Hamstrings are hard to develop since they are at the back of your legs. It’s hard to develop a mind-muscle connection with the hamstrings as you can’t see them in the mirror. Get ready to go through the most brutal hams workout of your life.
Exercise 1 – Wide Stance Squats – 3 Sets – 12, 10, 8 Reps
Squats are the king of all the leg exercises and we won’t miss utilizing it in our hams workout. Maintain a wider than shoulder width stance while performing the squats as it helps in recruiting hamstrings more than the quads.
Hip extensions help in activating the hamstrings, meaning your hams are most active as you straighten your legs and extend your hips. The wider the stance you take, the deeper your hips will flex resulting in exaggerating your hip extension and recruiting your hams.
Exercise 2 – Superset
– Leg Press – 3 Sets 30, 20, 10 Reps
– Good Mornings – 3 Sets 10, 20, 30 Reps
While performing the leg presses, place your feet at the top edge of the platform and keep the back support at a 60-degree angle. Keeping your feet at the top of the platform recruits your hams while placing them at the bottom activates your quads.
After performing 30 reps on the leg press, perform 10 reps on the good mornings. Keep your back arched and a slight bend in your knees while performing the good mornings. Don’t try to go too heavy on this exercise as it can lead to recruiting the lower back.
Exercise 3 – Lying Leg Curls – 6 Sets 30, 20, 10, 10, 20, 30 Reps
Lyings leg curls are for the legs what the preacher curls are for the biceps. Think of your hams as biceps and contract and squeeze them with every rep. By the end of the six sets, your hams should be filled with lactic acid and asking for mercy.
Change your feet placement on the pad with every set. Start the exercise with your feet placed wide apart on the pads. With every set, bring your feet closer and on the last set, your feet should be joined. The change in feet placement will work your hamstring from every angle.
Exercise 4 – Dumbbell Stiff Legged Deadlifts – 3 Sets 12, 10, 8 Reps
Dumbbell stiff legged deadlifts are a compound exercise and help in building muscle mass and strength. Keep your knees bent throughout the exercise and pause and squeeze your hams at the bottom of the movement.
Performing the Romanian deadlifts with dumbbells instead of a barbell gives you better leverage and can help with activating your hamstrings. Place your toes on a quarter plate to increase the leverage further by increasing the range of motion.
Exercise 5 – Superset
– Barbell Hip Thrusts – 3 Sets 20, 15, 10 Reps
– Glute Ham Hyperextensions – 3 Sets 10, 15, 20 Reps
The barbell hips thrusts and GHD target the hams and the glutes and can improve the separation between the muscles. Keep your feet shoulder width apart, maintain a full range of motion and pause at the top of the movement while performing the barbell hip thrusts.
Glute ham hyperextensions have been brought into the spotlight by CrossFit athletes. If you don’t have a GHD table at your gym, lie down on a flat bench and ask someone to sit on your calves. You could also perform this exercise on a lat pull-down machine by placing your knees on the seat and inserting your ankles between the seat and the pads.
Do you train your hamstrings and quads on the same day? Let us know in the comments below. Also, be sure to follow Generation Iron on Facebook and Twitter.
*Header image courtesy of Envato Elements.
5 Exercises To Build Horseshoe Triceps
5 Exercises To Build Horseshoe Triceps
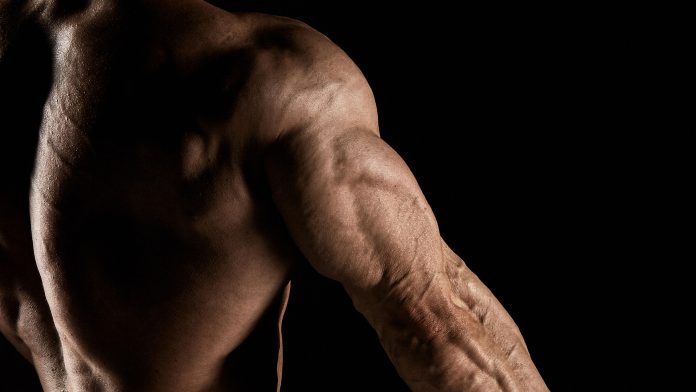
If your goal is to build sleeve-splitting arms, you can’t overlook your triceps. Most people make the mistake of going too hard on their biceps but skip training their triceps. Your arm development can never be complete without some ripped triceps.
Your triceps have three heads; long, lateral and medial. You need to be training them from all the angles to ensure an overall development. A combination of isolation and compound exercises is the most effective way of building horseshoe triceps.
1. Cable Pushdowns – 3 Sets 15 Reps
Cables are a great way to maintain a constant tension on your target muscle throughout the movement. While using the cables, you have the same amount of tension on your triceps at the top of the movement as you have on the bottom.
Stand at an arm’s length from the pulley machine. Attach a straight bar to the pulley and grab it with an overhand grip with your thumbs over the bar. Keep your elbows pinned to your side and hold and squeeze your triceps at the bottom of the movement.
2. Skull Crushers – 3 Sets 12 Reps
Skull crushers are an incredibly effective exercise when it comes to building ripped triceps. This exercise is also known as head smackers. Skull crushers train the long head of your triceps. The long head is also the hardest part to develop as only a few exercise can target it optimally.
You can use a straight bar or an EZ bar for this exercise. Make sure you have a complete range of motion while performing this exercise. Keep your elbows fixed at a single position, hold and squeeze your triceps at the top of the movement.
3. Smith Machine Close Grip Bench Press – 3 Sets 12 Reps
Smith machine close grip bench press works on the medial and lateral heads of your triceps. Using a Smith machine adds tension to your triceps while performing this exercise. Performing exercises with a complete range of motion are the secret to building horseshoe triceps.
Keep your elbows pinned to your sides throughout the movement. If you don’t have an access to a smith machine in your gym, you can perform the close grip bench press on a flat bench.
4. Cable Overhead Rope Tricep Press – 3 Sets 15 Reps
Ropes can target your triceps from a completely new angle. Overhead presses train the long head of your triceps. Keep your elbows pinned to the side of your head throughout the movement.
Keep the ropes together at the bottom of the movement, spread them out at the top and squeeze your triceps. Make sure you’re not using momentum while performing this exercise. Use moderate weights so you can handle and keep your reps slow and deliberate.
5. Dips – 3 Sets 15 Reps
By this point, your triceps will be completely exhausted. Dips can be a complete triceps buster and are a great exercise if you want shredded triceps. You can perform this exercise on parallel dip bars or on a flat bench.
If bodyweight version of this exercise is too easy for you, you can add extra resistance by using weights. Follow an explosive motion while performing this exercise. Hold and squeeze your triceps at the top of the movement.
Which is your favorite triceps exercise? Let us know in the comments below. Also, be sure to follow Generation Iron on Facebook and Twitter.
*Header image courtesy of Envato Elements.
Best Workout Plan Approach After Returning From A Long Layoff
The best workout plan approach after taking some serious time off.
So, it’s been a while since you have worked out. Things got busy. We get it. But now it’s time to hop back on that plan and see those gains you want most. But where to start. Taking time off has unfortunately limited how much you can lift, how fast you can run, and how much power you can actually generate, but fear not, for the right workout plan approach can get you back on track in no time.
Knowing what to do and how best to tackle this problem is important for jumping into it the wrong way can lead to injury and keep you out of the gym for much longer than need be. But there is no point in beating yourself up. You have come to the right place and we’ll put out an idea that will help get you back in the gym, working hard, and seeing those gains return in no time.
Let’s jump into a workout plan approach for those returning from a long layoff. Knowing what to do, and what not to do, will be important as you look to get those gains going again.
What To Prepare For
Unfortunately, your strength and cardio will have decreased slightly so be prepared to not lift as much or have the same endurance. But in due time that will return. Soreness and those stiff mornings are bound to happen as well but using a foam roller, stretching techniques, and the right supplements will help get you back on track easily.
How To Structure Your Workout Plan & What To Expect
At First…
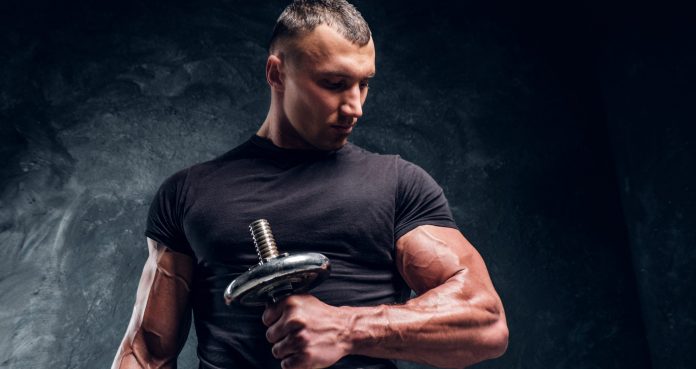
Start light and reacquaint yourself with those movements. Some big lifts like the squat and deadlift will come back easily and with lighter weight you can focus on form and rebuild that lost mind-muscle connection (1). Definitely put an emphasis on stretching and loosening up the joints that need it most like your hips and shoulders. Tools like foam rollers and massage guns can work wonders for you here.
When it comes to cardio, start light and build up that base again. The treadmill, elliptical, and bike are good ways to do this. Throw in some incline walking as well.
As Things Start Getting Going…
Slowly increase the weight as well as increasing your intensity. Your body will start getting back to where you stopped and you will start to tackle those exercises more and more. While you won’t be at PR shape, you are getting closer. Heavier loads with lighter reps will work well, and you can start pushing yourself to failure (2).
Ramping Up…
You can start going even heavier and can add some isolation exercises in there to focus on those spots you want to. Here is where sleep and hydration are key as you are pushing your body even more with intensity. For those cardio based workouts, HIIT workouts can be great to get your heart rate going, start to burn more calories, and increase strength at the same time (3).
Once You Feel Ready…
You should be back to normal training. Hitting those same reps as before and feeling good about your progress will start to return and you may even try some one or two rep maxes. Be sure to put an emphasis on nutrition and make sure you are using those supplements wisely. Your body is now going through the ringer and keeping it fueled for every workout will work wonders for you.
What Not To Do
Don’t start lifting heavy right away. This will only lead to unnecessary soreness and even injury. This applies to both lifting and cardio, for you need to get your body back to where it was before your layoff. Getting your body acclimated to those heavy loads and intense cardio takes times so be patient
Don’t neglect a good pre- and post-workout stretching routine. To start, focusing on flexibility and mobility work will better prepare you as those lifts start getting even heavier. Don’t build up strength again only to be limited by tight hips or other joints (4). To alleviate pain as well, looking into knee sleeves, elbow sleeves, or wrist wraps can help take some load off, allow you to lift a little more weight, and focus on form to rebuild that strength you want most.
Best Supplements When Returning From A Layoff
A solid supplementation routine is in order for those returning from a long layoff, as this will kickstart your gains and keep you grinding for much longer by putting an emphasis on health and wellness. To start, a protein powder is a must have on your shelf as this will work to increase muscle growth, enhance recovery, and allow you to better manage your weight, and even lose some. If you need a great a protein powder, look no further than Enhanced Whey Protein Isolate for those clean gains.
On top of those supplements to build muscle and aid in all things growth, those products to assist with health and wellness needs should be a must have as well. Fish oil can provide you with powerful omega-3 fatty acids that provide for a host of benefits to bodily functions. Enhanced Omega-3 Fish Oil is a great product, as well as their Health 3-In-1 to boost immunity, and aid in your digestive health.
Wrap Up
Getting back in the gym can be hard after a long layoff, but the right approach with your workout plan will make your return seem easy. While at first it may be a bit discouraging, that comes with the territory, and you will slowly start to rebuild that strength you want to see most. Having the best supplements to tag team alongside a great workout will work wonders for you and soon enough, you’ll be back on track and seeing those gains you want most again.
Let us know what you think in the comments below. Also, be sure to follow Generation Iron on Facebook, Twitter, and Instagram.
*Images courtesy of Envato
References
Calatayud, J.; et al. (2016). “Importance of mind-muscle connection during progressive resistance training”. (source)
Mangine, G.; et al. (2015). “The effect of training volume and intensity on improvements in muscular strength and size in resistance-trained men”. (source)
P.; et al. (2002). “The scientific basis for high-intensity interval training: optimizing training programmes and maximizing performance in highly trained endurance athletes”. (source)
Haley, J. “The Importance of Flexibility and Mobility”. (source)
How to Turn Your Toothpick Neck into a Wood Log
Build a Thick Neck With These Exercises
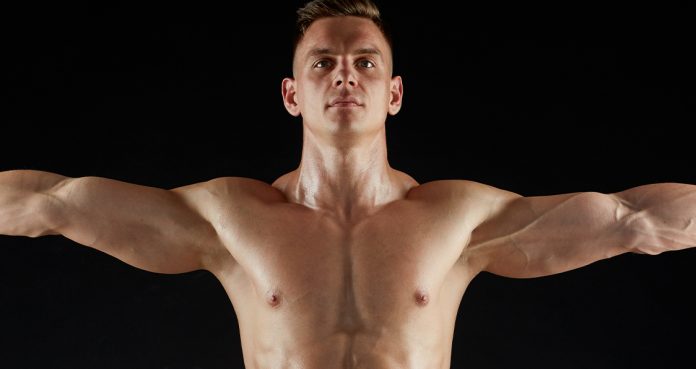
Many people will be curious after reading the title as only a few people in gyms around the world train their necks while the others have a pencil neck. It might come as a shock to them that you could develop the muscles in your neck.
Just like other muscles in your body, the muscles in your neck can be developed through training. Although you’ll need to be careful while training your neck as a small mistake can lead to an injury.
Neck Rotations
Many people these days have a desk job which makes them lean onto a laptop for the majority of the day. The awkward position while working on a laptop can cause problems like cervical pain and headaches.
Spending five minutes on rotating your neck in the morning can get you incredible results and fix the neck pain happening due to working on a computer. Neck rotations are also the easiest exercise on the list.
[embedded content]
Neck Bridges
We get into the serious business of developing a thick neck with the neck bridges. The neck bridges are commonly performed by boxers, MMA athletes and wrestlers in their training. These athletes take a lot of hits on their heads and having a strong neck keeps them from being knocked out.
The beck bridges are hard to perform and when you’re starting out, they should be done under the supervision of someone who knows how to do them correctly. While performing the bridges, hold the position where you feel a tension in the neck until the tension starts to fade away.
If the bodyweight version of the bridges feels easy, you can add resistance by placing a weight plate on your chest. Start with performing the orthodox bridges and once you get better, do the neck rotations as you get into the ‘bridge’ position.
Neck Curls
[embedded content]
Neck curls are fairly easy to perform, but you need to make sure your ego doesn’t get in the way. For the neck curls, place your chest on an incline bench, so your body is aligned from the top of your neck to your toes.
Use a head harnesses or simply hold a weight plate at the back of your head. Slowly lower your head and then raise it so your chest is lifted an inch off the bench. Hold the rep at the top and the bottom of the movement.
You can also perform this exercise on the cable pulley machines or with resistance bands. Both of these variations will add constant tension on your neck throughout the range of motion.
Shrugs
The trapezius muscle forms a big part of the neck and training the traps can help with the neck development. For the shrugs to help get rid of the pencil neck, make sure you maintain a full range of motion.
While performing the shrugs, try to touch your ears with your shoulders and hold the rep at the top of the movement. Perform three sets of 15-20 reps on each exercise. You can adopt the same approach to training the neck as the calves.
Do you train your neck? Let us know in the comments below. Also, be sure to follow Generation Iron on Facebook and Twitter.
*Header image courtesy of Envato Elements.
It’s Time You Ditch The Barbell Bench Press
Reasons to Give Up Bench Pressing
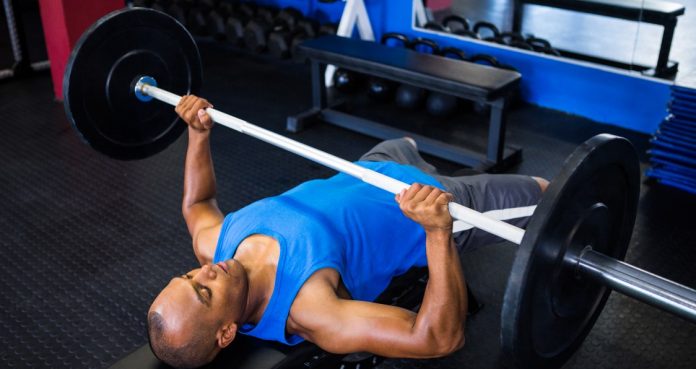
Barbell bench press is one of the most popular exercises. “How much do you bench?” is casually thrown around in gyms around the world. The bench press has been the symbol of strength for a long time.
The barbell bench press is a compound movement which incorporates multiple muscle groups. If you’re not careful while performing the bench press, it can cause more harm than good. Now is the best time to look for alternative chest exercises.
1. Plateau
When a person starts working out, the bench press is one of the first exercises he learns. Most people are too loyal to this exercise and always have a variation of it in their workouts. Performing the same exercises in every workout can cause you to hit a plateau.
If you’ve been benching for a long time but don’t see any progress in your pecs, you might have hit a plateau. If this is the case, you need to switch up your training and perform new exercises to shock your muscles and break the plateau.
2. Building Muscle
The bench press is a functional movement and is arguably not the best chest building exercise. Squats, deadlifts and bench press are a staple in a powerlifter’s training routine. People training to build muscle mass can do better by avoiding the bench press.
Powerlifters, strongmen, and weightlifters perform the bench press to build strength so they could perform explosive movements. On the other hand, bodybuilders need exercises which recruit and train the pectoral muscles to build size.
3. Injuries
A majority of injuries caused inside the gyms could be credited to the bench press. Pec tear is the most common injury caused due to bench pressing. If you have chest, shoulder or back injuries, you should stay away from this exercise.
If you have any of the injuries mentioned above, instead of giving up training your pecs you should work around your injuries by performing other exercises. Using training equipment like slingshots, elbow sleeves, etc. can be an aid in working out while you’re injured.
4. Targeting the Pectoral Muscles
You have a strict range of motion while performing the bench press which can limit the muscle fiber recruitment in your chest. Exercises using the dumbbells, machines or cables can help you target your pecs more efficiently.
Some people have a hard time performing the bench press and establishing a mind-muscle connection. These people end up recruiting their triceps and other supporting muscles. Exercises using the dumbbells and cables can help you in targetting your chest from different angles.
5. Training to Failure
Training to failure on the bench press can be a dangerous thing. The internet is full of videos of people dropping the barbell on their chests and necks. You certainly don’t want to find yourself in this situation.
If you’re going for a PR on the bench press, it is suggested you ask someone for a spot. On the other hand, going for failure while training with dumbbells, cables or machines is relatively less risky.
How often do you bench press? Let us know in the comments below. Also, be sure to follow Generation Iron on Facebook and Twitter.
*Header image courtesy of Envato Elements.
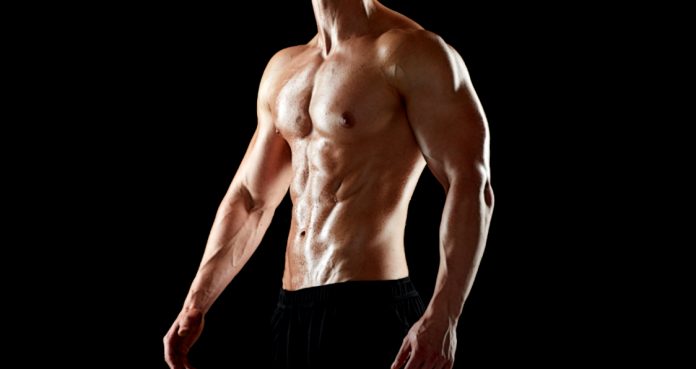
Build a Golden Era V-Taper with this Workout
Back Workout for Building a V-Taper
Aesthetics were the main focus of bodybuilding in the golden era. The advent of science and enhancement drugs took the battle from aesthetics to muscle mass and size. While the fads come and go, the golden era aesthetics will stay forever.
The love for the golden era V-taper and natural aesthetics has brought about starting the Classic Physique division in the Mr. Olympia competition. Nothing appeals more in a well-crafted physique than the good old V-taper and we’re here to help you build one.
Exercise 1 – Pull-ups – 50 Reps
We’ll be focusing on the old school exercises in this workout. We will start the workout with 50 pull-ups. Take as many sets as you need to complete the 50 pull-ups but try to hit failure with every set.
Exercise 2 – Superset
– Bent Over Barbell Rows – 3 Sets 20, 15, 10 Reps
– Seated Pulley Rows – 3 Sets 10, 15, 20 Reps
The rows build the thickness in the back while the pull-ups and pull-downs help in building wide lats. Use lifting accessories to eliminate the grip strength while performing the exercises as your grip is prone to give up before your back.
Focus on building a mind-muscle connection and contract your back with every single rep. While performing the seated rows, lean forward to give your lats a stretch, but don’t lean back and maintain an arched back while rowing towards your body.
Exercise 3 – T-Bar Rows – 4 Sets 15, 12, 10, 8 Reps
The T-bar rows are where it gets down and dirty. Go heavy on the rows while maintaining a strict form. If you don’t have a T-bar row machine at your gym, put a barbell in the landmine rows position and use a v-handlebar to row the barbell.
A good back workout should be as taxing as a brutal leg workout. Your back is the second biggest muscle group after your legs and building a v-taper will require you to put all you’ve got into every exercise.
Exercise 4 – Giant Set
– Pullovers – 3 Sets 15, 12, 10 Reps
– Front Facing Lat Pulldowns – 3 Sets 15, 12, 10 Reps
– Behind the Neck Lat Pulldowns – 3 Sets 15, 12, 10 Reps
The giant set will be focused on building the broad wings. In the first set, lie down across a flat bench and perform the first set with 15 reps. Don’t bend your elbows throughout the movement as doing so will recruit your pectoral muscles.
After the pullovers, we switch over to the front facing lat pulldowns and then move onto performing the behind the neck lat pulldowns. These three are the most effective exercises when it comes to building wings you could fly with.
Exercise 5 – Barbell Shrugs – 3 Sets 30, 20, 10 Reps
Trapezius muscles (or traps) are one of the most abused muscles when it comes to training them in the gym. Performing shrugs is fairly easy, all you need to do is stand with your feet shoulder width apart, grab a barbell, maintain a slight bend in your elbows and lift your shoulders to your ears.
Many people mess up by letting their egos get in the way and go too heavy on this exercise. Pause at the top of the movement and squeeze the living hell out of your traps with every rep.
Exercise 6 – Behind the Back Machine Shrugs – 3 Sets 10, 20, 30 Reps
We’re not leaving any stones unturned with this workout and will not settle for anything less than a golden era v-taper. The trapezius muscle is majorly on our backs and behind the back shrugs can help us train it efficiently.
Using a machine for this exercise puts constant tension on the muscle which a vanilla barbell can’t do. If you’ve put everything into this workout, by the end of the 30 reps, your back should be on fire.
Who do you think has the best V-taper? Let us know in the comments below. Also, be sure to follow Generation Iron on Facebook and Twitter.
*Header image courtesy of Envato Elements.
