Tag: training
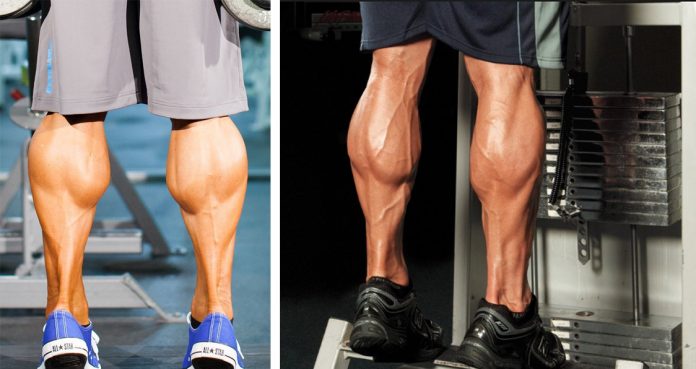
The Calf Training Secret No Pro Wants You To Know
Calf Training of The Pros
Calves are one of the smallest, most stubborn, and desired muscle groups. Since you’re reading this article, we’ll assume you’re lacking in the calf department and are willing to change your current situation.
If you’ve been laboring away on the calf exercises but don’t have any results to show for it, you’ve come to the right place. In this article, we’ll share a calf training secret with you which will take your calf gains to a whole new level.
The Mistakes
Before we let you in on the secret, we want to go over the mistakes most people make in their calf training. Once you know what is holding you back from achieving your goals, you can get better results by fixing your shortcomings.
Training At The End of A Leg Workout
Without going too deep into the mistakes, we’ll just touch on them and tell you how to overcome them. If you have lagging calves, you should never train them after a brutal leg workout when you have no gas left in the tank. For best results, work your calves when you aren’t fatigued.
No Volume
Most people make the mistake of following a vanilla calf training program where they perform 3 sets of 10-12 reps on a couple of exercises. If you want to turn your calves into bulls, you need to be training them like you train all your other major muscle groups. Perform at least five exercises and switch up the intensity often to keep your muscles guessing.
Lack of Variations
While people are proactive in their bicep training – they work their inner, outer, and medial bicep heads – they don’t follow the same approach when it comes to calf training. You should be targetting your calves from three angles to train them effectively.
Perform your calf exercises with your feet planted parallel to target the medial calf heads. Placing your toes together and heels apart – forming an “A” – will target the outer calf heads and keeping your heels together and toes apart – forming a “V” – will work the inner heads.
The Secret That Will Change Your Calf Training Forever
Your calves are made up of both slow and fast-twitch muscle fibers. Performing exercises with long TuT (time under tension) works the slow-twitch fibers and lifts with smaller TuT train the fast-twitch muscles.
So, the dilemma with calf training is that no matter which kind of intensity (high or low number of repetitions) you go for, you’re not going to get the best results. There is a way around the problem and it has been a well-kept secret until now.
Forget Reps, Focus on Time – 1 Minute Is The Magic Mark
To make the most of your calf training, you should focus on performing the exercises for one minute. It doesn’t matter how many reps you do in that one minute but you need to make sure you’re not taking a rest-pause during the set.
You also cannot go light with the weight on the bar because if you do, the slow-twitch muscle fibers will be left out of the action. Remember – this is not a drop-set. You have to end with the same weight you’ll be starting with. If done right, calf training isn’t easy, and you’ll experience it first hand with this technique.
How often do you train your calves? Let us know in the comments below. Also, be sure to follow Generation Iron on Facebook and Twitter.
*Header image courtesy of Envato Elements.
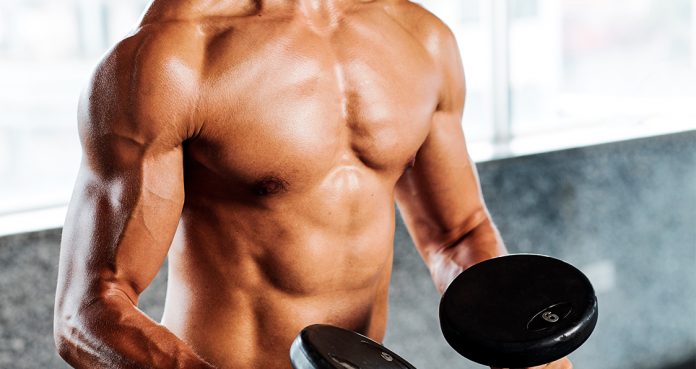
Turn Your Triceps Into Horseshoes With This Workout
A Triceps Busting Workout
It is no surprise most men are obsessed with the size of their arms. For most of these men, the obsession fades away after training their biceps. A triceps workout shouldn’t be overlooked as they are half of your arms.
When you flex your triceps, it should look like a horse kicked you in the back of your arm. If you train your bis and tris on the same day and your triceps are lagging as compared to your biceps, you should consider training them at the beginning of your workouts.
1. Straight Bar Cable Pushdowns – 4 Sets 20 Reps
The straight bar cable pushdowns is an isolation exercise which will get the blood flowing in your triceps and will get you a good pump. The high volume will help you in pre-exhausting your triceps, so you don’t have to use super heavyweights.
In all the triceps exercises, keep the reps slow and controlled. Pin your elbows to your sides and complete a rep. Exhale, pause and squeeze your triceps at the bottom of the movement. Slowly return to the starting position and repeat without using any momentum.
2. Single Arm Overhead Dumbbell Extensions – 3 Sets 15 Reps
Your triceps consist of three heads; lateral, medial and long. You need to train all of them equally to ensure an overall development. Overhead movements like the single arm overhead dumbbell extension work the long head which is the most stubborn of the three triceps heads.
Hold a dumbbell in your right hand and extend your right arm over your right shoulder. Stick your right bicep to your right ear and slowly lower the dumbbell towards your left shoulder. Return to the starting position and squeeze your triceps at the top of the movement.
3. Skull Crushers – 3 Sets 12 Reps
Skull crushers are one of the most effective exercises when it comes to building size and definition in your triceps. The skull crushers work your long triceps heads. If you’re trying this exercise for the first time or are attempting a PR, make sure you have a spotter.
Lie on a flat bench with your face towards the ceiling and arms extended over your shoulders. Your elbows should be in line with your shoulders and pinned at this position throughout the exercise. Slowly lower the bar so the barbell is an inch away from your forehead. Return to the starting position and flex your triceps.
4. Dumbbell Kickbacks – 3 Sets 12 Reps
Dumbbell kickbacks work the lateral and medial heads of your triceps. Most people make the mistake of going too heavy on this exercise. Use a weight which you can handle and can maintain a full range of motion.
Hold a dumbbell in your right hand, place your left foot in front of your right foot while maintaining a slight arch in your back. Pin your right elbow to your side and bring the dumbbell to your chest. Extend your elbow so your arm is fully extended and flex your triceps at the bottom of the movement.
5. Close Grip Bench Press – 3 Sets 10 Reps
Close grip bench press is a compound exercise which helps in building overall strength and size in your triceps. The close grip bench press is a variation of the normal grip bench press which works your chest.
While performing the close grip variation, grab the barbell just outside your chest. Keep your elbows and forearms parallel to each other throughout the exercise. Doing this will recruit your triceps in place of your chest.
6. Superset – Diamond Push-ups / Bodyweight Dips – 4 Sets 15 / 15 Reps
The diamond push-ups and dips superset is the last exercises in this triceps workout. This superset will smoke your triceps if they aren’t already. In the diamond push-ups, place your hands under your chest so that your index fingers and thumbs are touching to form a triangle.
After you have completed 15 reps on the diamond-pushups, move onto the bodyweight dips without taking any rest in between. In the bodyweight dips, your chest should be in line with your hands at the bottom of the movement. In both the exercises, pause and squeeze your triceps at the top of the movement.
Which is your favorite triceps exercise? Let us know in the comments below. Also, be sure to follow Generation Iron on Facebook and Twitter.
*Header image courtesy of Envato Elements.
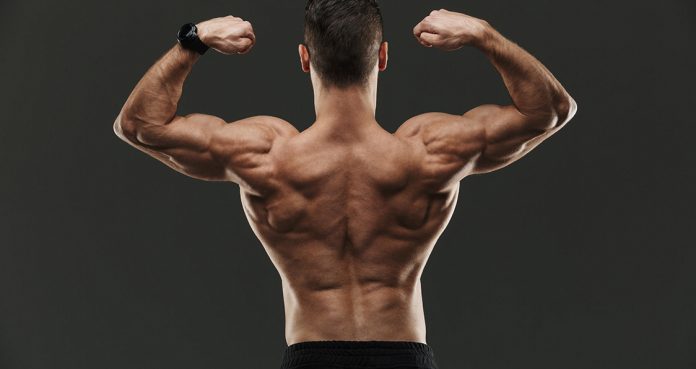
The 10 Best Back Exercises For Men
The Ultimate Back Exercises
A shredded back is what separates the men from the boys. A good back training session should be as brutal as a hardcore leg day. You should be running on fumes by the end of your back workouts.
If you want a cobra back, you need to constantly shock your muscles with different exercises. Your back is one of the biggest muscle groups and you need to target it from every angle for optimal results. We have put together the list of back exercises you can try during your next workout.
1. Pull-Ups
Pull-ups are one of the best back workouts. Arnold Schwarzenegger swore by them and performed 50 reps of pull-ups at the beginning of his back workouts. If bodyweight pull-ups are too easy for you, try the weighted version.
2. Seal Rows
Seal rows are an isolation exercise which works your lats. Lie facedown on a bench and perform barbell rows. Doing so will keep you from using your secondary muscles and momentum to lift the weights. You can also perform this exercise on an incline bench to target your lower lats.
3. Pull-Overs
Pull-overs are one of the most underutilized exercises. This exercise is incredibly effective in building a V-taper. Keep your elbows locked out throughout the movement and maintain a full range of motion.
4. T-Bar Rows
Rowing exercises like the T-bar rows help in building the thickness in your back while exercises like pull-ups and lat pull-downs help with broadening your back. If you don’t have an access to a T-bar row machine at your gym, use a barbell for this exercise.
5. Lat Pulldowns
Lat pulldown is a textbook back exercise. It is great at targetting your lats. Most people make the mistake of going too heavy on this exercise. Make sure you sit straight and don’t use momentum to bring the bar down.
6. One Arm Cable Rows
Using cables in your exercises help you in maintaining constant tension on your target muscles. One arm cable rows will help you in isolating your lats. You can perform this exercise while standing or seated.
7. Barbell Rows
Barbell rows are a compound exercise and will help in building muscle mass and strength in your back. Keep an arch in your back while performing this exercise. Bring the bar to your lower abs at the top of the movement.
8. Wide Grip Seated Cable Rows
Wide grip seated cable rows will add to the width of your back. Don’t lean back while performing this exercise. You could also try the underhand grip or a different cable attachment.
9. Dumbbell Rows
Dumbbell rows are incredibly effective at building size, definition, and thickness in your lats. You can perform the single-arm or the double-arm variation of this exercise. Using lifting gear like lifting straps can help you lift more weights as it eliminates your grip.
10. Deadlifts
We saved the best for the last. Deadlift is a compound exercise which should be a part of your back workouts. It is best to perform this exercise at the beginning of your workouts when you’re fresh.
Which is your favorite back exercise? Let us know in the comments below. Also, be sure to follow Generation Iron on Facebook and Twitter.
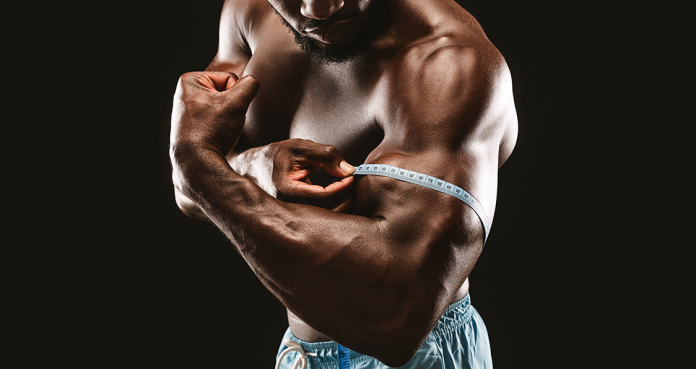
5 Tips For Building Bigger Biceps
Build Bigger Biceps With These Tips
Your pythons can become the biggest, meanest and most venomous with proper training. While most people love training their arms, only a few have guns worth flaunting. Tweaking your arm training a little can result in major gains.
How do you know you need tips for better bicep training, you ask? If you’re someone who flexes his guns in the mirror but sees nothing more than a flat pulse line, this article is for you.
Start With Isolation Exercises
Most people prefer starting their workouts with compound movements like the barbell curls. They usually start their workouts with free weights because they can lift heavier weights as they aren’t fatigued.
Starting with isolation exercises is a great way of pre-exhausting your muscles. Once you’ve exhausted your muscle fibers at the beginning of the workout, you’ll be able to get better muscle pumps without having to lift heavy which can reduce your chances of an injury.
Twists Your Wrists Outwards To Focus On The Peak
As we said at the beginning of the article, making small adjustments can take your guns to the next level. While performing dumbbell lifts, instead of having supinated palms (wrists facing you flatly), rotate your wrists slightly outwards so that your little finger is closer to your shoulder than your index finger.
The rest of the curling movement will remain the same apart from the minor twisting adjustment at the contraction point. The outward turning of the palms will put more tension on the peaks of your biceps.
You Need Volume AND Intensity
Many people get into the hopeless debate of whether they should do isolation or compound movements for building size or conditioning and if they should be performing a higher or lower number of reps?
Building your pythons needs an all-round approach, and it’s not a simple question of either this or that. You need to be constantly shocking your muscles by varying the volume and intensity.
Divide Your Bicep Training Into Parts
Biceps are called that for a reason. The biceps are made up of two major muscles, and yet many people don’t design their training around training each head of the bicep separately. For defined and stiriated guns, change your pattern of movement while performing the dumbbell exercises.
For example, while doing the dumbbell hammer curls, keep your elbows planted to your sides and point your lower hands away from your body to target the inner head of your bicep. To train the outer head, follow a range of motion where the dumbbell will be in front of your torso at the top of the movement.
Do Banded Work
Using resistance bands can be an incredibly effective way of gaining muscle mass and conditioning in your pythons. The bands are effective because they give you a different amount of resistance depending on where you are in the range of motion.
Your guns will be under the least amount of resistance at the resting position as the bands will be retracted. As you perform a curl, the bands will start adding resistance to your arms and the highest resistance will be experienced at the top of the movement.
How often do you train your guns? Let us know in the comments below. Also, be sure to follow Generation Iron on Facebook, Twitter, and Instagram.
*Header image courtesy of Envato Elements.
5 Reasons Why You Should Never Squat
Reasons Why You Should Not Squat
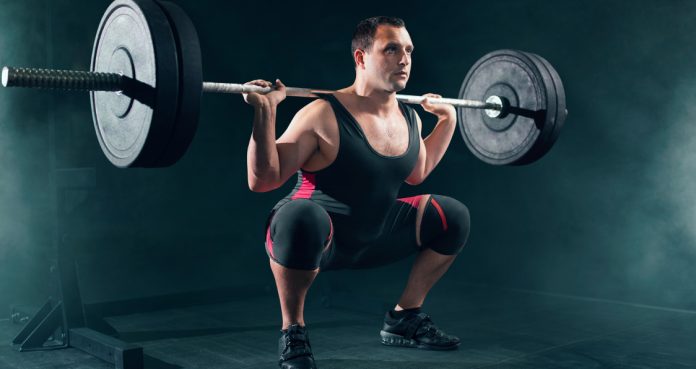
Squats are one of the most popular and despised exercises. Squats are a compound exercise which utilizes multiple muscle groups and joints. While the benefits of squats are widely known, they aren’t for everyone.
Back Injuries
People with back injuries should avoid squatting. Squats can put a lot of tension on your lower back and can lead to an injury if performed with an improper form. Squatting with back problems is asking for trouble.
No weightlifting belt or spotter can save your back from poping if you use an incorrect form or go too heavy on the squats with a back injury. Stretching and warming up your lower back before a leg workout is always a good idea whether you have a back problem or not.
Weak Knees
For some people, squats can cause knee pain. If you feel an uncomfortable joint pain every time you squat, you should probably avoid the squat rack for the time being and consult a physician.
Joint pains can be fixed by using supplements. Supplements like glucosamine and chondroitin have been proven to bring relief from joint pains. There also have been cases where people have developed old man knees by squatting with improper form.
Unusual Physical Characteristics
Not all of us were born to squat. People with unusual physical characteristics like long legs or torso can face genuine problems while squatting. People with long legs, tight calves or ankles might have relatively poor mobility and can find it hard to squat with proper form without recruiting secondary muscles like the lower back.
Alternatives Might Be Better
The ultimate goal of performing squats is to build stronger and muscular legs. You don’t have to be fixated on squats if you can reach this goal through other exercises. Everyone’s body works a little differently and some exercises might target your quads better than old-school squats.
While the squats are complete leg builders, if you want to focus primarily on your quads exercises like extensions and lunges might target the muscles more effectively. You should focus on what works better than following the herd into the squat rack.
Machines Can Be More Efficient
Some people complain of never getting a pump while performing the barbell squats. Using machines can put constant tension on the muscles. Isolation exercises like the leg extensions and leg curls can help you get a muscle-ripping pump.
Squatting on the smith machine or performing hack squats can be a great alternative for people who find it hard to maintain a straight back on the barbell squats. Other barbell squat alternatives are dumbbell goblet and dumbbell sumo squats.
Squats can be overlooked but training legs can’t be. If any of the above-mentioned reasons ring true for you, work around these problems and try getting comfortable with squats. Working with a coach on your form can help fix your problems with the squats.
How often do you squat? Let us know in the comments below. Also, be sure to follow Generation Iron on Facebook and Twitter.
Read This To Get A Shredded Midriff In A Week
Easy Steps For Getting A Sculpted Midriff
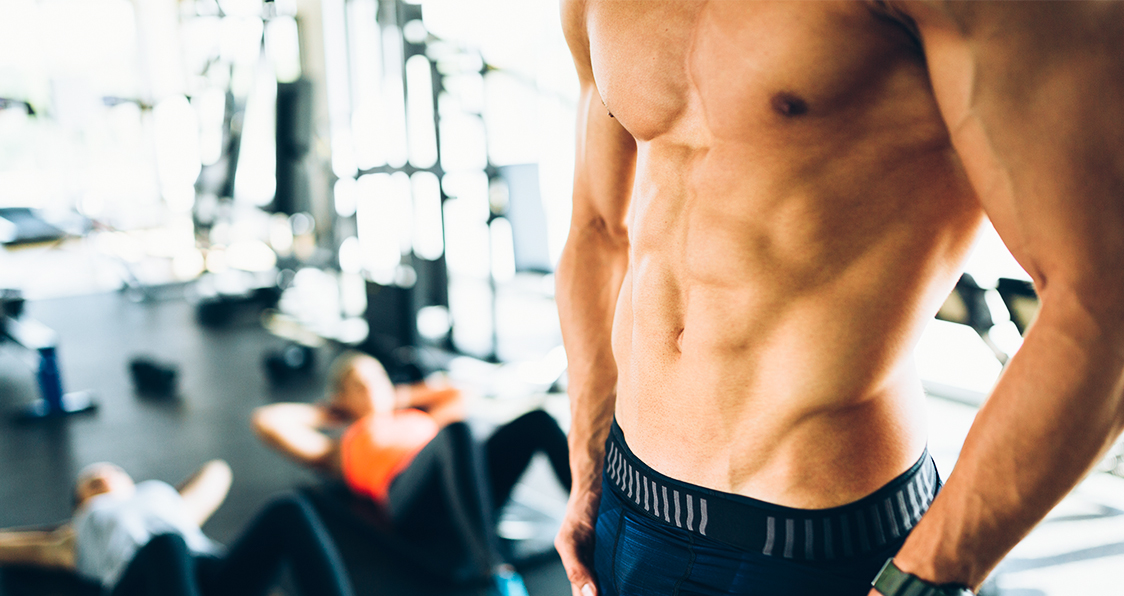
Men and women through the centuries have desired a chiseled midsection. It’s no coincidence that thousand-year-old sculptures of Greek gods, emperors, and fierce warriors were made to have washboard abs.
If your motivation wears out a week into training abs, don’t worry, you’re not alone. Achieving a shredded midriff isn’t as hard as some people make it out to be. You can achieve your goal in a week if you do the right things.
Fix Your Diet
First and foremost, abs are made in the kitchen. There is no one diet fits all approach. A lot of trial and error goes into designing the right diet program. Building abs usually involves getting rid of a few extra kilos which can require you to be in a calorie deficit state.
In a calorie deficit diet, you’re burning more calories than you’re consuming. Since you’re on an ab building crash course, if you don’t know how to build your diet program, it’s better to take the help of a professional. It can save you a lot of time and effort.
Switch-Up Your Core Training Approach
Most people follow a vanilla training program where they perform a couple of ab exercises at the end of their workouts. No wonder you can’t see any results following this approach. If you usually train your core at the end of your workouts, you should begin your training sessions with an ab workout.
Your core training needs to have variety. Utilize free weights, cables, and resistance bands in your core workouts apart from the usual bodyweight exercises. Train your core the same way you train all the other muscle groups.
Ramp Up The Cardio
If you have a layer of fat you want to get rid of, there is arguably nothing more effective than cardio. We recommend doing two cardio sessions a day to kill the excess body fat. You’ll be doing a LISS and HIIT session each.
The LISS or low-intensity steady-state cardio should be done first thing in the morning in a fasted state for 30 minutes. The HIIT or high-intensity interval training should be done for 10-minutes post resistance training.
Train Your Abs Every Day
Most people are scared to train their abs every day. They have been told training abs every day can lead to overtraining. Abs are a small muscle group and can recover relatively quickly after a workout.
You shouldn’t worry about overtraining because every person doesn’t have the capability of training their abs with the intensity required to achieve the state of overtraining. A rule of thumb should be to train your abs every day if they’re not sore.
No Cheating!
Since you’re on a deadline, you can’t afford to throw off your progress by feasting on junk food. You’ll have to say no to eating out, cheat meals or going out for a couple of drinks. You’ll have to stick to your diet plan.
Not cheating isn’t limited to your diet, you’ll have to follow your training and cardio programs religiously. Cutting out the junk food for a few weeks is an incredibly effective way of controlling your waistline.
How often do you train your abs? Let us know in the comments below. Also, be sure to follow Generation Iron on Facebook and Twitter.
*Header image courtesy of Envato Elements.
Build Monstrous Calves With This Insane Dorian Yates Workout
The Dorian Yates Workout For Monster Calves.
Calves are one of the most stubborn muscle groups. After years of unsuccessfully training their calves, many lifters come to the conclusion that you are either born with great calves or you are not. There isn’t much you can do about them in the gym.
Before you blame your ancestors for your pencil calves, you should know that there is more than just genetics holding you back from developing your lower legs. If you want to transform your calves into full-grown bulls, you should seek advice from someone who walks the talk, and no one else fits the bill better than the 6X Mr. Olympia, Dorian Yates.
It would be safe to say that Dorian Yates changed the face of bodybuilding forever. He overshadowed his competition (the likes of bodybuilding legends such as Flex Wheeler, Kevin Levrone, and Shawn Ray) with his monstrous size and razor-sharp conditioning.
If you haven’t already, Watch: Dorian Yates: The Original Mass Monster
Dorian Yates Stats
Weight: 255 – 265lbs (115.7 – 120.2kg)
Height: 5’10” (177.5cm)
Arms: 20″
Chest: 56″
Waist: 38″
Calves: 20″
D.o.B: 19 April 1962
Birthplace: Walmley, The Royal Town of Sutton Coldfield, United Kingdom
Alias: The Shadow, The British Bulldog, The Beast of Britain
Next Read: Build a Massive Back Like The Legend Dorian Yates
The Dorian Yates Legacy
According to Dorian, he gets calf training tips requests by the dozens every day. In this article, we will be revealing the secrets to the colossal calves that helped Yates win six Sandows.
Why should you listen to Dorian Yates, you ask?
Dorian has won 15 out of the 17 contests over his Pro league career. Also, the two losses were second-place finishes in:
His pro debut
His Mr. Olympia debut in ’91
And if you just skimmed through Yate’s stats, let us remind you – the guy has 20-inch calves. Most lifters do not have arms that big.
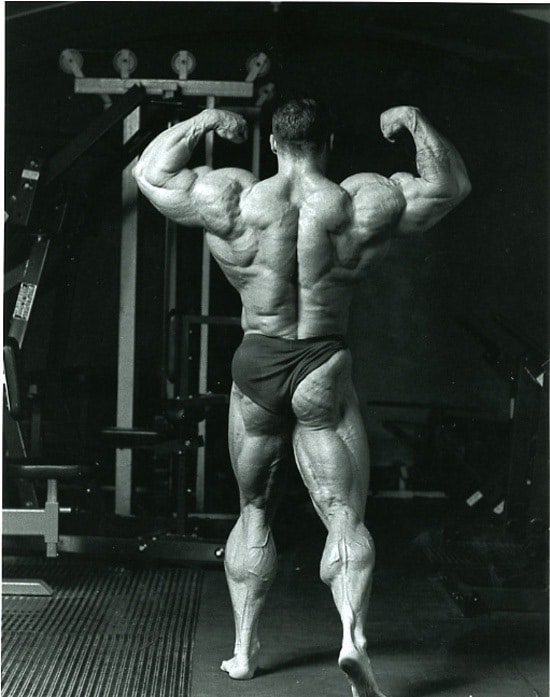
The Shadow’s giant calves helped him outdo his competition. Yates could use them in almost any pose to exert an advantage over his challengers. If you were to make a list of the 15 best calves in the history of bodybuilding – Dorian Yates would absolutely feature in the top 3.
There aren’t many pictures of Dorian Yates online (suiting for his nickname – “The Shadow”), but the ones that you can find will leave no doubts in your mind that his calves had a life of their own.
Yates had adopted a widely discredited training system (at the time) – high-intensity training (HIT) and made it his own. While training in the Dungeon, he revolutionized workout splits and body-part routines.
Check Out: Dorian Yates Still Looks Jacked at Age 58
The Calf Anatomy
To make the most of your calf workouts and to carve the lower legs of your dreams, you need to know the ins and outs of your calves. A little anatomy knowledge can take you a long way in developing muscular cows, or you could quit this article right here and be the subject of the next viral “skipped leg day” meme.
Your calf consists of two muscles: gastrocnemius and soleus. The soleus is the smaller muscle and lies underneath the gastrocnemius. The gastrocnemius, on the other hand, is the muscle that most people picture in their head when you say the word “calf“. It’s the heart-shaped muscle that contracts at the top of your lower leg, and it works to push the foot downward. It also assists in bending your knee.
Must Read: Dorian Yates’ ‘Blood & Guts’ Style Workout For Serious Growth
Training Approaches
Both calf muscles require different training approaches for optimal muscle recruitment and stimulation.
Soleus – Standing movements (knees extended) because the soleus attaches below the knee. Eg – seated calf raises.
Gastrocnemius – Seated movement (knees bent) since the gastrocnemius attaches above the knee. Eg – standing calf raises.
Since the soleus lies under the gastrocnemius, you will have to train the gastrocnemius at the beginning of your calf workout if you want massive and shapely calves.
We understand seated calf raises are more convenient, and you might feel a better pump while performing them, but they are also the reason you are not seeing an improvement in your lower legs.
Watch: ‘Dorian Yates: The Original Mass Monster’ Clip – Inside The Hardcore Dungeon That Was Temple Gym
Dorian Yates Calf Training Principles
1. KISS
Before you kiss your personal trainer on the mouth, KISS – keep it simple, silly.
Dorian Yates kept his calf workouts fairly simple. According to him, most lifters make the mistake of thinking that the muscle tissue in their calves differs in biological composition from that of other muscles.
Remember – skeletal muscle is skeletal muscle, no matter where it is in your body. If you want it to grow, you need to achieve muscular hypertrophy.
Related: Dorian Yates Says Weight Training Is Best Way To Get In Shape
2. Treat Your Calves Like Any Other Muscle Group
If your legs are lagging compared to other muscle groups, revalue your lower body training and get it in line with your other workouts.
For most bodybuilders, hypertrophy is best achieved through heavy and intense training.
Watch: Dorian Yates Reveals Facts About His Post-Bodybuilding Depression
3. Train Your Calves at the End of Your Leg Workout
While most bros will tell you to train your lagging calves at the beginning of your leg workout, Dorian Yates takes a different approach. Yates likes to fatigue his calves as quickly and efficiently as possible.
So, instead of training his lower legs on a separate day than legs, when the calves are at full strength, he works them last on leg day, when they have already been pre-exhausted by an annihilating thigh workout.
When the time comes to hit his calves, all that’s needed to finish the job are two exercises, but more on this later.
Watch: Dorian Yates Gets Real About The Crazy Steroids In The 90s
4. Have a Solid Mind-Muscle Connection
Just going through the motions for the sake of it is not going to cut it. For optimal muscle stimulation, you need to squeeze the life out of your calves at the top of every repetition.
If you cannot feel a pump in your calves while performing an exercise, following these steps should help:
Lower the weight and focus on contracting your calves.
Look at your calves in the mirror while performing an exercise.
Have your training partner tap on your calves gently while you do the standing calf raise. (You could do it yourself while doing the seated calf raise).
Perform a couple of unilateral warm-up sets.
Watch: The Best Dorian Yates Bodybuilding Motivation Video Of All Time
Most Common Calf Training Mistakes
1. Stick To Your Normal Rep Ranges
Usually, gym-goers try to annihilate their calves by performing 25-30 reps on every set. The high-rep theory is a concept out of the broscience Bible and does not hold water.
Your calves are already conditioned to high reps since you use them all day long to walk, and your chances of shocking them into growing through high rep training are bleak. To force a muscle to grow, it must be taken to total fatigue through heavy, low reps. Focus on exhausting your calves in 10-12 reps.
Check Out: Epic! This Dorian Yates Video Shows How Hard 6-Time Olympia Champ Trained!
2. Stick to the Basics
Many lifters try to make the most of their calf workouts by using different heel and toe placements. They use an “A” feet placement (toes pointed inward and heels outward) for training their outer calves and a “V” formation (heels pointed inward and toes outward) for hitting the inner calves.
According to The Shadow, the best way to train your calves is to keep your toes pointed straight ahead. Since calves have a relatively short range of motion, you must use all of it.
Watch: Insanely Massive Dorian Yates At 1996 German Grand Prix
3. Less is More
Dorian Yates is the king of intensity. At his peak, he only performed two exercises in his calf workout. But unlike most lifters who treat their calves as accessory muscles, Yates’ workouts were so hard that he could not go beyond the two exercises.
Check Out: Dorian Yates: “A World Without Steroids Would be Great”
4. Ego Lifting
Since calf raises have a small range of motion, most lifters let their egos get the better of them during lower leg training. They load more weight plates than they can handle and end up bouncing on their knees. If you have to use momentum, you are doing it all wrong.
If you cannot move your heels more than a couple of inches without using momentum, you should drop the weight and focus on lowering your heels to the bottom until it is only a few inches off the floor and raise them all the way to the top. At the top of the movement, you should look like a ballerina on her toes.
Must Watch: Dorian Yates Discusses Steroids With Joe Rogan
5. Not Stretching
Dorian Yates relied on stretching to get the best bang for his buck. Benefits of stretching include:
According to research, stretching between sets can help increase your flexibility.
Improves your range of motion.
Improves your performance during your workouts.
As per a study, stretching can help increase blood flow to your muscles.
Reduces chances of injuries.
After every set of every exercise, Yates stretches out the muscle and lets it relax. He says that if he did not stretch his calves between sets, they would cramp up so severely that he would not be able to finish his workouts.
Watch: Dorian Yates Calls His Career-Ending Injury A “Blessing In Disguise” | GI Vault
Dorian Yates Calf Workout
The Shadow kept it simple when it came to his workouts. Ready for the big reveal? You might want to sit down for this one. Here it goes:
1. Standing Calf Raise: 2 sets of 10-12 reps
2. Seated Calf Raise: 1 set of 10-12 reps
Boom! You weren’t expecting this, were you?
From the lead-up to this section, you might have guessed that Dorian did not do more than 10 sets of calf exercises, but just three sets? To be honest, we were just as shocked when we learned about this calf workout.
According to Dorian Yates, together, these two exercises chisel your calves with those deep, rocky strata and jutting promontories that indicate total development. Adding other movements, sets and reps is superfluous and may even amount to overtraining.
Related: Throwback: Dorian Yates Does The Most Intense Calf Training Ever!
Dorian Yates Calf Training Guide
1. Standing Calf Raise: 2 sets of 10-12 reps
Dorian Yates usually goes heavier on the standing calf raise, so he likes to start his calf workouts with this exercise. He does only one warm-up set of 10-12 reps and follows that with one all-out failure set of 10 reps, plus one or two forces reps in the end.
Yes, you heard it right. One out of the two sets is a warm-up set.
“I always work the bigger muscle, the gastrocnemius, first with standing calf raises. Then I do seated calf raises for the soleus. Once the gastrocnemius is fatigued, it’s easier to hit the soleus more directly.” – Dorian Yates
Steps:
Secure your shoulders under the pads of a standing calf raise machine. Place the balls of your feet at the edge of the elevated footrest.
If you do not have access to a standing calf machine at your gym, you could use a Smith machine by placing an aerobic step under the Smith machine bar.
Keep your legs straight, with just a very slight bend in your knees, and press your heels down toward the floor to stretch your calves.
Your heels should be only a few inches away from the floor at the bottom of the movement.
Raise your heels by contracting the calf muscles to rise as high as you can on the balls of your feet.
Pause and contract your calves at the top of the movement.
Lower back to the starting position with a slow and controlled motion.
Repeat for recommended reps.
2. Seated Calf Raise: 1 set of 10-12 reps
Dorian Yates does not feel that a warm-up set is necessary on the seated calf raises, so he performs one all-out set for 10 reps, plus one or two more forced reps at the end.
Steps:
Take a seat on the calf machine and place the balls of your feet on the platform with your toes pointed forward.
Position the base of quads under the knee pad and allow your hands to rest on top.
Extend at your ankles and release the safety bar.
Lower your heels until the calves are fully stretched and your heels are only a few inches away from the floor.
Extend the ankles and lift your heels as high as you can without using momentum or a bouncing motion.
Pause and contract your calves at the top of the movement.
Slowly return to the starting position.
Repeat for recommended repetitions.
Remember: It took Yates nearly 10 years to evolve to his one-main-set-per-exercise strategy. Beginners and intermediates should perform two or three sets per exercise.
Conclusion
We know what you are thinking. Just two exercises and three sets in the name of calf training?
That is Dorian Yates’ intensity for you.
There is a lesson to be learned through this training routine. The 80/20 principle applies to your workouts as well. 80% of the output results from 20% of all inputs. So, stop wasting your time performing 15 sets in your calf workouts and focus on doing six sets of the Dorian Yates calf workout well.
Who do you think has better calves than Dorian Yates? Let us know in the comments below. Also, be sure to follow Generation Iron on Facebook, Twitter, and Instagram.
The Best Way To Build Your Butt
Best Butt Building Exercises
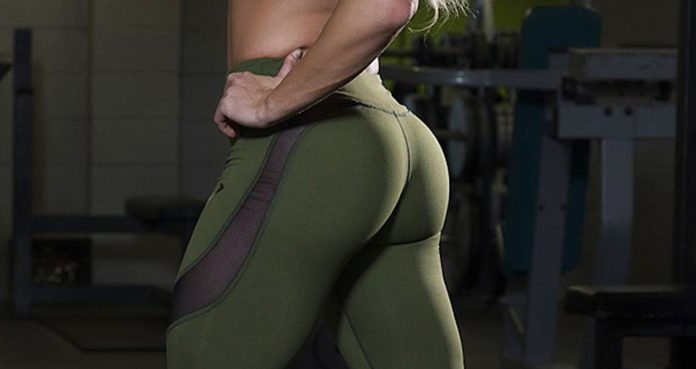
Turning a flat butt into a round and muscular butt can take some time and effort. Running on the treadmill or spending some time on other cardio equipment isn’t going to budge the needle for you if you’re looking to transform your rear.
If you want to build a peach emoji ? like butt, you need to switch between the compound (multi-joint) and isolation (single-joint) exercises. If your glutes are lagging as compared to the other muscle groups, you should dedicate entire workouts to training your butt.
1. Squats
Squats are an overall leg building exercise. While performing the squats and every other glute building exercise, you need to make sure you go deep. Ass to the grass is the way to go while performing the butt building exercises.
Going below parallel on the squats will target your butt effectively. Pausing at the bottom of the movement for a couple of seconds will fill your rear with lactic acid. Put more focus on your glutes by not locking out your knees at the top of the movement.
2. Donkey Kickbacks
Donkey Kickbacks are an excellent isolation exercise for building muscle mass in your glutes. If the bodyweight version of the kickbacks feels easy, you can add resistance by using weights.
Get into a kneeling push-up position on an exercise mat. The bend of your knee should create a 90-degree angle between your calf and hamstring. Exhale and lift your right leg until your hamstring is in line with your back. Return back to the starting position and repeat for the left leg.
3. Lunges
Lunges target your glutes and quads and can help in building muscle definition. You can try the standing, alternating or walking lunges to target your glutes. Bulgarian split squats are another variation of the lunges which can help you in developing your butt.
Start with holding dumbbells on each side. Bring your right leg forward and perform a lunge so your right knee is only an inch away from the ground. At the bottom of the movement, your right calf, and left quad should be parallel to the floor. At the same time, your left calf and right quad should be parallel to each other. Return to the starting position and repeat for the left leg.
4. Hip Thrusters
Hip thrusters are one of the most underutilized exercises when it comes to glute training. Most people make the mistake of going through the motions while performing this exercise. You should pause and squeeze your glutes at the top of the movement to get the best results.
Lie with your upper back at the side of a flat bench and place a barbell on your quads. Your feet should be flat on the floor. Your butt should be an inch away from the floor at the bottom of the movement. Your back, glutes, and hamstrings should be in a straight line at the top of the movement.
5. Dumbbell Sumo Squats
Using dumbbells while performing the sumo squats help you in increasing your range of motion. Stand on an elevated platform like the aerobic steps or a couple of benches to further increase your range of motion.
Hold a dumbbell between your legs and perform a squat without bending your back. Pause for a couple of seconds at the bottom of the movement and don’t lock out your knees at the top to target your glutes efficiently.
Which are your favorite glutes exercise? Let us know in the comments below. Also, be sure to follow Generation Iron on Facebook and Twitter.
*Header image courtesy of Envato Elements.
How To Bench More Weight
Lift Heavier Weights Instantly
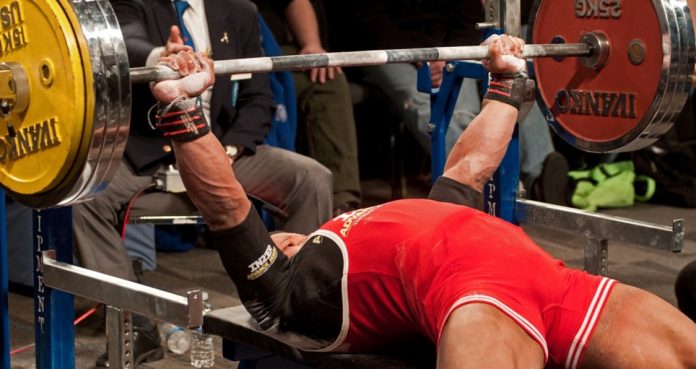
The bench press has been the benchmark for machoism for a long time. ‘How much do you bench?’ is one of the most common questions thrown around in the gyms by beefed-up bros trying to prove their superiority.
The bench press is a compound exercise and takes some time to get better at. If you’re gearing up for a contest or want to build a ripped chest on a schedule, this article will help you put a few extra pounds on your bench press.
Use Lifting Gear
Lifting accessories can be of great help in your workouts. Not only do they reduce the chances of injuries, but can also help you lift heavier weights. Lifting gear like wrist wraps, elbow supports should be a must in every serious weightlifter’s gym bag.
Modern weightlifting has seen the introduction of special bench press gear like the slingshot. Most people make the mistake of flaring out their elbows which can lead to a pec tear. Gym gear like slingshots can help eliminate this problem.
Perform Negative Reps
Negative reps are one of the best ways to increase your strength. You need a spotter to perform a negative rep. Make sure the spotter can handle the weights in case you fail a repetition.
Let’s say you have the target of lifting raw 200 lbs by the end of the month. Put on 200 lbs on the bar and ask the spotter to help you with the positive movement. Instruct the spotter to put in minimal help during the negative part. As you get stronger and feel more comfortable with the weights, eliminate the spotter on the negative and then the positive movement.
Ask for a Spot
Another way of getting stronger is to get a permanent spotter. Having someone to spot you gives you instant motivation and a confidence boost which can help you in lifting heavier weights.
If you don’t have someone to spot you at your gym, it is a good idea to sign up for personal training. Before you get yourself a personal trainer, read through this article. It will help you make a better decision.
Perform Heavy Isolation Exercises
Isolation exercises are a great primer for performing heavy compound exercises like the bench press. Isolation exercises allow you to have leverage by fixing a range of motion which can allow you to lift heavier weights.
You can lift heavier weights in isolation exercises as you don’t have to use your muscle stabilizers to balance the weights. Isolation exercises like the hammer strength chest press can help you in building strength which you can carry over to the bench press.
Fix Your Form
Many people fail to increase their bench press because they have the wrong form. Your form while performing the bench press has a big impact on how much weight you can lift. Following a powerlifter stance can help lift heavier weights.
Lie down on a flat bench with an arch in your back so only your shoulders and lower back are touching the bench. There should be enough space between your middle back and the bench that your hand could pass through it. Place your feet under your knees as doing this helps you in generating thoracic pressure.
How much do you bench? Let us know in the comments below. Also, be sure to follow Generation Iron on Facebook and Twitter.
*Header image courtesy of Envato Elements.
Build Thor Like Pecs with this Chest Workout
Thor Inspired Chest Workout
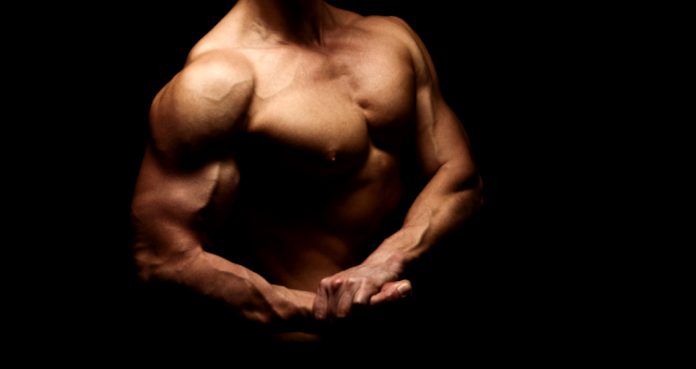
A wide chest has been the symbol of masculinity and strength since the beginning of time. It is no surprise superheroes have big pecs. A thick chest is what separates the boys from the superheroes.
If being a demi-god wasn’t enough, Thor has a perfectly crafted physique to put us mear mortals to shame. Although we can’t possibly turn into demi-gods, we can surely transform our bodies to look like them.
Chris Hemsworth’s pecs in the Thor movies are the result of countless hours spent in the gym. Thor’s pecs are close to perfect when it comes to size and definition. To build a chest like a demi-god’s, you need to have a balance of compound and isolation exercises in your workouts.
You don’t need to be the god of thunder to go through Thor’s chest workout, but you’ll have to put in all you’ve got. We’ll include advanced training techniques in the workout to completely annihilate your pecs.
Set 1 – Superset
Cable Crossovers – 3 Sets 15 Reps
Machine Chest Press – 3 Sets 15 Reps
We start the chest workout with a superset of isolation exercises to exhaust your pecs at the beginning of the workout. Most people start the workout with compound exercises and lift heavy weights.
While there is nothing wrong with lifting heavy at the beginning of the workout, it increases your possibility of getting an injury. Don’t just go through the motions in these exercises, pause and squeeze your pecs at the top of the movement.
Set 2 – Bench Press – 3 Sets 15-12-10 Reps
Seeing this exercise in this workout shouldn’t come to you as a surprise. The bench press is a compound exercise and is incredibly effective in adding size to your pecs. Most people make the mistake of going too heavy on this exercise.
Make sure you don’t bounce the barbell off of your chest and you shouldn’t lock out your elbows at the top of the movement. Doing so will help you in maintaining a constant tension on your chest.
Set 3 – Incline Dumbbell Press – 2 Sets 12 Reps Third Set Drop Set 15-12 Reps
The upper chest is one of the weakest muscle groups for most people. Incline dumbbell press on a 50-degree angle with help you in optimally targeting your upper pecs. Maintain a mind-muscle connection while performing this exercise.
The last set on this exercise will be a drop set. After completing 12 reps on the first two sets, perform 15 reps on the third set and then drop the weights and go into the fourth set for 12 reps or failure without taking a rest.
Set 4 – Decline Dumbbell Fly – 3 Sets 10 Reps
For an overall development of your pecs, you need to train it from all angles. The decline dumbbell flyes target your lower pecs and are a great exercise for helping you develop the separation between your abdominal and chest.
While performing this exercise, make sure your elbows are locked at an angle. While doing the flyes, the movement should happen at the shoulder joints and the elbows should remain locked.
Set 5 – Giant Set
Plate Chest Press – 3 Sets 10 Reps
Push-Ups – 3 Sets Failure
Dips – 3 Sets Failure
You’ll be ending this workout with a giant set. Just like a superset involves you performing two back-to-back exercises, a giant includes three continuous exercises. In these last three exercises, we’ll be focusing on contracting the muscles and leaving the gym with a muscle-ripping pump.
In the plate chest press, lie down on a flat bench and hold a weight plate between your hands with your arms extended. Lower the plate to the center of your chest and return to the starting position and contract your pecs.
Your pecs should be completely fried by now and you should have a hard time performing the push-ups and dips. If the bodyweight versions of these exercises are easy, feel free to add resistance by using weights.
Which superhero in your opinion has the best chest? Let us know in the comments below. Also, be sure to follow Generation Iron on Facebook and Twitter.
