Tag: training
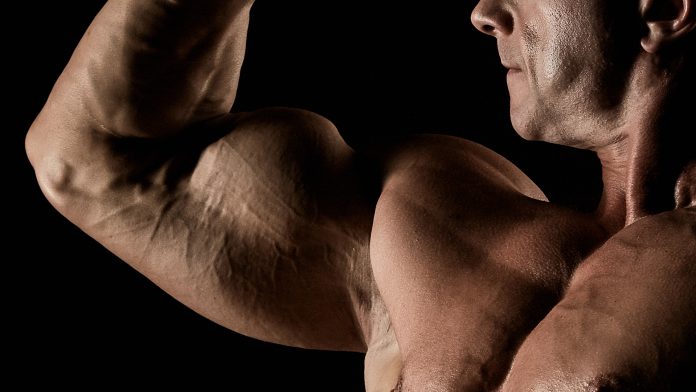
6 Little Known Facts For Building Bigger Arms
6 Facts for Building Bigger Arms
Big arms have been the symbol of machoism and badassery for a long time. Ask someone to flex their muscles and he’ll probably flash you with their biceps. Muscular arms are fancied by men and women alike.
Although arms are one of the most sought-after muscle groups, you don’t see a lot of people walking around with shredded bis and tris. A few tweaks to your training and nutrition can take your arm size to the next level.
1. Train the Weaker Muscle Group First
Most people have an imbalance between their biceps and triceps unless they’re a genetic freak. Many people like training their stronger muscle group first. Doing this can lead to the strong muscle getting stronger and the weak muscle group getting weaker.
If your biceps are stronger than your triceps, you should train your triceps at the beginning of your workouts. If you train your weaker muscle group later in the workout, you might already be fatigued and wouldn’t be able to train your muscle effectively.
2. Advanced Training Techniques
Advanced training techniques can help you take your gains to the next level. You should have at least one advanced training technique in your arm workout. This helps you pump extra blood into your muscles.
Blood flow restriction training (BFR), supersets, drop sets, intraset stretching is some of the training principles you should follow in your workouts. There are enough variations of the advanced techniques so you won’t get bored of them.
3. Add Volume and Intensity
Most people make the mistake of sticking with the same volume and intensity throughout their workouts. Volume is the number of sets you’ll be performing. Intensity, though a little vague, is how much effort you’re going to put in the set.
Changing the number of sets and repetitions every couple of weeks can ignite muscle growth and can add inches to your arms. You should switch between high volume, low intensity and low volume, high-intensity workouts to take your gains to the next level.
4. Target Your Arms from All Angles
Your biceps consist of two heads and your triceps have three heads. There is no one exercise which can target all the heads at the same time. You need to be doing different exercises to target your muscles from different angles.
Your biceps have a long and a short head. The short bicep head is worked when you have a wide grip and the narrow grip works the long head. Overhead exercises while training triceps work the long head while most of the other exercises work the medial and short head.
5. Shock the Muscles
If you have been working out, but don’t see any results, it could be because you’ve hit a plateau. If you do the same thing in every workout, your muscles will get used to them and will stop responding.
Do something new in every workout and keep your muscles guessing. Perform a new exercise, change up the intensity or volume, target your muscles from a different angle or use an advanced training technique to shock your muscles.
6. Eat Big and Be Patient
You don’t build muscle in the gym. You break your muscles in the gym, and they repair and grow bigger while you’re outside the gym. Your diet and nutrition should be on point to speed up your recovery and muscle growth.
Rest is an important aspect of your training. No matter how hard you workout, you won’t see the results until your body is properly rested. You need at least 6-8 hours of sleep every night to see optimal results.
How often do you train your arms? Let us know in the comments below. Also, be sure to follow Generation Iron on Facebook and Twitter.
*Header image courtesy of Envato Elements.

5 Things About Fat Loss You Need To Know
Things To Know Before You Start A Fat-Loss Program
Most people get a gym membership to shed off the extra kilos but quit the fit lifestyle soon after they don’t see any results. The biggest thing the unsuccessful people lack isn’t a training program or diet, it’s the right knowledge.
You’ll be saving yourself a ton of time and effort if you begin with the right knowledge about weight loss. In this article, we’ll be dropping serious knowledge and busting age-old fat loss myths.
Don’t Rely On One Area
When people start their weight loss journey they tend to give more value to the aspect of the program which feels more comfortable to them. For example, some people will value diet over cardio and the others think cardio is all that matters.
Apart from cardiovascular training and diet, there are other aspects of fat loss like recovery and supplementation which you need to consider. Relying on a single factor will lead you nowhere.
Count Your Calories
Most of the people who want to shed weight think that counting calories is too tedious, boring and isn’t for them. They like to eyeball the quantity of their food and trust themselves to make the right food choices. We all know how it ends.
You should also start following a diet plan or at least keep a food log to track your progress. Don’t be that individual who under-estimates and under-reports their calories by not accounting for snacks, condiments, beverages, or simple “taste tests” throughout the day.
You Can’t Compensate For An Unplanned Cheat Meal
Before eating an unplanned cheat meal, most people think they’ll compensate for it in the gym the next day by training a little harder or longer. A single unplanned cheat meal can throw you off track and send weeks of progress down the gutter.
You need to get rid of the mindset that exercise allows you more leniency with your food choices because of metabolic adaptations. Also, we’re sure most of the people with this mentality have no idea how many extra minutes on the treadmill will burn off the calories from the ice cream they’ll be eating.
Your Mind Will Effect Your Body
Your psychological health plays a vital role in your physical health. If you take on too much stress, get less sleep, or have unhealthy eating habits, it will show in your physique. Mental and physical well-being go hand-in-hand.
High levels of stress boost the level of cortisol in your body which can drop the testosterone levels in your body. Testosterone is the male sex hormone responsible for everything to do with puberty and building muscle mass.
Don’t Take The Weight Scale Too Seriously
Some people are obsessed with achieving a number on the weight scale. Yes, it is just that, a mere number. There is no set number you should weigh if you want to be healthy, look muscular or athletic.
More than the number on the scale, you should focus on your body composition, energy levels, or some performance markers you want to achieve. Going after some digits on the scale is a close-minded way of approaching fitness.
What is your fitness goal? Let us know in the comments below. Also, be sure to follow Generation Iron on Facebook, Twitter, and Instagram.
*Header image courtesy of Envato Elements.

Mark Wahlberg Diet & Workout Program
Mark Wahlberg Transformation Diet and Workout Program
Mark Wahlberg is, hands down, one of the fittest Hollywood actors. He has been in shape from his days as a Calvin Klein underwear model. Unlike actors like Christian Bale, Chris Evans, and Matthew McConaughey, who usually put on muscle mass for a specific role and then go back to being their frail selves, Mark Wahlberg stays in shape throughout the year.
All right, all right, all right. Since we are talking about physique transformations, let’s touch upon the most talked-about Mark Wahlberg transformation. No, it is not Pain & Gain (we will get to it later). We are talking about Father Stu here.
Mark Wahlberg Father Stu Transformation
We are accustomed to seeing a jacked Wahlberg. So much so that his physique transformation for a movie is not considered news anymore.
But, this time around, Wahlberg managed to surprise his fans with his physique update. Mark’s first look from his upcoming movie Father Stu stunned his fans. He is playing a bipolar boxer-turned-priest in the movie. According to sources, Wahlberg put on 30 pounds of body weight in 20 days while preparing for the role. That is pretty remarkable if you ask us.
We are not sure if we should call it a transformation or a reverse transformation. Don’t worry, we will not ask you to put on 30 pounds of body weight in this article – unless you want to.
Related: Mark Wahlberg Appears Shredded Once Again After 14-Week Transformation
Mark Wahlberg Father Stu Diet Plan
But if you are one of the curious one’s and want to know what Mark Wahlberg ate to put on the monster weight, here is what his daily diet plan looked like:
3 a.m. – 4 eggs
6 a.m. – 8 eggs, 6 strips of bacon, 1 cup rice, 2 tablespoons olive oil, and a protein shake.
9 a.m. – ground beef or ground turkey made into a hamburger patty or meatloaf, 1 cup rice.
Noon – 1/2 roasted chicken, 1 cup rice, 1 cup cooked spinach, and 1 cup cooked beets.
3 p.m. – 8 ounces veal or pork chop, 4 ounces salmon, 1 cup rice, olive oil, and beets.
6 p.m. – 8 ounces steak, 8 ounces white fish, 1 cup cooked vegetables.
9 p.m. – Custom mash (1 cup cooked steel-cut oatmeal, 2 tbsp applesauce, 2 tbsp jelly or jam, 2 tbsp almond butter, 1 tbsp molasses.)
Weight Gain ≠ Junk Food
We know what you are thinking.
How can someone eat so much?
We know, right?
We have a word of caution for readers who are looking to put on body weight. Please do not go about eating anything and everything you can get your hands on.
When Mark Wahlberg had to put on 30lbs for a movie, he did not go on an eating spree. Most people do not realize that Hollywood celebs do not load up on junk food while they are on a gaining program.
Although the Transformers star was eating 7-8 meals a day at about 7,000 calories, it was all coming through nutritious food. Transforming your physique becomes easier when you have an army of specialists taking care of you, and it was no different for Wahlberg.
Wahlberg’s team took it to the next level to ensure the actor’s health and safety during his gaining program. Lawrence Duran, Wahlberg’s personal chef, revealed to E! News that:
“We meet with a team of doctors who do his bloodwork and a nutritionist who gives us a full breakdown of what his body needs, what his body’s lacking, and basically come up with a meal plan accordingly. We go to a specialist every two weeks to see where we’re at and adjust things.”
Next Read: 7 Reasons Why You Shouldn’t Use Cheat Meals
Mark Wahlberg Pain & Gain Diet Program
We know this is what you came for. Wahlberg sported insane physiques in “The Fighter“, “Lone Survivor“, and “Shooter,” but he outdid himself with his transformation in “Pain & Gain.”
When the first teasers of “Pain & Gain” were realized, Mark looked like he had almost doubled in size from his previous movie. It was a big achievement for the actor considering he only had seven weeks to achieve the feat.
Mark Wahlberg Stats
Name: Mark Robert Michael Wahlberg
Birth Place: Dorchester, Boston, Massachusetts
D.o.B.: 5 June 1971
Height: 5’8″
Waist: 34″
Chest: 46″
Bicep: 16″
Weight: 185 lbs
Mark Wahlberg Pain & Gain Diet Program
Mark’s goal was to gain 40 pounds of muscle in seven weeks. He weighed 165 pounds for his last movie but had to be 205 lbs before starting shooting for Pain & Gain. The news that Dwayne “The Rock” Johnson would be his co-star would surely have made Mark push harder in the gym.
Related: The Rock Reveals His Leg Day Training Program for “Black Adam” Film
Mark Wahlberg worked with trainer Bryan Nguyen for his Pain & Gain transformation. He went back to his old-school workouts that included a lot of compound lifts. But this time around, he did less cardio and ate more.
(3:15 a.m.) Meal 1: Steel-cut oats, peanut butter, blueberries, and eggs.
(5:30 a.m.) Meal 2: Protein shake, three turkey burgers, five pieces of sweet potato.
(8 a.m.) Snack (Between meals): A plate of meatballs.
(10:30 a.m.) Meal 3: A mix of grilled chicken, kalamata olives, pepperoncini, cherry tomatoes, cucumber, bell peppers, and hard-boiled eggs.
(1 p.m.) Meal 4: Steak.
(3:30 PM) Meal 5: Chicken with bok choy.
(Before 5:30 p.m.) Meal 6 (Dinner): Fish with veggies.
Mark Wahlberg starts his day early. According to reports, he is out of his bed by 2:30 a.m. He gets done with his workout while most of the world is asleep.
The Transformers actor does not follow a vanilla diet program. His daily nutrition plan consists of three breakfasts and a snack at 8 a.m. Mark eats six small meals throughout the day that keeps his metabolism running and helps him burn calories even when he is not physically active.
In his Pain & Gain transformation diet program, Wahlberg does not consume carbs before bed. Protein is the primary source of calories in his diet plan.
Related: Best Ways To Kickstart Your Metabolism As A Bodybuilder
Mark Wahlberg Pain & Gain Training Program
Marky Mark followed a 5-day training split while prepping for Pain & Gain. Wahlberg’s workout program is a result of years of experience inside the iron paradise and a deep understanding of his body. He relied on supersets that did the job in the past.
Here is Mark Wahlberg’s Pain & Gain Workout Routine:
Monday: Chest, Arms, and Abs
i) AM Workout – Chest & Arms
1. Flat Bench Press: 4 sets 8-12 reps, No rest
2. Superset
Dumbbell Chest Fly: 4 sets 8-12 reps, No rest
Incline Bench Press: 4 sets 8-12 reps, 45-sec rest
3. Superset
Front Shoulder Raise: 4 sets 8-12 reps, No rest
Decline Bench Press: 4 sets 8-12 reps, 45-sec rest
4. Superset
Side Shoulder Raise: 4 sets 8-12 reps, No rest
Seated Military Press: 4 sets 8-12 reps, 45-sec rest
5. Superset
Standing Shoulder Press: 4 sets 8-12 reps, No rest
Parallel Bar Dips: 4 sets 8-12 reps, 45-sec rest
6. Superset
Cable Tricep Pressdown: 4 sets 8-12 reps, No rest
Barbell Lying Tricep Extension: 4 sets 8-12 reps, 45-sec rest
7. Overhead Cable Tricep Extension: 4 sets 8-12 reps, No rest
While prepping for Pain & Gain, Mark Wahlberg trained twice a day. Since he only had seven weeks to get in the best shape of his life, he knew 7 workouts of a muscle group were not going to cut it.
Mark trained each muscle group twice a week. Since he wanted burly arms for the movie, Wahlberg trained his arms almost every day.
ii) PM Workout – Stretching, Abs, and Cardio
1. Warmup: Stretching (Foam roller, bands, and Val slides)
2. Circuit – 3 rounds X 15 reps of each exercise
Curl-Up (McGill)
Bicycle crunch
Side crunch
Hip-up
Medicine ball twist
3. Cardio: Treadmill or Elliptical – 30 minutes
Related: Best Foam Rollers For Muscle Recovery & Back Pain (Updated 2021)
Tuesday: Legs, Back, and Biceps
i) AM Workout – Legs & Back
1. Front Squat: 4 sets 8-12 reps, No rest
2. Superset
Split Squat: 4 sets 8-12 reps, No rest
Leg Press: 4 sets 8-12 reps, 45-sec rest
3. Superset
Jump Squat: 4 sets 8-12 reps, No rest
Walking Lunge: 4 sets 8-12 reps, 45-sec rest
4. Superset
Standing Calf Raise: 4 sets 8-12 reps, No rest
Barbell Deadlift: 4 sets 8-12 reps, 45-sec rest
5. Superset
Alternating Leg Curl: 4 sets 8-12 reps, No rest
Pull-up: 4 sets 8-12 reps, 45-sec rest
6. Superset
Dumbbell Row: 4 sets 8-12 reps, No rest
Lat Pull-Down: 4 sets 8-12 reps, 45-sec rest
7. Seated Pulley Row: 4 sets 8-12 reps, 45-sec rest
While getting ready for the movie, Marky Mark trained at his swanky home gym. It saved him a lot of time he would have otherwise spent traveling to and from the iron paradise.
Related: Best Complete Home Gyms For Bodybuilding & Gains (Updated 2021)
ii) PM Workout – Biceps, Stretching, and Cardio
1. Warmup: Stretching (Foam roller, bands, and TRX)
2. Seated Bicep Curl: 3 sets 10, 8, 6 reps @ 20, 25, 30kgs
3. Barbell Bicep Curl: 3 sets 10, 8, 6 reps @ 20, 25, 30kgs
4. EZ Bar Curl: 3 sets 10, 8, 6 reps @ 20, 25, 30kgs
5. Preacher Curl: 3 sets 10, 8, 6 reps @ 20, 25, 30kgs
6. Machine Bicep Curl: 3 sets 10, 8, 6 reps @ 20, 25, 30kgs
7. Cardio: Treadmill or Elliptical – 30 minutes
Must Read: How To Use The TRX To Build A Bigger Chest
Wednesday: Rest Day
Thursday: Legs, Back, and Biceps
i) AM Workout – Full Body Circuits
4 rounds of each circuit
8 reps of each exercise
90-seconds after completing each round.
1. Circuit 1
Barbell Deadlift
Power Clean
Clean and Press
Hang Snatch
Push Press
2. Circuit 2
Split Squat
Barbell Bench Press
Barbell Deadlift
Inverted Row
3. Finishers
Cable Bicep Curl: 3 sets 8 reps, 60-second rest
Seated Chest Press: 3 sets 8 reps, 60-second rest
Leg Press: 3 sets 8 reps, 60-second rest
Tricep Pushdown: 3 sets 8 reps, 60-second rest
Seated Side Lateral Raise: 3 sets 8 reps, 60-second rest
Since Mark Wahlberg started his days early in the morning with a heavy workout, he often took a “growth nap” before doing his ab workout and light cardio in the afternoon.
ii) PM Workout – Stretching, Abs, and Cardio
1. Warmup: Stretching (Foam roller, bands, and Val slides)
2. Circuit – 3 rounds X 15 reps of each exercise
Curl-Up (McGill)
Bicycle crunch
Side crunch
Hip-up
Medicine ball twist
3. Cardio: Treadmill or Elliptical – 30 minutes
Friday: Chest, Arms, and Biceps
i)AM Workout – Chest & Arms
1. Flat Bench Press: 4 sets 8-12 reps, No rest
2. Superset
Dumbbell Chest Fly: 4 sets 8-12 reps, No rest
Incline Bench Press: 4 sets 8-12 reps, 45-sec rest
3. Superset
Front Shoulder Raise: 4 sets 8-12 reps, No rest
Decline Bench Press: 4 sets 8-12 reps, 45-sec rest
4. Superset
Side Shoulder Raise: 4 sets 8-12 reps, No rest
Seated Military Press: 4 sets 8-12 reps, 45-sec rest
5. Superset
Standing Shoulder Press: 4 sets 8-12 reps, No rest
Parallel Bar Dips: 4 sets 8-12 reps, 45-sec rest
6. Superset
Cable Tricep Pressdown: 4 sets 8-12 reps, No rest
Barbell Lying Tricep Extension: 4 sets 8-12 reps, 45-sec rest
7. Overhead Cable Tricep Extension: 4 sets 8-12 reps, No rest
While following Mark Wahlberg’s Pain & Gain transformation program, make sure that you are constantly pushing yourself. If 12 reps of an exercise feel easy, increase the weight and do not let your muscles get used to your workouts.
ii) PM Workout – Biceps, Stretching, and Cardio
1. Warmup: Stretching (Foam roller, bands, and TRX)
2. Seated Bicep Curl: 3 sets 10, 8, 6 reps @ 20, 25, 30kgs
3. Barbell Bicep Curl: 3 sets 10, 8, 6 reps @ 20, 25, 30kgs
4. EZ Bar Curl: 3 sets 10, 8, 6 reps @ 20, 25, 30kgs
5. Preacher Curl: 3 sets 10, 8, 6 reps @ 20, 25, 30kgs
6. Machine Bicep Curl: 3 sets 10, 8, 6 reps @ 20, 25, 30kgs
7. Cardio: Treadmill or Elliptical – 30 minutes
Saturday: Legs, Back, and Abs
i) AM Workout – Legs & Back
1. Front Squat: 4 sets 8-12 reps, No rest
2. Superset
Split Squat: 4 sets 8-12 reps, No rest
Leg Press: 4 sets 8-12 reps, 45-sec rest
3. Superset
Jump Squat: 4 sets 8-12 reps, No rest
Walking Lunge: 4 sets 8-12 reps, 45-sec rest
4. Superset
Standing Calf Raise: 4 sets 8-12 reps, No rest
Barbell Deadlift: 4 sets 8-12 reps, 45-sec rest
5. Superset
Alternating Leg Curl: 4 sets 8-12 reps, No rest
Pull-ups: 4 sets 8-12 reps, 45-sec rest
6. Superset
Dumbbell Row: 4 sets 8-12 reps, No rest
Lat Pull-Down: 4 sets 8-12 reps, 45-sec rest
7. Seated Pulley Row: 4 sets 8-12 reps, 45-sec rest
You will be lifting heavy and doing a lot of supersets on the Mark Wahlberg transformation plan. Mark followed a strict diet plan and relied on supplements to improve his muscle recovery and reduce the chances of injury.
Recommended Supplements:
Best Protein Powder For Bodybuilding Gains & Recovery 2021
Best Bodybuilding Multivitamins For Health & Wellness (Updated 2021)
The Top 5 Supplements Bodybuilders Should Be Taking
Best Pre-Workout Supplements For Muscle Building (Updated 2021)
ii) PM Workout – Stretching, Abs, and Cardio
1. Warmup: Stretching (Foam roller, bands, and Val slides)
2. Circuit – 3 rounds X 15 reps of each exercise
Curl-Up (McGill)
Bicycle crunch
Side crunch
Hip-up
Medicine ball twist
3. Cardio: Treadmill or Elliptical – 30 minutes
Sunday: Rest Day
Conclusion
Mark Wahlberg has been training since time immemorial. If you are a fitness rookie, start by performing only the AM workouts. You can switch to following the complete Pain & Gain workout regimen as you gain training experience.
Remember: Mark Wahlberg did not carve his Pain & Gain physique from scratch within seven weeks. He already had a solid foundation to build on. Patience, persistence, and lots of protein will be your best friends on the Mark Wahlberg Pain & Gain transformation program.
Which celebrity, according to you, has the best physique? Let us know in the comments below. Also, be sure to follow Generation Iron on Facebook, Twitter, and Instagram.
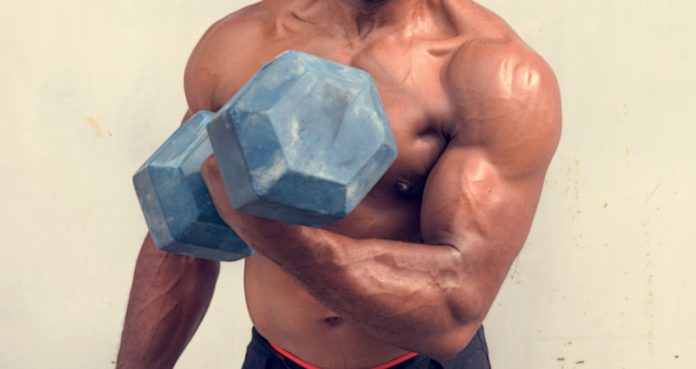
5 Tips For A Weight Room Beginner
Tips for Gym Beginners
No one is a born bodybuilder, meaning you get better at it with time and reps. While bodybuilding might look easy, you will take some time to change your lifestyle and get the most out of your workouts.
If you’re new to the gym, you might find the weight room to be intimidating. We have put together this article so you can start out on the right foot and don’t have to take advice from gym bros.
Learn the Right Form
You won’t see optimal results if you don’t have the right form while working out. Before picking up the weights, learn the right way to perform the exercises. If you don’t have certified trainers to teach you the right form, you should take the help of the internet.
There are many credible videos on Youtube you can learn from. You can also start working out with someone who is on an advanced training level. By training with an advanced guy, you’ll have a steep learning curve.
Work on Your Mind-Muscle Connection
Lifting weights aren’t about going through the motions. You won’t get arms like Arnold by just curling some dumbbells. You have to put your mind into it. While performing bicep curls, Arnold thought of his biceps to be mountains.
With every rep, you should be thinking about making the peaks bigger. If establishing a mind-muscle connection is hard for you, start by looking at your working muscles in the mirror and squeeze and contract your muscles with every rep.
Bodybuilding isn’t about lifting heavy, it’s about making your muscles grow. The amount of weight you lift doesn’t matter. If your ego is tied up with the weights you can lift, powerlifting and weightlifting are better sports for you.
Get the Best of Both Worlds
Many gym beginners enter the gym and go straight to the machines. While working out with machines is easy, you can’t rely on them completely. Machines are isolation exercises and are great for bringing definition to your muscles.
If your goal is to build muscle mass, you should have compound movements like squats, deadlifts, bench press and barbell curls in your training program along with isolation exercises like the leg extensions, pulley rows, machine chest press, and cable bicep curls.
Change Your Lifestyle
Your fitness journey doesn’t start when you enter the gym and end when you leave. You might have to make small changes everywhere. Start by getting your diet right and drink at least four liters of water every day.
Sleep is a major part of transforming your physique. You need at least 6-8 hours of sleep every night. No matter how hard you workout in the gym, you won’t see the results until you are giving your body enough time to rest and recuperate.
Go Slow
You won’t see changes in your physique in a day – or week. Crafting your body will test you physiologically and psychologically. Some beginners make the mistake of doing too much in the gym in hope of making quick gains.
You need to put in the work every day and be patient to see the results. Increase the volume and intensity of your workouts gradually and don’t try to do too many things too fast. And remember, fitness is a journey, enjoy it without worrying too much about the destination.
How long have you been working out for? Let us know in the comments below. Also, be sure to follow Generation Iron on Facebook and Twitter.
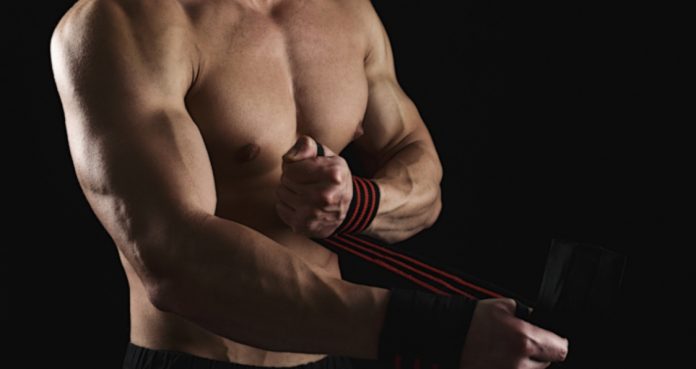
How To Get Ready For A Workout – Mentally
This Is How You Can Get In The Zone Before A Workout
Working out is as much a psychological game as it’s physiological. If you step inside the gym while you’re on the phone or hit a workout right after an exhaustive day at work, you’re jeopardizing your gains.
Most people never see the desired results in the gym because their mind-muscle connection isn’t optimal. Arnold popularized the concept of using the mind as a tool in carving your dream physique. In this article, we’ll tell you exactly how to do it.
Follow A Routine
Following a routine starts at going to the gym at the same time every day. You should follow a daily routine to enter the ‘zone’ before you start training. Doing the same things every day can turn into a shortcut to priming you mentally for your workout.
Your routine can go as far as doing the same warm-up stretching routine before you get into the workout. It’s better to delay starting your resistance training than to get into the workout without being mentally ready.
Blast Some Music
Good, loud, energetic, motivating music can solve so many of your problems. If you’re having a bad day and don’t feel like hitting the gym, put on a playlist that’ll make you want to kick some butt.
If you’re subscribed to a music service like Spotify, they have many high BPM playlists which will pump you up for your training. Many athletes have also made training playlists on the platform for their fans to follow.
Watch Motivational Videos
If you are someone who needs more stimulus than just audio, watching motivational videos on YouTube should do the trick for you. Many YouTube channels regularly post new motivational videos to pump you up for your workouts.
Watching videos can be a little more helpful as you can see your favorite athletes doing their favorite exercises and sharing their thoughts on training and life. Podcasts are another way of getting in the groove.
Visualize
Visualization is one of the most under-rated aspects of bodybuilding. Before you get into a workout, you should close your eyes and visualize how you want your muscles to look. Then during your workout, flex in the mirror and visualize your dream physique.
Visualization doesn’t stop at having a picture of your dream physique in your head. You need to put the visualization into action by building a mind-muscle connection during your working sets and contracting the muscles with every repetition.
Use Supplements
With the growing research and development in the health and fitness industry, many supplements have come out in the market which can help boost your mental capabilities for some time.
Pre-workout supplements are a hit with bodybuilders as they help them in delaying fatigue, getting a tunnel vision, better focus, and muscle pumps. You need to figure out what works for you and then double down on it.
What is your pre-workout ritual? Let us know in the comments below. Also, be sure to follow Generation Iron on Facebook, Twitter, and Instagram.
*Header image courtesy of Envato Elements

Gym Jerks Have These Things In Common
These are the things gym jerks have in common.
Every gym has a few people who are a pain in the ass. Some of these pricks can be so bad they could make you change your gym timings. The worst part is, you can do nothing about it. A single habit of these annoying people could be putting you off.
While some people could be a trouble on purpose, the others might have no idea they are doing something wrong. Even you are not safe from this. There is a probability people in your gym think you’re a jerk. Do you want to know if this is the case?
1. Loud Grunting
Let’s get this out of the way. Grunting doesn’t make you cool. We can understand you might be lifting heavy weights, but do you really need to grunt as if you’re in labor? We’re sure you could lift those weights while making much less noise.
The funny thing is, the number of men grunting in the free weights area is directly proportional to the number of women in the gym. And the loudness of the grunting is directly proportional to the proximity of the girls to the guys.
2. Taking Away The Weights Without Asking
Every single gym around the world has these people. These gym jerks take away the weights from the barbells or the dumbbells while people are resting between their sets. A little courtesy never hurt someone.
We get it, you saw one too many ‘thug life’ in the gym videos. Whenever you see a loaded barbell or dumbbells lying on the floor, it is always a good idea to ask around if someone is using them. Form a habit of asking otherwise karma isn’t too far away.
3. Too Badass To Re-rack The Weights
If the dumbbells at your gym are always racked, you’re in a heaven. People like lifting heavy weights but they hate putting them back. Unracked weights can make a complete mess of the gym. If you use any of the gym equipment, it is your responsibility to put them back.
“If you’re man enough to lift it, then you’re man enough to put it back.”
The next time you see someone not re-racking their weights, act responsible and ask him to put it back. Oh, and if he doesn’t listen, report it to the authorities. They surely will be on your side.
4. There To Pick Up Girls
Some people think of gyms as pick up spots. They are there to impress girls and almost no one of them is good at it. Just so you know, lifting heavy weights and flexing isn’t going to get you girls – unless you’re too good at it.
If you want to pick up girls, there are better places to do it. Have you ever heard of the club, maybe? Stop being a distraction for the ladies and the people around you in the gym. Do what you’re supposed to do in the gym.
5. The Broscientists
These are the biggest gym jerks. You will always find them giving training and nutrition advice to people. All their advice and methods have no science to back them up. Broscientists are the people who take it upon themselves to correct your form.
We have an advice for all these broscientists, refrain from giving advice to anyone until you feel they will hurt themselves. Everyone’s body is different and might respond to different styles of training.
People might have come to their current form of training and what works for them after years of trial and error. There is no ‘one solution fits all’ when it comes to working out.
Did we miss out any other types of gym jerks? Let us know in the comments below. Also, be sure to follow Generation Iron on Facebook and Twitter.
*Images courtesy of Envato Elements.
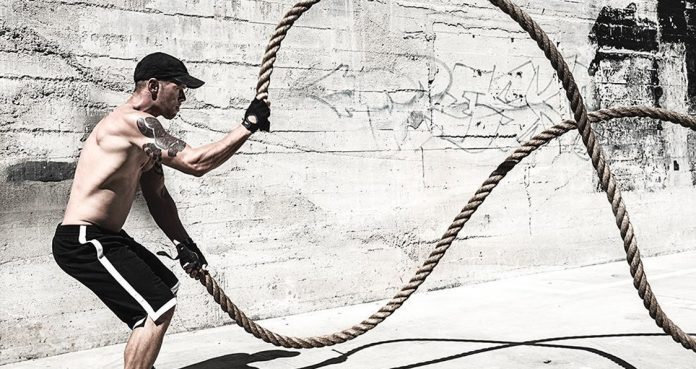
5 Exercises Which Will Burn Fat Better Than Cardio
Exercises Which Are More Effective Than Cardio
Most people get a gym membership because they want to shed weight. Losing weight is one of the most common New Year’s Resolutions. This is why there is an influx of new members in gyms around the world during that time.
Most people when they think weight loss, think about cardio. If you’re someone who doesn’t like the idea of spending time on a treadmill or don’t feel comfortable going for a walk or a run in the wild, this is the article for you.
1. Burpees
Burpees are one of the most brutal exercises. All the exercises on this list are high-intensity exercises which will put your cardiovascular system to a test. Apart from losing weight, HIIT workouts help you in building strength and stamina.
Stand with your feet shoulder-width apart. Perform a squat and place your hands on the floor, just inside your feet. Get into the pushup position, perform a pushup and return to the starting position. Reach your arms overhead and explosively jump up in the air. Land back and repeat for reps.
2. Alternate Kettlebell Swings
The benefit of performing HIIT exercises is, you can target specific muscle groups while burning fat. Alternate kettlebell swings will work your shoulders and back while burning those extra calories.
Stand with your feet in a wider than shoulder-width stance. Hold a kettlebell between your legs in your right hand. Swing the kettlebell so its parallel to the floor and at your shoulder level. Return to the starting position and repeat with your left arm.
3. Dumbbell Farmer’s Walk
Dumbbell farmer’s walk is an incredibly effective exercise if you’re looking to build grip strength. This exercise also helps in shedding weight while sculpting your body and strengthing your stabilizers.
Dumbbell farmer’s walk has different variations you can perform. You can use farmer’s walk bars, dumbbells, kettlebells or barbells for this exercise. You can also hold the dumbbells and kettlebells overhead to make the walk intense.
4. Step Up Jumps
If you have ever performed step-ups, you would know this exercise can smoke you. The trick with step-up jumps is you need to maintain a constant intensity. You could perform the bodyweight version of step-up jumps or could add resistance by using weights.
Stand behind a flat bench of knee height and place one foot on the elevated platform. Jump up, driving through the forefoot of the elevated leg. Switch legs in the air so that you land your opposite leg on top of the platform.
5. Battle Rope Wave
Battle rope training is a staple in unconventional gyms, and there’s a good reason behind it. They’re one of the most functional pieces of equipment for high-intensity training and hardcore conditioning.
Battle rope waves can exhaust you in a couple of minutes. This exercise might look easy but will take all you have. Hold the ends of the rope at arm’s length in front of your hips with your hands shoulder-width apart. Brace your core and begin alternately raising and lowering each arm explosively.
How long are your cardio sessions? Let us know in the comments below. Also, be sure to follow Generation Iron on Facebook and Twitter.
*Header image courtesy of Envato Elements.
Suffering From Shoulder Pain? Self-Diagnose With These Easy Tests
Shoulder pain self-diagnoses you can do at your home.
Suffering from shoulder pain? You have come to the right place.
Shoulders are one of the most complex and vulnerable joints in our body. Given the complicated anatomy and range of muscles and movement involved, it is a miracle we do not run into shoulder trouble often.
Most people with underlying shoulder issues experience pain when they are performing a physically intensive task. Compromised shoulder movement due to stiffness or pain can cause substantial disability and affect an individual’s ability to carry out daily activities.
Occupations that require a person to perform repetitive tasks, lift heavy loads, and cause shoulder vibrations are associated with a higher risk of shoulder disorder.
How the shoulder works
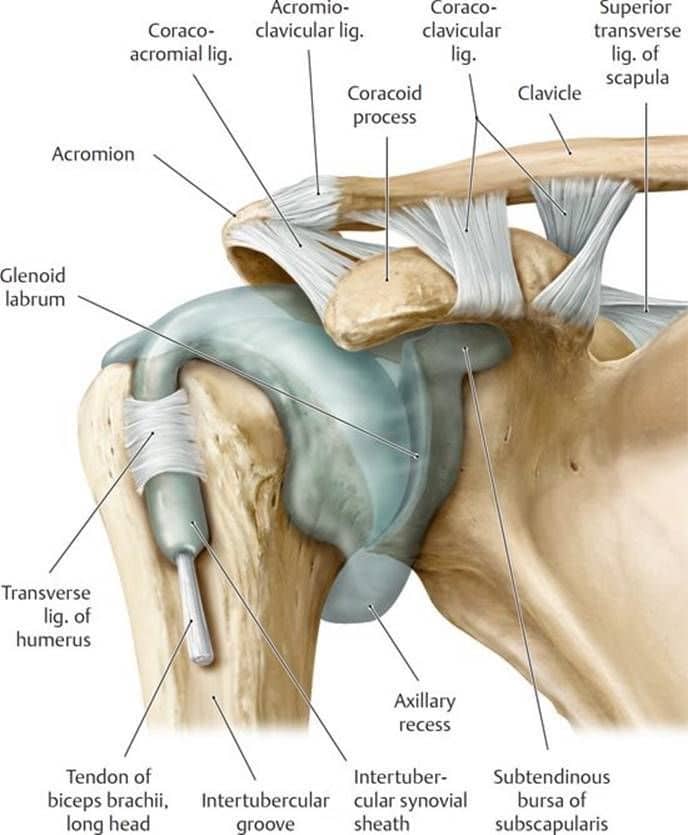
The shoulder is a ball-and-socket joint that has three main bones: the humerus (long arm bone), clavicle (collarbone), and scapula (also known as the shoulder blade).
The three bones are cushioned by cartilage. Further, there are two main joints:
Acromioclavicular – Located between the highest part of scapula and clavicle.
Glenohumeral (aka shoulder joint) – Made up of top, ball-shaped part of the humerus bone and outer edge of the scapula.
Fun fact: The should joint (glenohumeral) is the most mobile join in your body.
Rotator Cuff
Shoulders get their range of motion from the rotator cuff. The stiffer a person’s rotator cuff, the more restricted his range of motion will be. The rotator cuff is made up of four tendons.
But what are tendons, you ask?
Tendons are tissues that connect muscles to bone. If tendons or bones around the rotator cuff are swollen or damaged, it might be painful or difficult to lift your arm over your head.
Symptoms of a Shoulder Injury
The ball-and-socket structure of the shoulder gives you a great range of motion, but it comes at the expense of stability.
The shoulder joint is the most dislocation-prone in your body. On top of that, repeated stress (at work or while playing sports) can lead to tears and other shoulder injuries.
A preliminary shoulder injury test includes asking yourself the following questions:
Can you move your arm normally, or is your shoulder too stiff or painful?
Is your shoulder strong enough for routine tasks?
Do you feel that your shoulder could pop out of the socket?
Related: Get Bulletproof Shoulders with this Essential Stability Workout Program
Self-Diagnoses For Shoulder Pain
Here are a few simple DIY shoulder tests that can help determine the reason behind your shoulder pain. You will need the help of a partner to perform these shoulder self-diagnoses.
1. Supraspinatus Tear (Empty Can Test)
The empty can test is a common shoulder pain self-diagnose exam. The diagnostic is used to assess the status of the supraspinatus (one of the four rotator cuff muscles).
The muscle is used in arm abduction (raising) and is located on the upper part of the shoulder joint.
Steps:
Sit on a chair with your arms at your sides and hands supinated (palms facing forward).
Lift the sore arm forward and to the side at about 30-45 degrees.
Slowly turn your wrist (as if you were trying to empty a glass of water) until your palm faces down to the floor.
In this position, get your partner to slowly push your arm down while you attempt to resist the force.
If you feel pain or are not able to maintain the arm position due to weakness, you may have a supraspinatus tear.
2. Labrum Tear
The shoulder labrum is a thick piece of tissue attached to the rim of the shoulder socket that helps keep the ball of the joint in place. It can tear in three ways:
Completely off the bone.
Within or along the edge of the labrum.
Where the bicep tendon attaches.
The labrum tear test for shoulder pain has two parts: the apprehension test and the relocation test.
Apprehension Test:
Lie down on your back on a flat and elevated surface.
Move your arm out to the side so that it is perpendicular to your torso and parallel to the floor.
Flex your elbow so that your upper arm is at a ninety-degree angle with your lower arm.
Your partner should slowly rotate your arm so your hand moves toward your ear. Make sure you are maintaining the ninety-degree elbow flexion throughout the test.
If you are apprehensive (hesitant) about shoulder movement beyond the joint, this test is considered positive for a possible labrum tear.
Relocation Test:
In some cases, you might feel your shoulder is unstable and wants to move out of the socket or relocate – especially during extreme external rotation.
If you are facing the same problem, have your partner gently press on the front of your shoulder to relocate the joint.
After this, if you feel less relocation and your shoulder feels in place and more stable, then this test is considered positive.
Also Read: 5 Things You Should Never Do During Shoulder Workouts
3. Impingement
The space where your rotator cuff tendons and shoulder bursa reside becomes smaller when your arm is raised overhead. Impingement happens when the tendons of the rotator cuff get pinched in the bones of the shoulder.
Steps:
While seated, have a partner raise the arm of your sore shoulder to the front and overhead as far as possible.
Your partner should support your shoulder blade (scapula) with one hand and use the other hand to raise your arm.
If you experience shoulder pain while your arm is being raised, the impingement test is considered positive. The pain is probably caused by impingement of the tendons or bursa in that part of the shoulder.
4. Frozen Shoulder
A frozen shoulder is one of the most common types of shoulder issues. It is also known as adhesive capsulitis. It usually occurs over time and can cause shoulder pain, tightness, and limit the functionality of your arm. A frozen shoulder can make it difficult for you to reach overhead and scratch your back.
A frozen shoulder cannot be diagnosed through an X-ray or MRI. It has to be examined by observing the troubled shoulder while it is moving through its range of motion.
Frozen Shoulder Test #1 Steps:
Stand in front of your partner and ask them to observe you as you move your sore arm. Your partner should closely notice the range and quality of motion of the shoulder joint.
Slowly raise both your arms to the front and overhead. If you are suffering from a frozen shoulder, you might only be able to lift your sore arm to a point just past parallel with the floor. Additionally, as your scapula elevates towards your ear, you might experience incremental shoulder pain.
From the overhead position, slowly lower your arms down to the starting position.
Lift your arms out to your sides. As with lifting your arms overhead, you might be suffering from a frozen shoulder if you are only able to lift your arms to a point parallel to the ground.
Frozen Shoulder Test #2 Steps:
Stand with both arms extended straight at your sides so that they are parallel to the floor.
Flex your elbows so that your upper arm is perpendicular to your lower arm.
Rotate your arms outward.
If you are suffering from a frozen shoulder, the painful arm will not rotate as far as the healthy shoulder.
Check Out: How To Fix Rounded Shoulders For Optimal Posture
5. Bicep Tendonitis
Bicep tendons are long and strong cord-like structures that connect the bicep muscle to the bone in the shoulder socket. Biceps tendinitis is an inflammation or irritation of the upper biceps tendon.
Steps:
While seated, raise your sore arm forward so that it is parallel to the floor.
While holding the position, turn your wrist so that your palm is facing the roof.
Ask your partner to push your arm down, while you resist.
If you experience shoulder pain while resisting your partner’s attempt to lower your arm, you are probably suffering from bicep tendonitis.
6. Rotator Cuff Tear
A rotator cuff is a group of muscles and tendons that hold the shoulder joint in place and allow you to move your arm and shoulder.
The rotator cuff includes the following muscles:
Subscapularis
Infraspinatus
Supraspinatus (from the empty can test)
Teres minor
These four muscles arise from the scapula and insert into the humerus. The tendons of the rotator cuff muscles blend with the joint capsule and form a musculotendinous collar that surrounds the posterior, superior, and anterior aspects of the joint, leaving the inferior aspect unprotected.
This shoulder set-up is a big reason behind most of the shoulder dislocations as the humerus slides inferiorly through the unprotected part of the joint.
During arm movements, the rotator muscles contract and prevent the sliding of the head of the humerus. This provides stability and a full range of motion to our shoulder joints.
While we wait for human evolution to catch up to this flaw, use the following test to determine if your shoulder pain is caused by a rotator cuff tear:
Steps:
While seated, ask your partner to lift your painful arm to the side so that it is parallel to the floor.
After a few seconds in this position, ask your partner to let your arm drop.
If you are unable to maintain the parallel position by yourself, your shoulder pain might be due to a rotator cuff tear.
Make sure you are not compensating for a torn rotator cuff by elevating the scapula towards your ear to hold the parallel position.
Related: These Exercises Are Key to Developing Great Shoulder Stability
7. Sulcus Test
The sulcus test is used to assess the glenohumeral joint (responsible for connecting the upper extremity to the trunk) for inferior instability due to a laxity of the superior glenohumeral ligament and coracohumeral ligament.
Note: This test is best performed by a trained professional. We would recommend passing on your friendly neighborhood brofessor‘s help for this test.
Steps:
While seated, let your arms hang at your sides.
Taking hold of your wrist or elbow, your practitioner pulls the arm down.
While doing this, the healthcare professional is looking for the appearance of a small divot, or sulcus, at the top of your shoulder joint.
The presence of a sulcus is a sign that your shoulder might be pulling away from the socket, hence indicating shoulder instability.
8. AC Joint Separation
The acromioclavicular (AC) joint is a joint in the shoulder where two bones meet. One of these bones is the collarbone or clavicle. The second bone is a part of the shoulder blade (scapula), which is the big bone behind the shoulder that also forms part of the shoulder joint.
The AC joint is a plane-type synovial joint, which under normal physiological conditions allows only gliding movement. As it also attaches the scapula to the thorax, the AC joint allows an additional range of motion to the scapula and assists in arm movement such as shoulder flexion and abduction.
The AC joint may become separated in a traumatic event like a sports injury or a car accident. The test for an AC joint separation is called the AC joint compression test.
Steps:
While seated, have your partner place one hand on the front of your shoulder and one hand on the back of your shoulder.
They then push their hands together, compressing the AC joint.
If you experience shoulder pain, then the test is positive. Additionally, pain while raising the arm upward and while sleeping are also indications of an AC joint separation.
When to seek medical help?
Usually, shoulder pain is caused by the factors mentioned above and can be fixed at home with rest and ice. You could also bandage it to hold it in place if necessary or use a cuff or elbow support until you see improvement.
But you should not delay getting professional help if you experience heat and tenderness around the joints, shoulder deformity, fever, inability to move your shoulder, lasting bruising, numbness, or pain that persists beyond a few weeks of home treatment.
We do not want to be the article that relates everything to a possible heart attack (or cancer) but if your shoulder pain is intense and sudden and not related to an injury, call 911 immediately. It may be a sign of a stroke.
Do you perform shoulder-specific warmups before a workout? Let us know in the comments below.
Also, be sure to follow Generation Iron on Facebook, Twitter, and Instagram.
For the Love of God, Stop Going Super Heavy on These 5 Exercises
5 Favorite Exercises of Ego-Lifters
Look around in your gym, and you’ll surely find some egomaniacs lifting more weights than they can handle. Their incorrect form is proof of their bulging ego. Some people lift heavy to prove themselves. There are a few exercises where people go super heavy to show off.
Not only is lifting heavy on these five exercises dangerous, but they’ll also not be beneficial in adding muscle mass. Little do these people know lifting with the right form is more aesthetically appealing than overloading the machines.
Leg Press
Leg press is how most of the ego lifters stroke their egos. Many people fully load the leg press machine with weight plates and then get someone to sit on the top of the machine while they perform half a rep, and then re-rack it.
Leg presses aren’t supposed to be done this way. Like every other exercise on this list, you need to have a full range of motion while performing leg presses. Make sure you’re not supporting your legs by pushing your knees with your arms.
Standing Calf Raises
The reason most people have a weak lower body is that there is a lot of ego-lifting involved. Most people make the mistake of lifting too heavy on the standing calf raises and overlook the importance of a complete range of motion.
While performing the calf raises imagine extending your ankles as a Ballerina stands on her toes. While you’re on the top of the movement, hold and squeeze your calves. Your calves should be on fire by the end of the exercise.
Military Overhead Presses
Shoulder overhead presses are another ego-lifter favorites. Most people use a jerking motion to lift the weights over their heads. You need to perform this exercise with military discipline and without using momentum.
The barbell should rest right above your shoulders, and you need to lock out your elbows and have the barbell over your head at the top of the movement. Many people make the mistake of pushing the bar in front and over their toes at the top of the movement rather than their heads.
Leg Extensions
Leg extensions are a quad focused isolation exercise. You’ll reap the most rewards by extending your legs completely while performing this exercise. Your legs should go above the parallel level from the ground at the top of the movement.
Many people leave money on the table by stacking up the plates on the leg extension machine and moving the weights a few centimeters. Pause and contract your quads at the top of the movement to target your quads optimally.
Shrugs
Shrugs are probably the easiest exercise you can do. All you need to do is grab the barbell or a pair of dumbbells and lift your shoulders to your ears while keeping your elbows locked out or slightly bent.
Many egoist people still manage to screw up this exercise by going too heavy and moving their necks instead of the shoulders. Do yourself a favor by lifting lighter, pulling up your shoulders to your ears and pausing at the top of the movement.
How much do you shrug, bro? Let us know in the comments below. Also, be sure to follow Generation Iron on Facebook and Twitter.

8 Best Triceps Exercises
The Best Exercises For Building Triceps
The triceps are right behind the biceps, but sadly, they get close to the same love as the pythons. Unlike what many people think, building solid horseshoe triceps requires more than doing a few cable extensions.
Your triceps consist of three heads – outer, inner and medial. While the overhead tricep exercises work the inner (longer) head, the push/pressdowns train the outer (shorter) and medial heads. You need to maintain a balance between the exercises to ensure the overall development of your triceps.
Barbell Skullcrushers
Barbell skullcrushers are one of the most effective and underutilized tricep exercises. If you’re a beginner, you should perform the exercise with a spotter. Lie down on a flat bench and grab a barbell with both your hands at shoulder-width.
Extend your arms so they are perpendicular to the floor. While keeping your elbows and upper arms locked in position, lower the bar by flexing at your elbows so the barbell is a couple of inches away from your head. Return to the starting position and repeat for the recommended reps.
Dumbbell Kickbacks
While performing the dumbbell kickbacks your upper body should be at a 60-degree angle with the floor. Grab a pair of dumbbells and get into position by lifting your shoulder slightly and pulling back your elbows.
While keeping your elbow locked in place, bring the dumbbells close to your chest. When the dumbbells are a few inches away from your pecs, push back the dumbbell until your arms are fully extended.
Rope Overhead Cable Extensions
The rope overhead cable extensions work the inner tricep head which can be a stubborn muscle for most people. Place the pully machine at waist height and maintain a full range of motion while performing the exercise.
V-Bar Cable Extensions
Performing the V-bar cable extensions instead of the straight bar can put more emphasis on your outer and medial deltoids. Many people make the mistake of leaning onto the bar while performing the lift. Doing so can recruit secondary muscles and take off tension from your triceps.
Dips
Depending on your stage, you could perform bench or parallel bar dips to bring up the volume in your triceps. You could take your gains to the next level by using additional resistance.
Single-Arm Overhead Dumbbell Extensions
The single-arm overhead dumbbell extensions can take some time to master. While performing the lift, make sure the dumbbell is close to the back of your head at the bottom of the movement and you squeeze the life out of your tris at the top of the ROM.
Close-Grip Smith Machine Bench Press
While many people do perform the close-grip barbell bench press in their tricep training, they leave a lot of gains on the table as they aren’t able to target the tris optimally. The Smith machine close-grip bench press turns the compound movement into isolation lift and keeps your pecs from coming into action.
Reverse Grip Cable Extensions
The reverse grip cable extensions excel at helping you “push-back” your triceps while you’re contracting the muscles at the bottom of the movement. Make the reverse extensions a part of your exercise arsenal if you want your tris to pop.
Which is your favorite tricep exercise? Let us know in the comments below. Also, be sure to follow Generation Iron on Facebook, Twitter, and Instagram.
Header image courtesy of Envato Elements
