Tag: workout
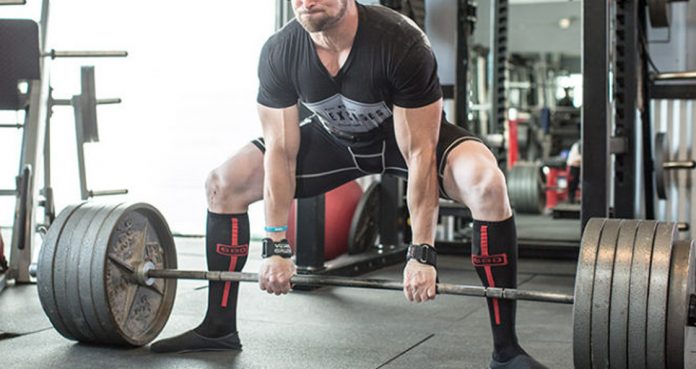
5 Tips To Master The Sumo Deadlift
Master the Sumo Deadlifts with these Five Tips
Deadlifts are some of the most brutal exercises which train your complete body. There are many variations of the deadlifts which will keep you from getting bored of the exercise. Sumo deadlifts have a greater impact on your hips, glutes and posterior chain.
Due to the limited range of motion, this variation of the deadlifts can enable you to lift heavier weights as compared to the traditional deadlifts. The sumo deadlifts are great for people who have a stronger lower body.
Since you get into a squatter stance while lifting the weights, your lower body does more work in this variation as compared to the traditional deadlifts. Sumo deadlifts are an advanced exercise and you need to perform them correctly to get the most out of them.
1. Find a Stance Which Works For You
There are no hard or fast rules when it comes to the sumo deadlift stance. The stance will vary for people based on their height and mobility. Some people have a false notion that the wider your sumo deadlift stance, the better it is. Most people need a moderate sumo stance to lift heavy weights while maintaining the correct form.
The sumo deadlifts are harder at the bottom. It is harder to move the weights off the floor than it is to lock our your hips and back at the top of the movement. Take a stance which makes it easy for you to lift the weights off the ground.
2. Get Your Body Behind the Bar
Some people make the mistake of ducking out their toes, doing this automatically puts the bar an inch in front of them. On the other hand, some people stand on top of the bar which is not the best position to start either because the bar can bump into your knees on the concentric movement.
Standing right behind the bar with your shins touching the barbell is the best position to start the lift. Keeping your head and chest behind the bar at the start of the movement will help you in locking out your hips and knees at the top of the movement.
3. Point the Toes Out
Feet placement is where most people go wrong with the sumo deadlifts. You neither want your feet to be pointing all the way out nor should they be pointing straight ahead. You want the barbell to be as close to you as possible while performing the sumo deadlifts.
If you stand with your feet completely “ducked” out, the bar will be an inch in front of you which can make it harder to lift it off the ground. Turn your feet slightly out as doing this will make the lift shorter and easy.
4. Generate Torque and Push Your Hips Through
As mentioned above, the sumo deadlifts are the hardest at the bottom of the movement. You need to generate a lot of torque to crack the bar off the floor. Make sure you push your knees out so they don’t come in the way of locking out your knees.
If you’re a competitive powerlifter, you will need to stand with your knees and back locked out at the top of the movement. Drive your hips into the bar to finish with a smooth lockout. Some people make the mistake of overextending their lower back which can unlock their knees.
5. Hand Placement
The hand placement while performing the sumo deadlifts can be tricky. Some people like to have a wider than shoulder width grip while the others like to keep their hands close to each other. A shoulder-width hand placement can prove to be the most optimal.
Holding the bar too wide can put extra tension on your lower back while a close grip can make it hard for you to balance the bar.
What is your sumo deadlifts PR? Let us know in the comments below. Also, be sure to follow Generation Iron on Facebook and Twitter.
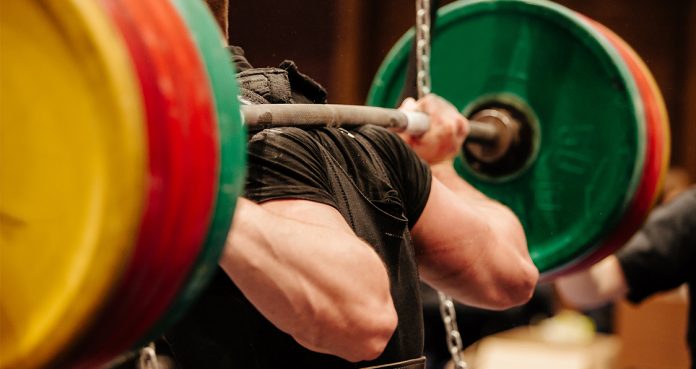
Front Squat Without Wrist Pain Or The Risk Of The Barbell Sliding
Vital Front Squat Grip Variations
The traditional back squats work your quads, hamstrings, and glutes while the front squats primarily target your quads. The front squats can be harder to perform as compared to the back squats. The front squats can put a lot of pressure on your lower back, wrists, and forearms.
If this wasn’t enough, there is always the possibility of the bar sliding forward while you perform a front squat. There are two variations of the front squat which can put varying degrees of pressure on your wrists and forearms.
The Weightlifter Grip
The weightlifter grip is also known as the full grip. A full grip involves holding the barbell with an overhand grip right outside shoulder-width. You need to keep your elbows pointed up so your upper arms are at least parallel to the floor.
The weightlifter’s grip requires mobility in your wrists, forearms, shoulders and lower back, and is the harder of the two variations to perform. The full grip can help you keep the weights pinned to your shoulders so you can lift heavier weights.
The Bodybuilder Grip
The bodybuilder front squat grip involves holding the barbell with a crossed-arm grip. The crossed-arm grip is used by people who have limited mobility in their wrists and forearms. You can only hold the barbell in place with the bodybuilder front squat grip.
You can’t actively push the bar into your shoulders while you perform a front squat with this grip. It is even more important to keep your elbows pointed up with the bodybuilder’s grip as the chances of the bar sliding forward are significantly higher.
Get Rid of Wrist Pain During Front Squats
If you use the weightlifter’s grip, you can encounter wrist and forearm pain while performing the squats. You will be in a better position if you perform a couple of warmup exercises and stretches for your wrists before going into the squats.
Extended Arm Wrist Stretches
The extended arm wrist stretches are the simplest warmups for the front squats. Extend your right arm with your palm facing the ceiling. Gently pull the fingers of your right arm towards your body with your left hand. Hold the stretch for 10-30 seconds.
Repeat the process with your left arm as the base arm. After you’re done with two sets of this exercise, point your palm towards the floor and repeat the stretching exercise. Doing this will warm up your upper and lower forearms.
Open Chest Stretches
The open chest stretching will help get your shoulders, chest, and wrists get warmed up for the front squats. Stand beside a squat rack with your arm extended and keep your elbow locked out.
Place your fingers on the squat rack and slowly start rotating away from the squat rack. After you’re done with the extended arm and open chest stretch, you’ll feel improved mobility in your wrists, forearms, and shoulders.
Avoid the Risk of the Bar Sliding Forward During Front Squats
Most people avoid performing the front squats because they can’t keep the bar steady on their shoulders. The bar sliding problem persists with both the weightlifter and bodybuilder grips. Before placing the bar on your shoulders, push your shoulders and arms forward so the bar can rest in the hole formed in the shoulder joints.
The best way to get rid of the bar sliding problem is to actively push your elbows upwards while you’re performing a front squat. Doing this will also help you keep your back straight which will put more tension on your quads.
At any point during the front squats, your elbows should not go below parallel to the floor. Looking at the roof while performing the squats can help you in keeping your elbows pointed up and your back straight.
Which grip do you use while front squatting? Let us know in the comments below. Also, be sure to follow Generation Iron on Facebook and Twitter.
*Header image courtesy of Envato Elements.
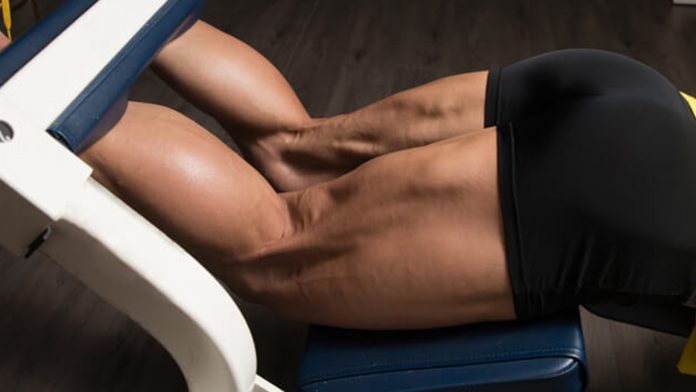
The Ultimate Workout for Building Shredded Hamstrings
Build Mass and Definition in Your Hamstrings
Most people have a love-hate relationship with training legs. They love to hate training their legs. Shredded legs are what separate the men from the boys. If you think building quads is hard, wait until you get serious about training your hamstrings.
Hamstrings are hard to develop since they are at the back of your legs. It’s hard to develop a mind-muscle connection with the hamstrings as you can’t see them in the mirror. Get ready to go through the most brutal hams workout of your life.
Exercise 1 – Wide Stance Squats – 3 Sets – 12, 10, 8 Reps
Squats are the king of all the leg exercises and we won’t miss utilizing it in our hams workout. Maintain a wider than shoulder width stance while performing the squats as it helps in recruiting hamstrings more than the quads.
Hip extensions help in activating the hamstrings, meaning your hams are most active as you straighten your legs and extend your hips. The wider the stance you take, the deeper your hips will flex resulting in exaggerating your hip extension and recruiting your hams.
Exercise 2 – Superset
– Leg Press – 3 Sets 30, 20, 10 Reps
– Good Mornings – 3 Sets 10, 20, 30 Reps
While performing the leg presses, place your feet at the top edge of the platform and keep the back support at a 60-degree angle. Keeping your feet at the top of the platform recruits your hams while placing them at the bottom activates your quads.
After performing 30 reps on the leg press, perform 10 reps on the good mornings. Keep your back arched and a slight bend in your knees while performing the good mornings. Don’t try to go too heavy on this exercise as it can lead to recruiting the lower back.
Exercise 3 – Lying Leg Curls – 6 Sets 30, 20, 10, 10, 20, 30 Reps
Lyings leg curls are for the legs what the preacher curls are for the biceps. Think of your hams as biceps and contract and squeeze them with every rep. By the end of the six sets, your hams should be filled with lactic acid and asking for mercy.
Change your feet placement on the pad with every set. Start the exercise with your feet placed wide apart on the pads. With every set, bring your feet closer and on the last set, your feet should be joined. The change in feet placement will work your hamstring from every angle.
Exercise 4 – Dumbbell Stiff Legged Deadlifts – 3 Sets 12, 10, 8 Reps
Dumbbell stiff legged deadlifts are a compound exercise and help in building muscle mass and strength. Keep your knees bent throughout the exercise and pause and squeeze your hams at the bottom of the movement.
Performing the Romanian deadlifts with dumbbells instead of a barbell gives you better leverage and can help with activating your hamstrings. Place your toes on a quarter plate to increase the leverage further by increasing the range of motion.
Exercise 5 – Superset
– Barbell Hip Thrusts – 3 Sets 20, 15, 10 Reps
– Glute Ham Hyperextensions – 3 Sets 10, 15, 20 Reps
The barbell hips thrusts and GHD target the hams and the glutes and can improve the separation between the muscles. Keep your feet shoulder width apart, maintain a full range of motion and pause at the top of the movement while performing the barbell hip thrusts.
Glute ham hyperextensions have been brought into the spotlight by CrossFit athletes. If you don’t have a GHD table at your gym, lie down on a flat bench and ask someone to sit on your calves. You could also perform this exercise on a lat pull-down machine by placing your knees on the seat and inserting your ankles between the seat and the pads.
Do you train your hamstrings and quads on the same day? Let us know in the comments below. Also, be sure to follow Generation Iron on Facebook and Twitter.
*Header image courtesy of Envato Elements.
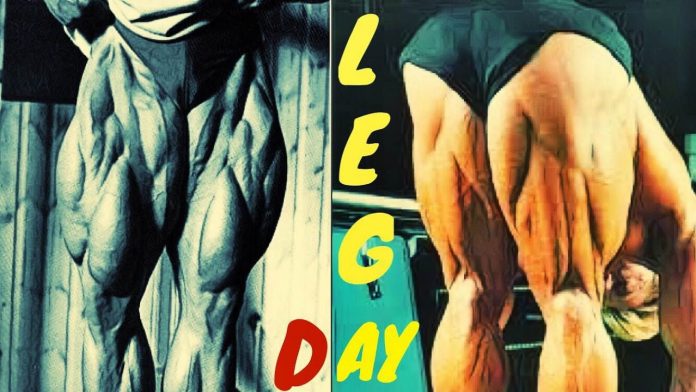
These Tom Platz Videos Will Pump You Up for Your Next Leg Workout
Tom Platz – The King of Quads
Tom Platz arguably had the most insane legs of all time (and still does based off recent video footage!). If this name doesn’t ring a bell for you, you have been missing out on something great all your life. Platz is a golden-era bodybuilder and stepped on the Mr. Olympia stage along with Arnold Schwarzenegger.
Tom’s legs got the way they were because of his insane workouts. We’re sure you might have seen hundreds, if not more, workout videos, but you’ll never have seen anything like the Tom Platz leg workouts.
If you’re one of those people who despise leg days and can’t find the motivation to train your wheels, watching a Tom Platz training video before hitting your legs can be the motivation you so badly need.
[embedded content]
Tom Platz loved squatting and swore by the exercise. He considered squats to be the best leg exercise and relied heavily on them in his leg workouts. After squats, he preferred hack squats and sissy hack squats.
Many of us mortals might get light headed just thinking about the volume of squats he performed. All of us can learn a lot about squatting and having a better form by following Platz’s principles.
How Many Can You Do?
[embedded content]
We’re sure you might be doing leg extensions and leg curls in your workouts, but have you ever done these exercises the way Platz does them? Chances are, Tom Platz is the only person who does them the way he does and that’s why he has the legs he has.
In your next leg workout, get yourself a spotter, but instead of asking him for support, tell him to add resistance to your reps. Adding external resistance to the weights will fill your muscles with blood and lactic acid, giving you a gorging pump.
Taking it to the Extreme
[embedded content]
Tom Platz has a very different view about training than many of his peers. Listen to him talk and you’ll realize he’s all about hitting failure with every set. There is nothing called overtraining in his dictionary.
At the same time, in his bodybuilding days, Platz’s leg workouts were so intense that he only trained his legs twice a month. Tom’s range of motion while performing his exercises is something we all can learn.
Platz – The Trainer
[embedded content]
You can take a bodybuilder of out bodybuilding, but you can’t take the bodybuilding out of a bodybuilder. Tom Platz now spends his time training people and we can all access his infinite bodybuilding wisdom through these videos.
Before a workout, you never know how many reps Platz is going to do or how many reps he’s going to make his trainees do. He’s all about going until the body can’t take any more. Platz didn’t believe in making his workouts look beautiful. Tom believed if he made his exercises look nasty, his wheels would turn out nasty as well. He was right!
Some Squatting Tips to Take Away
[embedded content]
Always keep your back straight while squatting. Don’t bend forward as it puts more tension on your lower back and glutes and recruits less of your quads. Squeeze and keeps your quads tight throughout the exercise.
While squatting, make your nose your pivot point. Your nose should go straight down perpendicular to the ground as you squat. It should be like jumping straight into a swimming pool. If your nose looks like you’re diving into the pool, you’re doing it wrong.
To wrap things up, look at this video of Tom Platz doing 23 reps with 525lbs on the bar. Platz has a smile on his face all throughout the set. This shows how much he loves what he does. Before we part, always remember, you’ve got five more left in you.
[embedded content]
Who has the best legs in the bodybuilding industry in your opinion? Let us know in the comments below. Also, be sure to follow Generation Iron on Facebook and Twitter.
*Header image courtesy of Tom Platz YouTube.
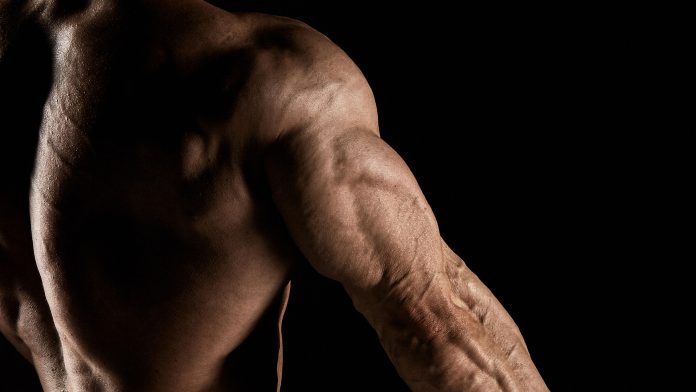
5 Exercises To Build Horseshoe Triceps
5 Exercises To Build Horseshoe Triceps
If your goal is to build sleeve-splitting arms, you can’t overlook your triceps. Most people make the mistake of going too hard on their biceps but skip training their triceps. Your arm development can never be complete without some ripped triceps.
Your triceps have three heads; long, lateral and medial. You need to be training them from all the angles to ensure an overall development. A combination of isolation and compound exercises is the most effective way of building horseshoe triceps.
1. Cable Pushdowns – 3 Sets 15 Reps
Cables are a great way to maintain a constant tension on your target muscle throughout the movement. While using the cables, you have the same amount of tension on your triceps at the top of the movement as you have on the bottom.
Stand at an arm’s length from the pulley machine. Attach a straight bar to the pulley and grab it with an overhand grip with your thumbs over the bar. Keep your elbows pinned to your side and hold and squeeze your triceps at the bottom of the movement.
2. Skull Crushers – 3 Sets 12 Reps
Skull crushers are an incredibly effective exercise when it comes to building ripped triceps. This exercise is also known as head smackers. Skull crushers train the long head of your triceps. The long head is also the hardest part to develop as only a few exercise can target it optimally.
You can use a straight bar or an EZ bar for this exercise. Make sure you have a complete range of motion while performing this exercise. Keep your elbows fixed at a single position, hold and squeeze your triceps at the top of the movement.
3. Smith Machine Close Grip Bench Press – 3 Sets 12 Reps
Smith machine close grip bench press works on the medial and lateral heads of your triceps. Using a Smith machine adds tension to your triceps while performing this exercise. Performing exercises with a complete range of motion are the secret to building horseshoe triceps.
Keep your elbows pinned to your sides throughout the movement. If you don’t have an access to a smith machine in your gym, you can perform the close grip bench press on a flat bench.
4. Cable Overhead Rope Tricep Press – 3 Sets 15 Reps
Ropes can target your triceps from a completely new angle. Overhead presses train the long head of your triceps. Keep your elbows pinned to the side of your head throughout the movement.
Keep the ropes together at the bottom of the movement, spread them out at the top and squeeze your triceps. Make sure you’re not using momentum while performing this exercise. Use moderate weights so you can handle and keep your reps slow and deliberate.
5. Dips – 3 Sets 15 Reps
By this point, your triceps will be completely exhausted. Dips can be a complete triceps buster and are a great exercise if you want shredded triceps. You can perform this exercise on parallel dip bars or on a flat bench.
If bodyweight version of this exercise is too easy for you, you can add extra resistance by using weights. Follow an explosive motion while performing this exercise. Hold and squeeze your triceps at the top of the movement.
Which is your favorite triceps exercise? Let us know in the comments below. Also, be sure to follow Generation Iron on Facebook and Twitter.
*Header image courtesy of Envato Elements.
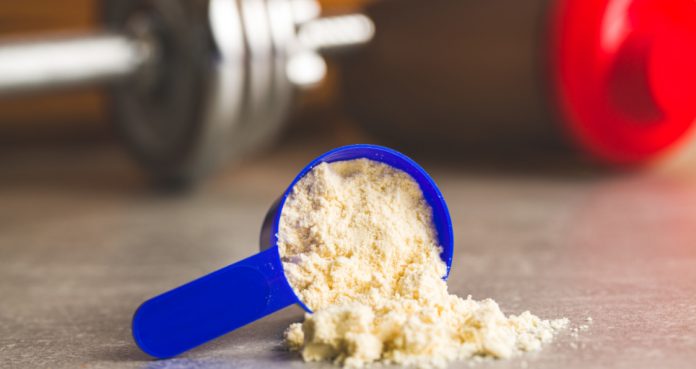
How To Tell If Your Protein Powder Is Fake
How To Tell If You’re Getting Phony Protein Powder
Most things with good sales records are vulnerable to be sold on the black market. Our beloved protein supplements are no different. There have been numerous instances where duplicate protein powders were being sold in through underground channels.
You’re more prone to fake supplements if you live in developing countries where most of the supplements are imported from countries like USA and Canada. Consuming fake supplements for prolonged periods can have a negative impact on your body.
There is a probability you’ve been using fake supplements for a long time without knowing it. If you’ve just started using protein powders, chances are you won’t know what they should be like. This is the complete guide to know if your protein powder is fake.
1. Solubility
Fake supplements aren’t there to improve your muscle mass, they focus on making the smugglers rich. These smugglers use the cheapest materials to make the protein supplements which leads to hard insoluble powders.
If you’ve ever used a genuine protein supplement, you would know how easy it is to dissolve in water. Fake protein supplements are the opposite of this. You won’t be able to mix fake protein powder in water with a spoon. You will need a blender bottle and some hard shakes of the wrist to dissolve the powder in the water.
2. Texture
If you’ve ever seen a protein supplement before this point, you know the powder has a constant texture. This might not be the case with fake supplements. You can expect to find irregularities in the powder.
These irregularities can be anything from vitamin powders to crushed chalk. It is recommended you buy supplements which have a unique flavor. Flavors like chocolate and vanilla are the most common to be tampered with.
3. Taste
When you tamper with the ingredients of a supplement, it will surely affect its taste. The best way to check if a protein is fake or not is to check its taste. If you know someone who is using the same protein powder, exchange one serving with them.
This taste test will be enough to reveal if you have the real thing. Fake protein supplements are also known to have a pungent smell and leave a bad aftertaste in your mouth. Also, check if your supplement has the same taste throughout. If the taste is changing after every serving, you have a fake supplement.
4. Side Effects
Since fake supplements have cheaper ingredients or substitute elements, they can have a negative effect on your body. If you see any ill effects on your body after switching to a new supplement, it’s a sign of a fake protein powder.
The most common side effects of fake supplements are the formation of acne and marks on your back and arms, and hair fall. Stop using the supplements when any of these signs start appearing.
5. Packaging
The product packaging of these fake supplements can be the biggest giveaway. Smugglers might use a substandard quality of jars or labels to save cost. If you have seen the original packaging, you would be able to tell the difference without a problem.
There are some cases where these crooks use the disposed and intact boxes of supplement to repackage their fake supplements. It can be hard in such situations to tell the difference between the real and the fake. It is always advised to crush your containers after you’re done using them to prevent piracy.
Have you ever used a fake supplement? Let us know in the comments below. Also, be sure to follow Generation Iron on Facebook and Twitter.
*Header image courtesy of Envato Elements.
How to Turn Your Toothpick Neck into a Wood Log
Build a Thick Neck With These Exercises
Many people will be curious after reading the title as only a few people in gyms around the world train their necks while the others have a pencil neck. It might come as a shock to them that you could develop the muscles in your neck.
Just like other muscles in your body, the muscles in your neck can be developed through training. Although you’ll need to be careful while training your neck as a small mistake can lead to an injury.
Neck Rotations
Many people these days have a desk job which makes them lean onto a laptop for the majority of the day. The awkward position while working on a laptop can cause problems like cervical pain and headaches.
Spending five minutes on rotating your neck in the morning can get you incredible results and fix the neck pain happening due to working on a computer. Neck rotations are also the easiest exercise on the list.
[embedded content]
Neck Bridges
We get into the serious business of developing a thick neck with the neck bridges. The neck bridges are commonly performed by boxers, MMA athletes and wrestlers in their training. These athletes take a lot of hits on their heads and having a strong neck keeps them from being knocked out.
The beck bridges are hard to perform and when you’re starting out, they should be done under the supervision of someone who knows how to do them correctly. While performing the bridges, hold the position where you feel a tension in the neck until the tension starts to fade away.
If the bodyweight version of the bridges feels easy, you can add resistance by placing a weight plate on your chest. Start with performing the orthodox bridges and once you get better, do the neck rotations as you get into the ‘bridge’ position.
Neck Curls
[embedded content]
Neck curls are fairly easy to perform, but you need to make sure your ego doesn’t get in the way. For the neck curls, place your chest on an incline bench, so your body is aligned from the top of your neck to your toes.
Use a head harnesses or simply hold a weight plate at the back of your head. Slowly lower your head and then raise it so your chest is lifted an inch off the bench. Hold the rep at the top and the bottom of the movement.
You can also perform this exercise on the cable pulley machines or with resistance bands. Both of these variations will add constant tension on your neck throughout the range of motion.
Shrugs
The trapezius muscle forms a big part of the neck and training the traps can help with the neck development. For the shrugs to help get rid of the pencil neck, make sure you maintain a full range of motion.
While performing the shrugs, try to touch your ears with your shoulders and hold the rep at the top of the movement. Perform three sets of 15-20 reps on each exercise. You can adopt the same approach to training the neck as the calves.
Do you train your neck? Let us know in the comments below. Also, be sure to follow Generation Iron on Facebook and Twitter.
*Header image courtesy of Envato Elements.
3 Nutrition Tips For Winter
Classically, winter is known in the fitness community as ‘Bulking Season,’ which in reality becomes justification for gaining fat during the holidays. While taking a break from strict dieting can benefit the body, better than increasing fat and carb intake would be using the season to focus on different aspects of nutrition. In his guest contributor article, Dr. Jacob Wilson shares tips to make the most out of nutrition this winter.
The first one is a no-brainer: probiotics. Everyone knows that winter is the season of sickness, but cold isn’t the only danger. The digestive tract is both integral to the immune system and ground zero for unfriendly viruses.
Constant eating, especially of high amounts of sugar and fat will imbalance gut bacteria and make one more susceptible to sickness. Excellent sources of probiotics are Greek yogurt, and Glutamine. But you could even try fashionable fermented products like kombucha, kimchi, or sauerkraut.
Second on the list of nutrients to emphasize during winter is Vitamin D. Obviously, supply of Vitamin D generally decreases during months that are cloudy or spent indoors. But unfortunately, “Vitamin -D Enriched’ products or vitamins simply do not carry the quality of bio-available Vitamin D that arrives in whole food sources.
Sockeye salmon and other types of fish are fantastic sources of this nutrient, and their high Omega-3 to Omega-6 ratios can help reduce levels of inflammatory cortisol throughout the body.
Such fats are also absolutely critical for brain function. We all know that the dreary and reminiscent months can trigger a less than chipper attitude, and keeping the brain properly supplied will go a long way to alleviating mental fog.
Saturate fats positively affect free testosterone, have been shown to help cells retain more Omega-3’s, and assist in conversion of fats into DHA which is optimal fuel for the brain. Of course, saturated fats have their con’s too. But if there was a time in the year to experiment with amounts and sources, it would be winter.
Ultimately winter is the season for experimentation. Everyone should try out different foods, eating schedules, and nutrient rations, to see if there’s anything to carry over into swimsuit season or competition prep.
If you’re looking for a deeper in-depth guide for maximizing your bodybuilding nutrition, make sure to sign up for Generation Iron Plus. The most detailed bodybuilding training and diet subscription guide with a massive archive of content and new courses uploaded every month.
How To Build A Chest Like Jay Cutler
These Are Jay Cutler’s Favorite Chest Building Exercises.
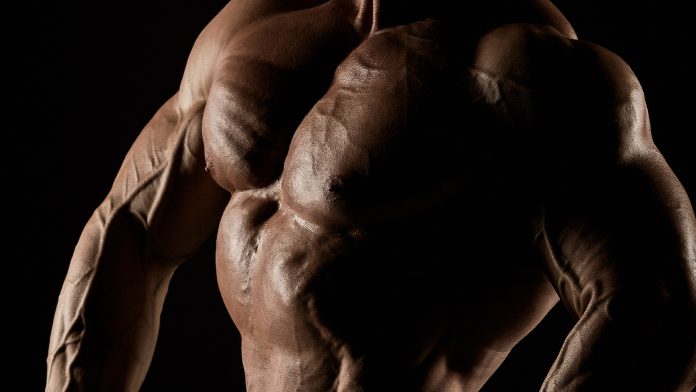
A chiseled chest has been the symbol of machoism for a long time. Jay Cutler, the 4X Mr. Olympia, is the poster boy for a broad chest and a narrow waist. There are no doubts Jay’s chest was a big factor in getting him the title of the best bodybuilder in the world.
Jay Cutler’s chest training program is different from what you might expect when you look at him. He follows a conservative approach when it comes to working out. He relies heavily on machines for his training. This mass monster believes eliminating the use of barbells reduces the chances of injury in the gym.
1. Hammer Strength Chest Press – 3 Sets 10 Reps
Jay stays away from lifting heavy barbells. This is a smart move especially if you’re prepping for a contest. An injury is the last thing you want while training to get on stage. Leverage chest press is a great substitute for the flat bench press.
Since this is a controlled isolation movement, feel free to use heavy weights. Cutler is big on establishing a mind-muscle connection. At the top of the movement, squeeze the living hell out of your pecs.
2. Incline Dumbbell Bench Press – 3 Sets 10 Reps
The upper chest is a weak muscle group for most people. If you’re one of these people, you can make it even worse by not training it often. Incline dumbbell bench press is incredibly effective at targeting your upper pectoral muscles. Follow a complete range of motion and contract your chest with every rep.
Jay doesn’t follow the conventional 12, 10, 8 reps scheme in his workouts. He does consistent 10 reps in all his sets. Although you will be doing the same number of sets in each set, don’t hold back from pushing yourself and increasing the weights.
3. Pullovers – 3 Sets 10 Reps
Most people do pullovers for their back, but Jay does it for his upper pecs. You don’t have to use heavy weights during this exercise. Use moderate weights you can control and perform slow and deliberate reps with. Don’t lock out your elbows during this exercise.
Locking your elbows will engage your back and take all the tension off of your pecs. Lying cross-bodied on the bench during this exercise is more effective than lying straight. In the cross-bodied position, your hips and back are hanging low while your chest is elevated. Doing this helps with a better pec recruitment.
4. Cable Crossovers – 3 Sets 10 Reps
If you want to build a chest like Jay Cutler your chest workouts should be a mix of isolation and compound exercise. Compound exercises help with building the size and strength while isolation exercises help with building muscle definition.
Cable crossovers help with building the striations in your middle chest. Holding and squeezing at the top of the movement will help you get the chest separation and definition. Stand with your chest out and back arched while performing this exercise.
5. Dips – 3 Sets 10 Reps
Dips can prove to be a brutal exercise after what you’ve already put your chest through. This exercise is great for building your lower pecs and improving the definition in your chest. Maintain a full range of motion while performing dips.
If the bodyweight version of this exercise is too easy for you, feel free to use weights. Don’t just go through the motions while performing dips. Hold and squeeze your pecs at the top of the movement.
According to you which athlete has the best chest? Let us know in the comments below. Also, be sure to follow Generation Iron on Facebook and Twitter.

The 1000-Rep Total Annihilation Bicep Workout
The Most Brutal 1,000 Rep Arm Workout.
Most people get a gym membership to build bigger biceps, but only a few of them end up achieving this goal. Building bigger biceps requires you to train them with insane intensity so that they have no idea what hit them.
In this article, we’ll be sharing a workout that you probably have never imagined doing before. By the end of the workout, you’ll have no idea what to do with your arms so that they stop hurting.
Barbell Bicep Curls – 10 Sets 20 Reps ~ 200 Reps
Since this is a 1,000 rep training session, you should be doing the compound lifts early in the workout. Doing the compound exercises when the fatigue starts to kick in can take a toll on your form.
The barbell bicep curls are the first lift in the workout and you should try to lift as heavy as you can in the exercise without compromising on the form. Don’t forget to pause and contract your guns at the top of the movement.
Cable Curls – 2 Set 100 Reps ~ 400 Reps
While following the workout, you should make sure you’re not resting for more than 60-seconds between sets. You should be able to complete the training session within an hour. Resting for too long will negatively impact training intensity.
In a high-rep high-intensity workout like this, the ego can be your worst enemy. Choose a weight you’ll struggle to complete the 100 reps with, but make sure you’ll not have to use momentum.
Dumbbell Hammer Curls – 5 Sets 20 Reps ~ 500 Reps
While performing the dumbbell hammer curls, you’ll be lifting the dumbbells at the same time. Your elbows will be pinned to your sides and your arms will be extended straight in the starting position.
Lift the dumbbells until they reach your shoulder height. Pause and contract your bis at the top of the movement before lowering the weights. Repeat for the recommended reps while keeping your lower arms parallel to each other throughout the lift.
Machine Preacher Curls – 4 Sets 50 Reps ~ 700 Reps
The machine preacher curls train the peak of your mountains. Most people make the mistake of shortening their range of motion while performing the lift. Follow a full ROM to ensure you’re not leaving any gains on the table.
Reverse Grip Barbell Curls – 5 Sets 20 Reps ~ 800 Reps
Many people neglect training the outer head of the biceps and their forearms. Performing the reverse grip barbell curls is an incredibly effective way of improving these muscles which also happens to be common lagging muscle groups.
Dumbbell Concentration Curls – 2 Sets 50 Reps ~ 900 Reps
The dumbbell concentration curls were brought into the limelight by the Governator. Arnie can be seen performing the exercise multiple times in the legendary documentary, Pumping Iron.
Drag Curls – 1 Set 100 Reps ~ 1000 Reps
Drag curls are one of the most underutilized exercises in the gym. In the exercise, you hold a smith machine barbell with a shoulder-wide grip. Curl the barbell by pulling your elbows up and back. The drag curls can make your pythons more venomous.
How many reps do you do in your last workout? Let us know in the comments below. Also, be sure to follow Generation Iron on Facebook and Twitter.
