Tag: workout
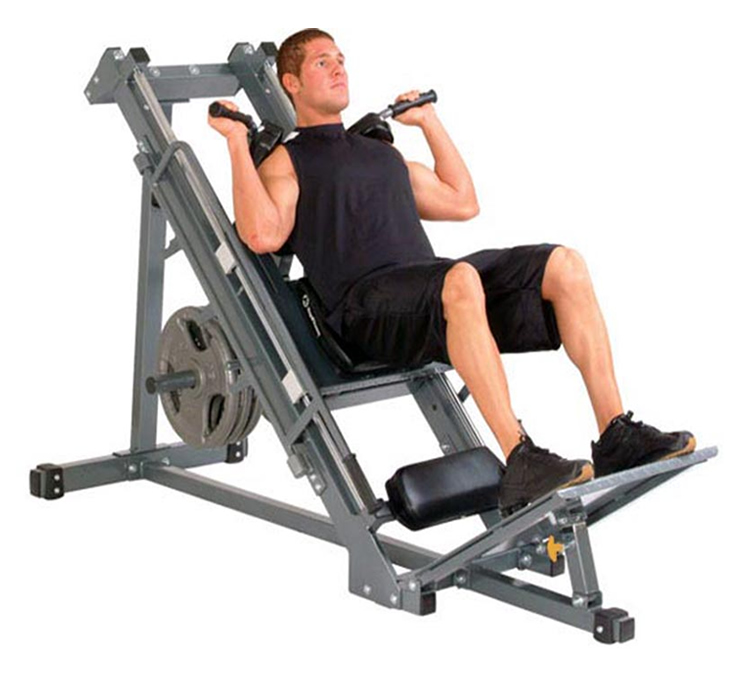
The Four Best Machines To Build Big Quads
Here are four great machines to build up your quads!
Every muscle can be built with free weights or machines, but quads in particular benefit greatly from machines. You show me somebody who’s built tree trunk quads and I’ll show you somebody who takes machine training seriously.
Oddly enough though, gym culture demonizes machines. They’d rather die on the barbell hill than grind their quads through a machine. They’ll say things like, “Machines aren’t as manly” or “Machines aren’t functional.” Oh so much stupid.
Machines rock and if tired of having baby quads, strap into the following machines.
1 – Hack Squat
The hack squat is an epic machine because it’s design fits everybody’s structure. It’s angled for a reason.
With traditional barbell back squats, the bar rests on your back and you’re essentially resisting weighted gravity. This means the bar has to stay over your center of mass or else you would topple over on either side and turn into a viral gym fail.
For the weight to stay over the center of your mid foot, your joints bend at specific ratios based on your anatomy. For some people, this means they genetically get more of an upright position which means more knee flexion(knee bend) hence more quad growth.
However, some people with less favorable limb ratios could be lifting the same load for the same amount of reps may not get as much quad growth because their anatomy limits knee flexion.
Fortunately, the hack squat solves this. The machine prevents you from toppling over and puts you at angle to get lots of knee flexion. It’s also suggested you bring your stance slightly lower and more inwards if it produces more knee flexion. This isn’t always the case, but for most people, the hack squat is better quad builder than barbell back squats.
To best perform the hack squat, follow the following cues:
Push through your entire foot.
Allow your knee to travel forward.
Keep your back neutral against the pad with no posterior pelvic tilt.
Grip the handles tight for stability.
I also like to have a reverse band set up on hack squats to add more resistance to the top portion of the lift. I find this more joint friendly and allows the entire rep to be more challenging as opposed to just the bottom portion being overloaded.
2 – Leg Press
The leg press is a bodybuilding stable and for good reason, but many dorks abuse it to stroke their ego. Nearly everyone who does it slaps on too much weight and perform a micro range of motion about the size of their puny brain. You thought I was going to say something else huh?
Well anyways, the leg press is a quad stimulating fast track if you used correctly. Here’s how to maximize quad growth on the leg press.
Set up
First set the seat as far back as you can. This minimizes hip flexion and the stretch on your glutes. This also increases your range of motion and allows for more knee flexion. Less hip flexion and more knee flexion means more quads and less glutes which is what you want.
To be clear, the glutes will still be working, but they’re not the priority in this case.
Keep your back pressed against the pad and similar to the hack squat, don’t allow for any posterior pelvic tilt. This takes tension off the targeted muscles and while it’s not a super dangerous position, does place more stress on the joints.
As for feet position, your most comfortable position should be fine. Do consider going slightly narrower and lower for more quads, but only if it doesn’t sacrifice range of motion.
Warm Up
The leg press is a heavily loaded exercise, so doing at least a couple warm up sets would be wise. This also allows you find your groove and adjust your feet position if needed. Perform all warm up sets just as you would your working sets.
This means with a controlled eccentric, a forceful concentric, and a full range of motion especially in the bottom position where the muscles are stretched and procuring lots of muscle building mechanical tension.
As you add load to your warm up sets, range of motion must not be compromised. If range of motion is cut short, you’ve gone too heavy.
Working Sets
Before you start your working sets, you can add bands for accommodating resistance. If not, no worries. Rest fully before starting your first working set.
Brace every rep and push until you reach near failure. Rest at least 3 minutes between sets. If you think you can go with less rest, you didn’t push hard enough.
By set 3, you should feel like walking is challenging. It’s ok, your quads will thank you later.
And remember, the leg press is a fixed plane. There’s no cheating technique besides range of motion. Either your quads get stronger or they don’t.
3 – Smith Machine
If the leg press or hack squat is taken, you can rely on the smith machine for some sweet quad gains. Yes, the most taboo machine is a hypertrophic beast.
“But it’s a fixed bar path.”
Yes, you dork, that’s the point. That’s where all the benefits come from. Similar to a hack squat, the design of the smith machine allows you to achieve more knee flexion through a fuller range of motion.
“But it deactivates your stabilizers.”
Again, people are dense. That’s what makes the smith machine so valuable. Without your core having to stabilize, you can push your quads much harder. You’re not limited by core or stability requirements not to mention it’s less taxing on your joints and nervous system.
In other words, more muscle building stimulus for less fatigue cost. A win, win.
The smith machine also possesses the same position as the bottom of the lunge except for both legs. So it’s perfectly functional. Haters need to stop hating.
For a smith machine squat, you can stand right under the bar or have your feet slightly in forward for slightly more knee flexion. If it is an angled smith machine, make sure you face the smith machine in the direction as the bar downwards towards where you’re facing.
To execute each rep, lower your self smoothly as the bar slides down with control. Sit as upright as you can and push your knees forward. Sink into the squat as deeply as you can without any part of your back rounding or your hips tucking under.
Your quads should stretch quite nicely at the bottom reach past 90 degrees. Because of the fixed bar path and low stability demands, training close to or all the way up to failure will ensure your quads fatigued all it’s muscle fibers.
4 – Leg Extensions
The leg extension is the unicorn of machines. It’s so unique people don’t even realize it. Every machine I’ve mentioned so far is great, but they’re all similar to one on another along with free weight exercise in the muscle length it trains.
All squat or compound quad movements train the quads in the lengthened position. To maximize hypertrophy, you need to train at all muscle lengths. Leg extensions are the only exercise that trains the quads in the shortened position. In addition, it’s one of the few movement patterns that hits the front of the quads (rectus femoris) well.
The rectus femoris is tricker to train than the other quadricep muscles because it crosses both the hip and knee joint. Any squat or lunge movement doesn’t place much mechanical tension on it.
Furthermore, leg extensions are highly low fatiguing compared to compound leg movements. You can do more volume and train it within a high frequency program without worrying about recovery issues.
It also allows you to train to failure without risk of injury and use set extending techniques nicely like myo-reps or rest pause.
To set up, set the seat back as far as you can to stretch the quads the most which increases force production. Don’t set it too far back where you lose stability though.
Set the pad above ankle level. Strap on a seat belt if your leg extension has one and grip the handles tightly. Your forearms should squeeze quite hard and pull yourself into the seat. This keeps your body stable, so the quads can get smooth force output.
Kick up forcefully while maintaining stability. Pause for 1 full second with your knees locked out and lower with lots of control even as you get towards that bottom portion where the resistance drops off.
You never want to slam your leg down as your muscles won’t be producing tension in the stretched position which is crucial to growing the rectus femoris.
Learn to Train Hard With Machines
Machines provide lots of advantages from biomechanics, stability, force output, and allowing you to train your quads optimally. In fact, it’s quite hard to grow your quads quickly and naturally without machines.
These machines simply have far too many advantages to expand your thighs. So I would think twice before you yap on about machines being lame.
In fact, machines allow the targeted muscle to reach close proximities to failure. They’ll burn like all hell. Are you man enough to endure it? If so, your quads will grow.
Shaun Clarida Shares Big Chest And Triceps Workout
Shaun Clarida provides a workout ahead of the 2022 Olympia.
Shaun Clarida has started preparing for the 2022 Olympia — and for good reason. The former Olympia 212 champion earned qualification to the biggest event of the year after winning the 2021 Legion Sports Fest in the Open division. Now, Clarida is sharing some of his workouts to get in championship shape.
Clarida finished second to Derek Lunsford in this year’s Olympia. Many considered Clarida to be the favorite but he ended up with a silver medal. Following the event, Clarida announced that he would test himself in the Open division but would not be leaving 212. After a victory, it is clear that he can compete and will continue. Clarida has expressed interest in competing in both divisions during the Olympia but it is unknown if that is allowed. It is also unknown which division Clarida will be apart of.
The 2022 event in Las Vegas is exactly one year away. Many athletes have begun training and sharing some workouts. Shaun Clarida recently shared a massive chest and triceps workout to his YouTube page.
Clarida’s day began with a quick calf exercise. He explained that this was an area that needed to be improved and this is how he is beginning workouts. Clarida performed three sets of standing calf raises on a machine before getting into chest work.
Chest Workout
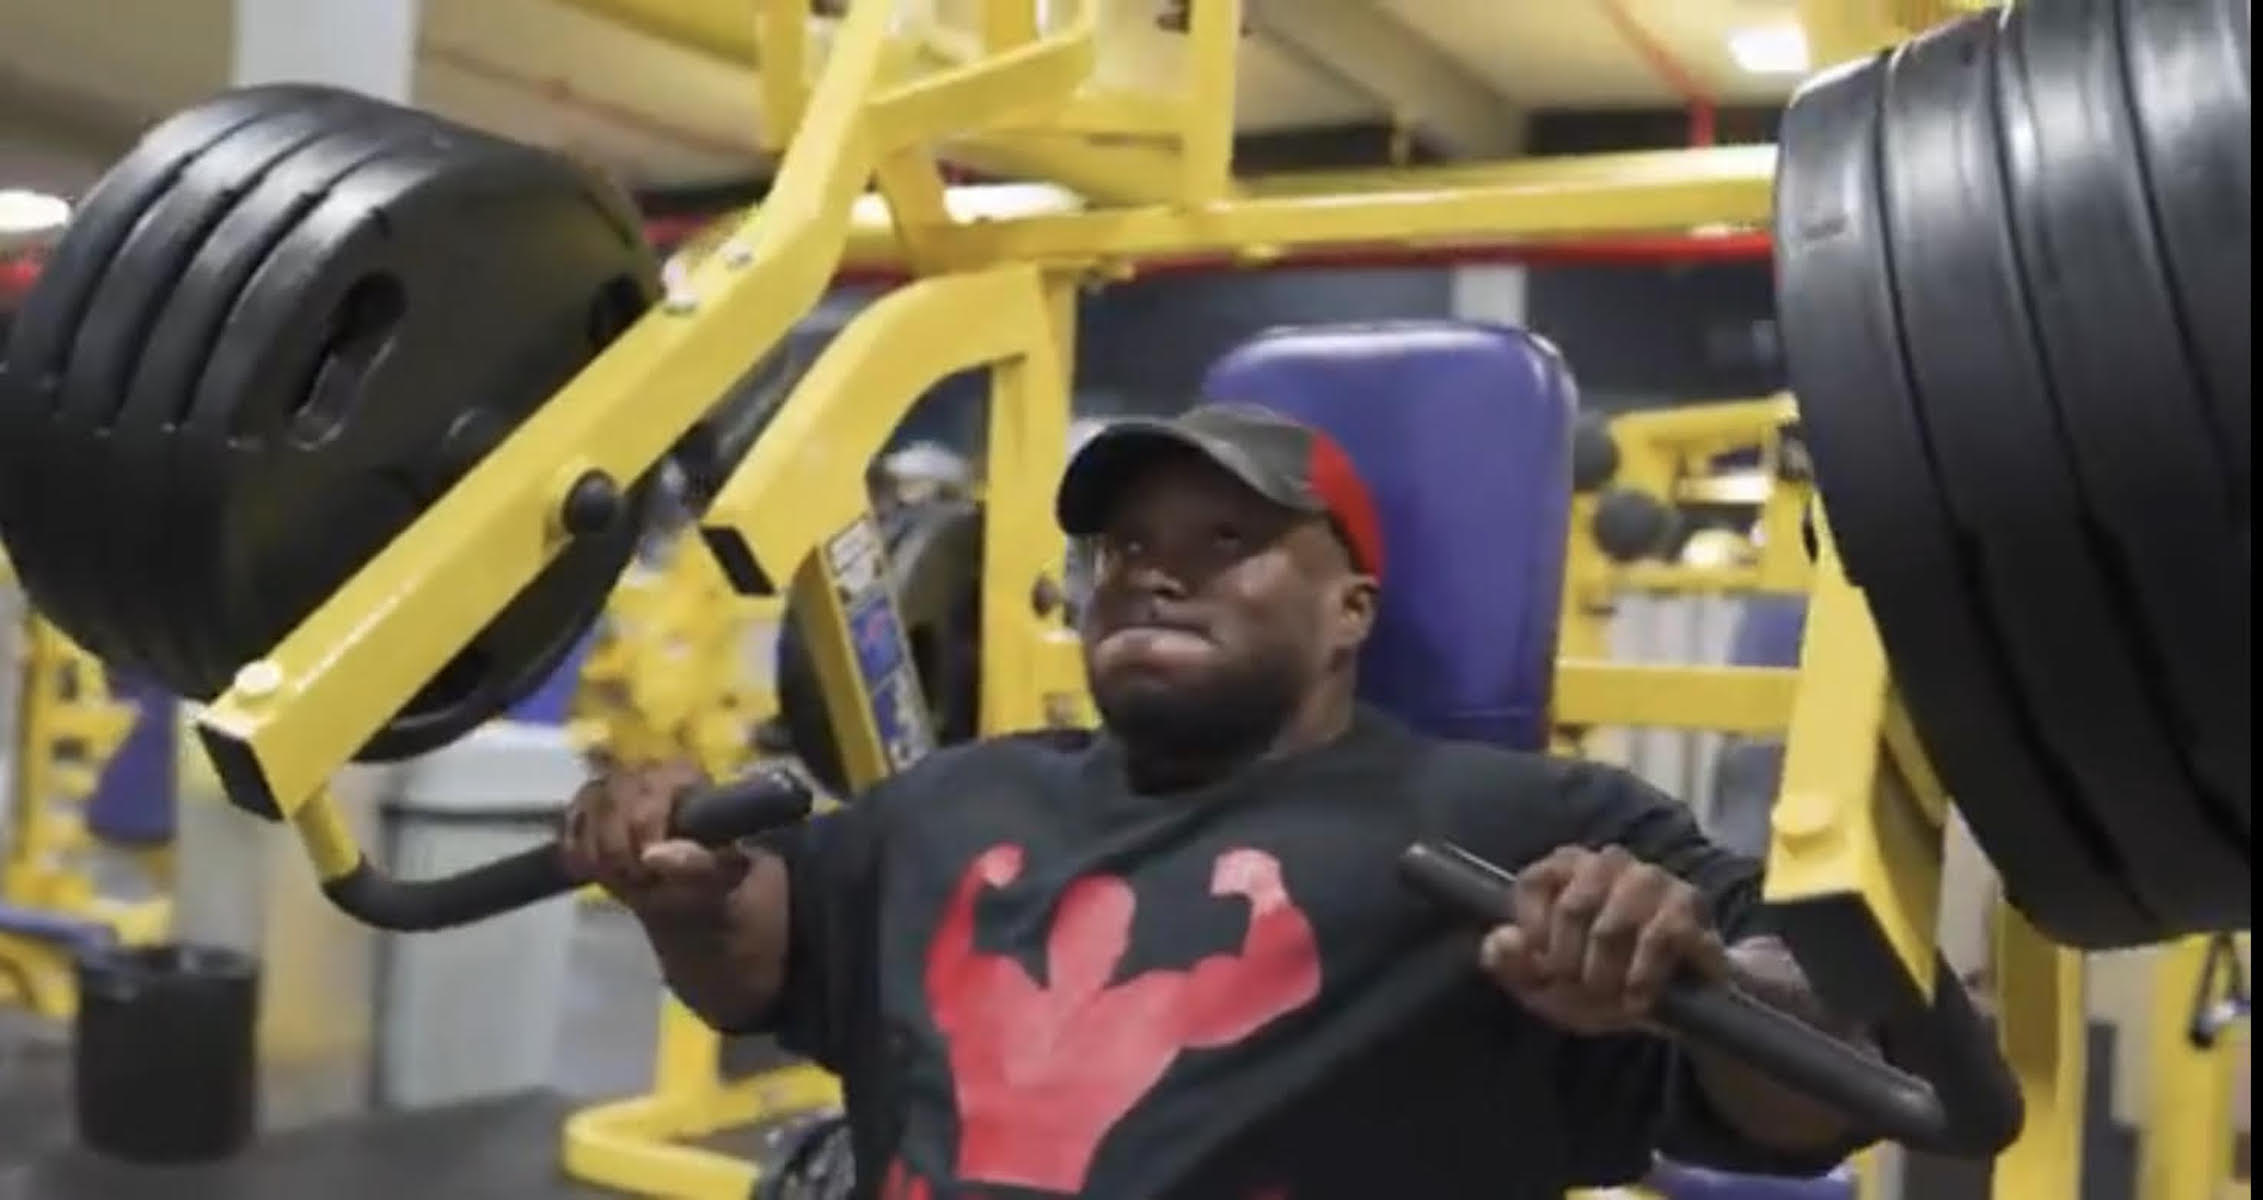
Hammer Strength Incline Press
Shaun Clarida began the workout with hammer strength incline press. He explained that this is one of the main exercises that he performs and even uses dumbbells on compound days. The machine will work muscles in a similar way. Clarida performs three sets totaling between 10-12 reps and finishes with a back-off set, which is usually 10-15 reps.
“For those who don’t know what the back-off set is, it’s when you finish your last heavy set, you do one more set. There, you increase the weight by, I think like, 16 percent of what you just did,” Clarida explained.
Incline Barbell Pin Press
This variation was attributed to Clarida’s late coach John Meadows. It is a more explosive version of an incline press. Clarida has been focusing on his upper chest area and this is a lift that can help. He performs two sets of 8-12 reps with progressive overload. Clarida likes to do upper chest early in the workout to get the best results possible.
Seated Chest Press Cable Machine
Shaun Clarida performed two sets of 8-12 reps on this machine before deciding to add a third. He was going to stop but admitted that this did not challenge him enough. Clarida added plates onto the machine weight and performed a third set. This provided the necessary pump before moving on.
Dips
Dips are an exercise that can work either chest or triceps — or both. When leaning forward, this exercise focuses on the chest muscles. This is what Clarida was looking for an completed a continuous set of 30 reps to failure.
Incline Chest Flyes Cable Machine
This was Shaun Clarida’s final chest workout of the day. He used D-handles because the diameter of the handle is smaller towards the thumb and gets wider. This is so the athlete can eliminate sing forearm strength for a firmer grip. Clarida performs two sets of 12-15 reps to finish his chest workout.
Triceps
Rope Pull-Downs
Pull downs are a great way to get the triceps going early in the workout and this is how Clarida began. He performed three sets of 8-15 reps. He explained that ropes provide extra movement and because of this, the triceps are hit harder. Clarida does not train arms on their own day in the offseason. He adds triceps to chest day and biceps to back.
Standing Overhead Dumbbell Extensions
Shaun Clarida finished his day with three sets of 8-12 reps with progressive overload. He said this was one of his favorite workouts for triceps because of the work that it does.
“You put more stress in the triceps in a straight position but also a really good contraction at the top.”
For more news and updates, follow Generation Iron on Facebook, Twitter, and Instagram.
6 Best Conditioning Finishers You Should Be Doing At The End of Your Workouts
6 Best Conditioning Finishers For Definition
Have you ever wondered why your muscles don’t look as striated as the guys on Instagram? It’s because the pros do things differently, and we’ll be letting you in on their secrets today.
If you leave the gym without sore muscles, you’re leaving gains on the table. Your muscles should be filled with blood and lactic acids by the end of your workouts. Performing the six exercises at the end of your workouts will make your muscles scream for mercy.
Leg Extensions
Most people perform the leg extensions at the beginning of their leg workouts. You should prefer doing isolation exercises as your finishers for better pumps as compared to the compound lifts.
Keep the reps slow and controlled and focus on squeezing your quads. Posing and flexing your muscles between sets can help in amplifying the pumps and improving the mind-muscle connection.
Cable Crossovers
Cable crossovers are an incredibly effective chest exercise. If you want to improve your inner pecs and want more striations, cable crossovers should be a part of your exercise arsenal.
If you want a nastier pump, pause at the top of the movement and squeeze your muscles. You can add variation in the exercise by adjusting the height of the pulley. Setting the pulley at your chest height will target your mid-pecs and high pulley will work your lower chest.
Cable Ground Pulley
It can be relatively hard to achieve a pump in the back. While the deadlifts and barbell rows can be great to build size in the back, you need isolation exercises to build definition and conditioning.
Some people make the mistake of swinging back and forth while performing the exercise. Using momentum can take off the tension from your back and put it on the secondary muscles like your arms and shoulders.
Machine Preacher Curls
Arnold Schwarzenegger helped put the bicep peak on the front cover of magazines. It was not late after that people started comparing biceps with mountain peaks. Developing the bicep peaks requires following a full range of motion.
If you don’t have access to a preacher curl machine at your gym, you can use a preacher bench and place it in front of a cable pulley. If you don’t have a preacher bench, use an incline bench, and if you don’t have an incline bench, find a new gym.
Ground Skullcrushers
The ground skullcrushers are one of the most underutilized exercises. While performing the lift, you need to lower the weights until they hit the floor. Keep your lower arms parallel to each other and perpendicular to the floor. Keep your elbows locked at an angle so they are slightly behind your head.
You could use a barbell or dumbbells to perform the exercise. Using the dumbbells will give you a better range of motion which can result in a better pump if you perform the lift with the right form.
Cable Side-Lateral Raises
No V-taper can be deemed aesthetically appealing without wide boulder shoulders. Shoulders are one of the least trained muscle groups and most people train them for the sake of it.
Using the cables can help keep constant tension on your shoulders. Place the cable pulley in a low position and raise your arms until they are parallel to the floor. Elevating your arms above your shoulders will take the tension off the delts.
Which is your favorite finisher exercise? Let us know in the comments below. Also, be sure to follow Generation Iron on Facebook and Twitter.
Victor Martinez’s Bicep Workout | Training With Victor Martinez (Part 3)
[embedded content]
Victor Martinez’s in-depth bicep training guide.
Victor Martinez is an iconic pro bodybuilder and legend in the sport. He is considered by many to have one of the greatest physiques of the 2000s era of bodybuilders. In 2007, in a controversial decision, he nearly beat Jay Cutler for the Mr. Olympia title. That’s why we met up with Martinez at the Generation Iron Personal Training Gym for an epic workout. In this GI Exclusive, Victor Martinez ends this 3-part training series with a powerhouse bicep workout guide.
It’s easy enough to find a training routine online – but the real work comes in knowing the details. A list of exercises, sets, and reps is simply the most basic foundation for a successful workout. Knowing proper form, full movement, and specific tips can transform a workout from good to great. It’s what separates a “normal” in shape person from a shredded bodybuilder.
That’s why Victor Martinez met up with Vlad Yudin to go through the ultimate gauntlet of a workout. In part two of our training mini series with Martinez, he puts Vlad through the paces and shares important tips on how to optimize your routine. A workout sheet is one thing – but this video guide will give you play-by-play examples of how to actually perform like a pro bodybuilder.
This exercise is an immediate follow up to Victor Martinez’ in-depth chest training and shoulder training guide and should be completed within the same session.
Victor Martinez’s Bicep Training Workout
As mentioned above, this bicep training session immediately follows a full chest day workout alongside half of a shoulder workout. Victor Martinez prefers to combine muscle groups in his workout sessions that he believes create the best combo for most effective progress. He combines chest with shoulders because chest exercises often indirectly workout your shoulders – then expands to an arm workout for a more complete upper body training session.
Exercises
Sets
Reps
Cable Bicep Curls (Warmup)
3
20-15-12
Barbell Curls
4
10-12
Dumbbell Curls
3
12
Cable Hammer Curls
3
15
When it comes to weight, that’s impossible to recommend broadly. Each individual has different limits on how much weight to push. Ultimately, you want to lift enough weight to complete all three sets for each exercise. By the end of the final set for each – you should barely be able to finish. It may take trial and error to begin with – but you’ll ultimately find a sweet spot this will be more than enough to exhaust your muscles completely.
Victor Martinez also has some tips on how to ensure you’re fully pushing yourself with each workout session. For every exercise, make sure you always hit the number of reps you are shooting for. On the final set, if you can’t hit, let’s say, 15 reps. Don’t stop. Drop weight so you can hit that number. That’s where real muscle growth comes from – pushing beyond your first perceived limit. In this video, Martinez explains there are two ways to get intensity when you are started to get exhausted – dropsets or supersets.
Cable Bicep Curls (Warm Up)
Victor Martinez starts this segment of his workout program with another warm up. This consists of cable bicep curls – three sets. The first set is 20 reps. The second set is 15 reps. And the last set is 12 reps.
During this warm up, Victor Martinez also shares some sound advice about how to prepare for a workout. He suggests never training on a completely empty stomach. If you are someone who trains in the morning – always make sure to have some food beforehand. If you train fasted – you will simply lose weight. If that’s your goal – that’s great. But if you are looking to build muscle, Martinez always recommends getting some food in you before hitting the gym.
Barbell Curls
For the first official exercise after the warm up, Victor Martinez recommends traditional barbell bicep curls. Four sets of 10-12 reps. During this workout, Martinez shares a tip for getting an extra bit of work into the workout. When the weight is lighter – Martinez likes to hold the peak of the movement for a extra split second to get more of a squeeze. He emphasizes only doing this on lighter weight. With heavier loads this can risk injuring your tendon.
Dumbbell Curls
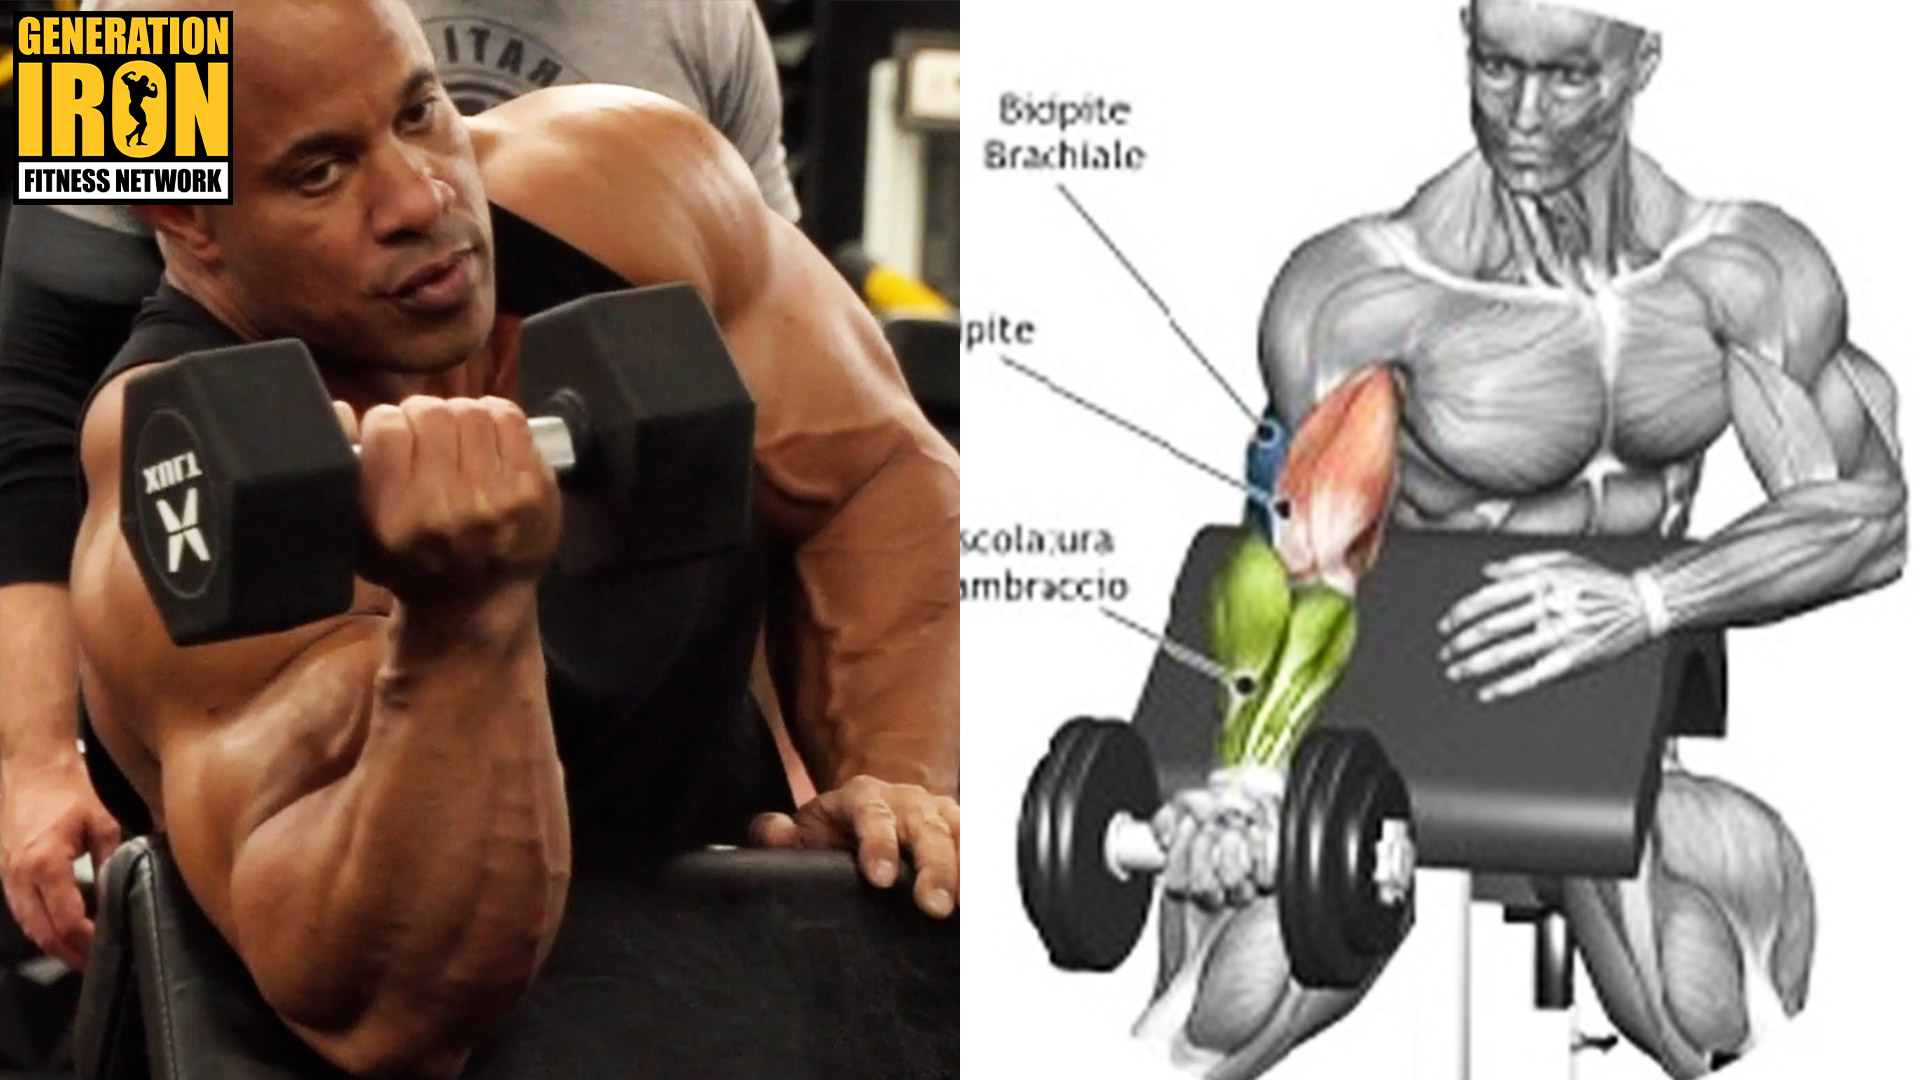
For the second exercise, Victor Martinez moves onto traditional dumbbell bicep curls. He uses a bicep curl bench to help prevent cheating or loose form. For this exercise he recommends three sets of 12 reps.
During this exercise, Martinez reiterates the importance of always hitting the correct number of reps. Even on the final set if you feel fully exhausted, do not give up early. This leads to slower or sometimes no improvement in muscle gains. Always drop weight and complete the max reps.
Cable Hammer Curls
Victor Martinez ends his bicep workout focusing on cable hammer curls. For this exercise, Martinez suggests three sets of 15 reps. While performing this workout, Martinez emphasizes focusing on safety, even when using machines in the gym. Always check your equipment to make sure it’s working properly to avoid injury.
He tells a story of injuring his quad when he was just 20 years old. He was lifting on a leg press machine that had misaligned ball bearings. It caused the machine to stop suddenly half way through a press – causing a tear in his quad and disabling him from full training for over a year.
Wrap Up
That about wraps up Part 3 of Victor Martinez’s upper body training routine. Make sure to watch the GI Exclusive training video above to get complete play-by-play tips on each exercise. Soon you’ll transform your workout into a pro level routine.
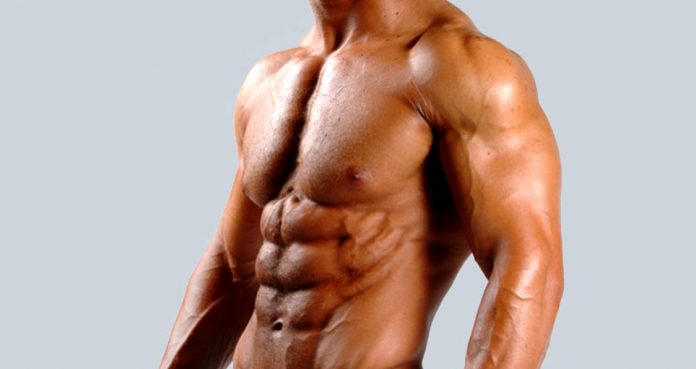
The Benefits of Stretching and Why You Should Stretch Before, During & After Your Workouts
Why Stretch?
Almost everyone to some extent knows and understands the importance of stretching, especially in bodybuilding but still don’t do it. Stretching is one of the most overlooked aspects of training and most people treat it as accessory work.
In this article, we’ll be focusing on fitness and bodybuilding athletes and the benefits of stretching for them. Many people think stretching is only for yoga practitioners and does nothing for athletes.
The stretching exercises athletes perform before, during and after workouts are meant to stretch the connective tissues which surround the muscles. These connective tissues are responsible for holding the muscles together and are the resistance that stops the muscles from expanding.
How Connective Tissues Work
The connective tissues form the fascia which tightly hugs and acts as a wall around the muscles. These walls are meant to stop the muscles from deforming while you go about doing your work.
While the fascia does a great job of keeping the muscles together, it acts as a hindrance for bodybuilders who want their muscles to grow bigger. The pump you get during a workout is your muscle tissues pushing against the fascia because of the blood which enters into the muscles and gives you a tight feeling.
Benefits of Stretching
While you could stretch at any time throughout the day, the best time for an athlete to stretch is during the workouts. Stretching after a workout is a great way to end your training and can help with recovery.
Before a Workout
Stretching before a workout won’t do a lot for you and is only helpful in warming up the muscles. You don’t have to stretch out all the muscles before your workout. Stretching only the target muscles is enough to make the most of your workouts.
During a Workout
Stretching during training can be incredibly effective for muscle growth. Posing and stretching after a working set helps in building a mind-muscle connection which combined with visualization techniques can improve the shape of your muscles.
Stretching in between sets also expands the fascia and pulls the connective tissue and muscles apart which enhances muscle separation and definition.
After a Workout
At the end of a good workout, your muscles should be filled with blood and lactic acid and should be feeling tight and pumped. Post-workout is a great time to stretch as the connective tissue is already being stretched by the excess blood in your muscles. Manually stretching the muscles at this point increases the muscle fiber growth potential.
Types of Stretching
Active Stretching
Active stretching involves using weights as resistance in the exercises which work the muscles in the fully stretched range of motion. To emphasize the stretch in these exercises, you need to hold the weights at the bottom of the movement for a couple of seconds.
Some examples of active stretching are dumbbell pullovers, flyes for chest, preacher curls for biceps, barbell lunges for quads, barbell stiff-legged deadlifts for the hamstrings, and standing calf raises for the calves.
Static Stretching
Static stretching is the traditional form of stretching which most people are familiar with. In static stretching, you use your own bodyweight to stretch the muscles. You stretch your muscles to a point of discomfort and hold the position for 30-60 seconds.
For example, to stretch your hamstrings, maintain a slight bend in your knees and touch your toes with your fingers. Hold the position until the discomfort in your hams reduces. Make sure you don’t push yourself too hard in the beginning as there are high chances of muscle pulls and tears.
Stretching in between sets takes no extra time and stretching after a workout can take 5-10 minutes. The benefits you’ll reap will far outweigh the time you’ll be putting in. We encourage everyone to incorporate stretching into their training routines.
How often do you stretch? Let us know in the comments below. Also, be sure to follow Generation Iron on Facebook and Twitter.
*Header image courtesy of Envato Elements.
Chris Bumstead Back Workout For A Sprawling Christmas Tree
3x Classic Physique Olympia champion Chris Bumstead shares a massive back workout!
Believe us when we say there will be major posterior pounding on the Chris Bumstead back workout routine. Honestly, we would be disappointed if we did not have to crawl out of the gym by the end of the 3X Mr. Olympia Classic Physique champion’s training regimen.
Building a V-taper is easier said than done. Your back is the second largest muscle group after legs. An effective back training session can be as taxing (if not more) than a leg workout. You need to target your back from every angle to ensure overall development.
Check Out: Chris Bumstead Gives Answer On Whether or Not to Use Steroids
Chris Bumstead Stats
Name: Christopher Adam Bumstead
Nickname: CBum
D.o.B: 2 February 1995
Birthplace: Ottawa, Ontario, Canada
Height: 6’0”
Weight: 225 pounds
Chest: 51″ (130 cm)
Waist: 30″ (76 cm)
Bicep: 20″ (51 cm)
Chris Bumstead Story
The reigning Mr. Olympia Classic Physique champ was born in Ottawa, Canada. He was involved in multiple sports through his childhood, playing football, baseball, basketball, and hockey in high school.
CBum started lifting at the age of 14 and fell in love with working out. He went from 170 to 225 pounds between the ninth and twelfth grades, growing his legs the most.
After building what he thought was a good physique, Bumstead met his sister’s boyfriend (a pro bodybuilder), Iain Valliere, and things started to change for the better. Iain made Chris believe that he could compete and become a fierce competitor.
Check Out: Iain Valliere Deadlifts 675lb Five Times Ahead Of 2021 Arnold Classic
In 2016, at the age of 21, he earned his pro card after taking home the IFBB North American Bodybuilding Championship trophy.
Chris Bumstead draws inspiration from the golden age bodybuilders. He focuses on keeping his waist small and building broad shoulders. It would be safe to say that CBum is one of the most popular bodybuilders of our time.
Bodybuilding legends like Jay Cutler have predicted that Chris could win the Mr. Olympia crown if he were to change divisions in the future. Given his monster size and razor-sharp conditioning, we would not be surprised to see him lift the Sandow a few years down the line.
Trivia: In 2021, Chris Bumstead won his third consecutive Mr. Olympia Classic Physique title at the age of 26. He was the runner-up in 2017 and 2018.
Next Read: Chris Bumstead’s Rules For Cheat Meals & Alcohol
Chris Bumstead Back Workouts Principles
CBum follows a 5-day training split, and some of his favorite exercises include squats, incline dumbbell press, and bent-over barbell rows. He uses the following training principles to make the most of his back workout:
1. Get the Form Right
Chris Bumstead is big on building a strong foundation. Before he starts prepping for a show, he takes a few weeks to work on his lifting form. Once in tune with the exercises, he adds weight to the bar (or machine) and gets after it.
Most rookies let their egos get the better of them in the gym. Remember – weightlifting and bodybuilding are two different sports. Chasing weights before nailing down your form can put you at risk of injuries.
If you are new to the fit lifestyle, do not hesitate to ask for help from more experienced lifters in your gym. Tip: If you are in it for longevity, you should steer clear of the broscientists.
Next Read: 5 Uncomfortable Truths About Exercise Form
2. Do Not Pull With Your Biceps
Many lifters use their biceps to pull the weight during back training. Doing this takes the tension off the back and puts it on your upper arms. If you have a more intense pump in your arms compared to your lats at the end of a back exercise, you are probably doing it wrong.
Focus on pulling the weight using your elbows and keep them close to your sides while performing back exercises. Flaring out your elbows distributes the tension to your biceps and shoulders.
For some people, gripping the dumbbell, barbell, or machine handle too hard has been known to ignite bicep and forearm recruitment. If you face similar issues, weightlifting straps can take the tension off your arms and transfer it to your target muscles.
Watch: Chris Bumstead Is The Next Generation Of Jacked And Shredded Bodybuilder
3. Focus on Lat Isolation
You should be able to see your lats and shoulder blades move during your back exercises. If you only notice arm movement, you are not following a full range of motion. On top of that, with every rep, pause and squeeze the life out of your lats.
For optimal lat recruitment and stimulation, you need to follow a full range of motion and contract your muscles with every rep. Just going through the motions for the sake of it is not going to cut it. You need to have a strong mind-muscle connection to make the most of your workouts.
If you face muscle or strength imbalances, unilateral lifts will help better isolate your lats and fix the issues. Research has shown that most athletes can benefit immensely from adding unilateral training to their training regimen.
Related: Chris Bumstead Shows Off Dungeon Style Gym and Training
4. Use Different Grips
Switching grips can make your back light up like the 4th of July. A pronated (palms facing downward), supinated (palms facing upward), and neutral (palms facing each other) all target your back differently.
You also have the option of adding more variations in your back training by using W or V-bars during cable exercises. Having a mix of these grips in your back workouts can ignite muscle growth and help grow that sprawling Christmas tree.
5. Include a Ton of Variety
You need to constantly add variety to your training to ensure that you never hit a wall. Performing the same exercise over and over for weeks on end is a sure-shot way of hitting a plateau.
Chris Bumstead changes up the start of his back workout after every three back days. He rotates through deadlifts for three back workouts, then switches to rack pulls for the next three sessions, and then skips both, moving right to dumbbell rows for the last three workouts of the cycle.
Apart from switching exercises, you could also add variety to your workouts by using advanced training principles like supersets, dropsets, intraset stretching, and experimenting with the number of reps, sets, and time under tension (TuT).
Must Read: Four Plateau-Busting Strategies To Apply To Your Training
6. Keep Rest Between Sets to a Minimal
If you are eating 5,000 monster calories like Chris Bumstead, you need to utilize every opportunity you can find to burn them off. While performing the Chris Bumstead back workout, limit your rest duration between sets and exercise to less than 60 seconds.
Note: Do not waste your resting time checking Instagram or clicking selfies. Use it to stretch your muscles and pose. Posing can improve your mind-muscle connection and help induce muscle-ripping pumps.
Related: Chris Bumstead Details 5,000-Calorie Diet During Bulking Phase
Chris Bumstead Back Workout
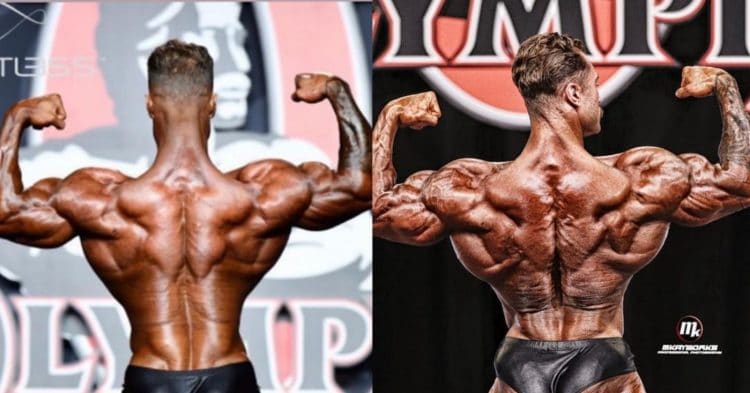
If you have seen Chris Bumstead hitting back poses on stage or his Instagram page, you know there are no weak spots in his posterior muscle chain. Let kids near CBum while he is posing, and they might end up hanging lights and stockings on his sprawling Christmas tree.
Building thickness in his already-wide back is one of Chris Bumstead’s back workout goals.
During Mr. Olympia 2021 presser, Bumstead explicitly mentioned that his back gains were on another level, and he had added 10 pounds of muscle mass just in his back.
Watch: Dennis James – Can Chris Bumstead Improve His Back Enough To Beat Breon Ansley?
Chris Bumstead Back Training Routine
Here is the Chris Bumstead back workout that will help you achieve similar results:
1. Deadlift: 6 sets of 6-8 reps
Steps:
Stand behind a barbell with a shoulder-width stance and your knees slightly bent.
Hinge at your hips and bend slightly at your knees.
Push back your butt while keeping your core engaged so that your back stays flat.
Squat down and bend at your knees to grab the bar with a mixed grip – one hand in supinated and the other in a pronated position.
Keeping your core tight, push through your heels, and lift the weight, straightening your knees first, keeping your back flat, and then reversing the hinge at your hip to stand up.
Pause at the top of the movement and contract your lats and shoulder blades.
Return to the starting position in a controlled motion.
Repeat for recommended reps.
Check Out: Chris Bumstead Answers: Is Classic Physique Easier Than Men’s Open? | GI Vault
2. Single-Arm Neutral-Grip Dumbbell Row: 4 sets of 10-12 reps (each arm)
Rather than using a staggered stance on dumbbell rows, Chris Bumstead likes to square his feet to the bench where he stabilizes his body with his resting arm. It makes the movement more concentrated.
Steps:
Set an incline bench at a 60-degree angle to the floor.
Place your left hand on the edge of the inclined side of the bench, take a step back, and stand with a narrower than shoulder-width stance.
Grab a dumbbell with your right hand using a neutral grip.
Pull your elbow back and upwards towards the roof without letting it flare out.
Pause and contract your lat at the top of the movement.
Return to the starting position with a slow and controlled motion.
Repeat for recommended reps before switching sides.
3. Seated Cable Row: 4 sets of 10-12 reps
Use a V-handle attachment on the cable row machine. To hit your lower lat, make sure you are performing seated rows low – below your belly button.
Steps:
Sit on the cable row machine with your knees bent and grab the V-bar attachment with a neutral grip.
Position yourself with your knees slightly bent and so that you have to reach to grab the handle with outstretched arms yet without curling the lower back over.
Pull the handle toward your lower abdomen without using momentum and swinging back and forth.
Keep your torso upright and chest raised throughout the movement.
Contract your shoulder blades and lats at the top of the movement.
Return to the starting position with a controlled motion.
Repeat for recommended reps.
4. Close Grip Lat Pulldown (rope attachment): 4 sets of 12-15 reps
Incorporating both close and wide-grip pulldowns in the Chris Bumstead back workout help target different posterior muscles.
Steps:
Sit on the pulldown machine with an upright torso.
Secure your legs under the thigh pad.
Grasp the rope attachment with a neutral grip (palms facing each other).
While keeping your chest raised, pull the rope down until your elbows move behind you.
Keep your elbows close to your body throughout the movement.
Pause and contract your shoulder blades and lats at the bottom of the movement.
Slowly return to the starting position.
Repeat for recommended repetitions.
5. Wide-Grip Lat Pulldown: 2 sets of 12-15 reps (dropset)
Wide-grip lat pulldowns consist of dropsets. After performing 12 reps, you will drop down the weight and perform another 15 reps. Choose a weight that will make you hit failure in the dropset.
Steps:
Choose your weight, and sit down on the pulldown machine with an upright torso.
Adjust the thigh pad so that your legs fit snuggly under the support.
Grasp the bar with a pronated (overhand) grip, with your hands more than shoulder-width apart.
Pull down the bar until it is a few inches away from your upper chest.
Pause and contract your shoulder blades and lats at the bottom of the movement.
Return to the starting position with a controlled motion.
Repeat for recommended reps.
6. Dumbbell Pullover: 4 sets of 10-12 reps
While performing the dumbbell pullover, focus on a deep stretch and only come about 3/4th of the way up to keep tension on the lats.
Steps:
Lie across a stable flat bench. Your upper back, neck, and head should be fully supported.
Plant your feet shoulder-width apart on the floor.
Hold a dumbbell at its neck with both hands.
Extend your arms toward the ceiling, over your chest. Your palms should be facing each other, and your elbows slightly bent.
As you inhale, extend the weights back and over your head, keeping a strong back and core.
Exhale slowly and come about 3/4th of the way up.
Repeat for recommended reps.
Related: Golden Era Lifts: 5 Exercises From The Iconic Era You Need To Try
7. Back Extension (bodyweight): 2 sets to Failure
Back extension is one of the most effective ways of training your lower back. CBum performs two bodyweight sets of back extensions to failure.
Steps:
Position yourself on the back extension machine with your hips on top of the cushioned pads and your feet secured under the leg anchor.
Your body should be in a straight line at the starting position.
Place your arms behind your head or cross them in front of your chest.
Lower your torso until your head is a few inches off the floor.
Return to the starting position explosively and lift your torso a few inches.
Pause and contract your back for a couple of seconds.
Repeat for recommended reps.
Conclusion
By the end of the Chris Bumstead back workout, your muscles will be begging for mercy. Remember – Do not engage in ego lifting. If you do not feel a pump after every set, you should lower the weight and focus on contracting your back with every rep.
Put in the work, and the Gods of bodybuilding shall bless you with the physique of your dreams. Good luck!
Who is your favorite bodybuilder? Let us know in the comments below. Also, be sure to follow Generation Iron on Facebook, Twitter, and Instagram.
The 4 Effective Leg Building Exercises Which No One Does
Build Monster Legs With These Exercises
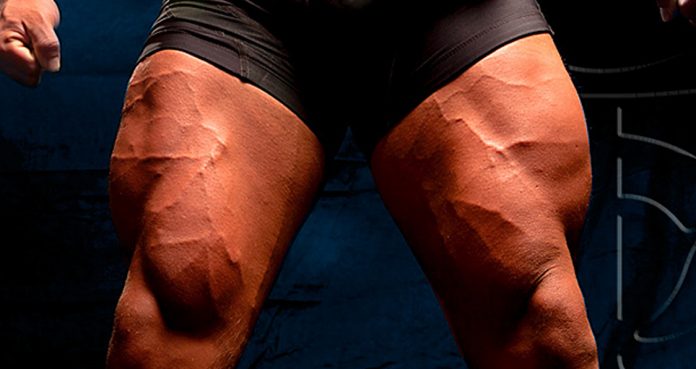
A pair of shredded legs is what separates the men from the boys. Most people stick to the same exercises while training their legs and leave gains on the table. All leg exercises aren’t created equal. Some exercises target your wheels better than the others.
A normal leg training session consists of squats, leg presses, extensions, and curls. While there is nothing wrong with these exercises, there are some exercises which can help you in changing your routine and build size and definition in your legs.
Performing the same exercises over and over again can make you hit a plateau. Adding new exercises to your workouts will shock your muscles and will help you in breaking the plateau. Every exercise targets your muscles in a different way which is great for ensuring an overall muscle development.
Platz Hack Squats
The legendary Tom Platz had one of the nastiest legs in the bodybuilding history. He came up with this variation of the hack squats. The Platz hack squats target your outer quad sweep and the teardrop in your quads.
Stand with your heels joined together and your toes pointing outwards. Perform a squat while pushing your knees down and forward. Your heels will come off the base as you squat. As you start pressing up, push onto the outer part of your feet. Doing this will transfer the tension onto the outer quad sweep.
Sissy Squats
Sissy squats have been around since the 1960s, but chances are you’re hearing about them for the first time. Don’t let the name of the exercise fool you. The sissy squats are a great finisher and will fill your quads with lactic acid.
If you’re performing this exercise for the first time, hold onto a squat rack around the hip level or slightly higher. Take a shoulder-width stance and slowly start to lower yourself by bending your knees and pushing them down and forward.
Your back will fall backward while you’re on the descent. Your heels will come off the ground as your knees go down. At the bottom of the movement, your quads should be at least parallel to the floor. Return to the starting position and repeat for reps.
Good Mornings
Good mornings are a compound (multi-joint) exercise which works your hamstrings. Most people make the mistake of going too heavy on this exercise. Good mornings are an exercise which requires a mind-muscle connection.
Stand with a barbell placed across the rear of your shoulders. Keep a slight bend in your knees and an arch in your back throughout the exercise. Push your hips back as you bend your back until it is almost parallel to the floor. Think of your hamstrings as chains used to lower and lift your back.
Step-Ups
Step-ups are a unilateral functional exercise which helps you in training one leg at a time. If you have a weaker leg, unilateral exercises can help you fix this problem as the stronger leg can’t compensate for the weaker one.
Step-ups have many variations and can be adjusted according to your fitness level. Hold a dumbbell in each hand and use your right leg to step onto a knee-to-hip high platform. Bring your left leg up and stand on the platform, then step back with left leg to return to the floor. Both your feet should be on the floor after you step back. Repeat the movement with your left leg and alternate between your legs for the desired reps.
Which day of the week do you train your legs? Let us know in the comments below. Also, be sure to follow Generation Iron on Facebook and Twitter.
Have Non-Existent Triceps? Use These Horseshoe Building Tricks
Have Non-Existent Triceps? Use These Horseshoe Building Tricks
Triceps and biceps are two sides of the same coin, and yet the tris don’t get the same love as the bis. Training the tris effectively can be trickier as you need to hit the three heads of the triceps as compared to the two bicep heads.
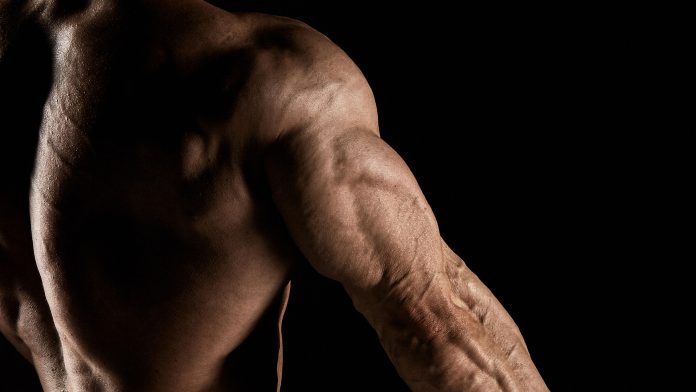
Bodybuilding is a game of illusions and having meaty triceps can make your arms look bigger. A pair of shredded triceps should look like a horse has kicked you in the back of your arm.
The Best Horseshoe Triceps Building Tips
Start With Compound Exercises
Most people make the mistake of starting their tricep workouts with isolation lifts. If you perform exercises like the cable tricep press-downs at the starting of your workouts, you’ll be fatigued by the time you get to the compound moves.
While it might be a good idea to perform the isolation exercises to pre-exhaust your muscles when you’re training the bigger muscle groups (like chest or back), it can have the opposite effect for your tris if you’re fatigued by the time you get to the functional lifts.
Know The Muscle
It’s always a good idea to do some research about the muscles before you start training. The triceps is composed of 67% fast-twitch fibers, so train it according to the adage, “go heavy or go home.”
For the uninitiated – fast-twitch fibers means that you’ll get the best results from your exercises if you keep the TuT (time under tension) short and overload the muscles with heavier weights.
Use Advanced Training Principles
In the sport of bodybuilding, people are always chasing the pump, and in doing so they favor performing a higher number of reps to flush their muscles with lactic acid. Using the advanced training principles while training the fast-twitch muscles can get a little tricky.
If you’ll be using advanced training techniques like supersets, drop-sets in your training, you should make sure you’re using heavier weights (with the right form) and are performing 5-8 reps on each set.
Stretch It Out
By not stretching and posing during the workout, many people leave gains on the table. Not only will stretching improve the muscle pumps, but it will also help establish a better mind-muscle connection.
Holding an overhead tricep pull is one of the most effective tricep stretching moves. Using resistance bands, hitting the bodybuilding tricep poses like the side chest are great ways of flushing the muscles with lactic acid.
Increase The Training Frequency
If your arms are nothing more than small tree branches, you’ll have to put in more effort. We recommend training the muscle twice a week if you have lagging tris. Don’t experiment too much with the exercises and follow the same workout on both the tricep training days in the week.
One of the days should be a single muscle day where you only train your triceps. For the second tricep training day, club your tri workout with bigger muscle groups like the chest or back. Make sure you’re maintaining a balance between training all the three (medial, long, short) heads of the triceps.
How often do you train your calves? Let us know in the comments below. Also, be sure to follow Generation Iron on Facebook and Twitter.
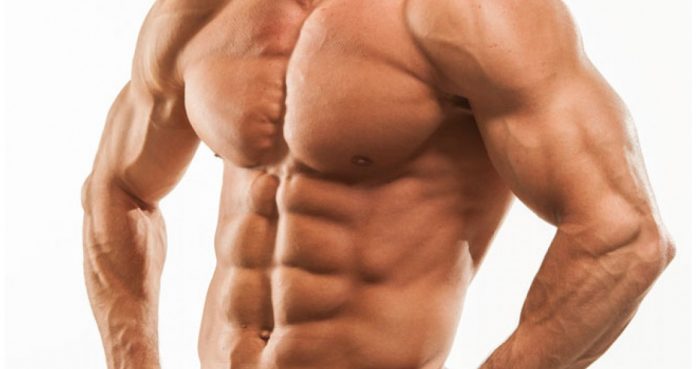
How To Reduce Your Waist Size Without Doing Ab Exercises
Reduce Your Waist Size With This One Trick
Let’s face it; many people get a gym membership to lose weight and to fit into smaller clothes. Following the advice of the broscientists, these people spend most of their time on the cardio equipment. Since you’re reading this article, chances are you’re one of them.
It isn’t long before they lose the motivation and return to their old ways. They blame their genetics for their inability to lose the excess body fat. The ‘too busy to workout’ excuse follows.
The others don’t like spending their time on the dreaded treadmill or doing crunches. Hardly do they know, it’s not their genetics. It’s the lack of knowledge which makes them quit working out altogether.
Changes In Bodybuilding In The Recent Eras
Have you wondered how bodybuilders in the golden era had small waists even when there was no fancy electronic cardio equipment? They used techniques which are long forgotten but were way more efficient than the ones employed by the pros now.
Unlike the bodybuilders today, the golden era bodybuilder focused primarily on symmetry and maintaining a narrow and tight midsection. Most of the current pro bodybuilders focus on getting big and turning into mass monsters.
The Vacuum Pose
If you haven’t heard of this, you’re already missing out. Frank Zane brought this technique into the mainstream by performing this pose on the stage. Before him, the athletes usually performed this pose in the gym as an exercise.
In this pose, you have to suck in your stomach to your spine to make it look like it has completely disappeared. When you hit the vacuum pose, you’re contracting your transverse abdominis (TVA).
The TVA runs across your waist just like a weight belt. It works like a weight belt in your daily operation. You can only perform this kind of thing with your belly.
TVA lies under the rectus abdominis and obliques and is one of the deepest abdominal muscles. Unlike most other muscles, it doesn’t connect to or move bones closer together. Many of TVA’s fibers don’t attach to the bone at all.
You need to take baby steps when it comes to performing this exercise. It will also need a lot of patience and persistence if you have never tried hitting this pose before.
There are four steps to mastering this exercise. In this article, we will take you through each step assuming you’ve never tried this exercise at this point. Each step will be harder than the previous one.
Don’t get intimidated by the four steps; you need to take one step at a time. Once you master one level the next will be relatively easy to perform and will be more efficient than the previous step in achieving your goal of a narrow waist.
Supine Vacuum
[embedded content]
This is the first step in performing the vacuum. It’s also the easiest way to suck in your stomach since the gravity will be your friend in this exercise. Confused? Let us explain.
Lie on your back with your knees bent, so your feet are touching the floor. This will help you isolate and focus on your abdominal. Once you’ve assumed this position, exhale all the air you can. This will raise your diaphragm and shrink your stomach.
This is where your TVA will have the maximum contraction, and you’ll be able to hit the vacuum pose. In the beginning, you might be unable to see or feel the vacuum, but it will come with time.
Hold your breath and perform this exercise for 15 seconds in the beginning. As you get better with time, increase the contraction time to 60 seconds. Take small breaths in between if you’re unable to hold your breath.
Quadruped Vacuum
Once you’re confident with your abilities at the supine vacuum and can perform it at will with no problems, it is time to the move on to the quadruped vacuum. If you’re performing each variation every day, it should take you a couple of weeks at most to perform them optimally.
The quadruped vacuum is called so because you perform them while having four touch points with the ground. In this exercise, you’ll be working against the gravity, and this makes this exercise harder than the previous variation.
Begin in a knee push up position so your shoulders are vertically over your elbows and your wrists and hips are over your knees. Follow the same steps as in the supine vacuum; exhale and suck in your abdominal.
This exercise is harder than the supine vacuum. So, if you were doing 60 seconds on the supine version, you should start with 30 seconds and work up to the 60 seconds mark.
Seated Vacuum
We know what you’re thinking. Isn’t the anti-gravitational version harder than the sitting on your ass version? No, it’s not because many stabilizing muscles come into play while performing this exercise.
Sit on a stable surface without leaning on to anything. Taking the support of a wall or any other surface will reduce the effectiveness of this exercise.
Exhale, pull in your navel and hold it for 30 seconds. Work your way up to 60 seconds as you get better at this exercise. Also, use unstable surfaces like a swiss ball to make this exercise harder.
Functional Vacuum
This is when you become a pro at hitting the vacuum pose. You’ll be so good you could perform it at any time, anywhere. Functional vacuum is the real life variation of this exercise.
You could be performing the vacuum pose in a subway, on your office desk or anywhere else without the people beside you knowing it. As you get better at the vacuum poses, you’ll be able to hold them for long durations.
This can result in a tighter, narrower and firmer midsection. Once you’re at this stage, you’ll find yourself vacuuming throughout the day. You won’t have to wait for long before your waist size drops.
Which ab tightening technique works the best for you? Let us know in the comments below. Also, be sure to follow Generation Iron on Facebook and Twitter.
*Header image courtesy of Envato Elements.
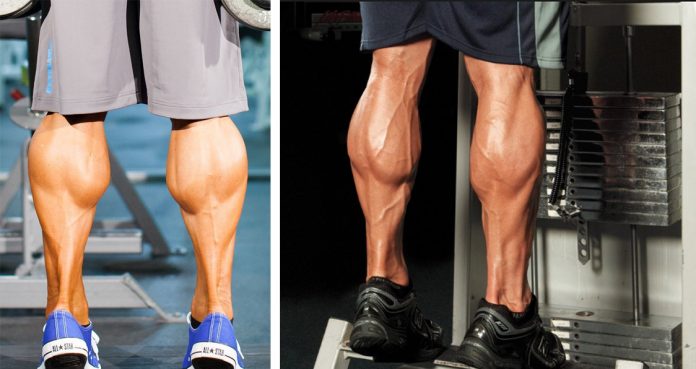
The Calf Training Secret No Pro Wants You To Know
Calf Training of The Pros
Calves are one of the smallest, most stubborn, and desired muscle groups. Since you’re reading this article, we’ll assume you’re lacking in the calf department and are willing to change your current situation.
If you’ve been laboring away on the calf exercises but don’t have any results to show for it, you’ve come to the right place. In this article, we’ll share a calf training secret with you which will take your calf gains to a whole new level.
The Mistakes
Before we let you in on the secret, we want to go over the mistakes most people make in their calf training. Once you know what is holding you back from achieving your goals, you can get better results by fixing your shortcomings.
Training At The End of A Leg Workout
Without going too deep into the mistakes, we’ll just touch on them and tell you how to overcome them. If you have lagging calves, you should never train them after a brutal leg workout when you have no gas left in the tank. For best results, work your calves when you aren’t fatigued.
No Volume
Most people make the mistake of following a vanilla calf training program where they perform 3 sets of 10-12 reps on a couple of exercises. If you want to turn your calves into bulls, you need to be training them like you train all your other major muscle groups. Perform at least five exercises and switch up the intensity often to keep your muscles guessing.
Lack of Variations
While people are proactive in their bicep training – they work their inner, outer, and medial bicep heads – they don’t follow the same approach when it comes to calf training. You should be targetting your calves from three angles to train them effectively.
Perform your calf exercises with your feet planted parallel to target the medial calf heads. Placing your toes together and heels apart – forming an “A” – will target the outer calf heads and keeping your heels together and toes apart – forming a “V” – will work the inner heads.
The Secret That Will Change Your Calf Training Forever
Your calves are made up of both slow and fast-twitch muscle fibers. Performing exercises with long TuT (time under tension) works the slow-twitch fibers and lifts with smaller TuT train the fast-twitch muscles.
So, the dilemma with calf training is that no matter which kind of intensity (high or low number of repetitions) you go for, you’re not going to get the best results. There is a way around the problem and it has been a well-kept secret until now.
Forget Reps, Focus on Time – 1 Minute Is The Magic Mark
To make the most of your calf training, you should focus on performing the exercises for one minute. It doesn’t matter how many reps you do in that one minute but you need to make sure you’re not taking a rest-pause during the set.
You also cannot go light with the weight on the bar because if you do, the slow-twitch muscle fibers will be left out of the action. Remember – this is not a drop-set. You have to end with the same weight you’ll be starting with. If done right, calf training isn’t easy, and you’ll experience it first hand with this technique.
How often do you train your calves? Let us know in the comments below. Also, be sure to follow Generation Iron on Facebook and Twitter.
*Header image courtesy of Envato Elements.
