Tag: workout
Top 8 Tips for a Tip Top Chest for Beginners
Here are some tips on how to build a bigger chest!
If you are new to the gym it can be quite daunting, where do you even start? Well let’s start by looking at the chest muscle, how do you build a monster chest?
Well to really build muscle mass and induce muscle hypertrophy it is all about incorporating multi joint exercises into your chest routine.
The chest is best stimulated, and developed, when it is fully stretched and flexed and targeted through movements designed to maximize development.
For example, the upper chest is best stimulated from exercises done on a 30-45% incline bench, the middle chest is best stimulated from exercises done on a flat bench and the lower chest is best stimulated from exercises done on a 30-45% decline bench.
The exercises below will ensure that each part of your chest is targeted.
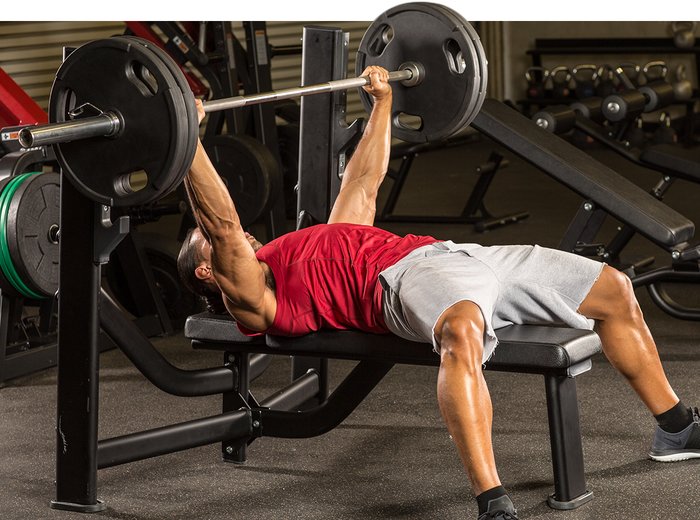
1. Wide Grip Flat Bench Press (barbell)
Lie back on a flat bench with feet firm on the floor.
Using a wide grip, with your palms facing forward and grip that is approx 3 inches away from shoulder width
Lift the bar from the rack and hold it straight over you with your arms locked.
The bar will be perpendicular to the torso and the floor
As you breathe in, come down slowly until you feel the bar on your middle chest.
After a second pause, bring the bar back to the starting position as you breathe out and push the bar using your chest muscles.
Lock your arms and squeeze your chest in the contracted position, hold for a second and then start coming down slowly again.
2. Incline DB Press
Lie back on an incline bench with a dumbbell in each hand atop your thighs.
Ensure that the palms of your hands will be facing each other.
Then, using your thighs to help push the dumbbells up, lift the dumbbells one at a time so that you can hold them at shoulder width.
Once you have the dumbbells raised to shoulder width, rotate your wrists forward so that the palms of your hands are facing away from you.
Be sure to keep full control of the dumbbells at all times. Then breathe out and push the dumbbells up with your chest.
Lock your arms at the top, hold for a second, and then start slowly lowering the weight.
3. Heavy Pec Deck
Sit on the machine with your back flat on the pad.
Take hold of the handles.
Your upper arms should be positioned parallel to the floor; adjust the machine accordingly
Push the handles together slowly as you squeeze your chest in the middle.
Breathe out during this part of the motion and hold the contraction for a second.
Return back to the starting position slowly as you inhale until your chest muscles are fully stretched.
4. Heavy Dips
For this exercise you will need access to parallel bars.
Get yourself into the starting position, hold your body at arms length above the bars.
While breathing in, lower yourself slowly with your torso leaning forward around 30 degrees or so and your elbows flared out slightly until you feel a slight stretch in the chest.
Once you feel the stretch, use your chest to bring your body back to the starting position as you breathe out.
Make sure you squeeze the chest at the top of the movement for a second.
5. Incline DB Flyes
Lie on an incline bench that is set to an incline angle of no more than 30 degrees
Holding the dumbbells in each hand extend your arms above you with a slight bend at the elbows.
Now rotate the wrists so that the palms of your hands are facing you
Slowly lower the arms to the side while keeping the arms extended and while rotating the wrists until the palms of the hand are facing each other
As you exhale start to bring the dumbbells back up to the starting position by reversing the motion and rotating the hands
6. Decline DB Bench Press
Position yourself into a decline bench press.
Once you are laying down, move the dumbbells in front of you at shoulder width.
Ensure the palms of your hands are facing away from you.
Bring down the weights slowly to your side as you breathe out and keep full control of the dumbbells at all times.
As you breathe out, push the dumbbells up using your pectoral muscles.
Lock your arms in the contracted position, squeeze your chest, hold for a second and then start coming down slowly.
7. Bent Arm DB Pullover
Place a dumbbell standing up on a flat bench.
Then lie perpendicular to the bench (torso across it as in forming a cross) with only your shoulders lying on the surface.
Hips should be below the bench and legs bent with feet firmly on the floor, your head will be off the bench as well.
Grasp the dumbbell with both hands and hold it straight over your chest with a bend in your arms.
Both palms should be pressing against the underside of the dumbbell.
While keeping your arms locked in the bent arm position, lower the weight slowly in an arc behind your head while breathing in until you feel a stretch on the chest.
At that point, bring the dumbbell back to the starting position using the arc through which the weight was lowered and exhale as you perform this movement.
Hold the weight on the initial position for a second
8. Cable crossover
Place the pulleys in a high position (above your head), select the resistance to be used and hold the pulleys in each hand.
Step forward in front of an imaginary straight line between both pulleys while pulling your arms together in front of you.
Your torso should have a small forward bend from the waist.
With a slight bend on your elbows, extend your arms to the side (straight out at both sides) in a wide arc until you feel a stretch on your chest.
Then return your arms back to the starting position as you breathe out.
There you have it, these exercises will get all you beginners on the right road to building a rock solid chest!
So until next time, keep pumping!
Mehmet Edip is a fitness writer, actor, and model who has worked in the industry for over 8 years. He focuses on achieving his physique through an all natural plant-based diet and shares his insight via his workout & nutrition guides.
5 Ways To Integrate Powerlifting And Bodybuilding
5 Ways To Integrate Powerlifting And Bodybuilding.
The longstanding relationship between bodybuilding and powerlifting has generally been that of a healthy rivalry. But sometimes oppositional thinking can blind one camp to the benefits of the other.
Recently, powerlifting has become increasingly fashionable in the fitness community, and new athletes are rising who are skilled in both powerlifting and aesthetic training, among them are names like Stan Efferding, and Susan Salazar. The following are some of tips for incorporating powerlifting and bodybuilding.
1. Heavy weights, higher reps
Powerlifters prioritize neurological training, but hypertrophy work (6-15 reps) builds a foundation of actual muscle for that training, which is often neglected by powerlifters. Often the weakest link for powerlifter is not their ability to recruit muscular force, it’s the amount of muscle available for recruitment. Bodybuilders often forget that hard, dense muscle and serious thickness is built with heavy weight. He compares Ronnie Coleman and Phil Heath: one preferred lifting very heavy and the other didn’t. The difference is clear.
2. Exchange Movements
To the powerlifters, it’s important to to balance the body. A more complete muscular system will minimize injury, increase strength and mobility, and allow the body to optimally recruit firing patterns.
To the bodybuilders, include some compound movements. Low bar squats are one of the best hamstring and glute builders out there. Paused bench press gives your chest and triceps a completely different stimulation and leads to thickness and growth because you’re starting from a dead point in a different firing pattern. And things like sumo deadlifts can take a lot of pressure off the precious low back while being phenomenal lower body developers.
3. Exchange Rep Ranges
Most bodybuilders would benefit from occasionally lowering the rep range to 1-3. A more powerful neurological system will always be a driver of muscular gains.For powerlifters he recommends occasional sessions of over 15 reps. Increased blood flow pulls nutrition into the joints and stimulates growth in slow twitch fibers. It will also help powerlifters walk up long staircases without feeling out of breath.
4. Nutrition
For bodybuilders, we recommend increasing carbohydrate intake. Carbs help strength performance and can be added slowly and safely into any diet if monitored properly. If you care about strength performance, you need carbs. Powerlifters, by contrast, should have focus on proper macros. Just because strength is king doesn’t mean donuts don’t hurt. He recommends baseline of 1.2-1.5g of protein, 1.5-4.0g of carbs, and 0.3-0.6g of healthy fat per pound of body weight.
5. Strategic Periodization
If you want to compete in both sports, strategic programming must be employed year round. Obviously, one doesn’t want to be maxing out 4 weeks out from a show and you don’t want to be doing a ton of accessory volume 4 weeks out from a meet. Everything has it’s place in a strategic and balanced program.
What do you think of these 5 Ways To Integrate Powerlifting And Bodybuilding? Let us know in the comments below. Also, be sure to follow Generation Iron on Facebook and Twitter.
Build More Muscle With Seated Overhead Press
Here is a guide of how to build shoulder muscles with seated overhead presses!
Want to optimize your barbell overhead press for building muscle? Here are four form fixes to get the most training effect while minimizing fatigue and injury risk of the shoulders.
1) Do your shoulder press seated instead of standing
Bodybuilding pros have been doing seated dumbbell presses for generations. Arnold and his golden era of bodybuilding peers did seated barbell shoulder pressing too. Standing creates too much opportunity to involve leg drive. Great if you’re training for strongman, but not as useful for the bodybuilder who seeks pure shoulder muscle mass. Standing also creates opportunity to lean back and excessively arch to cheat weight you otherwise can’t control.
2) Set your bench at 75-80 degrees instead of perpendicular 90
Try standing and lifting your arm straight above your head. If you need to arch your lower back or lean back to get into this position before adding weight, should you be forcing this with heavy weight while standing or seated in a 90 degree bench? If you can’t get into this position without compensating, we need to adjust the exercise to reduce injury risk.
Decline the bench one setting from vertical. This should allow all but the most compromised shoulders to press weight into a vertical stack directly above the shoulder joint, without compensating. A small pivot away from 90 degree vertical won’t change the recruitment of your front and middle delts. They’re doing most of the work along with your triceps in any vertical pressing position.
Meanwhile don’t arch in the bench so aggressively you could drive a Smart car between your lower back and the seat. A natural lumbar arch is healthy, but your butt should be set back in the seat while pressing. Otherwise just go incline bench press with better back support and lose the ego. Lift weight you can control with strict form and get stronger, instead of faking strength to impress random gym members. Do you want to show off(and look foolish to people who know better) or get results?
3) Get the bar under your chin at the bottom
Grab the bar just outside shoulder width and tuck your elbows forward to point directly in front of you. Retire the half range of motion wide grip barbell press that fails to get lower than your nose. It’s showing off with weight you can’t lift through full range of motion. Cherry picked images of pros from the 80’s doing it doesn’t prove it’s better. Those guys did a hell of a lot of things to be pros including, but far from limited to, elite genetics.
Forward tucked elbows allow the bar to pass in front of your face, instead of forcing restricted range of motion or aggressive arching to get your head out of the path of the bar. If you’re determined to use a wider grip and less range of motion, press with dumbbells. Even then tuck your elbow forward slightly for better scapular movement and long term shoulder health.
If you tuck your elbows toward the midline of your body instead of flaring them you gain more discomfort-free range of motion. Greater range of motion means more mechanical tension on the muscle fibres active through that range. While it may force you to use less load, the added training effect on your delts and triceps more than compensates. As your strict press gets stronger, you’ll eventually do full reps with the weight you were half repping previously.
4) Lockout at the top
Not only does locking out at the top ensure you’re working through full range of motion, the brief rest point may allow more training volume within the same set. Mechanical tension is most important for growing muscle. People confuse the idea of constant tension with mechanical tension. The overall mechanical tension that a muscle experiences creates growth. No research supports the idea that the tension must be constant within a set. Pausing and rest points don’t prevent optimal muscle growth and may well enhance it.
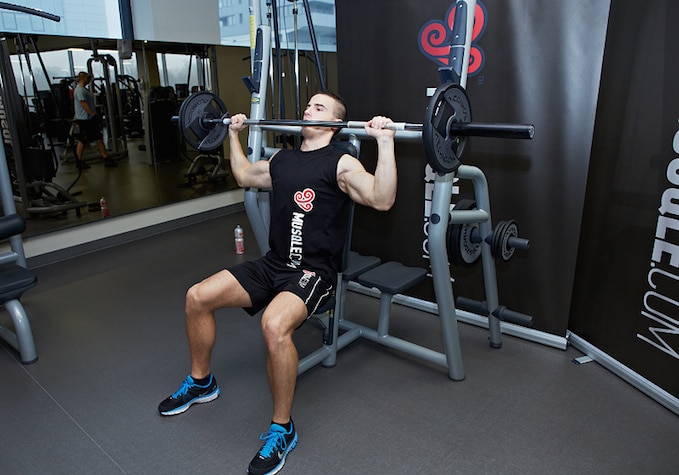
How to setup a seated overhead press
-Set an incline bench to the first setting shy of 90 degree vertical.
-Set the racked barbell at roughly shoulder height.
-Sit with your butt back in the seat, upper back against the bench with a natural lower back arch.
-Begin each rep with the bar below your chin.
-Grip the bar just outside shoulder width.
-Tuck your elbows forward toward the midline of your body.
-Your elbows will flare outward as you press the bar above your head.
-Allow the bar to pass close to your face then lockout directly above your head, with shoulder, elbow, and wrist firmly stacked.
-Begin to tuck your elbows as you lower the weight until the bar is again under your chin and elbows point forward.
-Repeat reps with minimal or slight pausing at the bottom.
Old school bodybuilding says you grow muscle with sets of 8-12. Research later showed you can build muscle at any rep range as long as you get within a few reps of failure. Lower reps to near failure requires longer rest breaks(and longer workouts) and puts added stress on joints. Taking most of your sets to near failure at rep ranges of 15-25 or more is only for the most masochistic lifters. The old school lifters had it figured out, leading us back to the classic wisdom of the 8-12 rep range as effective for getting a lot of intense training volume and mechanical tension on muscles while being time efficient.
After warming up with dynamic shoulder mobility work and tools like face pulls and bottom up kettlebell presses, pyramid to your working weight with 3 warmup sets before 3 working sets of 8-12 reps. Round out your shoulder training with accessory presses, laterals, and direct rear delt work.
Seated barbell overhead press may be the missing ingredient for breakthrough shoulder training results.
For more news and updates, follow Generation Iron on Facebook, Twitter, and Instagram.
5 Banded Resistance Exercises to Torture Your Muscles into Growing
Banded Resistance Exercises You Need to Include in Your Workouts
Once you have been training for some time, a time will come when you’ll have hit the ceiling of muscle growth. Breaking a plateau can be one of the hardest things and can only be done by adding advanced training techniques to your training routines.
Using resistance bands in your workouts can add constant tension to your muscles and can prove effective in forcing your muscles into growing. Resistance bands generally are of three different types (strong, medium and light). You need to use the right one according to your strength and the exercise.
In this article we break down the best resistance band exercises that you can do at home to help effectively grow muscle. Don’t underestimate the power of a good set of resistance band exercises!
RELATED: You can also check out our list of the best resistance bands of 2021 in our official buyers guide!
Banded Leg Press
Exercises with resistance bands work best where the range of motion is vertical. Using the resistance bands on the leg press is easy, and will make the exercise feel like a completely different exercise.
You’ll need a couple of bands of the same strength for all the exercises mentioned in the article. On each side, put one end of the bands on the lift-off handles and the other end on the bars which holds the weights.
Banded Squat
Using resistance bands in your exercises will make them harder by adding resistance when the bands are expanded and reducing the tension when the bands contract. For the barbell squats, you’ll need a set of heavy dumbbells to attach one end of the bands.
Put the other end of the bands around the barbell outside the weights while the bar is racked. Unrack the bar and walk back a couple of steps so you’re in line with the dumbbells on each side. It’s important to keep an upright stance while performing the banded squats.
Banded Bench Press
If you’re new to banded resistance training, it’ll be a good idea to ask someone for a spot. The added resistance might take you by surprise as the bands completely change the dynamics of the exercises.
Place a heavy dumbbell at some distance from your chest on each side. Attach one side of the bands to the barbell and the other to the dumbells. You’ll feel the resistance while you’re pressing the weights up.
Banded Deadlifts
If you’re using medium or heavy resistance bands, you’ll be lifting around 50% of your usual weights. You’ll need a couple of heavy dumbbells on each side for performing the banded deadlifts.
Place the dumbbells on each side so that each side of the barbell is placed between the two dumbbells. Wrap one side of the band around one dumbbell and the other around the second dumbbell. The bands on each side should go over the barbell while it’s resting on the floor.
Banded Smith Machine Military Presses
Place a dumbbell on each side of the smith machine under the barbell. Wrap one end around the dumbbell and the other around the barbell. Maintain a full range of motion while performing the banded resistance exercises to get the most out of them.
It can take some time to trial test which kind of band works the best for each exercise. Perform these exercises in your next workout and your muscles will be filled with lactic acid and begging for mercy.
Do you use resistance bands in your training? Let us know in the comments below. Also, be sure to follow Generation Iron on Facebook and Twitter.
Shrug It Out: Try These 6 Exercises To Give You Massive Traps Now!
Get killer traps now!
It’s those mountains of muscle that every bodybuilder needs in their repertoire. The trapezius muscles. This area is ultimately very important to round out the other upper body muscle groups. If you want championship level trap muscles to wow the judges or if you just simply want to turn heads in the street, follow these exercises and you’ll be on your way to bigger and better traps in no time.
Importance of Building Traps
When you’re looking to build traps, most bodybuilders are simply aiming for the aesthetics, hoping to completely change your upper body by making it appear more pumped up. While aesthetics are usually going do be a major deciding factor in whether or not you dive in and start a new exercise regimen, truth be told you need to be training with multiple different outlooks in mind. You should be aiming to not only put muscle onto your traps, but strengthen the muscles as well.
The traps are a major area in the upper back that do more than just make a lifter appear massive. Another major benefit to building up your traps is shoulder stability. By strengthening the traps it means having a stronger overall back and upper body. It means that your shoulders will be able to handle even heavier loads than ever before.
Barbell Shrugs
The barbell shrug is a favorite among bodybuilders and is perfect for engaging the trapezius muscles. Grab the barbell overhand and shrug the shoulders up in controlled motions, making sure to squeeze the traps at the top of the movement.
The idea behind this is to not use too much weight while performing the action. If you use too much weight you can unconsciously force the rest of your body, your legs for instance, into the motion. Too light and your muscles won’t get the proper stimulus for growth. Like any other movement, the barbell shrug is a balancing act that requires precise and controlled movements, not only for maximum growth, but to remain injury free as well.
Branch Warren and Johnnie O. Jackson are both big fans of the barbell shrug. Jackson has some of the most impressive traps in the the bodybuilding game, period. Branch Warren explains how he trains traps in both his younger years as well as in his prime in this video.
Calf Machine Shoulder Shrug
The calf machine shoulder shrug is another killer exercise for the traps. Another great addition to your workout arsenal to really punish those muscles and start your path towards bigger and better traps. Position your shoulders under the shoulder pads so that the pads rest directly atop the traps. Proceed to shrug shoulders up towards the ears, rinse and repeat.
Kelso Shrug
This exercise targets the middle and lower traps. The idea behind having great trap muscles is to not only work the upper traps, but the entire muscle group in order to get the desired results. This also benefits for overall stability and health of the muscle group. While lying face down on an incline bench, grab hold of a barbell overhand and shrug the shoulders back, far enough to pinch the shoulder blades together.
Overhead Barbell Shrug
The last and probably most advanced shrug on the list is the overhead barbell shrug. The shoulders should be in a neutral position, for example holding the barbell overhead in a relaxed position. You then shrug the traps up and release slowly with control. It can’t be stressed enough that controlled shrugs are the key to avoid injury while performing these exercises.
But what if you don’t have a barbell or dumbbell in reach? What if you can’t get to the gym to train your traps? Are you going to sit it out on the sidelines or find another approach to get the job done?
We already know the answer to that, so save yourself the trouble and check out these bodyweight movements that will help with your back and trap development.
Why Do Bodyweight Trap Exercises?
While resistance training utilizing barbells and dumbbells can get your traps in some seriously impressive condition, the reality is that bodyweight exercises can be more beneficial to your overall trap development. That’s not to say weight training should be taken off of the table, but that bodyweight movements in general provide an athlete with a better understanding of the mechanics of their body.
Really understanding how to move the body to effect muscle growth and control is a great reason to learn body weight movements and the traps are no exception. In order to really strengthen the small muscles and understand the mechanics of the traps, performing a few body weight movements should also be apart of your game plan.
Power Push
Coming across the highly educated and talented personal trainer, physical therapist and strength and conditioning coach Jeff Cavaliere of Athlean-X, this movement is a truly awesome body weight trap exercise that will provide a great deal of muscle control and development. Starting a push up position, elbows tucked at your sides, you push up from the floor at a forty five degree angle rather than the traditional vertical motion of a push up.
The idea is to load the traps at the bottom portion of the movement and pushing up at an angle until your elbows are locked out, the muscle group once again loaded at the top portion of the movement. After a few reps of these there’s no doubt that your traps are going to be on fire.
Angel and Devil
Despite the unusual name for the exercise, this a movement that will really bring everything together to complete your trap training. Essentially the movement is very reminiscent of making snow angels, except you’ll be laying on your stomach to perform this one. Keeping your arms locked out through the entirety of the movement, the idea is raise your arms from your sides up to your head, the whole time keeping the back and traps engaged. It may seem like an easy exercise to pull off, but you’ll be feeling the burn after just a few reps.
Whether you’re looking to use this as a finisher or a superset, this exercise is sure to give your back and traps a thrashing. This one can be really torturous on the back so it’s suggested to try this one as a finisher first before putting it into the rest of your program on back day.
To see both of these movements in action, as well as some other great movements you can pull off with or without equipment, check out the video below featuring the genius Jeff Cavaliere himself.
Ultimately the idea behind these workouts is to both isolate the trap muscles in order to stimulate growth and as well as treat the upper back as whole to make the entire package stronger. Add these exercises to your workout plan and in no time you will have some strong, well built traps.
Do these workouts make the cut? For more news and updates, follow Generation Iron on Facebook, Twitter, and Instagram.
Managing Editor at Generation Iron, Jonathan Salmon is a writer, martial arts instructor, and geek culture enthusiast. Check out his Instagram, Twitter and Facebook to keep up with his antics.
The Rock’s Trusted Transformation Diet & Workout Program Will Get You Shredded AF
The Rock has built one of the most muscular physiques in Hollywood!
Dwayne “The Rock” Johnson regularly posts his workout videos and epic cheat meals on social media, but his diet and workout program has been a long-kept secret. It changes today.
The Rock is a force to be reckoned with in the bodybuilding, WWE, film, and tequila industries. Oh, and also, social media. God, how could we forget The Rock’s epic Instagram? Let me atone for my sins by taking a shot of Teremana.
Dwayne “The Rock” Johnson is one of Hollywood’s highest-paid actors. Not to mention, I routinely add some spare change to his kitty with my generous drinking habits, but I digress.
It is no secret that The Rock is a long-time bodybuilding fan. Not only does he have a jacked physique, but he is also always looking at ways to contribute to the sport.
The Rock was last seen on the Mr. Olympia stage in 2016 when he conferred Phil Heath his sixth Sandow. At the same Olympia, Johnson was presented the “Man of the Century” award, a title specially created for him.
The Hollywood A-lister later announced his own bodybuilding show called “Athleticon.” Many experts speculate Johnson’s new show would overshadow the prestigious Mr. O.
As they say, “with great cash comes great business opportunities.” Or wait, did it have something to do with power and responsibility? Anyways, I hope you get our point.
Check Out: The Rock Tastes His Own Blood After Suffering a Cut During Training
The Rock’s Transformation
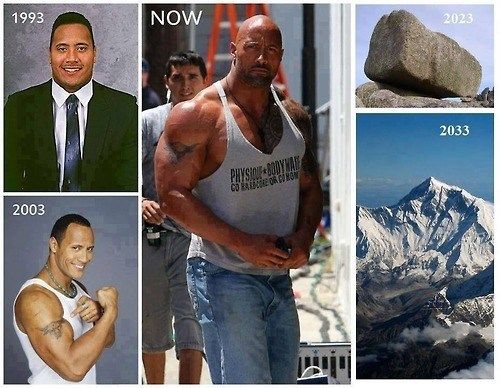
Now that we are done with The Rock’s antiques, let us talk about his physique transformation. It would be safe to say that Johnson was nowhere as big during his wrestling days as he is now.
The Rock’s physique has improved immensely since his Hollywood debut in The Mummy Returns in 2001. He keeps getting better with every movie, both physique-wise and in his acting skills.
Johnson’s physique in Pain & Gain arguably made the most headlines. Lately, he has been in the news for his physique in the DC movie Black Adam.
Dwayne “The Rock” Johnson looks like a total beast in his upcoming movie. He could give pro bodybuilders a run for their money if he decided to compete in a show.
The Jumanji hero is one of the few A-listers who preach lifting heavy and eating right.
Unlike most of his peers in the film industry, Johnson stays in photoshoot-ready shape throughout the year. He does not take up roles where he has to put on body weight and sport a double chin.
The Rock has his fair share of haters. While some people like to credit Johnson’s wrestling genes for his jacked physique, others accuse him of juicing.
Interestingly, the WWE star found a critique in a rather unusual place. Dan Bilzerian recently stated that it is not healthy to be as big as The Rock. “The King of Instagram” was on fire and, without a doubt, raised some eyebrows in his latest podcast.
Must Read: Dan Bilzerian Says It Is “Not Healthy” To Be As Big As The Rock
The Rock Diet Program
Although The Rock is one of the hardest workers in the gym, he does not overlook the importance of eating right. No matter how hard you train, if you are not feeding your muscles the right nutrients, you will not achieve your desired results.
“Manipulating water, sodium, cardio but also having to push and pull real iron to have dense, dry, detailed muscle. It’s real science that takes months and months to dial it all in with my strength & conditioning coach @daverienzi who keeps a very watchful eye, constantly fine-tuning our strategy daily.” – The Rock on preparing for Black Adam
Check Out: Dwayne “The Rock” Johnson Photos Which Will Motivate You to Hit the Gym
Cheat Meals
If you follow Johnson on Instagram, you probably already know about his insane cheat meals. 12 pancakes with peanut butter and syrup, 6 cookies, a box of donuts, sushi, pasta, bagels, and a giant pizza.
Although he does not eat all of that in a single sitting, it would be safe to say Johnson’s cheat meals are nothing short of legendary.
Besides his cheat days, The Rock limits his processed food intake. He keeps all the high-calorie food at bay due to its high sugar and refined carb content.
Related: The Rock Shows Off His Epic Cheat Meal
The Rock Diet Plan
Dwayne Johnson follows a “go big or go home” approach when it comes to his diet. The Rock switches between two diet plans based on what his role demands.
He eats seven meals and up to 5,000 calories a day while preparing for physically demanding movies like Hercules and Black Adam. To put this into perspective, that is about twice the number of calories recommended for most men his age.
For his less intensive roles, he follows a five-meal diet program. So let’s get to what The Rock is cookin’.
Dwayne Johnson’s 5 Meal Diet Program:
Meal 1
Steak: 10 oz
Oatmeal: 2 cups
Egg whites: 3
Whole egg: 1
Watermelon juice: 1 glass
Meal 2
Chicken: 2 servings
Bell pepper: 2
Mushroom: 3 cups
Broccoli: 3 cups
Protein shake: 2 scoops
Meal 3
Salmon: 8 oz
Asparagus tips: 8
Whole eggs: 2
Rice medley: 2 cups
Broccoli: 3 cups
Meal 4
Steak: 10 oz
Baked potatoes: 3
Asparagus tips: 8
Orange juice: 1 glass
Meal 5
Casein protein: 20 grams
Egg whites: 10
Check Out: The Rock Says Intense Prep for Black Adam Film Unlike Any Role Before
Dwayne Johnson‘s 7 Meal Diet Program:
Meal 1
Cod: 10 oz
Whole eggs: 2
Oatmeal: 2 cups
Meal 2
Cod: 8 oz
Sweet potato: 12 oz
Veggies: 1 cup
Meal 3
Chicken: 8 oz
White rice: 2 cups
Veggies: 1 cup
Meal 4
Cod: 8 oz
Rice: 2 cups
Veggies: 2 cups
Fish oil—122: 1 tbsp
Meal 5
Steak: 8 oz
Baked potato: 12 oz
Spinach salad: 1 serving
Meal 6
Cod: 10 oz
Rice: 2 cups
Salad: 1 serving
Meal 7
Casein protein: 30 grams
Egg-white omelet: 10
Veggies (onions, peppers, mushrooms): 1 cup
Omega-3 fish oil: 1 tbsp
Must Read: During a Recent Interview, The Rock Explains Why He Has “Messed Up” Abs
The Rock’s Post Workout Shake
So you thought Johnson does not gulp down a protein shake after his workout? What you are about to read will blow your mind.
The Rock consumes one of the most elaborate post-workout shakes we have ever seen. His post-workout shake could make Hercules proud. According to his Instagram, his post-workout smoothie contains:
65–70 grams of whey protein
1 apple
30 grams of carbohydrate powder
1 scoop of electrolyte powder
creatine
water
ice
We do not know about you, but we feel pretty full after reading about everything The Rock eats in a day. Also, Johnson’s diet program is not for someone with seven bucks in their pocket. If you know what we mean.
Don’t Miss: The Rock Says CT Fletcher: My Magnificent Obsession Is One of The Greatest Docs…
The Rock Workout Program
Dwayne “The Rock” Johnson is no ordinary human. The guy travels with his personal gym. His “Iron Paradise” has state-of-the-art equipment with dedicated muscle group training sections.
The Rock probably has the sickest legs in the film industry. The slabs of meat and vascularity are unlike anything we have seen on a Hollywood A-lister.
The Rock starts his days with 30-60 minutes of cardio. He then eats his first meal, post which he starts his strength training routine.
Johnson begins his resistance training workouts with 30 minutes of stretching and warming up. The Rock spends more time getting ready for his workouts than most people spend working out.
Also Read: The Rock Shows Off Some Recent Incredible Leg Development
The Rock Workout Principles
Johnson’s training principles include:
1. High Resistance Training
The WWE star is a proponent of high-intensity training. He has trained with Mr. Olympia winning coach Hany Rambod and follows the typical bodybuilding training principles including muscle hypertrophy and advanced training principles like dropsets, intraset stretching, and supersets.
2. Go Heavy
The Rock is one of the few Hollywood stars who lift super heavy in the gym. Unlike most of his A-list peers, Johnson trains for more than aesthetics. He has the strength and endurance to back up his size.
But at the same time, if you are a Rock fan, this does not give you the green light to lift as heavy as you can without any regard for your form or safety.
Watch: Phil Heath Trains Arms With The Rock
The Rock Workout Plan
The Baywatch star follows a 6-day training split, focusing on different muscle groups each day. You will be using a plethora of equipment for The Rock’s training program, including kettlebells, barbells, dumbbells, machines, and chains.
Without any further ado, here is what Johnson’s training routine looks like:
Day 1: Chest & Upper Body
Cardio: 30–60 minutes
Barbell bench press: 4 sets of 8–12 reps
Incline dumbbell press: 4 sets of 8–12 reps
Flat-bench dumbbell press: 4 sets of 8–12 reps
Dumbbell fly: 3 sets of 8-12 reps
Incline hammer curl: 4 sets of 8–12 reps
Chest dips: 4 sets to failure
Day 2: Legs
Cardio: 30–60 minutes
Walking lunge (with a barbell, chains, or dumbbells): 4 sets of 20-25 reps
Leg extension: 4 sets of 15-20 reps
Leg press: 4 sets of 25 reps
Hack squat: 4 sets of 8–12 reps
Single-leg hack squat: 4 sets of 8–12 reps
Romanian deadlift: 4 sets of 8–12 reps
Hamstring curl: 4 sets of 8–12 reps
Barbell squat: 4 sets of 8–12 reps
Hip abduction machine: 4 sets of 8–12 reps
Standing calf raise: 4 sets of 50-75 reps
Read Next: The Rock Shares Insane 100-Rep Workout To End Leg Day
Day 3: Back & Traps
Cardio: 30–60 minutes
Pull-up: 4 sets to failure
Single-arm dumbbell row: 4 sets of 8–12 reps (each side)
Hammer strength double-arm row: 4 sets of 8–12 reps
Lat pull-down: 4 sets of 8–12 reps
Cable rows: 4 sets of 12, 10, 8, 6 reps (pyramid set)
Shoulder shrugs with dumbbells: 4 sets of 8–12 reps
Back hyperextension: 4 sets of 8–12 reps
Day 4: Shoulders & Upper Body
Cardio: 30–60 minutes
Shoulder Press: 4 sets of 12, 10, 8, 6 reps (pyramid set)
Seated dumbbell shoulder press: 4 sets of 8–12 reps
Standing dumbbell lateral fly: 4 sets of 8–12 reps
Single-arm cable lateral raise: 4 sets of 8–12 reps (each side)
Reverse dumbbell fly: 4 sets of 8–12 reps
Bent-over dumbbell lateral raise: 4 sets of 8–12 reps
Day 5: Legs
Cardio: 30–60 minutes
Walking lunges (with a barbell, chains, or dumbbells): 4 sets of 20-25 reps
Leg extension: 4 sets of 15-20 reps
Leg press: 4 sets of 25 reps
Hack squat: 4 sets of 8-12 reps
Single-leg hack squat: 4 sets of 8-12 reps
Romanian deadlift: 4 sets of 8-12 reps
Hamstring curl: 4 sets of 8-12 reps
Barbell squat: 4 sets of 8-12 reps
Hip abduction machine: 4 sets of 8-12 reps
Standing calf raise: 4 sets of 50-75 reps
Day 6: Arms & Abs
Cardio: 30–60 minutes
Dumbbell curl: 4 sets of 12-15 reps
Hammer curl: 4 sets of 12-15 reps
Preacher curl: 4 sets of 12-15 reps
Tricep pushdown: 4 sets of 12-15 reps
Rope tricep overhead extension: 4 sets of 12-15 reps
Rope crunch: 4 sets of 20 reps
Russian twist: 4 sets of 20 reps
Hanging leg raise: 4 sets of 20 reps
Day 7: Rest Day
Check Out: The Old School Tool The Rock Uses To Chisel His Chest
The Rock Diet & Workout Program Notes
Dwayne Johnson is 6 foot 5 and 260 lbs of sheer muscle. If you are a beginner or even an intermediate lifter, following The Rock’s training program in its original form would not be a smart decision.
Pushing your body’s limits with Johnson’s training and diet program might sound like the perfect way of shocking your muscles into growing but biting off more than you can chew can put you out of the gym for weeks.
The Rock is built like a tank. If you have never followed an advanced training program before, you should work with a professional to help you ease into more serious training regimens.
Remember: The Rock’s physique is a combination of genetics, hard work, and access to the best food, training equipment, and a team of experts. So, use The Rock’s diet and workout program as a guideline instead of following it in its original form.
Next Read: Why The Rock Trains With Chains, And You Should Too
Wrapping It Up
Adopting The Rock diet and workout program is not a matter of access as much as it is a matter of conviction. If you want to transform your physique for the better, get ready to sweat it out in the gym (and the kitchen) for the next six months.
Who do you think has the best physique in Hollywood? Let us know in the comments below. Also, be sure to follow Generation Iron on Facebook and Twitter.
Joseph Baena Shares His Old School Workout Inspired By Arnold Schwarzenegger
Joseph Baena takes more inspiration from his father, Arnold Schwarzenegger, as he shows off his old school bodybuilding workout.
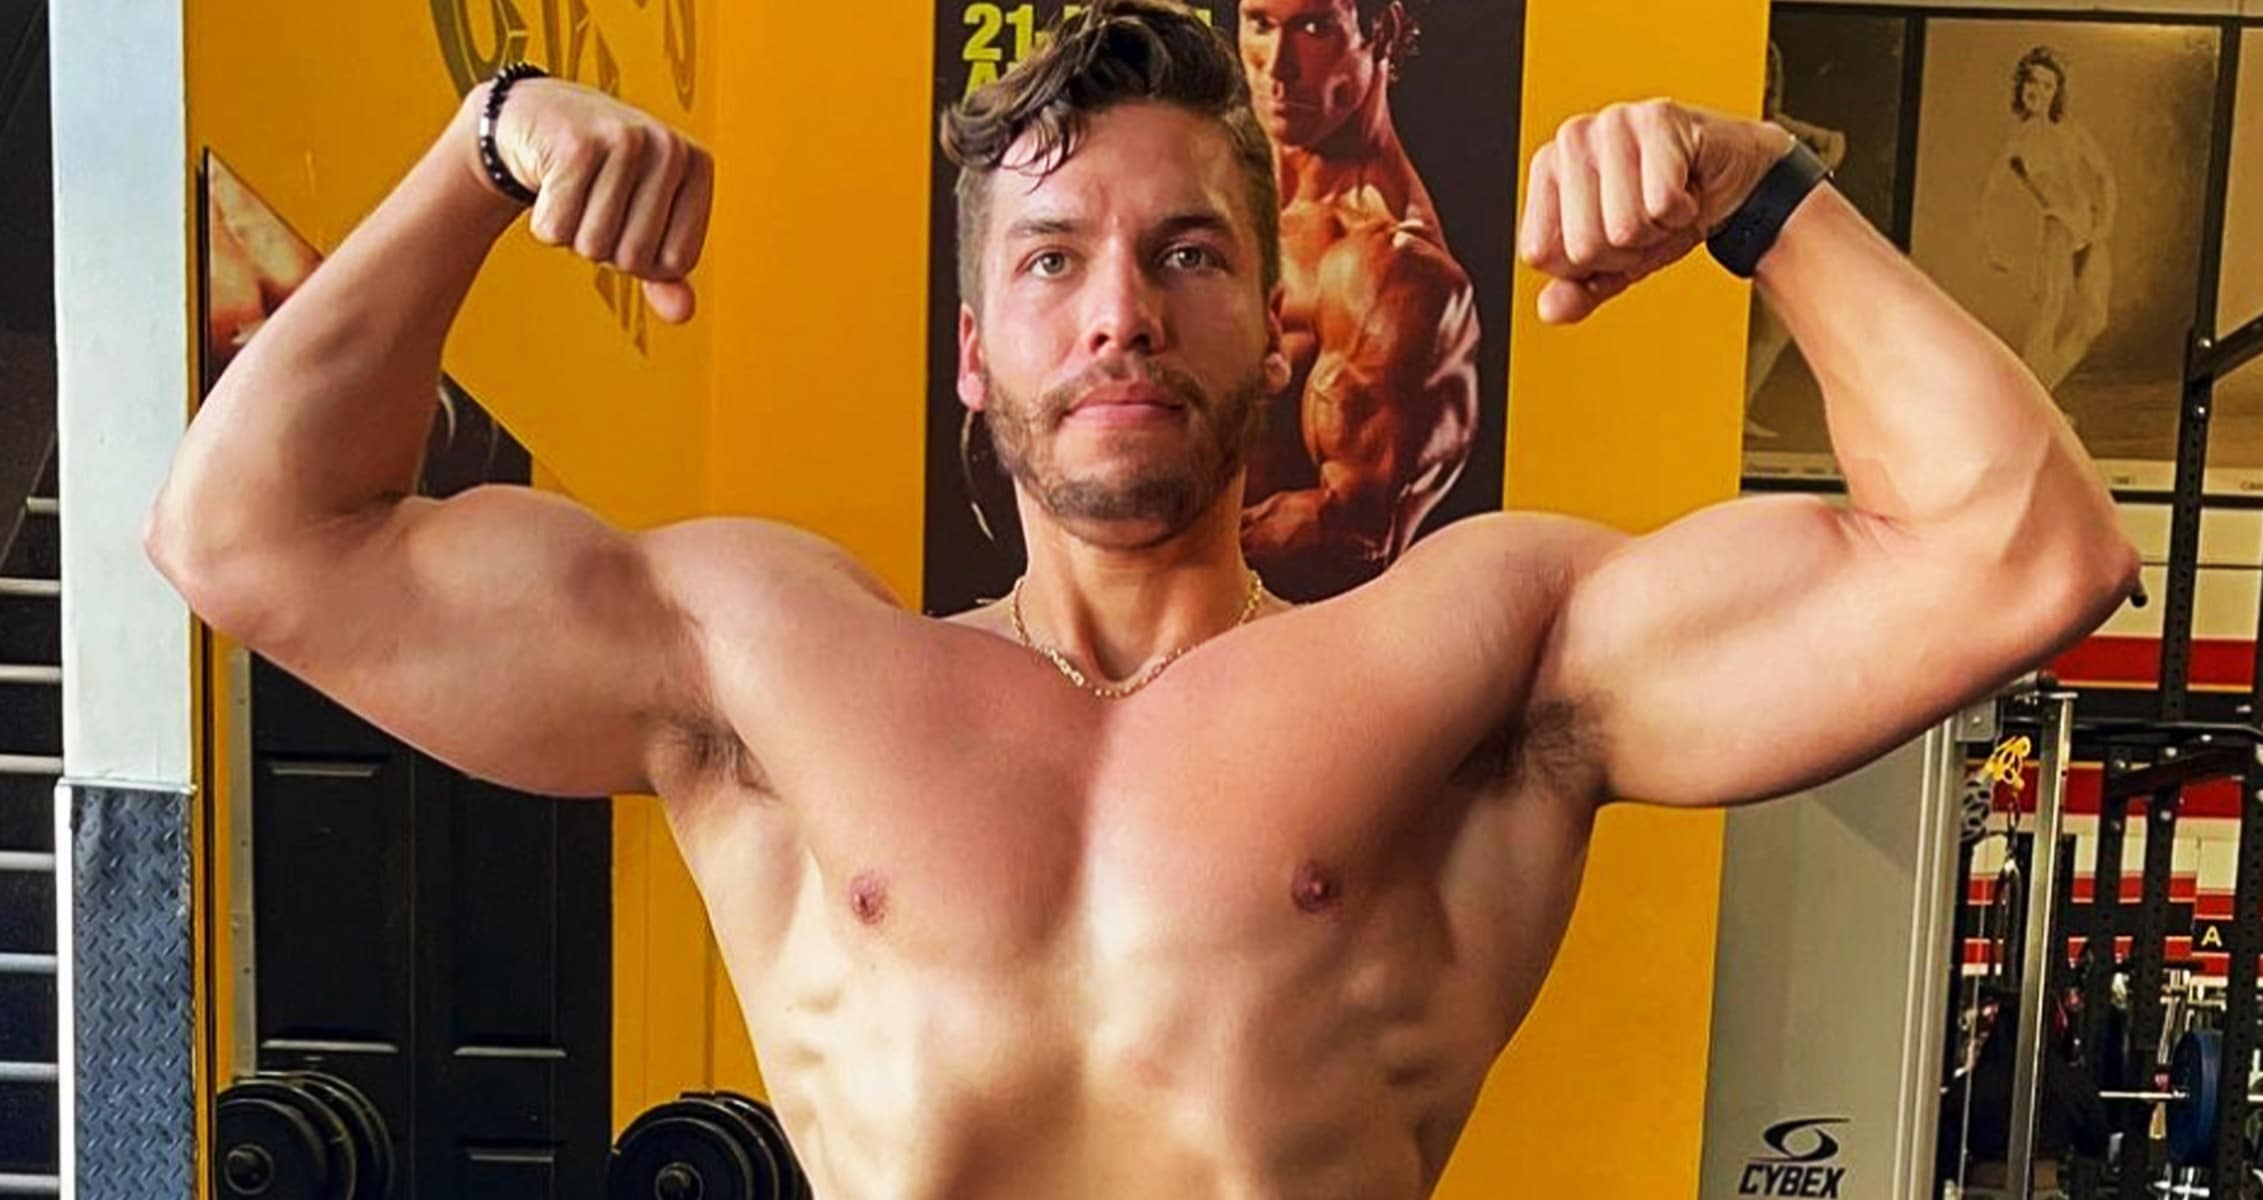
Over the years, Joseph Baena has been turning heads in the bodybuilding world. Perhaps initially known best simply for being Arnold Schwarzenegger‘s son, Baena has been building even more attention as he’s slowly sculpted an impressive bodybuilding physique of his own. Certainly the genetics are working in his favor – as his physique has begged the question: will we ever see Joseph Baena compete in bodybuilding.
We may not have an answer to that at the moment. But we do know that Joseph Baena has continued to build his identity as a bodybuilder and lover of fitness. Physique updates often grab attention and headlines. And while Baena certainly gained some genetic graces from his father, he is certainly putting in the hard work on his own merits.
So it’s even more exciting that Joseph Baena recently shared his workout routine with Men’s Health in an extensive cover story. Taking a page from his father, the workout is clearly inspired by the Golden Era of bodybuilding. Let’s break down Baena’s journey towards a muscular physique and his workout below.
How Joseph Baena Discovered Bodybuilding
Joseph Baena first found an interest in weightlifting and bodybuilding through competitive swimming. Shortly after, Arnold Schwarzenegger gifted Baena a copy of The Encyclopedia of Modern Bodybuilding – which, of course, was written by Schwarzenegger himself. The two then started training in the gym together. What better training partner can you ask for than 7x Olympia champion Arnold Schwarzenegger?
And while his father is a major inspiration and motivational factor in Joseph Baena’s growing physique – he also clearly is looking to put his own modern spin as he continues to train. In speaking with Men’s Health, he had this to say about his journey into bodybuilding:
“My father really inspires me… he kind of created the ideal physique for most people… do I want to have the same physique? I don’t know if I can.”
It’s clear the Joseph Baena has a bit of humorous self-deprecation in talking about his own physique. A clear difference between his father’s cocky attitude as seen in Pumping Iron. Regardless, the true message is in the physique and the hard work put into training.
Regardless of being Arnold Schwarzenegger’s son – this workout and his latest physique updates prove that he is a man who is willing to put in the hard work for impressive muscle. And more than that – he’s bodybuilder in the truest sense of the word. He has a passion for weightlifting.
16 Squat and Deadlift Variations You Should Know About
Squat and Deadlift Variations You Should Know About
Squat and deadlifts are two of the most dominant compound exercises. These two exercises are also some of the most functional movements. You’ll find these exercises in almost every kind of training discipline be it bodybuilding, powerlifting, CrossFit or any other.
Performing the vanilla squats and deadlifts can cause you to hit a plateau. A great way to break through the glass ceiling is to try new variations of the exercises. There are enough variations of these exercises to keep you entertained for months.
Squats
Back Squats
Back squats are the conventional and most common type of squats. Based on your mobility, you could perform all types of squats with a high or low bar position. In the high bar position, the barbell sits on your traps, and in the low bar position, the barbell is placed on your shoulder blades.
[embedded content]
Front Squats
In the front squats, you place the barbell across the front side of your shoulders. The front squats are quad dominant as you need to maintain an upright position throughout the exercise.
[embedded content]
Box Squats
If you’re don’t have the mobility and are not comfortable going ass-to-grass in the conventional squats, the box squats can help you by squatting to the desired depth and develop explosive strength in the squat movement.
Sumo Squats
Sumo squats are wide-stance squats which primarily target the hams, glutes and inner thighs. The range of motion while performing the sumo squats is considerably smaller as compared to the conventional squats.
Narrow Stance Squats
Narrow stance squats are the opposite of sumo squats. In this variation, you have to place your feet next to each other. Doing so targets your outer thighs and helps in building the outer quad sweep.
Frankenstein Squat
Frankenstein squats are an advanced level squat variation. To perform the Frankenstein squat, you need to extend your arms straight forward and place the barbell on the “shelf” created in your shoulders. The Frankenstein squat teaches you the proper positioning of both the bar and your body during the clean and front squat.
Goblet Squat
If you’re suffering from a back injury and are not comfortable performing the barbell squats, the goblet squats can be a lifesaver. Hold a dumbbell next to your chest while performing the squats to target your quads.
Zercher Squat
Zercher squat involves holding the barbell between the crook of your elbow while squatting. The Zercher squat increases glute and quad activation. It improves the front squat and even works the biceps.
Deadlifts
Conventional Deadlifts
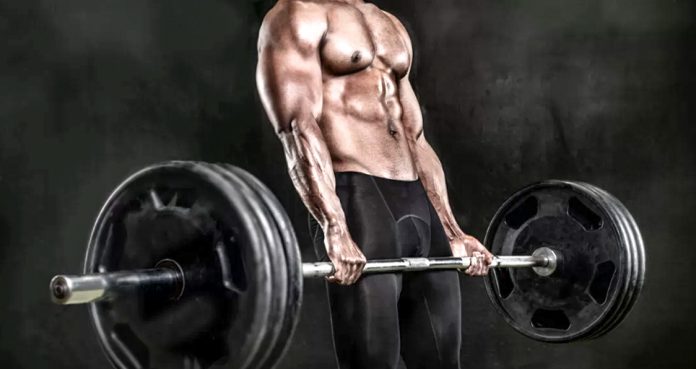
Conventional deadlifts are the most common type of deadlifts which involves standing with a shoulder width stance and holding the barbell with a shoulder-wide snatch or a mixed hand grip.
[embedded content]
Sumo Deadlifts
Sumo deadlifts have the same feet placement as the sumo squats. The sumo deadlifts take your legs out of the equation and primarily focus on the upper back. Hold the barbell with a mixed hand grip while performing the sumo deadlifts.
[embedded content]
Deficit Deadlifts
Deficit deadlifts are for the more advanced lifters as it includes standing on an elevated surface (weight plates or a hard aerobic stepper) while performing the deadlifts. Standing on the weight plates increases the range of motion which makes the movement harder than the conventional deadlifts.
Rack Pulls Deadlifts
In the rack pull deadlifts, you lift the bar off the safety pins in a squat rack. This variation of deadlifts is great for people who have back problems and can’t perform any other type of deadlifts. You can adjust the range of motion of the movement by setting the height of the safety pins.
Trap Bar Deadlifts
Trap bar deadlifts target the traps and the upper back. In the trap or hex bar deadlifts, you hold the barbell at your sides which makes the movement easier. You should be able to move heavier weights while performing the hex bar deadlifts.
Romanian Deadlifts
Romanian deadlifts or stiff-legged deadlifts target the hamstrings. Stand with a barbell in hands and your knees locked at a slight angle. Push your hips back as you lower the barbell and contract your hamstrings. Pause at the bottom for a second and return to the starting position.
Snatch Grip Deadlifts
In the snatch grip deadlifts, your hands take on a wide grip where they are almost touching the sides of the weight plates on the barbell. The snatch deadlift is a type of Olympic lift which mainly works the hamstrings. It acts to strengthen the pull of the snatch.
Dumbbell Deadlifts
Some people are not comfortable performing the deadlifts with a barbell. The dumbbells can improve the range of motion and the resulting pump as you have better mobility with them as compared to the barbell.
Have you tried all the variations of the squats and deadlifts mentioned above? Let us know in the comments below. Also, be sure to follow Generation Iron on Facebook and Twitter.
*Header image courtesy of Envato Elements.
Pro Training: 6 Remedies For A Stubborn Upper Chest
Train Like A Pro.
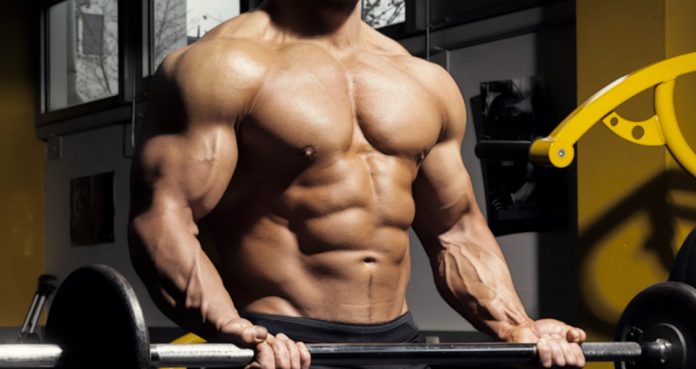
You can’t have too much upper chest. One of the most impressive areas in bodybuilding, you want your chest swole and the muscle walls thick. By now you’ve probably done all the incline exercises and hit the peck deck on a masochistic level, and still, nothing.
What you don’t realize is that there’s a method to working smart, not hard, and even if you’re doing everything there’s a few little tricks of the trade that will you give you maximum reward for minimal sacrifice. That’ the type of math we like over here at Generation Iron.
Tip #1: Train supporting muscles
In the words of the great Jay Cutler, you’ve got to train the whole pec. Many builders get caught up training only the upper pec but in reality the pectoris is one big muscle. If you train the whole muscle, the whole muscle will grow, inadvertently getting the upper pecs big in the process.
Tip #2: Train on an incline
With tip #1 being said, it also helps to train on an incline. While you do have to train the whole muscle, it must be combined with specialized angles or exercises for the particular muscle you want to grow. It’s important to train incline while your fresh in order to move the most weight.
Tip #3: Do exercises in close succession
If you do two incline exercises, change the angle. Try a press from 45 degrees, and then another from 20 degrees. Do this in close succession to really break the muscle down for more solid gains.
Tip #4: Concentrate on the tension
When training to boost up a specific area, you want to concentrate on the tension of the exercise from beginning to end. Pro’s like Jay Cutler and Flex Lewis recommend concentrating on the upper pecs and feeling the tension throughout the whole movement. When the tension stops, that’s when you stop and begin the negative portion of the exercise. This increases TUT (time under tension) which increases muscle growth.
Tip #5: Negatives and forced reps
adding slow negatives and forced reps onto the end of a set is a small change that can make a big difference. On the last couple reps, try going back down to starting to position as slow as possible, adding that extra little bit of TUT at the end. If you’re feeling really froggy, try pushing out a couple of forced rep with a partner to really blow out your pecs.
Tip #6: Stretch
Your high school gym teacher was right. No, not about Abba being the best band of all time, but stretching will actually help with muscle growth. According to pro bodybuilder Gunter Schlierkamp, stretching your chest after a grueling workout creates an environment for it to grow.
Make it a point to try out these 6 tips next time you’re at the gym and tell us if they helped with those stubborn upper pecs. Which body parts do you need help training?
Let us know by hitting up our comments below or head on over to our official Facebook and Twitter.
The Gym Machines You’re Probably Using Incorrectly
Cable Exercises For Strength Development
The cable machine is a superb, and often underutilized, piece of gym kit that can help to accelerate progress towards a multitude of health and fitness goals. One of the best things about the cable machine is its versatility. A wide range of effective strengthening exercises can be performed however, due to the many moving parts and handles, often the machine is used improperly or avoided altogether.
The cables are highly functional (1) and are specifically effective for increasing range of motion and for isolating specific muscle groups (2), which is of great benefit for those looking to build muscle strength, size or for rehabilitation from injury.
Setting Up The Cable Machine
The most important aspect to consider when setting up the cable machine is the amount of weight that is being lifted. For the beginner, start with light weight and prioritize technique over weight. The nervous system needs time to adapt and become accustomed to the movement patterns of the exercise (3). Only once proficient with technique should the weight gradually be increased.
Even for those who are more advanced lifters, technique should still take precedence. Picking a weight that is too heavy will more than likely cause technique to break down which will not only fail to work the specific muscles effectively, but will also increase the risk of experiencing injury.
The weight that is selected should align with one’s fitness goal. For increasing muscle mass, focus on 6-12 reps with every set as this has been found to be an effective range for onsetting hypertrophy (4). For strength gains, a heavier weight with lower reps is recommended, as again, this has been found to be most effective for building raw strength.
With some cable machines, the attachment is adjustable and can be moved higher and lower position. Prior to performing any exercise, make sure that the cable is set at the correct height for the chosen exercise.
Muscle Building Cable Exercises
As mentioned, there are a variety of exercises that can be performed to target a number of muscle groups. When assuming the correct position for each exercise ensure to brace the core to protect the back and reduce the chances of sustaining injury.
1) Cable Crossover
The cable crossover is a fantastic exercise for developing the pectorals and can facilitate improvements with the bench press.
With the cables set at a high point, grasp both handles and take a step backwards initially. From there, brace the core and pull the handles in to the chest. Walk forward with the handles tight to the chest, assume a staggered stance position and then “punch” the handles out, away from the body. Ideally, the arms should be slightly down from the height of the shoulders.
From that position, maintain straight arms and in a controlled fashion bring them out wide to the side of the body. Then focus on contracting the chest muscles in order to drive the arms together again and return to the starting position.
2) Decline Cable Flyes
Unlike with the decline bench press, the decline cable fly does not involve adjusting the body position, rather it refers to the angle of application. In simpler terms, instead of driving the arms together directly in front of the chest (as with the cable crossover), the arms start high and must drive the weight down towards the front leg.
This exercise is very similar to the cable crossover, both in terms of set-up and execution. As stated, the only variance is in regard to the angle of the movement. Ensure the cables are set at a high point, keep the arms straight and look to drive the weight downward.
3) Seated Cable Row
Possibly one of the best exercises for improving posture by strengthening the back and shoulders. For the seated row, take a seat and firmly plant the feet on the platforms. The legs should be relatively straight with only a slight bend maintained in both knees. Before grabbing the handle, drive the chest up, pull the shoulders back and squeeze the core muscles.
Start with arms extended and look to pull the handle in to the body (aiming for the area between the chest and stomach). As you pull, ensure to keep the elbows tucked in and focus on squeezing the muscles between the shoulder blades at the top of the movement. Under control, extend the arms while preventing any movement from the back and return to the starting position.
4) Bicep Cable Curl
When it comes to building muscle size, there is no doubt that the bicep curl is highly effective. For a bicep cable curl, ensure the cable is at the lowest point and attach a handle or a rope. Grasp the attachment and stand up tall, keeping the chest high and core tight to prevent the use of momentum. Pin the elbows in tight to the ribcage and focus on hinging only at the elbow to bring the hands up to the shoulders. Once at this point, squeeze the biceps and then reverse the movement under control.
5) Tricep Cable Extension
For comprehensive arm building, it is crucial to work the triceps as well as the biceps. To perform a tricep cable extension, start with the pulley at a high point and use a handle or rope. Keep the body upright, core engaged and chest up. Grab the attachment and, as with the bicep curl, fix the elbows to the sides of the ribcage. From there, flex at the elbows and drive the weight down to the hips and return, maintaining control.
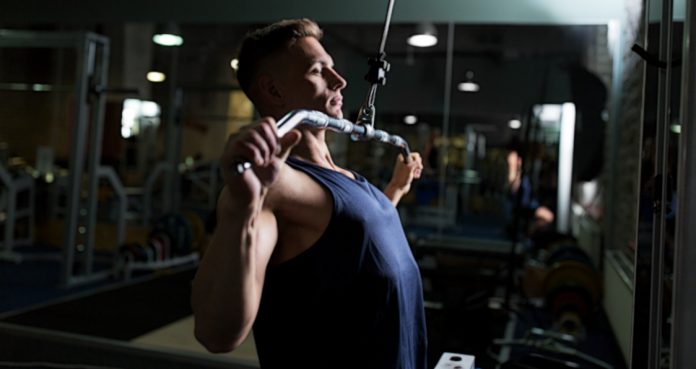
6) Seated Cable Lat Pulldown
The lat pulldown is an exercise that is very regularly performed incorrectly. Many generate momentum from trunk movement to assist with every rep. Others pull the bar down behind the neck, rather than to the upper chest, which can cause problems in the long run.
Start by grasping the bar slightly wider than shoulder width and sit down with straight arms. Hook the legs under the pads to anchor the body in place, drive the chest up and brace hard. Pull the bar down, keeping it close to the face as it passes, until contact is made with the upper chest. Finally, return to the starting position by extending through until the arms are straight once again.
7) Standing Trunk Rotation
The last exercise is a core strength and stability exercise – more specifically, an oblique exercise. For the standing trunk rotation, ensure the cable is approximately at shoulder height and assume a hip-width stance. Grab the handle with both hands and keep the arms extended throughout. From there, powerfully rotate round and control the movement on the way back.
Be wary of leaning or bending during this exercise. Keeping the chest up and core tight should keep the body upright and force the obliques to work hard. Finally, ensure that the feet stay planted and that no movement occurs from the lower body.
Final Word
There is no doubt that the cable machine is certainly more complex than a number of other machines in the gym, but with regular practice, using the cables should become more straightforward, less daunting and will ultimately facilitate improvements in health and strength.
For more news and updates, follow Generation Iron on Facebook, Twitter, and Instagram.
References:
1-Balachandran, Anoop; Martins, Maria M.; De Faveri, Frederico G.; Alan, Ozgur; Cetinkaya, Funda; Signorile, Joseph F. (09 2016). “Functional strength training: Seated machine vs standing cable training to improve physical function in elderly”. Experimental Gerontology. 82: 131–138. doi:10.1016/j.exger.2016.06.012. ISSN 1873-6815. PMID 27354031.
2-Signorile, Joseph F.; Rendos, Nicole K.; Heredia Vargas, Hector H.; Alipio, Taislaine C.; Regis, Rebecca C.; Eltoukhy, Moataz M.; Nargund, Renu S.; Romero, Matthew A. (2017-2). “Differences in Muscle Activation and Kinematics Between Cable-Based and Selectorized Weight Training”. Journal of Strength and Conditioning Research. 31 (2): 313–322. doi:10.1519/JSC.0000000000001493. ISSN 1533-4287. PMID 28129277.
3-Services, Department of Health & Human. “Resistance training – health benefits”. www.betterhealth.vic.gov.au.
4-Schoenfeld, Brad J.; Peterson, Mark D.; Ogborn, Dan; Contreras, Bret; Sonmez, Gul T. (2015-10). “Effects of Low- vs. High-Load Resistance Training on Muscle Strength and Hypertrophy in Well-Trained Men”. Journal of Strength and Conditioning Research. 29 (10): 2954–2963. doi:10.1519/JSC.0000000000000958. ISSN 1533-4287. PMID 25853914.
