Tag: Workouts
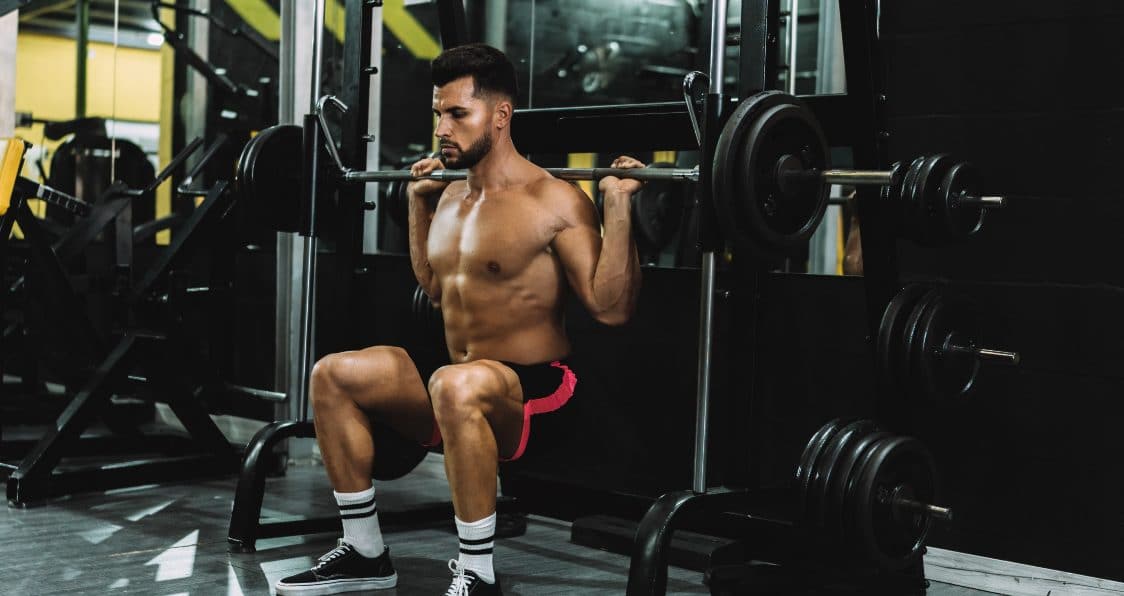
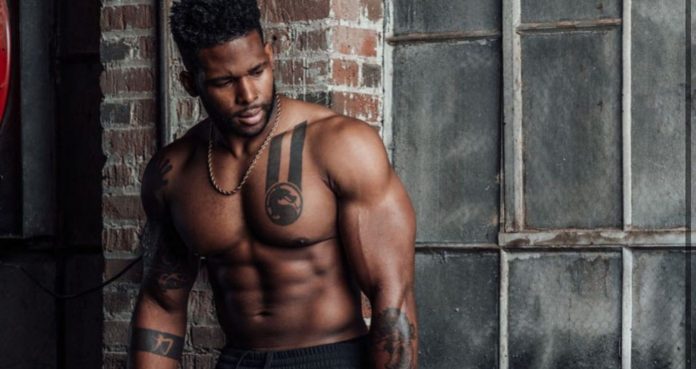
Squats: The Ultimate Mass-Building Exercise
Everything you need to know about this lower body building exercise.
If you’ve seen the movie Generation Iron or hung around this site for a few minutes, you should already understand that if you truly want to build a lean, muscular and powerful physique then you absolutely MUST train legs. You must train them intensely and consistently if you want to build a legendary physique that others will envy. Fortunately, there’s a single exercise that is the be all and end all to not only lower body development, but the entire body in the squat.
Whether you’re trying to shed fat or build muscle, no other exercise works better at targeting and developing the quads, hamstrings, and glutes in one single solitary movement. Most leg exercises target one muscle in the upper leg. Leg extensions hit the quads. Leg curls isolate hamstrings. But nothing secretes more testosterone and growth hormone than squats. They target the quadriceps, hamstrings, glutes, calves, even hips and lower back for a really nice and effective exercise able to build real strength and size.
Squats will also help you shed fat. How, you ask? Well, in order to burn body fat we must remember the three important keys: cardio, diet, and maintaining fat-burning muscle. The legs hold most of the body’s musculature. The more muscle you have, the more calories you burn when you’re resting. Squats truly develop and work the entire body. Squats have long held the title of being a total body exercise, the king of all exercises, and one that has become a staple in many lifters routines.
Let’s take a look at the squat and see what makes this exercise so great. We’ll talk about what it is, what muscles get worked, the benefits of it, and how best to perform it so you see only the best gains possible as you look to boost your overall health and performance.
What Is The Squat?
Squats are a fantastic compound exercise used to build muscle and improve power while also working for a host of other benefits. What you will find is an exercise with tons of variations that can impact you in a variety of ways. Used with a barbell, this strength building exercise has become a staple in many lifters’ routines and is one of the big three lifts associated with powerlifting.
Related: A Definitive Guide To Improving Your Squat
Muscles Worked
Squats will work those lower body muscles so you see great gains, however, what you will find is that your quads will get a lot of action. Other top muscle groups worked include your hamstrings, glutes, calves, hips, lower back, and core, since this is needed to enhance stability and offer support as you drive through your feet.
Benefits Of Squats
The benefits of squats can help take your gains to the next level and knowing what these can do for you can go a long way when looking to optimize your strength and performance.
Benefits of squats include:
Stronger lower body: Build those muscles in your lower body and work to capitalize on strength while increasing size (1).
More power: Given the power and explosiveness required with this movement, you will find this can increase sport specific and functional movements when it comes to needing the right amount of power (2).
Improve stability: With this lift, you will improve stability and get the most out of balance while feeling supported (3).
Help with posture: Squats can help with posture by working to improve your spine alignment and giving you great gains when it comes to overall support and stability.
Plenty of variations: Squats have tons of variations that you can try that will work to offer variety in your workouts while still increasing strength and size.
Related: How To Alleviate Lower Back Pain After Squats
How To Perform Them
Knowing how best to perform this exercise is important as you look to capitalize on form so you see the best gains possible. With the right form, your greatly reduce your risk of injury and unwanted soreness.
Here are the steps for performing squats:
Begin with your feet shoulder width apart. Make sure the bar is resting on the top of your shoulder blades and not the top of your spine. Your hands should be slightly wider than shoulder-width apart.
As you brace your core, maintain a neutral spine and bend at the knee, giving yourself stability before unracking.
Unrack the bar and when ready, lower to the ground. Keep your weight centered and heels on the floor.
Keeping solid form, push up to the starting position, driving through your feet to get the most out of your power.
Repeat for your desired number of sets and reps.
Key Points to Remember
Keep time under tension. Don’t rush the exercise. You want to soak up the pain and soak up the burn so that the muscles can get hit efficiently and effectively.
Keep the lower back straight and look straight ahead. Looking up or down will cause rounding in the back which can lead to injury.
Squat till your thighs are parallel or slightly below parallel and ensure that your knees are kept behind your toes to ensure that stress is kept away from your knees.
Wrap Up
Squats are one of those exercises that you need to see in your routine in order to get the most out of your training and performance. With the right number of sets and reps, and this placed strategically into your routine, you will find this exercise is one to take advantage of as you seek the best for your gains.
Editor’s Note: Some of this information above was shared with us by Geo Chang, a NASM Certified Personal Trainer and Nutritionist whose mission is to educate and empower his clients to live healthier and happier lives. Geo has a Bachelor’s Degree in Nutrition/ Biochemistry and is RD eligible. Geo Has maintained a thriving practice in New York City and brings the triple threat of education, experience, and passion to health & fitness for his clients.
Let us know what you think in the comments below. Also, be sure to follow Generation Iron on Facebook, Twitter, and Instagram.
*Images courtesy of Envato
References
Kubo, K.; et al. (2019). “Effects of squat training with different depths on lower limb muscle volumes”. (source)
Chiu, L.; et al. (2011). “A Teaching Progression for Squatting Exercises”. (source)
Chandler, T.; et al. (1989). “The effect of the squat exercise on knee stability”. (source)
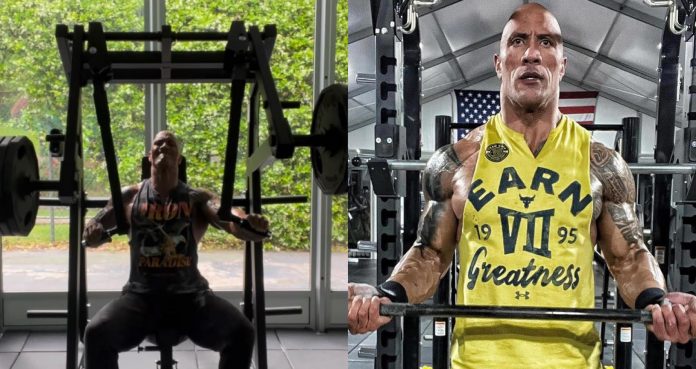
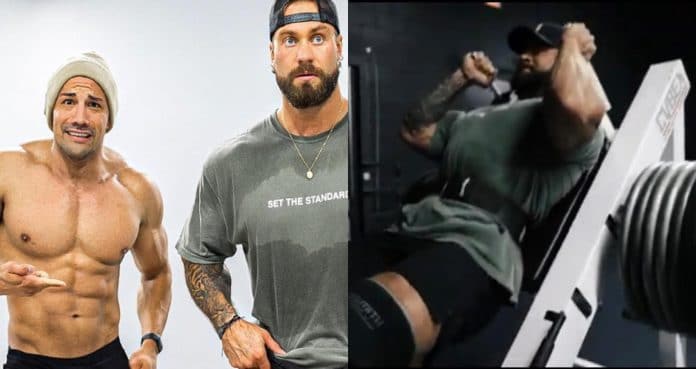
The Rock Shares ‘Chest Finisher’ To End Massive Chest & Back Workout
The Rock likes to focus on “quality, controlled reps” in order to get the best pump.
Dwayne ‘The Rock’ Johnson has been in the entertainment business for years now. He has been able to combine his passion for fitness and his incredible physique with entertainment, both in the ring and on the big screen. The former WWE superstar continues to share workout tips on social media and recently gave out a “chest finisher” to throw into your next chest day.
There are many actors in Hollywood that have to keep up their physique in order to play certain roles. The Rock is at the top of that list, keeping up with a shredded physique with incredible mass. Thanks to his home gym, The Rock has been able to get pumps in at any time of the day. His overall motivation to fitness has created a legendary physique.
In this particular workout, The Rock was hitting chest and back. He ended it by completing 20 reps per arm on the seated chest press machine. The Rock explained that he likes to focus on “quality, controlled reps” in order to get the best pump possible.
“Great chest finisher closing out my chest training today.Alternating 20 reps per arm with controlled negatives, then dual reps to fatigue with 3 second negatives.* on Saturday’s I usually train chest + back together and concentrate on quality, controlled reps for an intense pump as well as bringing the volume down since they’re major body parts to not overwork.Great one today.Worked hard.Raised the bar.
Have a productive weekend, my friends ?? and crush your cheat meals!!??”
The Rock Fitness Routine
The Rock is currently preparing to play a role in the movie Black Adam. This is a superhero movie and it is clear that Johnson is aiming to have his physique in the best shape possible. He is doing this by taking on new focuses.
The Rock has been focusing on tension in order to get a bigger pump during his workouts. This places high value on mind-muscle connection and is an effective way to build muscle. This is what he is accomplishing with quality, controlled reps over the course of his workouts.
Social media has seen that The Rock is famous for his cheat meals and he reminds everyone to enjoy them over the weekend. If there is a fitness mind to follow, The Rock is near the top of the list and he continues to share his wisdom and knowledge.
For more news and updates, follow Generation Iron on Facebook, Twitter, and Instagram.
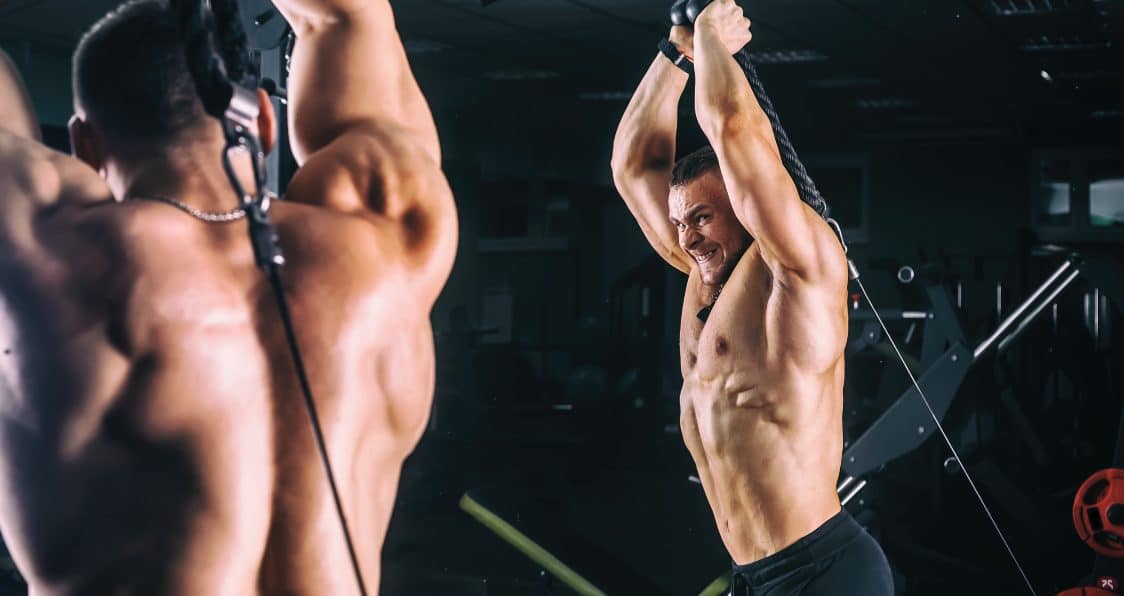
Build Sleeve Ripping Triceps With This Crazy Arm Workout
Build those ripped tris with this workout.
Biceps and triceps are two sides of the same coin and yet tris don’t get the same love as the bis, but this triceps workout can change that. Generally, the muscles which can’t be seen in the mirror directly like the tris, back, rear delts, hams, and calves don’t get the same treatment as their counterparts. We love to show off our muscles and if we can’t see them then we start to think others won’t either. But this is why these are the weak muscle group for most people. They just don’t get that much love.
Triceps consist of three heads and a great pair of tris should look like a horse kicked you in the back of your arm. Muscular tris can make your arms look significantly bigger as they add symmetry and size. Plus, they can help give your biceps shape so you really add a well-rounded look of symmetry, size, and shape to your biceps’ aesthetic.
You’ll have to hit your tris from all the three angles to train them effectively. The perfect triceps workout is a blend of compound and isolation exercises, plus resistance and bodyweight exercises. What you will find by doing this is that your workouts will never suffer because you will have so much diversity in your routine. With plenty of exercises, you won’t feel so bogged down and won’t suffer from any of those unwanted plateaus either.
We’ll be starting this workout with isolation exercises to exhaust our tris at the beginning of the workout, so we don’t have to lift heavier weights later in the compound exercises. We’ll be using a lot of variety in this workout to completely annihilate your triceps so you see those desired results to strength, size, and symmetry. Let’s jump into this triceps workout so you can get the most out of your arm day routine.
Sleeve Ripping Triceps Workout
This great sleeve ripping triceps workout will make you buy a new shirt every time you flex. Those bulging tris can add to any aesthetic and make your arms look absolutely massive. With the right approach to lifting and working your triceps, not only will your biceps benefit, but your overall physique will as well.
Exercises
Sets
Reps
SUPERSET
Cable Triceps Pushdown
3
30, 20, 10 (descending)
Elastic Band Triceps Pushdown
3
10, 20, 30 (ascending)
END SUPERSET
Incline Bench Dumbbell Skullcrushers
4
30, 25, 20 followed by 10 reps drop set
Dumbbell Kickbacks
3
20
Smith Machine Close-Grip Bench Press
3
20, 15, 10 (descending)
SUPERSET
Dips
3
Until Failure
Diamond Push-Ups
3
Until Failure
END SUPERSET
Exercise #1 and #2 (Superset) – Cable Triceps Pushdown & Elastic Band Triceps Pushdown
The first exercise of this workout should completely burn out your tris. Perform these exercises with a strict form. Stand straight, don’t lean over the bar or the bands, lock your elbows at your sides, and bring your hands over your elbows at the top of the movement.
Related: Eight Best Dumbbell Exercises For Your Triceps
In the elastic band triceps pushdowns, hang the bands around the cable pulley machine so the handles or the ends of the bands are at your chest level. In the lower reps set, increase the resistance on the bands by grabbing them higher and reduce the resistance by holding it by its ends.
Exercise #3 – Incline Bench Dumbbell Skullcrushers
The last set of this exercise is a drop-set. After completing the 20 reps, increase the weights by at least 50% and complete the remaining 10 reps. In this workout, we use many advanced training techniques to ignite new gains in our tris.
Hold a dumbbell in each hand and lock your elbows over your forehead where they are perpendicular to the floor. Hold the dumbbells with a hammer grip and bring them close to your shoulders at the bottom of the movement. Rotate your wrists to a dumbbell chest press position at the top of the movement and contract your triceps.
[embedded content]
Exercise #4 – Dumbbell Kickbacks
In this exercise, we’ll be using the rest-pause technique. After you’re done performing the 20 reps on an arm, take a five-second rest and then do more reps on the same arm until you hit failure.
Throughout this workout, focus on squeezing your tris with every rep and maintain a mind-muscle connection. Don’t just go through the motions. By the end of this workout, your triceps should be filled with blood and lactic acid and asking for mercy.
Related: 5 Exercises To Build Horseshoe Triceps
Exercise #5 – Smith Machine Close-Grip Bench Press
We prefer the smith machine close grip bench presses over the barbell presses because it adds a lot more stability, reduces the stress from the wrists, and adds more tension on the tris while limiting the pec recruitment.
In the intraset stretching sets, hold the bar at the bottom of the movement over your chest for 10 seconds after completing the aforementioned reps. Without racking the weights do more reps until you reach failure.
Exercise #6 and #7 (Superset) – Dips & Diamond Push-Ups
We’ll end this workout with bodyweight exercises done to failure. If you still have some gas left in the tank, feel free to add resistance. You could also perform this superset using the blood flow restriction technique (BFR) by tying elastic bands around your arms.
Perform the dips on parallel bars while keeping an upright stance. Don’t lean forward as it will recruit your chest. In the diamond pushups, form a triangle with your hands under your chest, so your thumbs and index fingers are touching each other and forming a triangle.
Wrap Up
The right triceps workout will enhance your goals for the better and give you that bulging aesthetic you want most. A great combination of compound and isolation exercises, what you will find is variety in your workout while also feeling like you are accomplishing what you want. Be prepared to buy a couple of new shirts for this triceps workout is one to rip the sleeves right off. You will love the way you look and the way you feel with this amazing triceps workout.
Let us know what you think in the comments below. Also, be sure to follow Generation Iron on Facebook, Twitter, and Instagram.
*Images courtesy of Envato
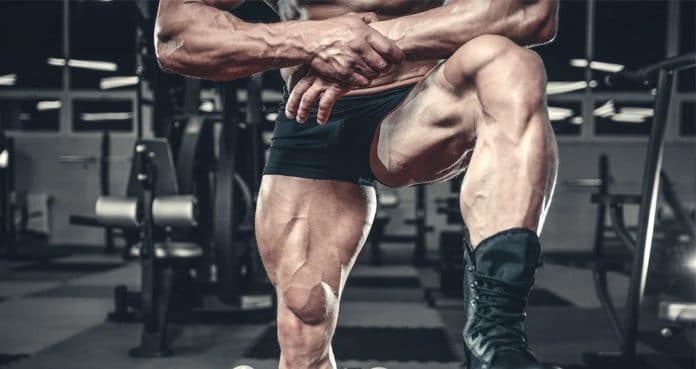
3 Better Muscle Builders Than The Barbell Back Squat
Try out these three exercises during your next leg day to replace the barbell squat!
Gym culture is oddly obsessed with impressing powerlifters. Somehow the sport of powerlifting has bled into everyday gym goers to worship the big 3 including the barbell back squat.
However, most gym goers simply want to have jacked legs.
And if you want jacked legs, you would ditch the barbell back squat for other quad builders. I know, that sounds blasphemous, but the barbell back squat is not as good of a quad builder as other exercises.
And this is not a matter of opinion. This is undeniable physiology and biomechanics. It’s like water being wet. You can’t debate it. So if you have any ounce of an open mind, let’s me explain everything to you.
How Quads Grow
For most bilateral squats, the goal is to build the quads with some glute development as well. Quads like any other muscle grow from mechanical tension, the force produced by your muscles. This is often confused with load because the barbell back squat is generally a heavy exercise, so people assume it builds tons of muscle.
However, your muscles have no idea how much weight is on the bar, nor it give a flying fairy about it. Your muscles only detect tension, so your quads can only detect the tension placed on it. Lifting heavy is great, but only if that load is applying mechanical tension across the quads.
This is why the barbell back squat is a poor quad builder for many people. Despite it’s heavy load and absolute obsession among the fitness community, the barbell back squat forces a bar over your center of mass or else you would topple over like a losing Jenga tower. Based on your mobility and limb ratios, you will likely not get much knee flexion from this position.
Knee flexion is simply a fancy word meaning the knee bend you achieve especially as your knees travel forward. Due to structural and mobility limitations, most people can’t barbell back squat deep with an upright posture without butt wink. That’s the position needed to stimulate more quad growth.
Furthermore, barbell back squatting is highly fatiguing.
So when you’re feeling dead after 2 heavy sets of barbell back squatting, that’s not because your quads are generating much muscle growth. It’s because your entire body is collecting tons of fatigue. The exercise has a deeply poor stimulus to fatigue ratio.
This is not to say it doesn’t build muscle. It certainly does, but it builds a less than expected amount for a higher price point.
Better Muscle Builders
So to build your quads, you need deep knee flexion. This position trained through a full range of motion while minimizing fatigue is far more important than total load. In fact, arguably the best exercise on this list is also the lightest.
Here’s the list starting with the front foot elevated split squat.
1 – Front Foot Elevated Split Squat
You’re essentially doing split squats with your front foot elevated. Pretty straightforward.
This exercise trains each leg individually with the rear leg for support. The position allows you to manipulate the joint angle of one leg to maximize knee flexion. In addition, it requires less mobility and will also help your lower body mobility in the hips and ankles.
For the elevation, use anything that is about 5-10 inches off the floor. Press through your entire front foot as you keep you push your knee forward and sink down with an upright or relatively upright torso down. If your knees are able to go past your toes, that’s a good thing!
Don’t listen to outdated coaches who tells you that’s bad for your knees. That’s how you build mobility and more importantly, that’s called deep knee flexion. It means your quad is actually contracting through it’s full range of motion and experiencing the mechanical tension needed to grow in size.
Start this exercise off with dumbbells. You will notice as you progress and use heavier dumbbells, they might hit the box you’re using to elevate your front foot and limit range of motion. This is where it’s best to use an elevation with minimal surface area or simply switch to having a barbell on your back.
For a barbell set up, use a squat rack. And yes, you can do split squats in a rack, not just barbell squats.
Finally, if you want even more quad growth, you can get more knee flexion by elevating the front heel.
2 – Hack Squat
It’s odd that machines get such a bad rep. Some people see barbell exercises as the meat and potatoes of a program while they describe machines as “accessories” whatever the flying fairy that means.
Ironically, the hack squat takes all the pitfalls of the traditional barbell back squat and fixes it allowing for more quad growth.
The angle and stability of the machine allows for more knee flexion without worrying about the weight folding you over. In other words, the hack squat fits everybody’s structure allowing for more quad growth. You are able to get deeper with a hack squat as well.
[embedded content]
Although, for my fellow short lifters, most hack squat machines will end at the bottom when you can still go lower. An easy fix is to slap on some yoga blocks underneath the pad to extend the range of motion.
There are also 2 setups I particularly like with hack squats. Banded and unbanded. With an unbanded version, you load the bottom stretched position more. Adding bands to the hack squat increases the resistance at the top of the movement where you’re typically stronger.
I’ve also noticed banded hack squats tend to be more joint friendly with my clients as well, but certainly train both versions.
3 – Leg Press
For whatever reason, people are sticklers about barbell back squat depth and form. If you don’t go low enough, you’re wimpy dork who didn’t squat like a man. However, all of these critics will happily slap on a billion plates on the leg press and do a bunch of reps with a microscopic range of motion.
Not to mention people leg press with bouncy uncontrolled reps. They like seeing the weight they’re lifting more than actually growing their quads.
However, if you’re serious about your leg day, doing proper full range of motion leg presses are brutal for the quads. The angle allows for a deep range of motion that will fit most people’s structure.
I like to have clients do them for both lower and higher reps. The lower reps allow for some heavier strength work which can feed a person’s ego.
Higher rep work really pumps your quads into a new dimension and skyrockets your mental strength.
A bit of an exaggeration there, but the leg press will grow you bigger quads than the barbell squat regardless of the rep range.
[embedded content]
Learning to Think For Yourself
Look, I don’t hate the barbell back squat. It’s cool and required for powerlifting. However, it has it’s major limitations that nobody talks about. People do it because they’ve been taught to without rhyme or reason. As a result, they’ve grown an emotional attachment towards it.
This is clearly the case when you tell a bro that the barbell back squat is not a great muscle builder and they’re so triggered, they’re about to have a heart attack. That scenario is more common than you think.
But anyways, you need to reassess your exercise selection if you want actual quad muscles. The type that have lines of definition, not those flabby dimensionless chunks most guys have.
Chris Bumstead Hits Leg Day With Men’s Physique Competitor Christian Guzman
Chris Bumstead joined Christian Guzman for a massive leg day workout.
Chris Bumstead continues his Olympia prep by hitting all body parts in hopes of bringing his fourth consecutive victory in December. Recently, Bumstead was joined by Men’s Physique competitor Christian Guzman for a leg day workout in Stuart, FL.
Guzman shared the workout to his YouTube page as part of a series called “Summer Shredding.” Before the workout, Guzman took a trip to pick up more supplements and enjoyed a meal of egg whites, onions, salsa toast, and coffee. From this point on, the duo traveled to Revive Gym in order to hit a lower body workout.
[embedded content]
Chris Bumstead & Christian Guzman Leg Workout
Warm-Up
Single-Leg Extensions
Standard Leg Extensions
Hamstring Curls
Workout
Hack Squats
Bulgarian Split Squats
Seated Calf Raises x Hamstring Curls
Chris Bumstead and Christian Guzman began the leg day with warm-up sets of three different variations. It began with single-leg and standard leg extensions. The duo then hit some hamstring curls to really get the blood flowing into the legs. Guzman quickly learned how Bumstead trains and said it was refreshing to see a different style.
“Out of everyone I have trained with, Chris is calm. It’s like a very, very composed, calm, this is what we’re doing, tempo. Like, I haven’t heard him make a noise. It’s awesome. It’s refreshing to see. It’s not what you think and this is from the f***ing number one Classic Physique competitor to ever be in this world,” Guzman said of Bumstead.
Once the warm-up was finished, Bumstead and Guzman continued onto hack squats. they were both wearing leg sleeves and Bumstead added a lifting belt during his sets. Both athletes were exerting great amounts of energy by the look of the video.
The exact amount of sets and reps was not revealed. Guzman added a final set on this machine with resistance bands. For his final set, Bumstead reached 630 pounds with seven plates on each side.
“I feel like I’m having a heart attack on this machine every time,” Bumstead said.
Chris Bumstead and Christian Guzman moved to the dumbbell rack to perform Bulgarian split squats next. Bumstead began his sets with 150-pound dumbbells and no straps. Not only is Bumstead one of the best competitors on stage, he is also one of the strongest. Guzman opted for 90-pound dumbbells and the duo performed at least three sets.
The workout ended with a superset of seated calf raises and more hamstring curls. It is clear that both competitors were able to get the most out of leg day by the looks of it. For Chris Bumstead, this is part of a bulking phase that is meant to put on size in order to win the Olympia once again.
For more news and updates, follow Generation Iron on Facebook, Twitter, and Instagram.
Jay Cutler Reveals Four Best Exercises To Build A Monstrous Chest
Jay Cutler put together a chest and bicep workout where he shared some of the top workouts.
Jay Cutler is one of the all-time greats in bodybuilding and has continued to maintain an impressive physique in retirement. Recently, Cutler put together a chest and bicep workout where he shared some of the top exercises to build monstrous size.
Cutler is a four-time Olympia champion. His first victory came in 2006 when he was able to end an eight-year reign by Ronnie Coleman. Since calling it a career on stage, Curler has continued to build a following because of his knowledge and passion for fitness and bodybuilding.
On Sunday, Jay Cutler released his most recent workout video sharing some of the top chest exercises that help build size and width.
[embedded content]
Jay Cutler Chest & Bicep Workout
Standing Calf Raise Machine – 2 warmup sets of 10-12 reps, 4 working sets
Seated Calf Raises – 3-4 sets of 10-12 reps
Incline Hammer Press Machine – 3-4 sets of 10-12 reps
Flat Dumbbell Press – 3 sets of 10-12 reps
Cable Chest Press – 3 sets of 10
Flat Dumbbell Flyes – 3 sets of 10
Bicep Curl Machine – 1-2 warmup sets, 3 working sets of 10-12
Bicep Curls w/ EZ Bar – 4 sets of 10
Seated Bicep Cable Curls – 3 sets of 12
Hammer Curls – 3 sets of 10
Chest
Jay Cutler hit chest with some of his favorite exercises here. That was highlighted by dumbbell press on a flat bench. This was the second exercise of the day but Cutler believes it is No. 1 on his list on chest day.
“Favorite exercise, if you asked me what the best exercise to grow your chest, it is the seated, lying flat dumbbell press. Dumbbells preferably just because I always had one side that was stronger than the other. You guys ask that question a lot. Isolateral movements.”
Cutler began the chest portion of his workout with the incline hammer press machine before moving to dumbbell presses. Following three sets in both exercises, Cutler decided to take on the cables. This is a movement that he admits to not doing each week but decided to perform it in this particular workout.
The final chest exercise of the day was dumbbell flyes. Cutler laid on a flat bench and grabbed two dumbbells that were lighter in weight than those he used for presses. He explained that this exercise is great to build a certain area of the chest.
“You guys looking to build your under, outer pecs, great exercise for that. You notice an arch in my chest, even when I bench, with a lot of those movements I try to keep the chest out.”
Biceps
Jay Cutler added biceps to chest day in retirement because he admits to not liking arm day. He also trains triceps on shoulder day.
“I wanted to take arm training out of my routine because I hate it so much. I’ll be honest, I hate bi’s and tri’s. So instead of having a bi’s and tries day, which I did for most of my career, I moved them to chest and shoulder days.”
This was the next portion of his workout performing different variations of curls including seated cable curls and hammer curls. Cutler also performed an EZ bar curl with a wide grip. He used a thicker bar in order to focus on his grip and make the lift more difficult.
“I do not like to curl with a thin bar. This is a wider grip. It kills your ego a bit because you have to be lighter with the weight.”
Calves
Jay Cutler makes sure to include calves into his regular training. This was the first movement that he did in order to warmup and get the blood flowing. Cutler performed sets on the seated calf machine and standing calf machine. Some say that they target different areas of the muscle but Cutler is not so sure.
“They always say that with calf training, the standing calf works the inner calf and the seated works the outer because you’re seated in a bent-knee position. I don’t know if I believe that very much.”
For more news and updates, follow Generation Iron on Facebook, Twitter, and Instagram.
Summer Abs Made Easy
Summertime is around the corner and that means it is time to show off the abs!
Sooooo, the summertime is fast approaching and some of you may not be quite ready until those abs are at full peak.
So get ready to up your LISS morning cardio, or your afternoon HIIT, or even your post lifting elliptical and treadmill time. As exhausting as it sounds, for those who have more time, you may go to doing two sessions per day.
Be ready to adjust your diet and reduce your calories, and don’t forget 3500 calories is in 1 lb of body fat, so make it simple, just reduce your calorie consumption by 500 calories a day in order to lose 1lb of body fat per week.
But today I am not going to dwell on diet and cardio, I am going to delve into how you go about sculpting those abdominal muscles.
So how do you get your abs to look sculpted? All you have to do is follow the simple circuit routines below and they will be ready in time for the sunshine.
Ab Circuit 1
Upper Abs *
Lower Abs*
Obliques*
Weighted cable crunch
Hanging knee raise
weighted cable crunch
Sets
5
5
5
Reps
20
20
20
Times Per Week
2
2
2
Superset with stomach vacuum with 20 seconds on vacuum during each set
Then repeat again so you have repeated the circuit at least 5 times, continue to do this twice a week in conjunction with your weights routine.
How to execute each movement
Kneeling Weighted cable crunch:
To execute, attach a rope attachment to a high pulley cable, then adjust the weight accordingly on the stack.
Then grab the pulley and get into a kneeling position, your buttocks should be resting on top of your feet. Keeping your elbows bent and hands at either head height or shoulder height, crunch down as far as possible.
Pause at the bottom, then slowly return to the starting position.
Hanging knee raise:
Grip the bar with hands around shoulder width apart. Once you’re hanging with your feet slightly off the floor, slowly pull your knees up keeping your legs together.
Pause for a second, and slowly lower your knees back to the starting position.
Weighted oblique cable crunch:
Set up the high pulley cable machine by attaching a grip attachment and selecting the weight you want to use.
If you are crunching the right oblique’s then grab the left pulley grip with right hand with the handle behind your head, feet should be shoulder width apart.
Pull down your oblique as far as possible without crunching into the hips.
Stomach Vacuum:
To execute the Stomach Vacuum, stand upright and place your hands on your hips, and exhale all the air out of your lungs. Expand your chest, and bring your stomach in as much as possible, and hold. Imagine that you are trying to touch your navel to your backbone.
Ab Circuit 2
Upper Abs
Lower Abs
Obliques
Rectus Abdominis
Upper ab crunch reach
Windshield wipers
Landmine oblique twist
Barbell rollout
Superset with
Plank (30 seconds)
Superman plank (30 seconds per side)
Side plank (30 seconds per side)
–
Sets
5
5
5
5
Reps
20
10 per side (20 in total)
10 per side (20 in total)
10
Times Per Week
2
2
2
2
Then repeat again so you have repeated the circuit at least 5 times, continue to do this twice a week in conjunction with your weights routine.
How to execute each movement
Upper ab crunch reach:
This is pretty straight forward.
Simply lay on your back, knees bent, and raise your arms towards the ceiling and keep doing so while you are performing the crunch.
Plank: (forearm plank)
Start in a push up position, then place your forearms on the floor, and tighten the core, also ensure the quads, glutes are tight also. Keep this position for at least 30 seconds
Windshield Wipers: (on the floor)
Lie on your back on the floor with a slight bend in your knees.
I sometimes like to do these with my arms holding something behind my head.
Then tighten the glutes and engage the core, then keep both legs together, start them both on one side of your body, let’s say the left.
Then bring your feet off of the ground and bring your legs to the other side of your body while engaging the core, mimicking a windshield motion.
Ensure your legs do not touch the floor then mimic the motion and go back to the other side.
Continue in this fashion until you reach 10 reps per side.
Alternative versions:
This can also be done on a bench, aptly named the ‘sitting windshield wiper’ and also the hanging version, named the ‘hanging windshield wipers’.
Superman plank:
Set up in a high plank position then simply raise your left arm off the floor and point it out in front of you, and then also raise your right leg off the ground and keep it pointing behind you, So you are essentially mimicking Superman’s flying post, hence the name. Brace the core and hold this position for 30 seconds then switch sides
Landmine oblique twist:
Set up an olympic bar in a landmine position and add the appropriate weight.
Then raise the bar to your chest, that is the starting position.
Then while holding the bar with both hands rotate and twist your trunk from one side to the other. Ensure you engage your core while doing this movement. Do 10 reps per side.
Side plank:
Start by lying down on your side, with your feet stacked together.
Then begin by supporting your body on your right forearm and ensure the hips are kept tight and away from the floor and are in line with your feet.
Hold this position for 30 seconds then switch sides.
Alternative versions:
This can be made harder by using your hand instead of your forearm.
Barbell rollout:
Load up a barbell, and ensure the plates are able to roll so they need to be cylindrical.
Get into a kneeling position and grip the bar. Then keep the core tight and slowly roll the bar out in front of you, then use your core to bring the barbell back towards you, then repeat and go again for 10 reps
So there you have it, you have two awesome ab routines to kick your butts until summer comes around.
So until next time keep pumping!
Most Effective V-Line Ab Workout & Diet Program to Build the ‘Sex Lines’
The Ultimate Guide To Building V-Cut Abs!
Once upon a time, abs were considered the epitome of fitness. Don’t get us wrong. Washboard abs are still regarded as a hallmark of peak fitness, but with a caveat — the v-line.
V-lines, also known as V-cut abs and “sex lines,” have grown in popularity over the last few years. The v-shape is created where the obliques meet the trans versus abdominis muscles.
The Rectus abdominis is made up of two connected muscle bands that run parallel down either side of your abdomen. It is the muscle people are usually referring to while talking about abs. On the other hand, obliques are fish-gill-like muscles on the sides of your abs.
Developing the v-cut is easier said than done — it requires a strict diet and training regimen. Since the sex lines are located near the bottom of your abdomen, crunches alone won’t help you build the coveted shape. Additionally, going overboard with leg raises and other lower ab exercises can hurt your lower back. You need to strike the perfect balance between your training, diet, and recovery program to carve the v-lines.
Related: 8 Closely-Guarded Secrets of Guys with Abs, Revealed!
V-Line Workout Program
Given below are two V-cut ab workouts that will help you carve your dream midriff:
V-Line Workout #1
Superset
V-up: 3 sets of 20 reps
V-up Hold: 3 sets of 10 reps (with a 5-second hold)
Superset
Hanging Leg Raise: 3 sets of 20 reps
Hanging Leg Raise Hold: 3 sets of 10 reps (with a 5-second hold)
Lying Leg Raise: 3 sets of 20 reps
Rotating Mountain Climber: 3 sets of 20 reps
Reverse Crunch: 3 sets of 20 reps
Ab Wheel Rollout: 3 sets of 15 reps
Russian Twist: 3 sets of 20 reps (each side)
How to perform the exercises:
1. V-Up
[embedded content]
Lie face-up on the floor with your legs extended straight and arms at your sides.
Raise your arms over your head and lift your legs off the floor slightly to get in the starting position.
Simultaneously lift your lower and upper body off the floor as if you’re trying to touch your toes.
Pause and contract your abs at the top.
Return to the starting position slowly and repeat for reps.
Tip: For the V-up holds, pause at the top of the movement for five seconds and contract your abdomen before returning to the starting position.
2. Hanging Leg Raise
[embedded content]
Grab a pullup bar with an overhand grip.
At the starting position, your arms should be extended and your feet off the ground.
While maintaining a slight bend in your knees, tighten your core and use your abs to raise your feet toward your shoulders.
Pause and contract your lower abs when your legs are parallel to the floor.
Return to the starting position.
3. Lying Leg Raise
[embedded content]
Lie face-up on the floor with your legs straight and your hands underneath your low back for support.
While keeping your legs straight, raise them until they are slightly above parallel.
Pause and contract your lower abs at the top.
Slowly lower your legs back to the starting position.
Repeat for recommended reps.
4. Rotating Mountain Climber
[embedded content]
Assume a pushup position with your hands underneath your shoulders. Your body should be in a straight line in the starting position.
Drive one knee towards the opposing elbow until the hip reaches 90 degrees of flexion.
Slowly return to the starting position.
Alternate between reps.
5. Reverse Crunch
[embedded content]
Lie face-up on an exercise mat with your knees together, and your legs bent to 90 degrees, feet planted on the floor.
Place your hand under your hips for lower back support.
Tighten your abs and drive your knees towards your chest.
Pause and contract your lower abs at the top.
Return to the starting position and repeat for recommended reps.
6. Ab Wheel Rollout
[embedded content]
Kneel on the floor and place the ab wheel directly under your chest. Your knees should be under your hips and hands under your shoulders at the starting position.
You can cross your legs or keep them straight back. Your feet can remain on the ground, or you can lift your feet, which requires more stability.
Keeping your arms straight, slowly roll the wheel straight outwards. Roll out as far as you can before you feel your back arching.
Pause for a moment in this position. Then, squeeze your abs to slowly return to the starting position.
Pro tip: Instead of rolling the wheel straight, you could roll it to the sides to put more stress on the V-line.
7. Russian Twist
[embedded content]
Sit on the floor with your knees bent and your feet flat on the floor.
Hold a weight plate with your arms fully extended in front of your chest.
Lean back so your torso is at a 45-degree angle with the floor.
Twist your torso as far as you can in one direction. Pause and contract your obliques at the top.
Reverse the motion and return to the starting position.
Repeat on the other side.
Related: Best on the Planet! Physiques with Picture Perfect 6-Pack Abs
V-Line Workout #2
Hollow Body Hold: 3 sets of 10 reps (with a 10-second hold)
Toes To Sky: 3 sets of 20 reps
Superset
Medicine Ball Slams: 3 sets of 45-60 seconds
Burpee: 3 sets of 45-60 seconds
Side Plank: 3 sets of 45-60 seconds (each side)
Heavy One-Arm Suitcase Carry: 3 sets of 20-second walks (each side)
Landmine Oblique Twist: 3 sets of 15 reps (each side)
Exercise Guide:
1. Hollow Body Hold
[embedded content]
Lie face-up on an exercise mat.
While maintaining a tight core, slowly raise your arms and legs towards the ceiling until they are at a 60-degree angle with the floor.
Hold the position for 45-60 seconds before returning to the starting position.
Repeat for reps.
2. Toes To Sky
[embedded content]
Lie face-up on an exercise mat.
Bend at your knees so that your upper legs are perpendicular and your lower legs are parallel to the floor.
In one motion, pull your knees toward your chest, raise your hips off the floor, and extend your legs straight towards the ceiling so your legs are perpendicular to the floor at the top.
Slowly return to the starting position and repeat for recommended reps.
3. Medicine Ball Slams
[embedded content]
Hold a medicine ball at your chest level with a soft bend in your knees.
Rise tall on your toes and extend the arms overhead with the medicine ball. Contract your V-lines in this position.
Exhale and aggressively slam the med ball into the floor.
Catch the med ball as it returns from the floor.
Repeat for the desired number of repetitions.
4. Burpee
[embedded content]
Start in a squat position with your knees bent, back straight, and your feet placed shoulder-width apart.
Lower your hands to the floor in front of you so they’re just inside your feet.
With your weight on your hands, kick your feet back to get in a pushup position.
Keeping your body straight from head to heels, do one pushup.
Do a frog kick by jumping your feet back to their starting position.
Stand and reach your arms over your head and jump explosively.
As soon as you land with knees bent, get into a squat position and do another repetition.
5. Side Plank
[embedded content]
Start by laying on your side with your feet stacked on top of one another.
Place your right elbow under your right shoulder. Your forearm should be perpendicular to your body.
While keeping your neck neutral, breathe out and brace your core.
Lift your hips off the mat so that you’re supporting your weight on your elbow and the side of your right foot. Your body should be in a straight line from your ankles to your head.
Keep your abdomen contracted as you hold the position.
Return to starting position and repeat on your left side.
6. Heavy One-Arm Suitcase Carry
[embedded content]
While holding a heavy kettlebell or dumbbell in one of your hands, stand upright with a shoulder-width stance.
Keep your shoulders down and core engaged throughout the exercise.
Begin walking forward slowly for 20 seconds.
Alternate between sides for the recommended number of repetitions.
7. Landmine Oblique Twist
[embedded content]
Stand upright with a shoulder-width stance.
Set up a barbell in a landmine attachment or the corner of a room.
Grab the opposite end of the barbell with both hands and raise it to your eye level.
As you pivot with your right foot, twist your torso to the left, then explode back to a neutral position.
Repeat on the other side.
Check Out: Debunked: The Top 5 Myths About Six Pack Abs
V-Line Diet Program
Like abs, everyone has V-lines, but most of us choose to protect them under a thick layer of fat. If you want to expose your V-cuts, you should begin by fixing your diet.
One of the most effective ways of bringing down your body fat percentage is to be on a calorie deficit — meaning, you should expend more calories than you consume in a day.
Here is a brief rundown on the relationship between body fat and ab visibility:
20%+: You will be soft around your midsection, and your abs will not be visible.
15-19%: It can be considered healthy, but it is unlikely that you will see any ab definition.
10-14%: You will be lean, which means your abs will be visible.
5-9%: You will be shredded to the bone.
It is no secret that abs are made in the kitchen. If you are new to the fitness lifestyle and want to build the v-line, you should begin your transformation journey by counting your calorie for two to three days. Note: Your weight should be consistent — meaning you should not be following a diet of any kind — while counting calories.
After you have the average value for your daily calorie and macronutrient intake, you can proceed to the next stage — diet planning.
According to Mayoclinic, if you want to lose one to two pounds per week (a generally healthy and sustainable goal), you need to burn between 500 and 1,000 calories more than you eat each day — or between 3,500 and 7,000 calories per week. Subsequently, you could start your weight loss journey by cutting out 500 and 1,000 calories from your diet to enter a calorie deficit state.
After you have a calorie consumption goal, use a macronutrient calculator to determine your daily protein, carbs, and fat goals. Knowing the macro breakdown makes it easier to design a transformation diet.
Must Read: Terrence Ruffin Details Diet Plan Used Heading Into Arnold Classic
V-Cut Abs Diet Plan
If you are in the 15-19% body fat percentage range, use the diet laid down below to shed the extra fat.
Breakfast
3 oz chicken breast, boneless, skinless
3 egg whites
1 whole egg
½ cup green pepper
6 almonds (as a side)
Snack
Boiled Sweet Potato
Lunch
4 oz turkey breast, boneless, skinless
½ cup brown cooked rice
1 cup broccoli, steamed
½ large grapefruit
Snack
⅔ cup cottage cheese
¼ cup blueberries
10 almonds, chopped
Dinner
Chicken breast with Mediterranean brown rice
Bedtime
20g whey protein isolate
½ tbsp peanut butter, natural
Cardio
Although you could build the v-lines without adding cardio to your fitness regimen, it will take significantly more time than if you performed cardio every day. Cardio is one of the most efficient ways of burning calories and entering a calorie deficit state.
Besides its fat-loss properties, according to research, cardio can help lower your heart rate, improve blood flow, regulate blood sugar and increase your daily energy level. [1] [2]
For best results, you should incorporate two cardio sessions in your V-line workout routine. The first session will be a 10-minute fasted HIIT (high-intensity interval training) workout that you should do first thing in the morning.
For the second cardio workout of the day, you’ll be doing a 30-minute LISS (low-intensity steady-state) workout in the evening. Performing both types of cardio routines will ensure you’re getting the best of both worlds and are optimizing your fat loss.
The Role of Genetics in Building V-Lines
Before wrapping up, let’s address the elephant in the room — genetics. As much as we hate to admit it, genetics play a huge role in bodybuilding. Your genetics are solely responsible for the shape, structure, and muscle origin and insertion.
Some people will find developing the V-cut easier than others. But why is that, you ask? Every individual has varying amounts of fat around their abdominals, and the skin around their abdominals might be thicker. Additionally, some people have abs that are uneven or at an angle.
The time an individual needs to devote to workouts, diet, and cardio, and their results will depend upon their genetics. Furthermore, the V-cut definition and muscle separation vastly depend on a person’s genetics.
Must Read: The Truth About Genetics, Bodybuilding & How To Overcome Them
Summing Up
V-cut abs are amongst the most stubborn muscle groups. Building the V-line requires strict training, diet, and a recovery program. You cannot develop the sex lines even if even one of the three components is not in order. Hence, you might come for the aesthetics but will stay for the overall fitness level you achieve while working for the V-cut abs.
Which is your favorite ab exercise? Let us know in the comments below. Also, be sure to follow Generation Iron on Facebook and Twitter.
References
Yang, Z., Scott, C.A., Mao, C. et al. Resistance Exercise Versus Aerobic Exercise for Type 2 Diabetes: A Systematic Review and Meta-Analysis. Sports Med 44, 487–499 (2014). https://doi.org/10.1007/s40279-013-0128-8
Donnelly, J.E., Honas, J.J., Smith, B.K., Mayo, M.S., Gibson, C.A., Sullivan, D.K., Lee, J., Herrmann, S.D., Lambourne, K. and Washburn, R.A. (2013), Aerobic exercise alone results in clinically significant weight loss for men and women: Midwest exercise trial 2. Obesity, 21: E219-E228. https://doi.org/10.1002/oby.20145
How Terron Beckham Builds Massive Muscle & Burns Stubborn Fat
Photo via @fbaftermath Instagram
These workouts from Terron Beckham will show you how he builds his chest and burns away fat.
Terron Beckham is a fitness model, rugby player, and social media personality with many followers seeking his advice on workouts, nutrition, and lifestyle tips. With great content centered around health and fitness, Terron works to deliver only best for his loyal followers.
When it comes to working hard and pushing our bodies, looking to those online with shredded physiques is a good place to start. They’ve done it all before and are living proof of what can happen when you grind in the gym. We all know great exercises and many of us know our way around a gym, but with advice from those who do it every day, and who produce stellar content at that, you may learn a thing or two that can take your workouts to the next level.
These two workouts below are great for building your chest and burning stubborn fat with a high-intensity workout. What you will find are a few exercises, but the right amount of sets and reps to push muscular endurance and strength in order to get the workout done as efficiently as possible.
Full Name: Terron Beckham
Weight
Height
Date Of Birth
220-225 lbs.
5’9’’
07/28/1992
Profession
Era
Nationality
Fitness Model, Social Media Personality, Rugby Player
2010
American
Photo via @fbaftermath Instagram
About Terron Beckham
Terron was always active as a child, playing sports and taking advantage of outdoor activities. He was a talented football player, but he would eventually give this up in order to put himself through school. But fitness remained a large piece of his life and he continued to lift and stay as shredded as possible.
He began sharing photos and videos online which garnered attention and the followers started coming. When his career as a fitness trainer and model began to show prospect, he decided to take advantage of it and continued to impress. Now with a large following on social media, he continues to share his workout advice and post great content to educate and entertain his many followers.
Photo via @fbaftermath Instagram
Terron Beckham Training Routine
In two of his videos, Terron shares his training routine involving a high-intensity interval fat burning workout and a chest building workout. The HIIT session is great for those on limited time looking to get their heart rate going and get a sweat on. While you will use certain machines, like a treadmill and rowing machine, a gym will have these so you can complete with no problem.
The chest building workout is great for those looking to beef up their chest and pump those pecs. The exercises you will know, however, the higher sets and reps Terron has included in this workout are great for those looking to build muscular endurance and really push those muscles to fatigue.
HIIT Workout
Warm-Up
Terron warms up with a 5 minute jog or some form of light cardio to get the blood flowing and heart rate going. A warm-up is obviously important for all workouts, however, with a high-intensity interval workout, you will need to give those muscles some special attention.
Workout
Superset: 5 sets total
Rowing Machine: 500 meters
Med Ball Burpees: 10 reps
End Superset
Treadmill Sprints: 100m, 10 times
Box Jumps: 20 reps
Run: 1 mile
[embedded content]
Chest Workout
Exercises
Sets
Reps
Dips
4
25
Bench Press
4
2-6
Incline Flys
4
10-15
Cable Crossover
4-5
10-15
Chest Press Machine
4
10
Dips
4
25
Aside from the bench, these other exercises are designed for higher reps to push endurance and build up muscular fatigue. The bench press is the only heavy exercises to get a pump and push your chest at the start of your workout. Lower reps allow you to go up in weight within what you feel as your limits.
Terron starts and finishes with dips to develop triceps and chest thickness for better development while also serving as a great warm-up and workout finisher. With a total of 200 dips, you will certainly feel the burn in both your chest and triceps as you seek to push yourself to the limit.
[embedded content]
Why High Intensity Interval Training Is Great For Gains
High-intensity interval training is a fast-paced form of cardio where you engage with intervals and alternate between high intensity and recovery style intervals. What you will find is the high intensity work pushes you to the limit for a brief period of time while you recover in between with lighter work. HIIT is typically done on the bike, treadmill, rowing machine, or elliptical, but everyone has their preference.
People love HIIT sessions because it provides for a number of benefits to aid in your muscle building and endurance enhancing goals. By getting your heart rate going, what you will find is more calorie burn, more energy, and the ability to push yourself to the limit while building effective muscle and losing fat.
Benefits of high-intensity interval training include:
Promotes fat loss: Gets your heart rate and metabolism going to burn more calories and change your body composition to develop your desired physique (1).
Increases muscle: Works your muscles by improving strength and requiring them to push through fatigue, thus building more muscle (2).
Boost endurance: Effective cardio builds that endurance base and improves oxygen consumption to train longer and with more intensity (3).
Wrap Up
Terron Beckham knows exactly what to do in efforts to lean down and build muscle. These two workouts are great to include in your own routine as you look to get that desired physique you want most. Taking notes from those fitness folks who know what it takes can greatly enhance our chances of seeing our own goals become reality. A great HIIT fat burning session and a chest building workout will ensure you see gains and do so effectively in the process. Give these workouts from Terron Beckham a try and watch those gains take off today.
Let us know what you think in the comments below. Also, be sure to follow Generation Iron on Facebook, Twitter, and Instagram.
*Images courtesy of Terron Beckham Instagram
References
Viana, R.; et al. (2019). “Is interval training the magic bullet for fat loss? A systematic review and meta-analysis comparing moderate-intensity continuous training with high-intensity interval training (HIIT)”. (source)
Blue, M.; et al. (2018). “The effects of high intensity interval training on muscle size and quality in overweight and obese adults”. (source)
Laursen, P.; et al. (2002). “The scientific basis for high-intensity interval training: optimizing training programmes and maximizing performance in highly trained endurance athletes”. (source)
How to Implement Reactive Deloads
Ever wonder how to cause less fatigue and add deloads into each week’s workout plan?
Here’s the dream. You go to the gym. You lift weights. You sleep and recover. Then, your muscles get bigger and you lift bigger weights. Rinse and repeat forever until you look like a Greek statue on steroids.
Unfortunately, getting stronger linearly forever like this is not possible. It appear this way when you first start lifting, but as you inch towards your genetic ceiling, things get tricky.
You realize, you’re building significantly less muscle as you advance in your training career. You’re forced to train a bit harder and because of the loads you’re lifting, fatigue is accumulating on your body.
Adding 5-10 lbs to the bar every week is now an impossible fantasy.
This is where hardcore lifters often learn about deloads where you reduce training variables so fatigue can dissipate. However, the common practice of deloading is pre-planned and usually requires a week of not making progress for the whole body.
This works well in powerlifting where deloading is often popularized, but many people who are primarily training for size would do better with reactive deloads.
Instead of a preplanned deload week for your entire body, reactive deloads are autoregulated deloads that only require you to reduce training variables for the body parts necessary.
This allows you to maximize on progressive overload and only deload when you need it. Here’s how to do it.
When is a Deload Necessary?
To reactively deload properly, you need to know when it’s time to deload. This means you need objective metrics, not subjective feelings.
Sometimes, people get sore, have a poor’s night of sleep, or simply feel unmotivated where they think a deload is warranted. However, the human body is a beautiful adaptable machine. It can adapt in ways you don’t realize it’s doing. This is why, you could feel like utter piss, but still be recovered.
Because being recovered for your workouts objectively means your performance is returned to baseline. So if you could bench 185 for 3 sets of 8 this week just like you did last week, your bench press is fully recovered. If you can perform even better, then you’ve recovered and your body has adapted to do more. Brownie points.
So before identifying the need for a deload, you need to be tracking your perforamnces consistently. This is basic 101 type of stuff that still gets ignored by dudes going to the gym for decades. Without tracking, your performance, you might be deloading when you don’t have to. For example, soreness doesn’t necessarily mean deload. If you take an unnecessary deload, you wasted a week that could’ve netted you more gains.
Alternatively, without tracking your performance, you might be missing out on deloads you should’ve taken. Remember how I said, you can feel like piss but be recovered? Well the opposite is also true. You can be unrecovered but feel great.
You might feel fresh and the weights might be moving well, but without tracking your performance, some people don’t realize their performance keeps dropping as they’re body is collecting fatigue faster than this country is collecting inflation.
So once you’re tracking your performance, you’ll know it’s time to do a reactive deload when you do your first set and your performance drops. This is a clear sign for a reactive deload which I’ll show you how to do in just a sec.
But let’s say you match your performance on set 1, but barely made it out alive to do so. Chances are, your performance will drop on set 2 as well, so you might as well do a reactive deload. There’s no point in risking it for the biscuit and digging yourself a deeper recovery hole.
How to Implement Reactive Deloads
Once you’ve determined it’s time for a reactive deload, you will turn all subsequent sets for that exercise into speed work. This means you drop the load significantly. It doesn’t matter by how much, but 50% is a good rule of thumb. This allows you to accelerate the movement on the concentric at a fast tempo.
Eccentric tempo should still be controlled to maintain technique. Rep target should be much lower as well to minimize fatigue. To keep it simple, I have all of my clients aim for 5 or 6 reps for all reactive deload sets.
The speed work allows you to reach high levels of muscle activation while allowing neuromuscular fatigue to drop along with relieving stress on the joints and connective tissue.
These sets should feel super easy. It’s tempting to add more weight or do more reps, but that’s defeating the purpose. You’re adding unnecessary fatigue when you should be clearing fatigue.
It’s also so easy that it’s tempting to skip the set altogether. However, speed work allows you to train the movement keeping it fresh in your nervous system and can boost your performance in that lift later on which is always great when you return to training that movement hard.
After you’ve deloaded that movement, you have the option to do a reactive deload for all other movements in your training week that directly involves that muscle.
This will be based more on feel. If you initially had a small drop in performance, just deloading that movement should suffice. However, if you had a bigger drop in performance and overall, feel pretty beat up, deloading from all relevant movements for the week is wiser.
Nonetheless, you don’t deload from all exercises. For example, if deloaded from Romanian Deadlifts, you can still keep progressing your biceps curls and lateral raises because those muscles/movements are still recovering. Push them hard and don’t let weeks of growth slip by where they don’t have to.
Time to Reactive Deload
So let’s say last week you did hack squats for 3 sets of 12, 11, and 10 with 200 lbs. This week, you’re expected to do better and possibly even max out the rep range to get 3 sets of 12 with 200 lbs. However, your first set sucked. You only got 9 reps instead of 12. The remaining 2 sets are now reactive deloads where you’ll do sets of 5 with 100 lbs.
Next week, you’re likely to hit 3 sets 12 with 200 lbs and then you can keep pushing the weight or reps up from there.
That’s essentially what training comes down to. You train hard and push your performance up. When you can’t train hard, you dump fatigue strategically as if you’re breaking up with a deadbeat girlfriend. Then once the baggage is gone, you keep moving on up.
Rinse and repeat and you can get more strong and muscular than ever before. This alone simplifies your training as well and destroys the need for complex periodization models.