Tag: Workouts
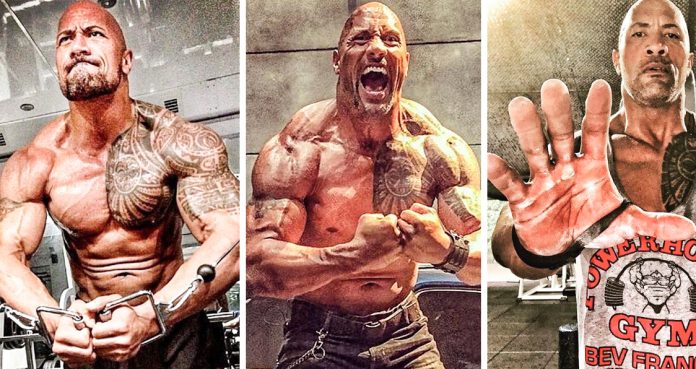
Dwayne “The Rock” Johnson Photos Which Will Motivate You to Hit the Gym
Dwayne “The Rock” Johnson Photos Which Will Motivate You to Hit the Gym
The Rock is one of the most inspirational peoples of our time. If you ever find yourself dragging your feet, a scroll through Dwayne Johnson’s Instagram feed should be enough to pump you up.
The Rock started out as a football player and then made his way into the WWE (then WWF), before making it big in Hollywood. Johnson is amongst the most widely recognized and humble celebrities.
Photos of The Rock to Motivate You
The Rock travels with his own gym. The Iron paradise has all the equipment you would ever need to train any muscle group. The picture above is from his ‘portable’ gym which travels with him.
The physique Dwayne Johnson has is the result of intense workouts. The Rock has had multiple injuries and surgeries, but they couldn’t stop him from improving his physique with every passing year.
Clanging and Banging
Johnson has a partnership with Under Armour. His Project Rock brand has become Under Armour’s number one seller worldwide. These numbers say something about The Rock’s popularity.
If you’ve ever wanted to try Johnson’s workout, he lays it out for you in this video. The Rock is solid as a rock and strong as a bull. He can move serious weights with a perfect form.
The Rock takes no off days. Even while he is traveling around the world, he hits the gym first thing after landing to kick jet lag. Dwayne is a fan of bodybuilding and is seen at big shows like Mr. Olympia.
The Hardest Worker in the Room
When was the last time you saw such jacked forearms on a movie star? The Rock isn’t just another celebrity, he’s the ‘people’s champ’. Johnson has a heart of gold and you’ll often see him go out of the way for his fans.
Some people might think it’s easier for The Rock because he’s such a big star. It is actually the other way around. The more successful The Rock gets, the harder it is for him as he’s setting higher standards for himself to beat.
It was time for a transformation picture. The Rock has been successful in transforming his physique for his movie roles. The picture in the right is from the sets of the movie Pain & Gain.
The Rock’s quads can put a pro bodybuilder to shame. The legs are the foundation of your body. You can’t have a strong upper body without strong legs. Follow Johnson’s lead and start to love training your legs.
Johnson’s Instagram feed is a paradise for bodybuilding lovers. It’s great to see one of the biggest Hollywood stars is into the fit lifestyle. We believe The Rock will inspire many people to transform their physiques and their lives.
View this post on Instagram
Finish your week strong. It is not the critic who counts; not the man who points out how the strong man stumbles, or where the doer of deeds could have done them better. The credit belongs to the man who is actually in the arena, whose face is marred by dust and sweat and blood; who strives valiantly; who errs, who comes short again and again, because there is no effort without error and shortcoming; but who does actually strive to do the deeds; who knows great enthusiasms, the great devotions; who spends himself in a worthy cause; who at the best knows in the end the triumph of high achievement, and who at the worst, if he fails, at least fails while daring greatly, so that his place shall never be with those cold and timid souls who neither know victory nor defeat. And after the man leaves the arena, he will then pour fine tequila ? on his oatmeal and brown sugar because he’s also kinda f*cking crazy and finds that concoction delicious. Excerpt from one of my favorite speeches from one of my favorite Presidents. I may or may not have made up the last sentence.. ??? it’s conjecture at this point. #ManInTheArena #Roosevelt26 #DareGreatly #AndGetToWork
A post shared by therock (@therock) on Nov 2, 2018 at 3:49pm PDT
We think it’s enough motivation for now. It’s time to get off of your butt and as The Rock likes to say ‘Get to work.’ Head to the gym and make it the best workout of your life.
Which is your favorite The Rock movie? Let us know in the comments below. Also, be sure to follow Generation Iron on Facebook and Twitter.
*Header image courtesy of Instagram.
Exposing The Biggest Training And Nutrition Myths In Bodybuilding
The Biggest Training and Nutrition Myths
The fitness trend has been on the rise around the world. This has also given a boost to the number of broscientists eagerly waiting to spread their knowledge. These pseudo bodybuilders are responsible for most of the myths you hear about training and nutrition in your gym.
It is important you don’t listen to their advice. You might not have someone who could put you on the right path when it comes to your diet and training. So, we have put together a list of the biggest training and nutrition myths you should avoid following.
Biggest Training Myths
1. You Should Always Train To Failure
If only we got a nickel for every time we heard someone say this in a gym. The most common myth regarding training is you need to be hitting failure in every set if you want to build muscle mass. This is complete BS!
Training to failure every time can actually have the opposite results of what you desire. Muscle exhaustion in every set can lead to overtraining which in turn can halt your growth. Overtraining can also negatively impact your immune system.
2. Start Your Workout With Heavy Compound Movements
Many people believe it is better to start your workouts with heavy multi-joint exercises like squats, bench press, etc. The reason they give for this is, you are the strongest at the beginning of your workouts and hence can lift more weights.
On the other hand, your body doesn’t know how much weight you’re lifting. It is your ego which pushes you to lift more. You need to break your muscle tissues in order for them to grow bigger. The weight you lift for it doesn’t matter.
You should start your workouts with isolation exercises, so you fatigue your muscles early. Doing this will help you get the same results lifting relatively light as you would if you were lifting heavy. This also dramatically reduces the chances of an injury.
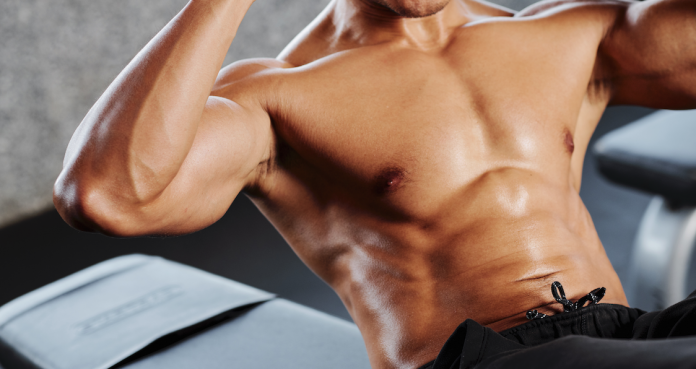
3. You Can Spot Reduce The Fat On Your Belly
The reason most people do crunches and ab exercises is that they want to melt off the fat from their midriffs. Hardly do they realize this won’t do anything for them. Spot reduction whether in the case of abs, under arms or thighs, doesn’t work.
You need to take an overall approach to your training. If you want to lose weight, controlling your diet and doing cardio will give you the best results. Spot reduction is only possible if you go for liposuction.
Biggest Nutrition Myths
1. You Can’t Gain Muscle Without A Protein Supplement
While it is true protein is the most important macronutrient when it comes to gaining muscle mass, you don’t need a protein powder to help you with your goals. If you consume enough protein from your natural diet, you don’t need a protein supplement.
If your goal is to build muscle, you should be taking two gram of protein per pound of body weight daily. For eg- you should be consuming 200 gram of protein every day if your body weight is 100lbs.
2. Eating Fats Make You Fat
Many people think eating foods which contain fats make them gain weight. Due to this, they completely eliminate fats from their diet. Removing fats from your diet can cause bodily dysfunctions as it is an essential macronutrient needed by your body.
Fats help in storing energy in your body which you can utilize when your body is running short of carbohydrates. Fats also help with lubricating your joints, digesting nutrients and maintaining your body temperature.
3. You Should Consume Protein First Thing In The Morning
There is a myth that consuming protein first thing in the morning will help with muscle gain. The logic they give for this is since you’re on an empty stomach, your muscles get a rich and pure supply of protein. This is as far away from the truth as it can be.
If you consume protein on waking up, your body will start using it as a source of fuel for the entire day. If you want to lose weight and build muscle, you should start your day with fats. Doing this will help you burn fat throughout the day even while you’re resting.
Which, according to you, are the biggest training and nutrition myths in bodybuilding?
Let us know in the comments below. Also, be sure to follow Generation Iron on Facebook and Twitter.
Kai Greene Leg Workout For Massive Wheels
Kai Greene Leg Workout Routine
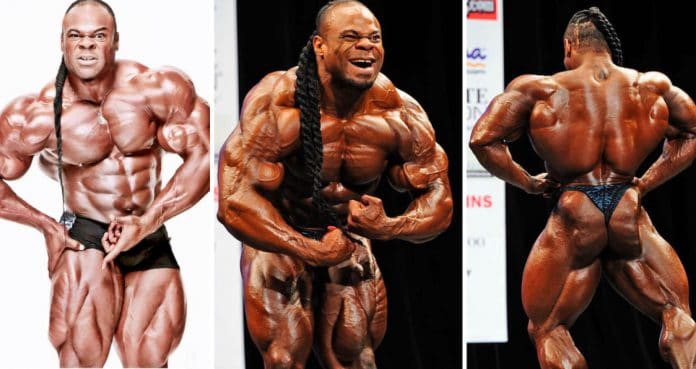
Kai Greene is one of the most widely recognized bodybuilders of our time. His mind-blowing physique, inspirational words, incredible artwork, trademark hairdo (and infamous grapefruit video) have earned him fans all over the world.
Kai Greene Stats
Full Name: Kai Greene
Weight
Height
Year Of Birth
317 lbs.
5’8’’
1975
Arms
Chest
Thights
22″
58″
33″
Kai Greene made his Mr. Olympia debut in 2009 and competed in the world’s most prestigious bodybuilding contest until 2014. Kai Greene’s Mr. Olympia track record:
2009 – 4th place
2010 – 7th place
2011 – 3rd place
2012 – 2nd place
2013 – 2nd place
2014 – 2nd place
Related: Is Kai Greene Challenging Phil Heath In Recent Tweet?
For four years in a row (2011-14), Kai Greene came close (but not close enough) to conquering the throne. Some fans consider Greene a part of the “uncrowned Mr. Olympia” club accompanying bodybuilding legends like Flex Wheeler, Kevin Levrone, and Shaun Ray.
The Predator’s legs are one of the biggest reasons behind his success on stage. Greene’s vastus medialus (quad teardrop) striations are unmatched, hams in perfect symmetry with quads, and his calves have a life of their own.
But before we dive into Kai Greene’s leg workout, let’s get to know him a little better. Shall we?
Also Read: TOP 6 UNCROWNED BODYBUILDERS OF ALL TIME
The Kai Greene Story
Born and raised in Brooklyn, New York, Greene had a tough childhood. After being orphaned at 6-years-old, he spent most of his youth in foster homes.
Throughout his younger years, Kai struggled to find a place in the community. The ensuing feeling of being an outcast turned Greene into a trouble child. His regular misconducts put him at risk of being kicked out from both his school and foster home.
Finding The Anchor
Weight training came as Kai Greene’s saving grace. Greene started training at the age of 13 and used the gym as an escape from all his problems.
Kai’s 7th grade English teacher realized his bodybuilding potential and started encouraging him to compete in teen bodybuilding shows. This little push was all Kai needed to turn his life around.
It did not take Kai Greene too long to realize that he had great bodybuilding genetics. He was growing faster than others his age and was beating kids older than him at bodybuilding competitions.
Check Out: Decoding Genetics: Check If You Have Bodybuilding Genetics
The Predator Was Born
Over the next five years, Kai Greene competed in various unofficial teen bodybuilding shows. Since Greene was bigger and more jacked than other teenagers his age, he dominated every contest he entered.
By the time Mr. Getting It Done turned 19, he had earned his Pro card in a natural bodybuilding federation, the 1994 NGA American Nationals. The early and quick success made Kai realize that he could make it big in bodybuilding, and make it big, he did.
Kai Greene & His Haitus
Since 2014, Kai Greene fans have been complaining about his absence from the Olympia stage. But hardly do they know, this is not the first time Kai has taken a break from competing.
Kai’s first show as an IFBB Pro was the 1999 World Championships in Slovakia. Although Greene placed 4th, he was not satisfied with his performance.
Determined to work on his weaknesses and sculpt one of the greatest physiques of all time, Kai Greene went back to the drawing board and took four years away from the competitive circuit.
Related: Kai Greene Meets With Universal Execs During Olympia Week
Kai Greene Leg Workout
Because of his size and appearance, many people expect Kai Greene’s workouts to consist of lifting heavy, grunting, and cursing throughout the workout. But, the reality is different.
Kai Greene Workout Principles
It does not matter if Kai is training legs, arms, or back. He swears by the following training principles:
1. Form Is King
Let’s do an activity. It will be worth it, we promise.
Set a five-minute timer, log onto YouTube, and watch (at 2X speed) as many Kai Greene training videos as you can.
Now here is what you need to do – note down every time Kai compromises on his form in favor of lifting heavy. At the end of the five minutes, you will probably have – zero entries.
“The weight is a tool. Do you focus on the hammer or the nail? You better focus on the thing you’re trying to hit.”
2. Mind-Muscle Connection
If you see Kai Greene pose, you would know that he can move each fiber in his body at will. The control he has over his muscles is incredible. Kai’s movements are precise, contractions are hard, and each rep is harmonious with the next.
Bodybuilding is not about lifting as heavy as you can. To sculpt your dream body, you need to contract your muscles and visualize your goal physique with every rep to ensure maximum muscle fiber recruitment.
This technique was first made famous by Arnold Schwarzenegger. If you do not feel a muscle pump by the end of an exercise, you would be better off dropping the weight (and your ego) and trying again.
Next Read: The Importance of Mind-Muscle Connection To See Huge Gains
3. Warm-Up
Kai Greene spends 15-20 minutes warming up before every workout. Benefits of warming up include:
Improves flexibility.
Enhances performance.
Less muscle tension and pain.
Improved range of motion.
Increased blood flow and oxygen.
Lower risk of injury.
Mr. Getting It Done believes that his relatively long warm-up routine gets him in the right mindset to train and improves his focus. According to him, he gets more alert, aware, and his neurological connections get sharper.
Related: Follow This Insane Pro Warm-Up Routine For Ultimate Gains
4. Volume is Key
The Predator uses a lot of sets and reps in his workouts. He does not leave the gym unless he has annihilated his muscles. You will be doing up to four sets of eight different exercises and completing 12-20 reps in each, so get ready for the Kai Greene leg workout.
5. Take Your Time
Take your focus off the clock and put it where it should be – on your lower body. You are not in a race against time here. Take as long as you need between sets. Do not begin the next set until you are properly rested.
Kai Greene Leg Training Routine
Kai Greene’s monster truck wheels are a result of years of hard work and consistency. His leg workouts include a combination of advanced training principles and a variety of exercises to train his lower body from different angles.
The Predator’s legs are one of his strengths, but it was not always this way. He has been training for over 20 years with a focus on sculpting the perfect pair of wheels. Greene is presently working on adding more detail to his upper legs and making them rounder.
1. Superset
Glute Kick-Back: 4 sets 20 reps
Hip Abductor: 4 sets 20 reps
Kai Greene trains in a specific order that addresses body parts from weakest to strongest. He believes that it helps him build better muscular symmetry.
Greene starts his leg workouts with glutes and then transitions to training his calves, then hams because, according to him, that is the order of needed improvement. He trains his quads in the end because they are superior to other parts of his legs.
2. Superset
Standing Calf Raise: 4 sets 20 reps
Seated Calf Raise: 4 sets 20 reps
There are no accessory muscles on Mr. Getting It Done’s training program. Kai performs four sets each of standing and seated calf raises. While the standing variation trains the gastrocnemius, seated calf raises are optimal for training the soleus muscle.
Kai Greene uses the standing calf raise machine for the first leg of the superset. If you do not have access to a standing calf raise machine at your gym, you could use a smith machine with an aerobic stepper or a leg press machine for the exercise.
While performing calf exercises, you need to make sure you are following a full range of motion. Your heels should only be a couple of inches away from the floor at the bottom of the movement. On the other hand, at the top of the movement, you should look like a ballerina on her toes.
Related: 10 Reasons Why You’ll Never Have Big Calves
3. Superset
Jefferson Squat: 4 sets 20 reps
Hip Adductor: 4 sets 20 reps
Kai Greene played a big role in bringing back the Jefferson squat.
Named after circus strongman Charles Jefferson (1863-1911), the unique squat variation can help increase leg strength, size, core stability, and build power in multiple planes of movement.
How To Perform Jefferson Squat:
Stand over a barbell, facing one of the weighted ends with the bar between your legs. Your front foot should be facing forwards, and your rear foot rotated 90 degrees outwards.
Place your feet at a distance so that as you go down into your squat, your knees are directly above your ankles.
Squat down over the bar and grab it using a mixed grip with one hand behind you and one in front of you.
Drive down into the ground through your feet and stand tall, bringing the barbell straight up between your legs.
Return to the starting position with a slow and controlled motion.
Repeat for recommended reps.
4. Unilateral Standing Leg Curl: 4 sets 20 reps
Unilateral standing leg curl is an incredibly effective exercise to target your hams individually. It is especially beneficial for people whose hams are lagging their quads, glutes, and calves.
Standing leg curls can also limit the use of momentum and jerking motions. Keep your toes pointed throughout the exercise to ensure maximal hamstring muscle fiber recruitment.
5. Lying Leg Curl: 4 sets 20 reps
Kai Greene likes to think about his hams as piano wires throughout the entire range of motion. You do not want to be moving the weight primarily focusing on your shins or lower body. At the top of the movement, focus on squeezing your hams.
Lying leg curl can do for your hams what bicep curls do for your biceps. Perform the exercise with a slow and controlled movement, and you will feel every fiber of your hamstring working.
The Predator does not limit his workouts to a pre-defined number of sets. If he feels that he was not focused during the first couple of sets, he makes up for it by performing couple more sets of the exercise.
Remember – bodybuilding is not about going through the motions. Your goal should be muscle annihilation.
6. Barbell Stiff-Legged Deadlift: 4 sets failure
For the barbell stiff-legged deadlift, Kai Greene uses relatively lightweight. To put maximum tension on his hamstrings, he turns his toes in and points his heels outwards (forming an “A” with his feet) while performing the lift.
The Predator maintains a slight bend in his back throughout the exercise and uses his hamstrings and glutes to move the weight.
If you cannot perform the movement with a 2:1:2:1 rep tempo (two seconds on the way down, a second’s pause at the bottom, two seconds on the way up, and a second’s pause at the top), and have to jerk your body up and down to punch out the reps, you are probably going too heavy.
7. Squat: 5 sets 20 reps
No, this is not a typo. Kai Greene gets to the squat rack at the end of his leg workout. Since you will be fatigued at this point in your workout, you need to make sure you are not compromising on your form.
Mr. Getting It Done maintains total control for the entire set and length of each rep. Rather than dropping down and blasting up, Kai focuses on feeling every inch of the rep and tries to intensify the contraction on his legs.
8. Leg Press: 5 sets 20 reps
Unlike most lifters, Kai Greene does not like to go super heavy on the leg press machine. While fitness noobs focus on locking out their knees and squeezing their quads at the top of the movement, Greene tries to contract his legs throughout the entire rep.
If you can only move the weight a few inches while performing the leg press, it is a sign you have more weight on the machine than you can handle.
Wrapping Up
The next time you hear fitness gurus talking about why Kai Greene cannot make a comeback, remind yourself that the guy in question here has no qualms taking four years off if he believes he can bring a better package to the stage. Should you be doubting his commitment and ability? They don’t call him Mr. Getting It Done for nothing.
Who, according to you, has the best legs in the fitness industry? Let us know in the comments below. Also, be sure to follow Generation Iron on Facebook, Twitter, and Instagram.
German Volume Training: Does it Increase Strength or Just Size?
Hypertrophy Training Programs
From strongmen to bodybuilders, one of the most gym related questions coaches face is “how do I build muscle as quickly as possible?”
It is a combination of effective programming, proper nutrition and patience that gets results but unfortunately, this process takes time.
There are no “quick fixes” or shortcuts when it comes to developing muscle strength and size. It’s important that a long term perspective is adopted if you want to be successful in your endeavors.
While it is true that change takes time, there are some training programs that will produce results more rapidly than others.
This article will cover German Volume Training (GVT) which is a high intensity hyperthrophy resistance training program that will bring about significant changes in muscle mass.
All You Need To Know About German Volume Training
This advanced training program was created by Charles Poliquin, a strength and conditioning coach of legendary status.
The reason that GVT is so intense is because it combines high volumes, short rest periods, and a restricted time frame.
When it comes to strength training programs, there are two standard ways of programming. Programs either tend to be short and intense or moderate in both length and intensity.
The high intensity programs cannot be sustained over a prolonged period of time as the body simply cannot deal with the extreme intensity and stress related to the workouts for a prolonged duration.
This explains why the GVT program lasts just 30 days. Upon completion, it is recommended that you don’t attempt it again for a minimum of 6 months. That’s how intense it is!
If this program is run too regularly or without extended breaks between cycles, there is a real risk of overtraining.
Overtraining should be avoided at all costs as it will cause regressions with performance, increase fatigue levels and elevate the risk of experiencing injury (1).
When asked about the GVT approach, Poliquin said that he recognized that many of the top weightlifters in the western world were German.
As a result, Poliquin met with German national weightlifting coach, Rolf Feser, and asked him about his athlete’s performances.
Feser explained that he would periodize his athletes training and take them through ten sets of ten, ten sets of five and ten sets of three.
Feser was a big advocate of the law of repeated efforts and believed that weightlifters were simply not performing enough sets in order to get strong.
How German Volume Training Works
With GVT, there are three workouts to be completed over a five day period. This cycle is then to be repeated six times in total giving you a 30 day program.
For those who are more advanced, it is possible to cycle the program in its entirety up to three times.
Every workout contains two supersets or four exercises in total. The supersets are labeled “A” and “B”.
Superset A is considered the primary superset and include exercises which utilize a large amount of muscle, expend a great amount of energy and consequently bring about large adaptations.
Meanwhile, superset B is considered the accessory superset. The exercises here are specifically chosen to facilitate improvements with the primary lifts, add more volume and generally accelerate progress.
For superset A, both exercises are performed for ten sets of ten repetitions with a ninety second rest between sets. The load that is to be used for this should be 60% of your one rep max.
The reason you start at 60% is to ensure that you can complete all ten sets. 60% of your one rep max will likely feel very light to start with, however, after completing ten sets it will feel heavy.
If you manage to complete all ten reps for ten sets, look to increase the weight by four to five percent for the following week.
As the weeks progress, it’s likely that you’ll be using a higher percentage of your one rep max. This is simply because your body will be adapting and allowing for more work to be performed.
To summarize for superset A – perform exercise 1, rest 90 seconds, perform exercise 2, rest 90 seconds and repeat ten times.
Once the 200 reps have been completed, it’s time to move on to superset B.
Superset B involves completing two exercises but only for three sets this time. Additionally, the rest period is reduced from ninety to sixty seconds and the rep range may vary depending on the exercise.
German Volume Training Exercises
It is vitally important that powerful exercises that effectively challenge the body and lead to significant adaptation are chosen for this program.
Ideally, the exercises should recruit a large number of motor units. This is both for superset A and B.
The greater number of motor units recruited, the greater the force generated by the muscles (2).
For example, selecting exercises such as the back squat is highly recommended due to the challenges associated with it and the large number of motor units recruited.
Exercises such as the goblet squat would be seen as less than effective as it is much less demanding than the back squat.
Another example would be to select a french press over a tricep pulldown as it recruits more muscle and therefore places a greater demand on the body.
German Volume Training Workout
There are number of GVT programs in existence that may be used to achieve an array of different goals.
The following program comes directly from Charles Poliquin. The primary focus for this program is full body muscle building.
Day 1 – Chest and Back
Exercise
Sets x Reps
Tempo
Rest (s)
A1 – Neutral Grip Decline Dumbbell Press
10 x 10
4 – 0 – 2
90
A2 – Chin-Ups
10 x 10
4 – 0 – 2
90
B1 – Incline Dumbbell Flyes
3 x 10 – 12
3 – 0 – 2
60
B2 – One Arm Dumbbell Rows
3 x 10 – 12
3 – 0 – 2
60
Day 2 – Legs and Abs
Exercise
Sets x Reps
Tempo
Rest (s)
A1 – Back Squats
10 x 10
4 – 0 – 2
90
A2 – Lying Leg Curls
10 x 10
4 – 0 – 2
90
B1 – Low Cable Pull Ins *
3 x 15 – 20
2 – 0 – 2
60
B2 – One Arm Dumbbell Rows
3 x 15 – 20
2 – 0 – 2
60
*For Cable Pull Ins – Use a weightlifting belt and attach it to the low pulley of a cable machine. From there, lie flat on your back and place the feet inside the belt. From there, drive the knees to the chest and return in a controlled motion.
Day 3
REST
Day 4 – Arms and Shoulders
Exercise
Sets x Reps
Tempo
Rest (s)
A1 – Parallel Bar Dips
10 x 10
4 0 1 0
90
A2 – Incline Hammer Curls
10 x 10
4 0 1 0
90
B1 – Bent Over Dumbbell Lateral Raises *
3 x 10 – 12
2 0 X 0
60
B2 – Seated Dumbbell Lateral Raises
3 x 10 – 12
2 0 X 0
60
*For Bent Over Dumbbell Lateral Raises – sit on the edge of a bench and tip the torso forward so that you are bent over. Drive the dumbbells out to the sides and look to bring the dumbbells up to approximately in line with the ears.
Day 5
REST
Next Steps
On completion of the 30 days you may find that you have made great progress and are enjoying the program.
If so, it is possible to move straight into a 15-day follow up program to help you continue to build on your results. Details of this program can be found below:
Day 1 – Chest and Back
Exercise
Sets x Reps
Tempo
Rest (s)
A1 – Incline Dumbbell Press
10 x 6
5 0 1 0
90
A2 – Wide Grip Pull Ups
10 x 6
5 0 1 0
90
B1 – Dumbbell Flyes
3 x 6
3 0 1 0
60
B2 – EZ Bar Bent Over Rows
3 x 6
3 0 1 0
60
Day 2 – Legs and Abs
Exercise
Sets x Reps
Tempo
Rest (s)
A1 – Bent Knee Deadlifts
10 x 6
5 0 X 0
90
A2 – Seated Leg Curls
10 x 6
5 0 1 0
90
B1 – Twisting Crunches
3 x 12 – 15
3 0 3 0
60
B2 – Standing Calf Raises
3 x 12 – 15
3 0 3 0
60
Day 3
REST
Day 4 – Arms and Shoulders
Exercise
Sets x Reps
Tempo
Rest (s)
A1 – Parallel Bar Dips
10 x 6
3 2 X 0
90
A2 – Incline Hammer Curls
10 x 10
4 0 1 0
90
B1 – Bent Over Dumbbell Lateral Raises *
3 x 10 – 12
2 0 X 0
60
B2 – Seated Dumbbell Lateral Raises
3 x 10 – 12
2 0 X 0
60
Day 5
REST
Does German Volume Training Build Strength?
GVT is primarily a hypertrophy inducing program. After all, studies have indicated that there is a relationship between high volume and substantial muscle growth (3).
But can GVT prove to be a beneficial program for building strength as well as size? Theoretically, could a powerlifter use this program and improve their performance?
GVT may indeed be effective for the powerlifter, most specifically for those who are looking to move up a weight class.
The program will allow them to pack on muscle size thus facilitating an increase in body weight and moving them into the above weight class.
Poliquin recommends a strength specific version of the GVT program which involves a 10 x 6 cycle, followed up with cluster training or a 10 x 3 cycle.
He emphasizes that, providing the weight is constant throughout all ten sets, it is fine to move in and out of periodization.
However, if adopting this program, it would be wise to schedule it into the off-season and use it to firstly develop conditioning before moving onto strength.
If you prefer to stick with the original ten sets of ten reps, that is also fine and it will undoubtedly yield results.
Sets of ten by ten will ultimately push you to the next level and develop maximal strength, work capacity and muscle mass.
German Volume Training Considerations
GVT is a surefire way to get bigger however, Poliquin believes that GVT is more about how fit you are as an individual, rather than how strong or big you are.
He points out that the improvements you make are like a sliding scale dictated by the number of reps you perform which will invariably determine which muscle characteristic is developed.
When it comes to the number of reps used, a lower number of reps will predominantly increase strength capacity but fail to develop muscle size optimally.
Conversely, a higher rep range may more effectively build muscle mass but fail to develop strength in the same way that heavy, low reps will (4).
One thing that is abundantly clear about GVT is that this type of training is not for the faint of heart.
The fact that it is recommended that this program is only completed once or twice per year should be ample warning that this program requires both physical and mental strength.
If you decide to adopt a GVT program, firstly, ensure that you have enough time to dedicate to training as the workouts are long and gruelling.
Secondly, it’s vital that you look to prioritize nutrition and sleep throughout the duration of this program. Both are key recovery components and will ensure that you last the distance and train with real intensity (5, 6).
With that being said, these things should not serve as a deterrent as there is no denying that GVT is a powerful and efficacious strength program that will force the body to adapt and improve.
Final Word
While GVT is an excellent example of an effective hypertrophy program, it may also be of benefit for those who wish to develop their strength and work capacities.
By the time you have completed the 30 day cycle, providing you have been consistent with both training and nutrition, your muscles will have significantly increased in both strength and size.
For more news and updates, follow Generation Iron on Facebook, Twitter, and Instagram.
References:
1-Kreher, Jeffrey B.; Schwartz, Jennifer B. (2012-3). “Overtraining Syndrome”. Sports Health. 4 (2): 128–138. doi:10.1177/1941738111434406. ISSN 1941-7381. PMC 3435910. PMID 23016079.
2-Williams, S. Mark; McNamara, James O.; LaMantia, Anthony-Samuel; Katz, Lawrence C.; Fitzpatrick, David; Augustine, George J.; Purves, Dale (2001). “The Regulation of Muscle Force”. Neuroscience. 2nd edition.
3-SCHOENFELD, BRAD J.; CONTRERAS, BRET; KRIEGER, JAMES; GRGIC, JOZO; DELCASTILLO, KENNETH; BELLIARD, RAMON; ALTO, ANDREW (2019-1). “Resistance Training Volume Enhances Muscle Hypertrophy but Not Strength in Trained Men”. Medicine and Science in Sports and Exercise. 51 (1): 94–103. doi:10.1249/MSS.0000000000001764. ISSN 0195-9131. PMC 6303131. PMID 30153194.
4-Schoenfeld, Brad J.; Grgic, Jozo; Ogborn, Dan; Krieger, James W. (2017-12). “Strength and Hypertrophy Adaptations Between Low- vs. High-Load Resistance Training: A Systematic Review and Meta-analysis”. Journal of Strength and Conditioning Research. 31 (12): 3508–3523. doi:10.1519/JSC.0000000000002200. ISSN 1533-4287. PMID 28834797.
5-Knowles, Olivia E.; Drinkwater, Eric J.; Urwin, Charles S.; Lamon, Séverine; Aisbett, Brad (2018-9). “Inadequate sleep and muscle strength: Implications for resistance training”. Journal of Science and Medicine in Sport. 21 (9): 959–968. doi:10.1016/j.jsams.2018.01.012. ISSN 1878-1861. PMID 29422383.
6-Burke, L. M. (1997-3). “Nutrition for post-exercise recovery”. Australian Journal of Science and Medicine in Sport. 29 (1): 3–10. ISSN 0813-6289. PMID 9127682.
How To Perform The Kirk Shrug
Develop Your Back and Traps With This Shrugging Variation
The kirk shrug is an exercise that was developed by 7-time USPF national powerlifting champion, Kirk Karwoski or “Captain Kirk”.
It is thought that the exercise was used to help Karwoski improve his pulling strength and allow him to lift heavier with the deadlift. The exercise is performed to primarily bring about changes in upper back and trap size, along with an improvement in grip strength.This article will cover the kirk shrug in detail, providing a breakdown of the technique and highlighting a number of benefits associated with the movement.
Kirk Shrug Technique
The differences between the kirk shrug and standard barbell shrug are not huge, therefore pay close attention to the following coaching points.In terms of the weight on the bar, use approximately 25% of your normal working weight for a barbell shrug.
Step One
Start with the loaded barbell on a rack as you would with a standard shrug. Place the feet directly under the hips and grasp the bar at shoulder-width using a thumbless grip. Before lifting the bar from the rack, push the chest up, pull the shoulders back and down and brace the core muscles.
Step Two
Shrug the barbell upward by contracting your lats and traps, imagining that you are attempting to pull the shoulders up to the ears.Remember that movement should only be initiated from the shoulders. The arms should bend slightly to bring the bar up to the belly button, however, ensure that the hips and legs do not assist in any way.Throughout the shrugging motion, ensure that the shoulder blades are pulled back and down. Squeezing tightly between the shoulder blades throughout should help.
Step Three
Once the bar has reached the belly button, perform a static hold for one second while maintaining the contraction of the lats and traps.As far as possible, keep the shoulders shrugged for the full second before controlling the descent of the bar back down to the hips. Resist the weight as far as possible and avoid dropping the bar too quickly.
Kirk Shrug Muscles Worked
The kirk shrug will typically work the same musculature as the standard barbell shrug but in a slightly different manner.
Traps
The trapezius muscle is often seen as the muscle that sticks out from the top of the shoulder. However, this is just the upper portion of the trap muscle. The muscle actually originates from the thoracic (mid) spine and stretches upward attaching to the shoulder blades, collarbones, cervical (upper) spine, and skull.Considering the number of connections that the traps have, they contract to cause a range of shoulder, neck and head movements.The traps are highly active during shrugs as they contract to retract, elevate and depress the shoulder blades.
Lats
The lats are the large wing-like muscles that stretch from the low back up to the shoulders. These muscles contract to cause a variety of movements around the shoulders and spine.The lats insert onto the scapula and when the muscles contract they pull the shoulder blades down. In addition, the lats work to stabilize both the shoulder joint and spine.Therefore, while the lats are not the primary movers during the kirk shrug, they do assist in the depression on the scapula and engage to increase shoulders stability.
Forearm Muscles
The thumbless grip that is used in the kirk shrug places a great demand on grip. By removing the thumb’s involvement, it immediately becomes more challenging to hold the bar.As a result, the muscles of the forearms that control the fingers must work extremely hard to keep the bar in the hands.
Kirk Shrug Benefits
Regardless of whether you are a bodybuilder, powerlifter, sports athlete or are simply just looking to improve your fitness, the kirk shrug can have a substantial impact on the body.This section will detail three of the biggest benefits associated with the kirk shrug.
1) Increases Strength and Stability
Considering the actions and muscle activated during the exercise, the kirk shrug can bring about significant improvements in the upper back and grip strength, as well as improved shoulder stability.Building upper body strength, shoulder stability, and grip strength can help to enhance your workouts, reduce the risk of injury, and simplify a number of everyday tasks.The upper back and shoulders are an area of the body that is commonly affected by poor posture with weakness and instability often being the primary causes.Therefore, a further benefit associated with building upper back and shoulder strength is that poor posture may be rectified (1).
2) Enhanced Performance
If you have reached a plateau with your deadlift or wish to accelerate deadlift progress, the kirk shrug will be valuable.Improving the upper back strength and shoulder stability can allow you to drive the bar more powerfully from the floor and allow you to move beyond any sticking points. If you find grip to be an issue during the deadlift, especially when lifting heavy, consider using the kirk shrug to develop your grip strength.The thumbless grip that is used in the kirk shrug will cause grip strength to substantially improve as the bar is difficult to grip. Increasing your grip strength may contribute to a better deadlift.As well as facilitating deadlift performance, improving your grip has the potential to improve performance with other pulling exercises such as pull-ups, chin-ups, rows, and lat pulldowns.
3) Building Trap Size
In the world of bodybuilding, aesthetics are everything. One thing that is often very eye-catching with top-level bodybuilders is the sheer size of their traps.Considering that the shrugging exercises place the highest amount of stress on the traps (2), there is great trap-building potential.If you have noticed that barbell shrugs aren’t really doing it for you anymore, changing to the kirk shrug may be beneficial. The change of stimulus should allow the traps to begin increasing in size once again.
Why Powerlifters Should Perform Kirk Shrugs
While it is true that shrugs are more commonly in bodybuilding, the kirk shrug can prove to be invaluable for powerlifters.
Using the kirk shrugs as an accessory exercise can facilitate an improved performance with all three lifts – the squat, deadlift, and bench. As highlighted, regularly performing the kirk shrug can significantly build upper back and grip strength and improve performance with pulling exercises such as the deadlift.
However, it can also lead to improvements with the bench and squat too.Firstly with the bench, a large degree of shoulder stability is required. Additionally, increasing the size of the upper back and shoulder can give you a larger, more solid base to bench press from.A combination of increased upper back and shoulder size, strength and stability will ultimately have a positive impact on how much weight you can lift for bench press.Finally, for squats, by building the size of your back, the barbell will have a better “shelf” to sit on. This may improve leverage and confidence when handling heavier loads.
Back Size and Grip Strength Workout
For those who wish to develop upper body muscle size and strength, consider using the following workout that incorporates the kirk shrug.
Exercise 1:
Barbell Rows 3 sets x 10 – 15 reps
One of the best exercises around for back and grip development. To maximize the demand on grip, use an overhand grip and avoid using wrist straps as they will reduce the need for grip strength (#).Once in the bent-over position, avoid moving the trunk or hips and focus on pulling the bar into the body through movement of the shoulders and elbows only.
Exercise 2:
Towel Chin-Ups3 sets x failureFor this exercise, drape a towel over chin-up bars and pull on the towel. The towel will make grip very challenging which will lead to significant grip strength development.Complete as many reps as you possibly can and look to hold the top position of the exercise for as long as possible during the last set.
Exercise 3:
Kirk Shrugs2 sets x 8 repsProgramming 8 reps will give you the opportunity to lift heavy and maximize improvements in the upper back strength and grip strength.
Exercise 4:
Standing Cable Crunch5 sets x 10 – 20 repsYou may be wondering why there is an abdominal exercise incorporated into an upper back session. The abdominals are a key antagonist muscle to the back which means that, when the back is working, the abs generate force to assist in the control of the movement. Therefore, it is important that the abdominals develop at a similar rate to the back muscles so that they can effectively assist the muscles of the back (4).With each rep, hold the contracted position for one full second.
Final Word
There is no doubt that the barbell shrug is an effective exercise for upper back, shoulders, and grip development. The addition of the static hold and increased range of motion in the kirk shrug increases the intensity of the exercise and therefore, may help to accelerate the strength-building process.
References:
1 – Kim, DeokJu; Cho, MiLim; Park, YunHee; Yang, YeongAe (2015-6). “Effect of an exercise program for posture correction on musculoskeletal pain”. Journal of Physical Therapy Science. 27 (6): 1791–1794. doi:10.1589/jpts.27.1791. ISSN 0915-5287. PMC 4499985. PMID 26180322.
2 – Schory, Abbey; Bidinger, Erik; Wolf, Joshua; Murray, Leigh (2016-6). “A SYSTEMATIC REVIEW OF THE EXERCISES THAT PRODUCE OPTIMAL MUSCLE RATIOS OF THE SCAPULAR STABILIZERS IN NORMAL SHOULDERS”. International Journal of Sports Physical Therapy. 11 (3): 321–336. ISSN 2159-2896. PMC 4886800. PMID 27274418.
3 – Coswig, Victor S.; Machado Freitas, Diogo Felipe; Gentil, Paulo; Fukuda, David H.; Del Vecchio, Fabrício Boscolo (2015-12). “Kinematics and Kinetics of Multiple Sets Using Lifting Straps During Deadlift Training”. Journal of Strength and Conditioning Research. 29 (12): 3399–3404. doi:10.1519/JSC.0000000000000986. ISSN 1533-4287. PMID 26595133.
4 – Hirai, Hiroaki; Miyazaki, Fumio; Naritomi, Hiroaki; Koba, Keitaro; Oku, Takanori; Uno, Kanna; Uemura, Mitsunori; Nishi, Tomoki; Kageyama, Masayuki; Krebs, Hermano Igo (2015). “On the Origin of Muscle Synergies: Invariant Balance in the Co-activation of Agonist and Antagonist Muscle Pairs”. Frontiers in Bioengineering and Biotechnology. 3: 192. doi:10.3389/fbioe.2015.00192. ISSN 2296-4185. PMC 4656836. PMID 26636079.
Set Your Calves on Fire with This Workout
Set Your Calves on Fire with This Workout
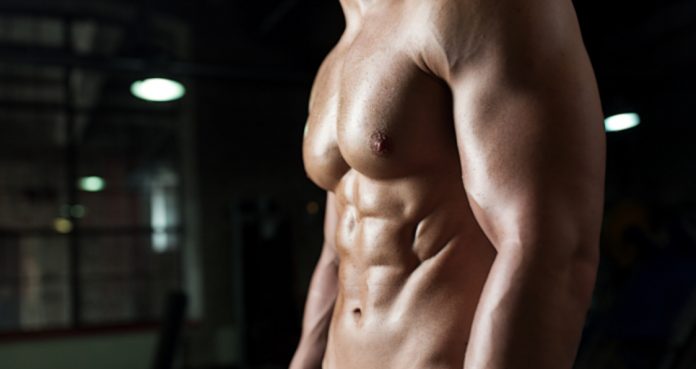
Calves can be one of the most stubborn muscle groups. Most people treat their calves as accessory muscles and throw in a couple of exercises to train them at the end of their workouts. It’s going to take much more if you want to turn your calves into bulls.
You need to train your calves like all your other muscle groups and hit them from all the angles. Your calves are made up of gastrocnemius and soleus muscles which can be targeted with different exercises.
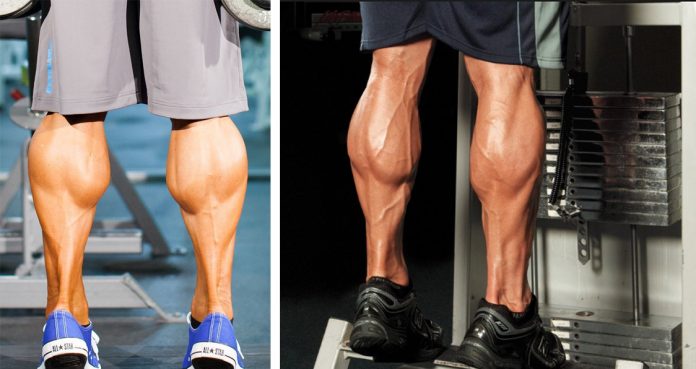
The standing (knees extended) calf exercises work the gastrocnemius muscle while the sitting (knees bent) exercises target the shorter soleus muscle. You need to constantly shock your calves by switching the intensity, volume, and exercises.
Changing your feet placement while performing the calf exercises can also spark new gains. Performing the exercises with a normal foot placement (parallel) targets the medial calves.
Keeping your toes together and heels facing outwards will work the outer calves. If you want to target your inner calves, you should keep your heels together and toes facing outwards.
Calves Blaster Workout
Standing Calf Raises – 3 Sets 30 Reps
A complete range of motion is one of the most important aspects of training calves. Many people make the mistake of overloading the machine and can only move the weights a few inches. You should try to go as deep as you can so your heels are almost touching the floor.
At the top of the movement, your feet should look like a Ballerina standing on her toes. Contract your calves at full extension with every rep. Your calves should have a muscle-ripping pump by the end of this set.
Seated Calf Raises (Changing Feet Placements) – 3 Sets 10-10-10 Reps
Since your knees are bent in the seated calf raises this exercise targets the soleus muscle. In this exercise, you’ll be changing your feet placement to target the three heads of your calves.
Start the exercise with a neutral foot placement and perform 10 reps. Rack the weights and switch your foot placement so your toes are pointing inwards. After completing 10 reps, point your toes outwards and complete the last 10 reps.
Leg Press Calf Raises – 3 Sets 10 Reps
Leg press calf raises are a great exercise as they isolate your calves. You should be able to have a better range of motion in this exercise as this is one of the few calf exercises where your feet will be placed higher than your upper body. This foot placement can give your toes leverage to extend more than the other calf exercises.
Since you’ll only be doing 10 reps on this exercise, you should try going heavier without compromising your form. Use rep tempos and take three seconds to lower the weights, and hold the weight at the bottom for a second. Take two seconds to extend your feet and hold for three seconds at the top of the movement.
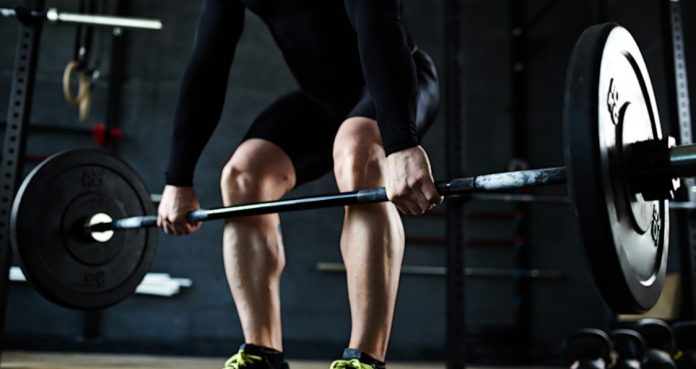
Single Leg Standing Smith Machine Calf Raises – 3 Sets 15 Reps
Unilateral exercises are a great way to bring up lagging muscle groups as it gets easier to establish a mind-muscle connection. Training one side of a muscle group at a time also helps in fixing muscle imbalances.
Stand on your right foot at the edge of an aerobics exercise step or a weight plate with your left foot elevated. Perform the 15 reps on the right leg and then switch to your left leg.
Donkey Calf Raises – 3 Sets 20 Reps
Donkey calf raises were one of Arnold’s favorite exercises to train his calves. If you don’t have a donkey calf raise machine at your gym, bend over on a raised platform and ask someone to sit on your back.
Since your knees are bent in the donkey calf raises, they target your soleus muscle. By the end of this exercise and this workout, your calves should be filled with lactic acid and blood and should be begging you for mercy.
Which is your favorite calf exercise? Let us know in the comments below. Also, be sure to follow Generation Iron on Facebook and Twitter.
*Header image courtesy of Envato Elements.
How Steve Kris Works Out For Gains With Minimal Equipment
These workouts from Steve Kris are perfect for seeing gains with only dumbbells and resistance bands.
Steve Kris is an Austrian bodybuilder and personal trainer who knows exactly what it takes to see huge gains and which workouts will prove to be most effective. A great following on social media has allowed him to post his own progress while also inspiring others to do the same.
While we all know roughly what we need to do to get fit and trim down, it can be hard to put together the most effective training plan possible for ourselves. With so much going on, and our plates full with busy lives, work, and other activities, sometimes having a workout blueprint makes life just a little bit easier.
Looking to professional bodybuilders, athletes, and other experts can be a great way to gain knowledge while also working to change our physiques into something to be proud of. With the right guidance, you are well on your way to easy success inside and out of the gym.
As a personal trainer, Steve knows how to deal with those struggling to stay motivated and focused. As a bodybuilder, Steve knows exactly what it takes to stay motivated and focused. Together, Steve has become a source of inspiration and knowledge for many and these workouts are no different.
Full Name: Steve Kris
Weight
Height
Date Of Birth
185-195 lbs.
6’0’’
05/20/1992
Profession
Era
Nationality
Bodybuilder, Personal Trainer
2010
Austrian
Steve works with higher volume to create more tension and really push his muscles to failure. While these workouts below are only with dumbbells and resistance bands, it is still possible to see great growth with minimal equipment and Steve is a prime example.
About Steve Kris
Steve Kris was always athletic as a child and stood out with whatever he did. An aspiring soccer player, he was quite good and sought a professional career. But as fate would have it, an injury proved to be a set back and Steve seemed beyond defeated.
Starting to go to the gym, Steve became enthralled with lifting and was soon hooked on heavy lifting. Building an impressive physique, he turned what was a part time hobby into something full time, getting his personal training certification and looking to help others achieve their goals. He also began competing in bodybuilding competitions and wants nothing more than to win more shows and inspire others through his hard work.
Steve Kris Training Routine
These workout from Steve are done with minimal equipment to show that you can in fact see great gains without the need for a full gym. Using only dumbbells and resistance bands, this still allows for time under tension and the ability to move weight, thus fatiguing your muscles and forcing them to grow. Steve typically trains 5-6 days a week and mixes in different exercises to add unique variety for engagement and fun, while also still being challenging to see the results he wants.
Working his biceps, triceps, shoulders, and chest with dumbbells, and also his chest with resistance bands, Steve provides us with a great workout to boost all of our gains using almost no equipment. Many of these exercises will look familiar, as they are ones you perform all the time, but the nice variation and change of pace by using either dumbbells or resistance bands adds an extra layer to each exercise and may feel different too.
Let’s take a look at these three workouts from Steve that work your biceps and triceps, chest and shoulders, and then strictly chest.
Arms (Dumbbell Only)
Exercises
Sets
Reps
DB Curls
3
10
DB Kickbacks
3
12
DB Hammer
3
10
Triceps Extensions
3
10
DB Curls into Hammer Curls
3
12
Front Triceps Extension
3
10
Chest & Shoulders (Dumbbell Only)
Exercises
Sets
Reps
Side Raises
3
12
Front Raises
3
12
Arnold Press
3
10
Push and Press
3
10
Floor DB Press
3
8
Floor DB Flys
3
8
Floor Close Grip Press
3
10
Floor Pull Over
3
10
Seated DB Military Press
3
12
Half Side Raises
3
15
Chest (Resistance Bands)
Exercises
Sets
Reps
Elastic Band Chest Press
3
10
Elastic Band Flys
3
10
Elastic Band Close Grip Chest Press
3
12
Pronated Grip Triceps Extension
3
10
Kneeling Behind Head Triceps Extensions
3
12
For some great equipment, check out our list of the Best Dumbbells and Best Resistance Bands so you can mimic these workouts and see great gains!
The Best Supplements For Better Growth
For seeing real results, having a proper supplementation routine is vital for continued success. While Steve uses his own supplements of choice, including something like a protein powder post-workout will work to increase growth and recovery time while also keeping you full. If you are someone who feels they need a boost pre-workout, then consider a pre-workout supplement to really maximize your training, as well as tacking on a BCAA supplement to push through fatigue and any unwanted soreness. Additionally, for a physique like Steve’s, a fat burner will shed that unwanted fat and kickstart your metabolism to continually burn calories. Whatever you decide, the right supplements will work absolute wonder for your gains.
Wrap Up
These workouts from Steve Kris require minimal equipment and will allow for real growth to take place. We often associate a full gym as the only way to build a desired physique, but as Steve proves, it is absolutely possible with only a little equipment but a real desire for change. Dumbbells and resistance bands should be staples in your routine anyway, and along with a supplementation routine, you never have to worry about losing gains again. Give this workout from Steve a try and see what it can do for all your workout needs today.
Let us know what you think in the comments below. Also, be sure to follow Generation Iron on Facebook, Twitter, and Instagram.
*Images courtesy of Steve Kris Instagram
Four Plateau-Busting Strategies To Apply To Your Training
Understanding Training Plateaus and How To Deal With Them
When things are going well in the gym, it’s a great feeling. Your body is noticeably different, the weights are all going up, and motivation is through the roof.
But, what about when things are not going so well?
Training plateaus are a normal part of physical training and if you’ve not yet hit one, you will. Plateaus can be extremely frustrating and challenging. But, fear not, there are a number of methods that you can implement to allow you to break through.
This article will highlight four scientifically-backed strategies that can allow you to move beyond a plateau and start making progress again.
What Is A Training Plateau?
As the name suggests, a training plateau is where improvements stall or cease even though you are continuing to train consistently in the gym.
A plateau will occur after a period of progress. Initially, you may find that you are consistently able to add weight or reps to your lifts, however, after a while, you will find this is not possible.
It’s important to recognize that the training plateau is part and parcel of physical training and a hurdle that all lifters will face at some point or another.
Therefore, understanding how to move beyond training plateaus is crucial if you aspire to continually improve.
What Causes A Training Plateau?
A training plateau occurs when the body has become accustomed to the training stimulus and can deal with the stresses associated with physical training.
To best explain the relationship between the training stimulus and a plateau, let’s consider strength training novices.
Those who are new to strength training have never been exposed to strength training before, their body rapidly adapts to deal with stress being placed on the muscles.
As a result of this new training stimulus, muscular strength and size will increase which will allow them to lift heavier or perform a greater number of reps.
However, as their body becomes more highly conditioned, they will find that they are no longer able to add the same amount of weight or perform the same number of additional reps as previous.
Eventually, they will reach a point where the body can comfortably deal with the demands of the workouts and, therefore, adaptations will cease.
This can be a frustrating period where the lifter is working hard in the gym yet is not reaping the rewards.
The most common strategy employed to help you start improving once again is to simply change the training stimulus.
Introducing a new training stimulus that the body is not accustomed to will force it to start adapting once again.
However, some lifters (particularly athletes and the highly conditioned) may need to apply some additional measures to allow them most effectively move beyond a training plateau,
The Four Plateau-Busting Strategies
This section will outline four effective strategies that you should consider that will allow you to make progress again.
1) Switch Up Your Training Program
As reflected on, the most common strategy to bust a plateau is to change up the training stimulus. This means making alterations to your training program and workouts.
Most lifters will attempt to change training volume and loading schemes.
For example, instead of following a program that revolves around heavy lifts of five sets of five reps, you might consider switching to a program that primarily uses moderate weights for sets of 10 reps or more.
While this undoubtedly can be an effective way of altering the training stimulus, research has suggested that there may well be a better strategy for plateau busting.
Results from one study have shown that introducing new exercises to a training program is an effective way of increasing strength levels and may be more significant than changing loading schemes (1).
Therefore, consider performing exercise variations that work the muscles of the body in a slightly different manner.
For example, instead of performing the back squat, you could switch to the front squat. Similarly, you may wish to swap the conventional bench for the incline bench.
Another alternative would be to change the equipment that you are using. Instead of the barbell shoulder press, you could perform the press using dumbbells or cables.
2) Perform A Deload
Although changing up your training program is recommended, it may not always be necessary. In fact, it may actually be beneficial to reduce the training load.
On the face of things, this may seem counterproductive. How can reducing the training stimulus lead to improvements?
Well, it all comes down to recovery.
Although hard work in the gym is required, the extent to which you adapt is also dependent on your ability to recover.
You will only be able to make significant progress if your body has adequately recovered from the previous training session.
Training with excessive intensity or failing to prioritize post-workout recovery may place too much stress on the body.
If the body is unable to cope with this demand, substandard progress will be made. This is why performing a deload is important.
A deload is where the intensity and total training volume of each workout is substantially reduced.
The purpose of this is to allow the body sufficient time to recover fully and avoid overtraining thus enhancing the rate of adaptation (2).
If you are unsure about how to effectively deload, a useful guide is to reduce total training volume by 40% for at least one week before ramping up the intensity once again.
3) Focus On Improving Sleep
When it comes to improving health and fitness, an important factor that is often overlooked is sleep.
Often, sleep is sacrificed to cater for the busy lives that so many people live. However, getting inadequate sleep can be detrimental and contribute to a training plateau.
Research has determined that getting a good amount of sleep can lead to a greater improvement in muscular strength.
Conversely, poor sleep has been associated with a decrease in muscular strength (3).
During sleep, the body is going through a variety of different processes that contribute towards our recovery from strength training sessions.
Therefore, by failing to prioritize sleep, you may interfere with these processes and not allow the body to recover fully.
One particularly crucial process that occurs during sleep is hormone production. It is thought that poor sleep may interfere with this process and consequently impair repair and recovery (4).
As highlighted in the above point, recovery is key if you want to make significant improvements.
While sleep demands differ from individual to individual, the general recommendation for adults is to sleep for seven to nine hours per night.
If you fail to get this amount of sleep, you may find it challenging to make significant progress in the gym, and should, therefore, make sleep a higher priority.
4) Analyze Your Nutrition
Staying on the topic of recovery, good nutrition also plays a massive role in recovery from training sessions.
The first area to consider is your calorie intake. For the majority of individuals, if you are not consuming enough calories per day, it may be extremely challenging to make substantial progress.
Secondly, you must have a look at your daily macronutrient intake. There are three macronutrients – carbohydrates, proteins, and fats.
Your intake of carbohydrate and protein is particularly important when it comes to physical training.
Carbohydrates are sugars that provide the body with the energy required to perform exercise. Therefore, failing to consume enough carbs may negatively impact energy levels and athletic performance.
Most lifters will already know the importance of consuming enough protein each day. Protein helps in the muscle rebuilding process after a workout.
Not consuming enough protein can inhibit recovery from training sessions which can negatively impact progress and even contribute towards overtraining.
Hydration is another extremely important factor to consider. There are a number of studies that have found that poor hydration levels can lead to a reduction in performance (5).
If you are unsure where to start, begin by tracking your nutrition and do so for a full week. Once the week is over, have a full audit of your nutrition and then look to implement any necessary changes.
Final Word
Although frustrating, plateaus are not insurmountable. With careful review of your training, sleep, and nutrition, it is very possible to bust through one.
Therefore, if you are in the position where improvements are few and far between, consider applying the four strategies outlined above.
References:
1 – https://pubmed.ncbi.nlm.nih.gov/24832974/ Fonseca, Rodrigo M.; Roschel, Hamilton; Tricoli, Valmor; de Souza, Eduardo O.; Wilson, Jacob M.; Laurentino, Gilberto C.; Aihara, André Y.; de Souza Leão, Alberto R.; Ugrinowitsch, Carlos (2014-11). “Changes in exercises are more effective than in loading schemes to improve muscle strength”. Journal of Strength and Conditioning Research. 28 (11): 3085–3092. doi:10.1519/JSC.0000000000000539. ISSN 1533-4287. PMID 24832974.
2 – https://www.ncbi.nlm.nih.gov/pmc/articles/PMC4637911/ Lorenz, Daniel; Morrison, Scot (2015-11). “CURRENT CONCEPTS IN PERIODIZATION OF STRENGTH AND CONDITIONING FOR THE SPORTS PHYSICAL THERAPIST”. International Journal of Sports Physical Therapy. 10 (6): 734–747. ISSN 2159-2896. PMC 4637911. PMID 26618056.
3 – https://www.ncbi.nlm.nih.gov/pmc/articles/PMC5749041/ Chen, Yanbo; Cui, Yufei; Chen, Shulei; Wu, Ziqiang (2017-12). “Relationship between sleep and muscle strength among Chinese university students: a cross-sectional study”. Journal of Musculoskeletal & Neuronal Interactions. 17 (4): 327–333. ISSN 1108-7161. PMC 5749041. PMID 29199194.
4 – https://www.ncbi.nlm.nih.gov/pmc/articles/PMC4860870/ Buchmann, Nikolaus; Spira, Dominik; Norman, Kristina; Demuth, Ilja; Eckardt, Rahel; Steinhagen-Thiessen, Elisabeth (2016-4). “Sleep, Muscle Mass and Muscle Function in Older People”. Deutsches Ärzteblatt International. 113 (15): 253–260. doi:10.3238/arztebl.2016.0253. ISSN 1866-0452. PMC 4860870. PMID 27151463.
5 – https://www.ncbi.nlm.nih.gov/pmc/articles/PMC4672008/ Sawka, Michael N.; Cheuvront, Samuel N.; Kenefick, Robert W. (2015). “Hypohydration and Human Performance: Impact of Environment and Physiological Mechanisms”. Sports Medicine (Auckland, N.z.). 45 (Suppl 1): 51–60. doi:10.1007/s40279-015-0395-7. ISSN 0112-1642. PMC 4672008. PMID 26553489.
The 7 Kick-ass Bicep Exercises You’re Not Doing
7 Kick-ass Exercises which Need to be a Part of your Next Biceps Workout
Biceps are one of the most loved muscle group for people in the gyms throughout the world. Even though biceps are the favorite muscle for many people, you won’t see many people walking around with 20-inch arms.
Dumbbell and barbell curls are fine, but there is so much more to biceps training which people neglect. If you want to see supernatural results, you should be willing to do supernatural things in the gym.
21’s
21’s are arguably one of the nastiest biceps exercises and are sure to leave you with a muscle-ripping pump. The exercise is divided into three subsets of seven reps each. Hold a barbell at shoulder width.
In the first seven reps, bring the barbell from the bottom to the mid-half position of a complete barbell curl. Return to the starting position and complete seven reps. For the next seven reps start at the top of the movement and bring the barbell to your waist level.
Perform the complete biceps curls for the next seven reps. If it is one of the days when you’re feeling invincible, take this exercise up a notch and perform 30’s (10-10-10). Similarly, if 21’s are a little too much for you, you can dial down the number of reps.
T-Curls
[embedded content]
T-Curls are an exercise made famous by the Superman from Compton, CT Fletcher. The T-Curls are an isolation exercise which focuses on the inner head of your biceps. Since this is an isolation exercise, use moderate weight and focus on contracting the muscles.
Lie down on an incline bench and extend your arms to your sides so your elbows are in a straight line. Bend your arms a little and lock your elbows at your sides. Perform hammer curls and maintain a full range of motion. Make sure you have your elbows locked in a place and you’re not using momentum to lift the weights.
Zottman Curls
Zottman curls are complete arm builders. In this exercise, you start with your arms fully extended and with a dumbbell in each hand and at your sides. Begin to curl the weight by rotating your wrists so they’re facing upwards.
Pause for a second at shoulder height and now rotate your wrists so your wrists are facing the floor. Lower the dumbbells to the starting position. The Zottman curls will set your biceps and forearms on fire.
Cable Hammer Curls
Only a very few people perform the cable hammer curls. Cable hammer curls are an isolation exercise and will help you build the outer head of your pythons. Grab a pulley machine cable in each hand while standing in the center of the cable pulley machine towers.
With your right hand, perform a hammer curl so your right hand is at the level of your left chest. Return to the starting position and repeat with the left arm. Hold and squeeze the life out of your guns at the top of the movement.
Spiderman Curls
Only a few other exercises come close to helping you build the peak in your mountains as the Spiderman curls. In this exercise, lie on an incline bench with your chest against the pad and hold a barbell in your hands.
Your arms should be extended so they’re perpendicular to the floor. Curl the weight so the bar is almost touching your forehead. Return to the starting position while making sure you don’t use momentum by swinging the barbell and taking the bar behind the perpendicular point.
Reverse Grip Cable Curls
You don’t want to be the guy with muscular biceps and skinny forearms. Small elbow joints and wrists and muscular forearms, bis and tris give the illusion of giant arms. Reverse grip cable curls are an incredibly effective exercise in targeting your biceps and forearms.
If you want to put extra tension on your forearms, grab the bar with a monkey grip. Not using the thumb grip makes you hold the bar tighter and in the process, you squeeze harder and recruit your forearms.
Smith Machine Drag Curls
Smith machine drag curls focus on your biceps primarily and eliminate any momentum you might use in performing the standard barbell curls. As the name suggests, in this exercise you’ll be dragging the weights up to your upper abs.
Begin lifting the weights by pulling your elbows back. As the bar rises, bend your elbows to curl the weights to your torso while keeping your elbows behind you the entire time. Hold and contract your guns at the top of the movement.
Which is your favorite biceps exercise? Let us know in the comments below. Also, be sure to follow Generation Iron on Facebook and Twitter.
5 Exercises You Should Be Doing For Boulder Shoulders
5 Exercises You Should Be Doing For Boulder Shoulders
Bodybuilding is a sport of illusion. The athletes you see on stage aren’t as big as they appear. Symmetry holds a significant importance in bodybuilding for this very reason. Your shoulders determine your structure and shape your V-taper.
Broad shoulders are seen as a symbol of strength and authority. Look around your gym and you’ll see many people with big biceps and chest but slouching shoulders. You need to train your shoulders from every angle to ensure an overall development.
Your shoulders are made of three heads; front, medial and posterior deltoids. You need to be following a training program which focuses on developing all the three heads.
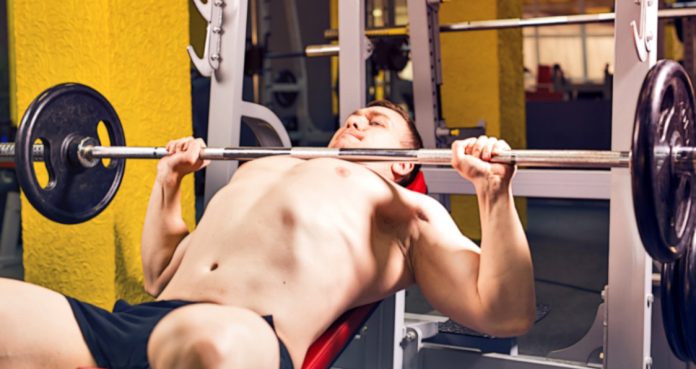
1. Military Presses
There is no going around this exercise. Military presses is a compound exercise which helps in building muscle mass while increasing your overall strength. You should start your shoulder workouts with this exercise.
Many people make the mistake of using momentum while performing this exercise. It’s called military press for a reason, you need to be completely disciplined and not use a jerk or momentum. Use moderate weights and have a complete range of motion.
2. Side Lateral Raises
The roundness of the shoulders is achieved with side lateral raises. Performing this exercise with strict form can add size and definition in your shoulder caps. You can try the cable variation of this exercise for a deeper and more intense pump.
Start by keeping the dumbbells at your side with a slight bend in your elbows. Lift your arms so they are parallel to the floor. Keep the movement slow and deliberate. Avoid using momentum or bending and bringing the dumbbells in front of your thighs.
3. Arnold Presses
Arnold himself was the man behind this exercise. You need to hit your shoulders from all the angles for a balanced growth and Arnold Presses do just that. Only a few other shoulder exercises can work your shoulders like this exercise can.
Hold the dumbells with a supinated grip in front of your shoulders. As you elevate the dumbbells, rotate your hands so your palms are facing outwards at the top of the movement. Return to the starting position while slowly rotating the dumbbells.
4. Bent Over Rear Delt Raises
Rear delts are a genetically weak muscle group for most people. Not training them can make matters worse as your stronger shoulder heads might take over while you train your rear delts.
Since you can’t directly see your rear delts while training them, it can be a little hard to establish a mind-muscle connection. Use moderate dumbbells and keep a slight bend in your elbows throughout the exercise.
5. Shrugs
Shrugs target the trapezius muscle (traps). A solid pair of shoulders can never be deemed complete without developed traps. You can perform shrugs with dumbbells or a barbell. Dumbbells can offer you a better contraction while the barbell can help you lift more weights.
Always have a full range of motion while performing this exercise. Drop your ego while you’re performing this exercise. Moving your shoulders an inch won’t do anything for you. Try touching your ears with your shoulders, hold at the top of the movement and squeeze the hell out of your traps.
Which is your favorite shoulder exercise? Let us know in the comments below. Also, be sure to follow Generation Iron on Facebook and Twitter.
*Header image courtesy of Envato Elements.