Tag: Workouts
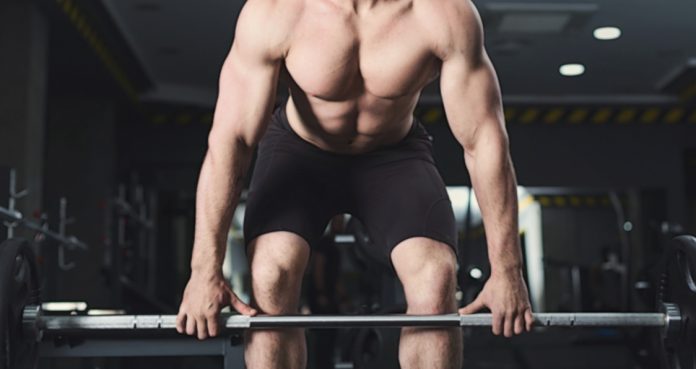
How To Perfect The Trap Bar Deadlift
The Deadlift Variation for Maximizing Strength and Hypertrophy
Considering the number of muscles engaged, the deadlift has to be regarded as one of the most effective resistance exercises for developing full-body strength.There are many functional deadlift variations that can be utilized to develop specific muscle groups and components of fitness.One such variation is the trap bar deadlift which uses a hexagonal-shaped barbell rather than a straight bar that is used in the conventional or sumo deadlift.This article will cover the muscles worked and the technique required to execute the trap bar deadlift before moving onto review the benefits of the exercise.
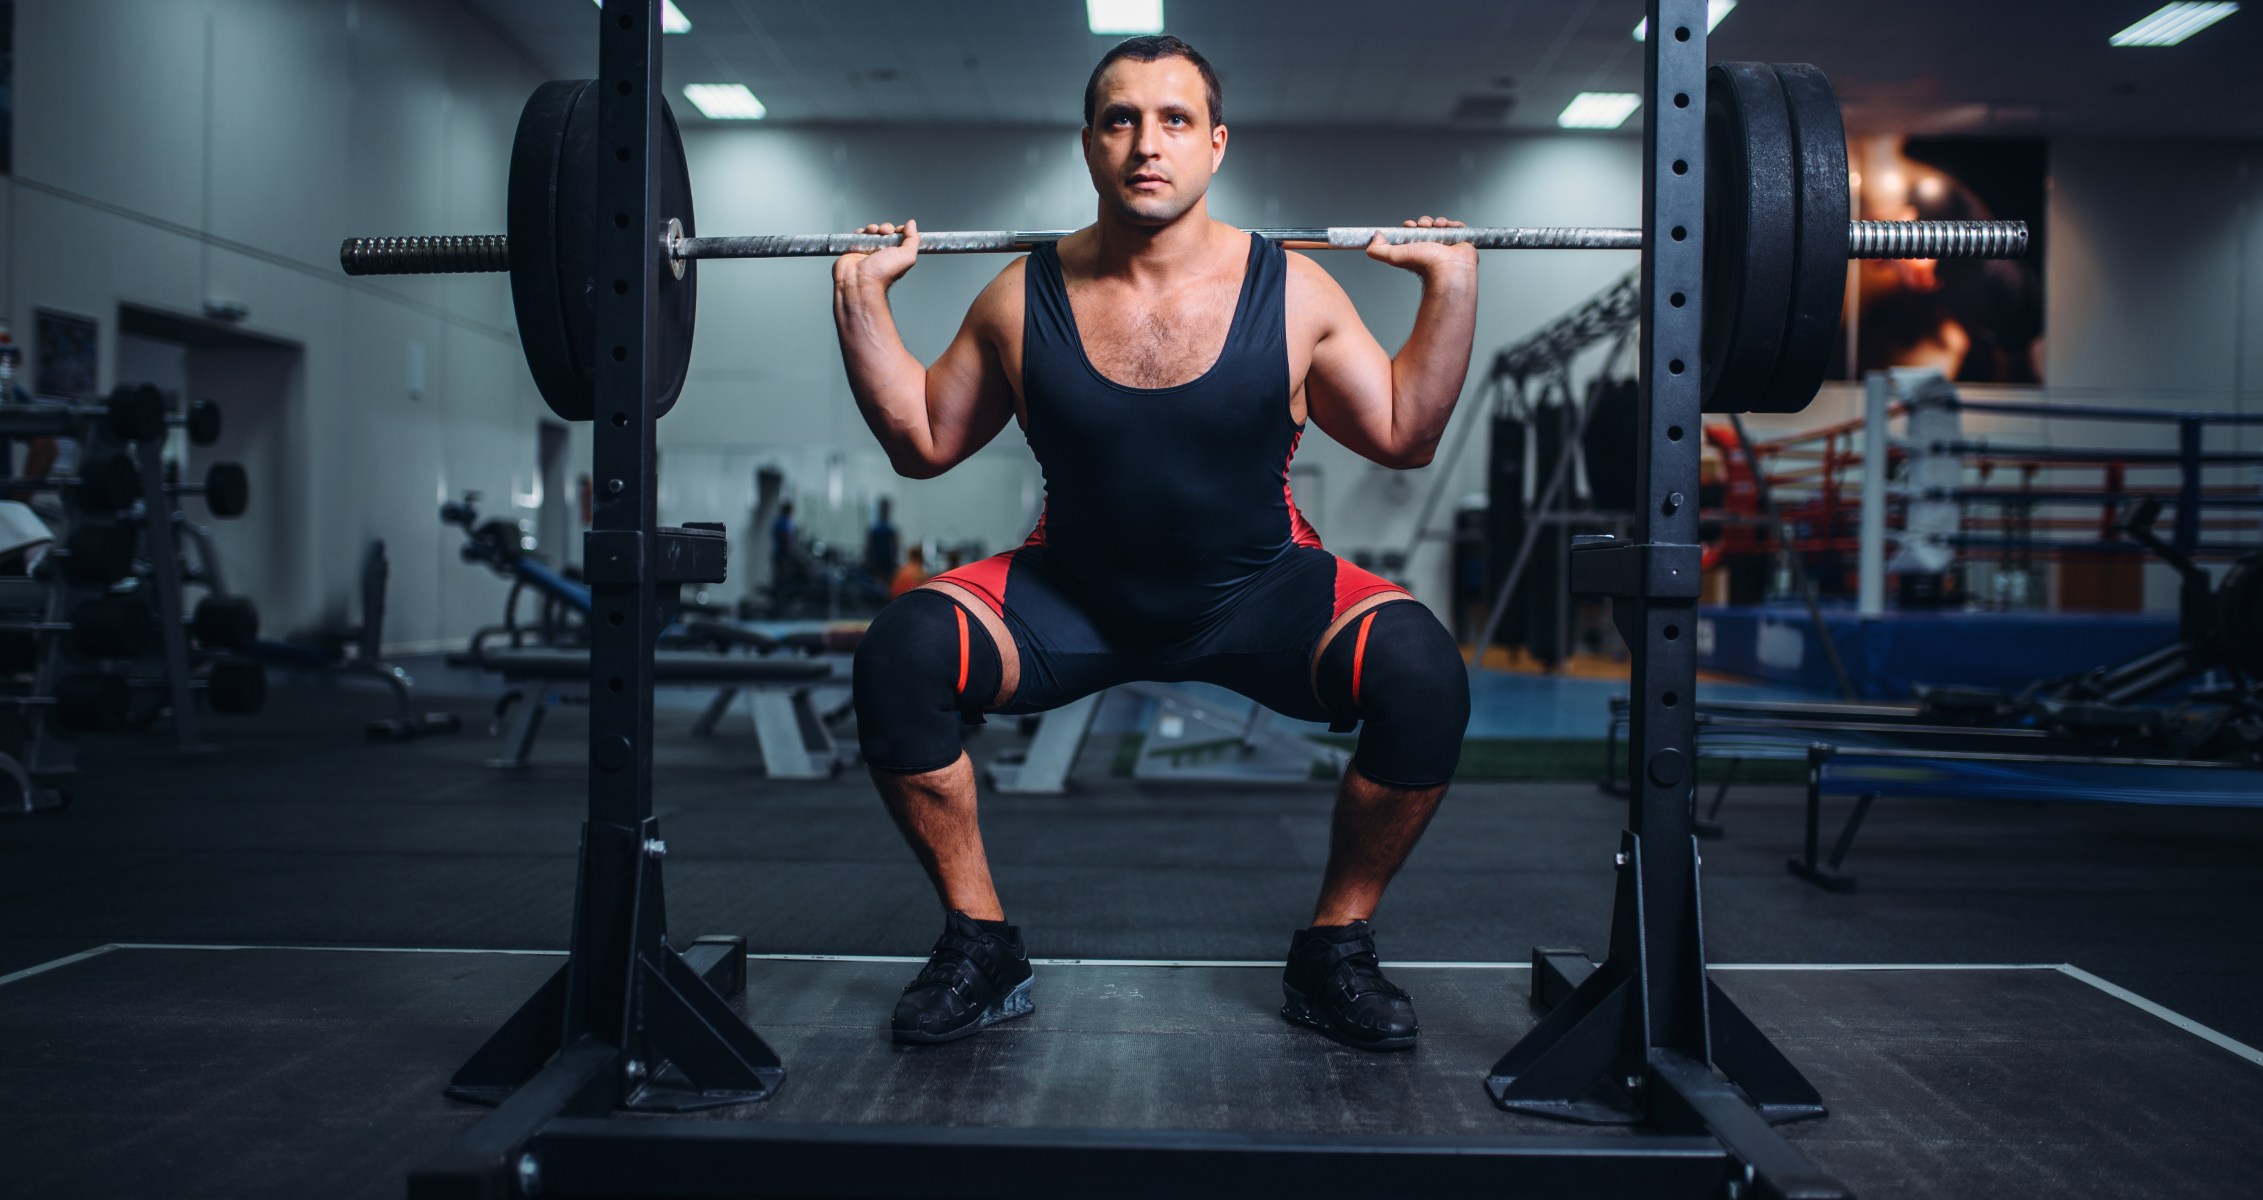
Trap Bar Deadlift Technique
While this exercise is a deadlift variation, be aware that the trap bar actually places the body in a slightly different position than the conventional deadlift which changes the mechanics of the movement (1).To effectively perform the trap bar deadlift, use the following 4-step guide.
1) Setting Up
Start by standing in the trap bar, assume a hip-width stance and keep the toes pointed forward.While a hip-width stance is recommended, physical attributes will dictate your stance. Some lifters with long limbs may find that a wider stance is required to allow them to take up the correct position.Rather than simply reaching down to the bar, drop down by pushing the hips back while keeping the chest lifted as this will prevent any movement occurring through the spine.If the correct position is assumed, the shins should be perpendicular to the floor, the back neutrally aligned and the shoulders directly over the bar.
2) Bracing
Before initiating the lift, with the bar still in contact with the floor, grip the bar hard, lift the chest, pull the shoulder blades together and actively squeeze the core muscles.
The purpose of this is to protect the body from injury and to facilitate an efficient lift. If appropriate bracing is not applied, it is possible that form will breakdown thus increasing the risk of injury.
3) The Drive
To lift the bar from the floor, avoiding thinking about picking the bar off the floor and instead focus on driving the feet through the floor.
Sometimes those who view the deadlift as simply picking the bar from the floor round their spine instead of maintaining a neutral position which can increase the risk of injury.
Therefore, concentrate on the feeling of the knees and hips extending as the feet are firmly driven into the floor.
4) Finish Strong
As you reach the top of the exercise, remember to squeeze the glutes tight and drive the hips forward. At the same time, maintain a core brace to prevent any spinal flexion or extension.
In the standing position, the body should be entirely vertical with the shoulders pulled back and down and the chest lifted high.
Upon reaching this position, reverse the movement in a controlled fashion ensuring that the back remains flat as the bar drops down to the floor.
Trap Bar Deadlift Muscles Worked
The trap bar deadlift targets a multitude of muscles throughout the body and therefore can be considered a highly effective full-body developer.This section will detail the major muscle groups that are targeted during the trap bar deadlift.
1) Glutes
The glutes are the most powerful muscle group in the human body and therefore play a crucial role in a number of strength and power exercises.Due to the degree of hip flexion performed during the deadlift, the glutes are placed under great demand and play an influential role in bringing the bar up from the floor to the hips.Therefore, the trap bar deadlift can be considered an effective exercise for developing glute function, strength, and size.
2) Hamstrings
While there are other deadlift variations that more specifically target the hamstrings, such as the Romanian and straight-leg deadlift, there is no doubt that the trap variation effectively works the hamstrings.The hamstrings are responsible for bringing about hip extension and knee flexion and are heavily involved in the trap bar deadlift as a result. However, it must be noted that because the trap bar typically places more demand on the quads (due to increased knee flexion), the stress placed on the hamstrings is slightly reduced.
3) Quadriceps
In a similar fashion to the sumo, the trap bar variation targets the quadriceps to a greater degree than a conventional deadlift.As touched on, a greater amount of knee flexion is typically required for a trap bar deadlift which causes this increased quadriceps activation.The increased flexion of the knee in the setup causes the trunk to be held in a more upright position which reduces the demand on the hamstrings and lower back.
4) Erector Spinae
The majority of deadlift variations will highly activate the erector spinae; this is because these muscles, which run the length of the back, contract in order to keep the back flat.The mechanics of the trap bar deadlift does contribute to a decreased demand on these muscles in comparison to other deadlift exercises. As a result, those who wish to limit the amount of stress placed on the lower back, while still regularly performing pulling exercises, may find it beneficial to use the trap bar variation.
5) Back Muscles
While the decreased back angle has a substantial impact on reducing the load placed on the erector spinae, having the torso in a more upright position may place more of a load on the traps, specifically the mid and upper traps.The lats are another muscle group of the back that are recruited during the deadlift in order to stabilize the spine.
Trap Bar Deadlift Benefits
The trap bar deadlift can easily be incorporated into a training problem and makes a great substitute for the conventional or sumo deadlift.Powerlifters, weightlifters, strongman athletes, crossfitters, sports athletes and those looking to improve their general health can experience significant benefits by adding this exercise to their training.This section will highlight five benefits to allow you to understand why the trap bar deadlift is such an effective exercise for strength, function, and hypertrophy.
1) Improved Pulling Strength
The trap bar deadlift is an excellent exercise choice for developing pulling capabilities or for adding in additional pulling volume.It can be used as a primary or accessory lift and can contribute towards a better performance with the conventional deadlift, sumo deadlift, front squat and back squat.In addition, a recent study suggests that the trap bar may be more beneficial than the straight bar for developing force, power, and velocity (2).The trap bar deadlift is also a great place to start for the beginner and it requires less of a hip hinge – a movement that some beginners can find challenging to begin with.
2) Weightlifting Benefits
For Olympic lifters, the trap bar deadlift can prove to be an effective exercise for facilitating a better clean or snatch as it will effectively build total-body strength.There are similarities between the first pulls of both the clean and snatch and the trap bar deadlift. The main similarity is in terms of trunk position as all of these exercises place the trunk in a more upright position. While it should not be used as a replacement for the clean or snatch, adding it into your training as a supplemental lift can be highly beneficial.
3) Reduced Lumbar Stress
The conventional deadlift places a great demand on the spinal erectors, hips, and hamstrings due to the reduce flexion at the knee in the setup.As reflected on, this makes the trap bar deadlift an effective choice for those who are looking to reduce the demand placed on these muscles. Many individuals struggle with lower back issues and pain, therefore, there may be times where you need to use the trap bar deadlift in order to reduce the loading on the lower back.
4) Glute and Quad Development
For those who are looking to develop muscle size, the trap bar deadlift will apply a large amount of stress to the quadriceps and glutes.With appropriate nutrition, these muscles will adapt to the training stimulus and significantly increase in strength and size.Once again, the reason that the quadriceps and glutes are subject to the greatest amount of stress in the trap bar deadlift is due to the upright position of the trunk.
5) Supramaximal Lifting
For those who are at an advanced level of training, the trap bar deadlift can be loaded supra-maximally and research suggests that a greater load can typically be lifted with a trap bar deadlift (3).There may be a number of reasons for incorporating supramaximal training. It may allow you to become more accustomed to dealing with heavier loads and overload the nervous system.This can have a consequent positive impact on your strength capabilities and allow you to more safely and effectively lift heavy loads.
Final Word
While there are a number of useful deadlift variations, the trap bar deadlift is an excellent exercise for a variety of reasons.Not only will it significantly develop strength and size, but it can also be a practical choice for those who need to reduce lower back loading.
References:
1 – Swinton, Paul A.; Stewart, Arthur; Agouris, Ioannis; Keogh, Justin W. L.; Lloyd, Ray (2011-07). “A biomechanical analysis of straight and hexagonal barbell deadlifts using submaximal loads”. Journal of Strength and Conditioning Research. 25 (7): 2000–2009. doi:10.1519/JSC.0b013e3181e73f87. ISSN 1533-4287. PMID 21659894.
2 – Camara, Kevin D.; Coburn, Jared W.; Dunnick, Dustin D.; Brown, Lee E.; Galpin, Andrew J.; Costa, Pablo B. (2016-05). “An Examination of Muscle Activation and Power Characteristics While Performing the Deadlift Exercise With Straight and Hexagonal Barbells”. Journal of Strength and Conditioning Research. 30 (5): 1183–1188. doi:10.1519/JSC.0000000000001352. ISSN 1533-4287. PMID 26840440.
3 – Lake, Jason; Duncan, Freddie; Jackson, Matt; Naworynsky, David (October 24, 2017). “Effect of a Hexagonal Barbell on the Mechanical Demand of Deadlift Performance”. Sports. 5 (4). doi:10.3390/sports5040082. ISSN 2075-4663. PMC 5969032. PMID 29910442.
The Dumbbell Row Side Plank for Developing the Abdominals
Unconventional Core Training for Effective Strength Gains
When it comes to selecting core development exercises, there are a number of popular exercises that are often chosen – crunches, side bends, Russian twists & planks. There is no denying that these exercises are highly effective when performed correctly. However, after some time it may become necessary to find alternative core exercises. It may be necessary to change them as a method of progressive overload or because there is a need to freshen up your training to maintain motivation or adherence.Whatever the reason for performing new abdominal exercises, the dumbbell row side plank can present a real challenge, not just for the abdominals, but for the entire body.
Dumbbell Row Side Plank Technique & Muscles Worked
In terms of the muscles recruited in the exercise, there are many muscles must engage either to cause movement or stabilize the body.The muscles which are primarily involved in the dumbbell row side plank are the abdominals, obliques, lats, rhomboids, adductors, and glutes.There are a number of secondary muscles that assist in the exercise including the quads, hamstrings, traps, deltoids, and triceps.Judging by the number of muscles listed, it should be evident that the dumbbell row side plank is a full-body exercise.
1) The Side Plank Position
When setting up for the dumbbell row side plank, it is imperative that the body is set in the right position before the rowing phase of the exercise can take place. When assuming the side plank position, start on your side. Place your hand flat on the floor, and extend the arm fully ensuring that the hand is directly under the shoulder. Keeping the core muscles engaged, lift the hips off the floor while extending the legs fully so that the body is held in a straight line – ankles, knees, hips, and shoulders should be aligned.
2) Locking the Shoulder
Prior to picking up the dumbbell, it’s important to ensure that the shoulder of the rowing arm is “locked” in position. To effectively do this, retract the shoulder and pull it downwards.Allowing the shoulder to rise upward or pull forward will not only negatively impact the movement mechanics but may also place excessive strain on the shoulder joint thus increasing the risk of injury.In addition, look to keep the supporting arm straight throughout the duration of the exercise. Allowing the elbow to bend may compromise stability and affect the side plank position.
3) Rip the Dumbbell
To allow you to reach the dumbbell on the floor it will be necessary to rotate the trunk slightly. Keep the chest up and core tight while you rotate in order to maintain alignment and protect the spine.Once you pick up the dumbbell, rotate the trunk and simultaneously row the dumbbell powerfully into the body and maximally squeeze between the shoulder blades.In the row, ensure that the elbow is kept slightly down from the height of the shoulder as the dumbbell is pulled into the body. Allowing the elbow to rise up can place strain on the shoulder joint.
4) Control the Descent
As you begin to lower the dumbbell back down to the floor, avoid dropping the dumbbell too quickly as this will only increase the risk of pulling the body out of position.Instead, squeeze the abdominals, reverse the rowing action in a controlled manner and slowly rotate through the trunk in order to bring the dumbbell back down. Lowering the dumbbell in a controlled fashion while maintaining core engagement will effectively facilitate a solid side plank position thus reducing the risk of sustaining of injury.
Dumbbell Row Side Plank Benefits
The dumbbell row side plank can prove to be a highly effective exercise for a range of lifters and athletes. This section will expand on a select number of benefits associated with the dumbbell row side plank.
1) Enhanced Full-Body Stability
As mentioned, the dumbbell row side plank places a large demand on the core. Often the function of the core is misunderstood – the core works to stabilize the body as it moves (1).The core maximally engages during the side plank in order to hold the body in the correct position. The addition of the dumbbell row places even more demand on the core to work and maintain stability.Furthermore, proprioceptive abilities such as balance and coordination will also improve with regular practice thus enhancing full-body stability further.
2) Improved Ab Strength & Definition
The abdominals are often mistaken to be just one muscle; however, there are four individual muscles that make up the abdominal muscle group – the transverse abdominis, rectus abdominis, internal oblique & external oblique (2).All four of these muscles must isometrically contract in the side plank to successfully hold the side plank. The obliques must also concentrically and eccentrically contract to cause the trunk to rotate in the row.Regularly performing the dumbbell row side plank will place a large demand on the abdominal muscles and cause them to increase in both size and strength.
3) Improved Pulling Strength
The lats are wing-like muscles found in the back that are predominantly responsible for all upper body pulling exercises. The row phase of the exercise will place great stress on the lats, as well as a number of other back muscles (3), consequently causing a significant adaptation in back strength and size. Having bigger and stronger lats, rhomboids, traps, and rear delts will improve your pulling capacity and build your back.
4) Performance Facilitation
Finally, a combination of the aforementioned benefits associated with the dumbbell row side plank can have a positive impact on athletic performance and injury risk.Having a stronger and more stable core can notably impact compound lifts such as the squat, deadlift, presses, and Olympic lifts, and may facilitate a safer, more effective lift.Increasing the strength of the back and your pulling capacity may also transfer into a greater performance with all upper body pulling exercises such as the lat pulldown and row.
Dumbbell Row Side Plank Variations & Alternatives
This section will highlight a number of variations that can be utilized to advance the dumbbell row side plank and add demand to maintain a steady rate of adaptation.There are also three dumbbell row side plank alternatives listed that will allow you to regress the exercise if necessary.
Variations
Alternating Dumbbell Row Side Planks
The alternating version involves switching sides after each rep. On completion of a row on one side, immediately move into a side plank on the alternate side and complete a row.Continuously switch from side to side until you have completed the prescribed number of reps.Constantly switching arms will not only add a challenge in terms of stability and coordination, but it will also place an increased demand through the shoulders.
Eccentric Dumbbell Row Side Planks
For the eccentric variation, complete the movement as normal, however, look to slowly the dumbbell back down to the floor with each and every rep.Using a descent of 3-5 seconds will add mechanical tension and increase the degree muscular damage sustained – both of which are principles of muscular growth (4).As a result, eccentric exercises can be considered an effective method for bringing about muscular hypertrophy.
Archers Row Side Planks
The archers row variation starts in a full plank position rather than the side plank. Grip the dumbbell and as you begin to row, simultaneously rotate the body into a side plank.From that position, keep the core tight and gradually reverse the movement by extending the arm and rotating the trunk until you assume the full plank position once again. Switch sides and repeat for the designated number of reps.
Alternatives
Dumbbell Fly Side Planks
The dumbbell fly side plank is very similar to the original exercise and it works the body in a similar fashion.The only difference between the two exercises is that a fly in performed rather than a row. For the fly, maintain a straight arm and drive the dumbbell up until it is directly over the shoulder joint.The fly will place more of a stress on the rear delts (back of the shoulder) and typically a lighter weight will be used for this variation.
Renegade Rows
The renegade row is exactly the same as the dumbbell row side plank however, it places the body in a full plank rather than a side plank. For the renegade row, start in a full plank position while holding onto two dumbbells. Row one dumbbell into the body while maintaining a full plank, control the descent and then swap sides and repeat.
Plank Pull Through
For the plank pull through, assume a full plank position and place a weight to the right side of the body. Keeping the core tight, lift the left hand from the floor, reach under the body, grab the weight side and pull it through. Alternate hands and repeat.
Final Word
It is clear that the dumbbell row side plank is an effective developer of abdominal strength, core stability, and pulling power, all of which contribute towards improving athletic performance. As a result, all lifters and athletes should seriously consider incorporating this exercise into their training regime.
References:
1 – Kibler, W. Ben; Press, Joel; Sciascia, Aaron (2006). “The role of core stability in athletic function”. Sports Medicine (Auckland, N.Z.). 36 (3): 189–198. doi:10.2165/00007256-200636030-00001. ISSN 0112-1642. PMID 16526831.
2 – Services, Department of Health & Human. “Abdominal muscles”. www.betterhealth.vic.gov.au.
3 – Fenwick, Chad M. J.; Brown, Stephen H. M.; McGill, Stuart M. (2009-03). “Comparison of different rowing exercises: trunk muscle activation and lumbar spine motion, load, and stiffness”. Journal of Strength and Conditioning Research. 23 (2): 350–358. doi:10.1519/JSC.0b013e3181942019. ISSN 1533-4287. PMID 19197209.
4 – Franchi, Martino V.; Reeves, Neil D.; Narici, Marco V. (July 4, 2017). “Skeletal Muscle Remodeling in Response to Eccentric vs. Concentric Loading: Morphological, Molecular, and Metabolic Adaptations”. Frontiers in Physiology. 8. doi:10.3389/fphys.2017.00447. ISSN 1664-042X. PMC 5495834. PMID 28725197.
An Arm Workout You’ll Feel Until Next Week
The arm workout you will write home about.
Let’s be honest. Everyone loves training arms. Some bros (to look like total badasses) might say that legs are their favorite muscle group to train but push them a little, and they will tell you arm workouts run a close second. And at this point, you will know the truth.
We hate to break this to you, but there is no “alpha male“ without jacked muscles. A pair of ripped pythons can make you stand out. Jacked arms are symbolic of strength, look aesthetically appealing, and garner attention, whether in the workplace or on the street.
Although you might see people in your gym training their arms more than twice a week and flexing their guns at every chance they get (yes, even on leg days), but only a very few lifters have pythons that the Greek gods would approve.
Mostly, the reason behind lagging arms development is not a lack of training equipment or intent but a dearth of correct training techniques. If your arm workouts only consist of a few bicep curls and tricep pushdowns, do not be surprised if your tiny wigs never grow into venomous pythons.
Also Read: 5 Ways To Bring Up A Lagging Body Part
Workout Principles For a Kickass Arm Workout
Arms are a relatively smaller muscle group. While you do not need as much intensity while training your guns as you would while training your lower body, do not use this as an excuse to show them mercy. Here are the principles you should be following during your arm workout:
1. Antagonistic Supersets
Lifters tend to train their favorite muscle group at the beginning of a workout. While some people train biceps at the beginning of their arm workout, others start with triceps.
The problem with this technique is that by the time you get to training your weaker muscle group, you are fatigued, and do not have enough gas left in the tank to break new ground.
Not only do antagonistic supersets lay the groundwork for biceps and triceps muscular balance, but they also are time efficient.
2. Hypertrophy
Hypertrophy refers to an increase in muscular size achieved through exercise. To achieve hypertrophy, you should perform 12-15 reps per exercise and not rest more than 60-90 seconds between sets.
In this arm workout, you will not be stopping for rest between exercises while performing the antagonistic supersets.
Remember: Do not lift a weight that is too light, as that will not allow you to see the same gain of definition.
Related: 5 Ways To Write a Great Training Program
3. Rest-Pause Sets
Most individuals usually perform 12-15 reps in a set. After a few training sessions, people get a good idea of how much weight they need to be lifting to hit failure by 12-15 reps.
While there is nothing wrong with this technique, you need to remember that we are on a mission to remain sore until our next arm workout. We want to push our arms to their limit.
Rest-pause sets give your ATP (adenosine triphosphate) reserves enough time to replenish so that you can perform an additional 5-10 reps without getting you out of hypertrophy.
Muhammad Ali explained this the best when he said:
“I don’t count my sit-ups; I only start counting when it starts hurting because they’re the only ones that count.”
Also Read: How To Increase The Time Under Tension To Maximize Your Gains
4. There Are No Accessory Muscles in This Arm Workout
Forearm training is an afterthought in most arm workouts, but this routine is unlike most regimens. Bodybuilding is a game of illusions. Muscular forearms and small joints (if you have them) can give an illusion of bigger arms. Stick with this arm workout for 12 weeks, and you might end up looking like The Hulk – at least in the arms department.
Check Out: Advanced Training Techniques To Take Your Gains To The Next Level
5. Mind-Muscle Connection
Bodybuilding is not about lifting as heavy as you can or just going through the motions for the sake of it. If you want your biceps to look like mountain peaks and triceps to resemble horseshoes, you need to focus on contracting your muscles with every rep.
The better your mind-muscle connection, the more muscle fibers you will be recruiting during your exercises. A higher degree of muscle activation also means that you lower the chances of injuries during your sets.
You should not turn your rest periods between sets into dead time. Utilize that time to flex your muscles as hard as you can and hit your favorite poses.
Related: 6 Ways To Improve Your Mind-Muscle Connection
6. Shock Your Muscles Into Growing
Your muscles stop responding when they get used to your workouts. Contrary to popular opinion, you do not always need to perform new exercises to stimulate muscle growth.
If you perform the arm workout laid out in this article for eight straight weeks (which you should), you could add variety to your workouts by switching the number of sets, reps, and advanced training techniques. Never perform the exact same workout for more than three weeks on a stretch.
With all said and done, here is a simple gauge to find out if your arm workout was a success: are you able to touch your right shoulder with your right hand? If yes, then you did not go hard enough. Keep taking this test between your sets to check how you are doing.
Must Read: This is How Your Training Should Change as You Get Advanced
8 Week Arm Workout From Hell
As Big Ramy would say, “the winter is here.”
If you have lagging arms, the “bulking season” is a great time to work on them. Carve them while they are under wraps, and come out brandishing your polished guns when the sun is out.
1. Superset
(a) Standing Bicep Cable Curl: 3 sets 12-15 reps, no rest
Steps:
Adjust the pulley to the lowest setting.
Attach a straight bar to the pulley.
Grab the bar with a supinated (palms facing up) grip and stand upright with a shoulder-width stance.
While keeping your elbows pinned to your sides, curl the bar toward your chest.
Hold and contract your pythons at the top for a couple of seconds.
Return to the starting position with a slow and controlled motion.
Repeat for recommended reps.
(b) Straight Bar Tricep Pushdown: 3 sets 12-15 reps, 30-60 second rest
Steps:
Attach a straight bar to a cable stack as high as possible.
Stand with an upright torso in a shoulder-width stance.
Grasp the straight bar with a pronated grip (palms facing down) and lean forward slightly by hinging at the hips.
Initiate the movement by extending your elbows and flexing the triceps.
Pull the handle down until your elbows are almost locked out.
Squeeze the life out of your triceps at the bottom of the movement.
Return to the starting position with a controlled motion.
Repeat for repetitions.
Rest-Pause: 10 seconds 8-10 reps
Every exercise in this workout routine (except forearm lifts) includes a rest-pause set. Meaning – after performing 12-15 reps of an exercise, rest for 10 seconds, and then perform 8-10 more repetitions of the same movement with the same weight before moving onto the next lift.
2. Superset
(a) EZ Bar Skullcrusher: 3 sets 12-15 reps, no rest
[embedded content]
This is no accident. You will be alternating between biceps and triceps as the first exercise of your supersets. This technique will ensure that you are training both muscle groups with the same intensity.
Steps:
Choose your desired weight and sit on the edge of a flat bench with the EZ bar on your lap.
Lay back while lifting the bar to your chest.
Once in position, press the bar until your arms are fully extended and perpendicular to the floor.
While keeping your elbows pinned in position, lower the weight towards your forehead by lowering your forearms.
Once you are a few inches away from your forehead, reverse the movement by extending your elbows while flexing the triceps to lock out the weight.
Repeat for the desired number of repetitions.
(b) Zottman Curl: 3 sets 12-15 reps, 30-60 second rest
[embedded content]
Steps:
Hold a pair of dumbbells by your sides with your palms facing each other.
Curl the weights up to your shoulders, keeping your upper arms still and turning your hands so your palms face up as you lift.
Pause at the top of the movement and slowly rotate your grip so your palms are facing downwards.
Lower the dumbbells slowly back to the starting position using the overhand grip.
When the dumbbells are close to your thighs, turn your hands so that your palms are in the starting position facing one another.
Rest-Pause: 10 seconds 8-10 reps
3. Superset
(a) Barbell 21s: 3 sets 12-15 reps, no rest
[embedded content]
Steps:
Stand upright with a shoulder-width stance.
Grab a barbell and hold it in front of your thighs.
While keeping your elbows pinned to your sides, curl the barbell to the halfway point (up to your belly button).
Return to the starting position and complete seven repetitions with this range of motion.
Without pausing, curl the same weight all the way to the top, then lower the weight to the halfway point and back up again. Perform this for 7 reps.
Finally, perform 7 reps of full barbell curls from the bottom to the top.
(b) Dumbbell Kickback: 3 sets 12-15 reps, 30-60 second rest
[embedded content]
Steps:
Position yourself on the left side of a flat bench with your right knee and right hand resting on the bench.
Using a neutral grip, pick up the dumbbell with your left hand. Keep your back straight and look forward.
Tuck your left upper arm close to your torso and bend at the elbow, forming a 90-degree angle with your upper arm and forearm. This is the starting position.
Moving only at the elbow, raise the dumbbell behind you until your arm is fully extended.
Pause, and then lower the dumbbell back to the starting position.
Repeat this movement for desired reps before switching sides.
Rest-Pause: 10 seconds 8-10 reps
4. Superset
(a) Single-Arm Overhead Extension: 3 sets 12-15 reps, no rest
Steps:
Stand upright in a shoulder-width stance.
Grab a dumbbell with one hand and position it behind your head with the elbow flexed to 90-degrees.
Place your other hand on your side or abdomen for stability.
Press the dumbbell upward until your arm is fully extended.
Pause and contract your tricep at the top of the movement.
Repeat for recommended reps before switching sides.
(b) Dumbbell Hammer Preacher Curl: 3 sets 12-15 reps, 30-60 second rest
[embedded content]
Steps:
Grab a dumbbell in each hand and sit on a preacher bench.
Keeping your elbows flexed and your palms facing each other (neutral or hammer grip), place the backs of your upper arms flat on the pad.
Lower the dumbbells in a slow and controlled motion until your arms are fully extended.
Curl the dumbbells back to the starting position explosively.
Pause and contract your pythons at the top of the movement.
Repeat for reps.
Rest-Pause: 10 seconds 8-10 reps
5. Superset
(a) Supinated Grip Pull-Up: 3 sets 12-15 reps, no rest
Steps:
Grab the pull-up bar with your hands roughly shoulder-width apart and your palms facing towards you.
Bring your shoulder blades down and contract your lats and biceps to pull up until your chin rises above the bar.
Pause at the top and squeeze your biceps.
Slowly return to the starting position and repeat.
(b) Diamond Push-Up (weighted): 3 sets 12-15 reps, 30-60 second rest
Steps:
Get on all fours with your hands together under your chest.
Position your index fingers and thumbs so that they are touching, forming a diamond shape.
Extend your arms so that your body is elevated and in a straight line.
Lower your chest towards your hands while ensuring you do not flare your elbows out to the sides.
Stop when your chest is a few inches away from the floor.
Return to the starting position explosively.
If the bodyweight version of this exercise feels too easy, feel free to add resistance by getting someone to place a weight plate on your upper back.
Rest-Pause: 10 seconds 8-10 reps
6. Triset
(a) Pull-Up Bar Hang (Dead Hang): 3 sets failure, no rest
Steps:
Use a step or bench so you can easily reach the bar. You shouldn’t jump into a dead hang.
Grab the overhead bar with a shoulder-width overhand grip.
Hang on to the bar while keeping your arms straight.
Hang for as long as you can.
(b) Farmer’s Walk: 3 sets 30 seconds, no rest
Steps:
Grab a dumbbell in each hand.
While standing tall, keeping your shoulders, back, and core tight, walk at an even pace for 30 seconds.
(c) Behind Back Cable Wrist Curl: 3 sets failure, 30-60 second rest
Steps:
Attach a straight bar to a low pulley.
While facing away from the pulley, squat down, and grab the bar with a pronated grip.
Squat back up and stand with a shoulder-width grip.
While keeping your arm straight, slowly open your hands and let the bar slide from inside your palms to the tip of your fingers.
Return to the starting position by clenching your fists so that the bar is raised into your palms.
Curl your wrists and hold for a count of two.
Return to the starting position and repeat for the desired number of repetitions.
Conclusion
Disclaimer: It is absolutely normal for your arms to cramp up during the day after you perform this brutal arm workout. Get accustomed to the pain, and it will not be long before you put on an inch on your arms. Good luck!
How often do you train your arms? Let us know in the comments below.
Also, be sure to follow Generation Iron on Facebook, Twitter, and Instagram.
Why You Should Stay Away From The Barbell
Stay Away From The Barbell
Barbell exercises have been a symbol of badassery for a long time. “How much do you bench?” is casually thrown around in the gyms all around the world. Many people are always on the quest to increase their 1RM (one rep max).
“Why?”, you ask? Because, as the broscientists put it; if the rod ain’t bending, you’re just pretending. Barbells are great if you’re just starting to lift weights because they can correct your form. Compound movements with barbell also help in increasing your core strength.
There is no doubt, barbell can be really helpful in building muscle mass and strength, but it comes with a price. This is why you should stay away from the barbell.
Increases The Chances Of Injury
Compound exercises using a barbell can shoot up your chances of an injury since multiple joints are involved. For eg – in an exercise like the squats, your legs are the focus muscle group but you might recruit your lower back while performing the movement.
Supporting muscles will always be weaker than the primary muscles. This puts you at the risk of an injury. The three exercises where most injuries happen are the barbell bench press, squats, and deadlifts.
It is especially important for a person with a record of injuries to stay away from the barbell. There is an alternative exercise or a variation of these exercises you can perform while significantly reducing the chances of an injury.
2. Play Safe With The Dumbbells
If you’re looking for a substitute for the barbell, dumbbells are your best bet. Dumbbells help you do all the exercises you perform with a barbell while reducing the chances of an injury.
Using dumbbells can also help you improve your range of motion resulting in a better development of muscles. If you’re suffering from joint pains or an injury, you should switch to using dumbbells.
Many pro athletes like Kris Gethin have almost eliminated the use of barbell in their training routines. If you plan on staying in the fit lifestyle for an extended period, do yourself and your joints a favor and start working with dumbbells.
3. Squeeze Your Way To Growth With Cables
Cables are an incredibly effective isolation exercise which can help in getting muscle ripping pumps. Apart from the good feeling, bodybuilders chase a pump because all the nutrients travel to your focus muscle group through blood.
The muscle building macronutrient, protein travels through the blood to your target muscle and helps in repairing and developing the muscle. Add a cable exercise in your workouts to optimize your muscle growth.
Using cables makes sure there is constant tension on your muscles throughout the movement. On the barbells and dumbbells, your muscles are worked on the concentric (flexing) movement and all the tension is released on the eccentric (downward) movement.
4. Avoid Muscle Imbalances
It is no secret one of your sides is stronger than the other. For a right-hander, his right side might be stronger than his left, and a left-hander might be stronger on his left side.
Using a barbell can make your muscle imbalances more prominent as your stronger side might take over while performing an exercise with the barbell. Your body does this to compensate for the weaker side.
Using dumbbells, on the other hand, makes sure both your sides are equally used. You can even work on your weaker side by performing unilateral exercises. Unilateral exercises involve working one side at a time. This helps in focusing on and developing the weaker side.
Do you agree with this approach of training? Let us know in the comments below. Also, be sure to follow Generation Iron on Facebook and Twitter.
Posterior Chain Training for Greater Gains
The Many Benefits of Posterior Chain Training
Strength training can be used for a multitude of reasons – to improve aesthetics, strength, performance or reduce the risk of injury.Perhaps you’ve been having some problems with your training programs and the results just don’t quite live up to your expectations.This article will look at the posterior chain and highlight the many benefits of regularly training it. In addition, the article will provide a fantastic posterior-chain training program for you to use.
Why It Is Vital To Train The Posterior Chain
Nowadays, people are sitting for long time periods and are generally less active than in years gone by. This can wreak havoc with our posture, alignment, and general movement.The biggest issue that many face is commuting to work and work itself. Many individuals work in an office and therefore often seated for the best part of the day. Being seated for many hours can lead us to forget about good posture and proper alignment which can apply a great deal of stress to our muscles and joints (1).As a result of this stress, our bodies adapt to accommodate long periods of sitting by shortening the hip flexors and hamstrings (leg) which adversely alters pelvic tilt. Furthermore, the shortening of the pectorals (chest) can pull the shoulders forward and consequently cause the rounding of the upper back & shoulders.Many individuals with forward shoulders have lost the ability to fully retract and depress the shoulders.
As a result of muscles shortening, tightening and being underutilized, the joints can become less mobile and stiffer.Many office workers display postural problems such as forward head, rounded back & shoulders, tight hamstrings & stiff hips.Not only is this not a good look, but it can significantly reduce performance and increase the chances of experiencing an injury.The combination of tightened muscles and muscular imbalances is dangerous and may significantly increase the chances of sustaining an injury.In addition to this, pain can be a real issue with shoulder, back, arm, wrist, and neck pain coming out on top in a recent study (2).Considering the role that the posterior chain plays in posture, movement, and performance, strengthening these muscles should be a top priority.
Feeding the Postural Problem
The issue with many strength training programs is that they fail to take into account postural starting points and how your work or daily habits may impact your posture.
Typically, strength & hypertrophy programs use a 1:1 push to pull ratio. Pushing exercises tend to develop the anterior chain whereas pulling exercises work the posterior chain.When starting strength training, the majority of beginners target all the anterior chain muscles as they are most visible. In fact, it’s not just beginners who do this – at some point, everyone will have been guilty of overdeveloping the anterior chain and neglecting the unseen posterior chain.The problem with developing the anterior muscles more quickly than the posterior muscles is that you are simply exacerbating any postural issues that may exist (3).Now, this is not to suggest that you should remove all anterior-focused exercises from your program, rather the overall volume should be adjusted so that more posterior chain work is performed.While it is important to adjust the volume to increase the amount of posterior work, it must be accompanied with appropriate mobility work to maintain joint health and promote efficient movement.As you will see in the program, there is a great emphasis on the posterior chain strength and mobility. There is a specific focus on the shoulder depressors, retractors & external rotators, the glutes & hamstrings, and core.When you consider the role that the core plays in maintaining good posture, strengthening muscles such as the multifidus, diaphragm, erectors spinae & transverse abdominis can have a huge impact on posture (4).Furthermore, increasing core strength can also lead to a better performance with a number of compound lifts, such as the squat, deadlift, bench, bent rows, and overhead press.
Work Considerations
If you are an individual who works in an office or spends a long portion of the day seated, look to increase your activity levels throughout the day.If you must sit for the majority of the day, aim to adjust your seated position every hour, if possible.As the day progresses, pay particular attention to your posture and how you are sat. Being aware of your own body position and adjusting yourself regularly can have a significant impact.Good posture involves keeping upright by extending the spine, pushing the chest high, pulling the shoulders back & down, and keeping the core engaged (5).Be very aware of your neck position too. It should be in a comfortable, neutral position with the head back and ever so slightly extended.Initially doing this may feel strange, however as with learning a new exercise, the more you practice, the better you become at it to the point where it is automatic.Ensure your desk is set up to allow you to sit with good posture. If you find that your posture is poor when seated, place a tennis ball between you and the chair to “remind” you to maintain good posture.
Posterior Chain Training Program
The following sample posterior chain program has two parts – warm-up and strength training. It has been designed to improve both posterior chain strength and movement.
Part 1: Warm-Up
As mentioned earlier, while strengthening the posterior chain muscles is crucial, it must be accompanied with appropriate mobility work.Ensure that you complete the following 4-stage warm-up prior to commencing the strength work.The warm-up is a key part of the session as it can help to increase range of motion, performance and reduce injury risk.It is recommended to complete the warm-up on rest days too as performing it more regularly will improve mobility and reduce fatigue & DOMS (delayed onset muscle soreness).
1. Soft Tissue Release (i.e foam rolling)
Focus primarily on the pec minor, lats, adductors and quads. Spend some time on any muscles that are tight or sore.
2. Stretches
Stretch out the levator scapulae, pecs, subscapularis, traps, lats, hip flexors, quads, adductors, and calves.
3. Mobility Work
Use the following exercises to mobilize a number of joints:
– Cat-cow to child’s pose (spine & pelvis)– Knee to wall drill (ankles)– Strider exercise, a worlds greatest stretch, 90-90 hip stretch and adductor stretch (hips)– T-spine foam roller extension and lying t-spine rotation stretch (thoracic spine)
4. Activation Exercises
Use the following muscle activation exercises and complete 1 set of 10-15 reps to adequately prep the muscles for lifting:
– Wall slides– Band pull aparts– Glute bridge
Part 2: Strength Training
For safe and effective exercise, good technique is vitally important. If you are unsure always consult an exercise professional.The exercises that have been selected work posterior muscles from a variety of positions and angles in order to stimulate muscle fibers efficiently to comprehensively develop strength and size.It’s important to remember that this is a sample program and therefore may not fit your goals or levels of experience. It can be adjusted to suit. For optimal back and shoulder development, use a number of rowing variations that use multiple angles and positions.Focus on hip-hinging movements along with single-leg squat variations, abduction work & bridges to effectively target the glutes.Finally, for core development, use exercises that require the body to resist extension, rotation, and lateral rotation.
Day 1: Upper Body
Exercise
Sets x Reps
1. Chest Supported Dumbbell Row2. Chest Supported Dumbbell Rear Delt Fly
3 x 10-123 x 12-15
1. Neutral Grip Dumbbell Chest Press2. Chest Supported W-Raise
3 x 10-123 x 12-20
1. Seated Machine Alternating Row2. Banded Y Raise (with 2-second holds)
2 x 12-152 x 6-12
1. Half-Kneeling Landmine Press2. Hollow Body Isometric Hold
2 x 10-121-2 sets
Day 2: Lower Body
Exercise
Sets x Reps
Barbell Romanian Deadlift
4 x 10-12
1. Reverse Lunges2. Seated Band Abduction3. Single-Leg Hip Thrust4. Pallof Press
3 x 10-123 x 15-203 x 8-122 sets
Day 3: Upper Body
Exercise
Sets x Reps
1. Seated High Cable Row2. Standing Band W Raise
4 x 10-124 x 12-15
1. Pull-Overs2. Prone Lower Trap Raise
3 x 12-153 x 12-15
1. Alternating Seal Row2. Push-Ups
3 x 8-123 x 12-15
1. Behind the Neck Pull Aparts (with 2-second holds)2. Long Lever Plank
2 x 12-151-2 sets
Day 4: Lower Body
Exercise
Sets x Reps
Barbell Sumo Deadlift
4 x 8-10
Bulgarian Split Squat to Romanian Deadlift
4 x 10-20
1. Feet-Elevated Banded Glute Bridge2. Banded Dead Bug3. Suitcase Carry
2 x 15-202 x 6-122 x 1-1.5 mins
Final Word
Having a strong posterior chain is highly beneficial for day-to-day activities. However, it is important that mobility is also prioritized in conjunction with all strength work.
The program outlined in this article is a surefire way to effectively develop the posterior chain and prevent or eliminate a whole host of postural issues.
References:
1-van Vledder, Nicole; Louw, Quinette (November 10, 2015). “The effect of a workstation chair and computer screen height adjustment on neck and upper back musculoskeletal pain and sitting comfort in office workers”. The South African Journal of Physiotherapy. 71 (1). doi:10.4102/sajp.v71i1.279. ISSN 0379-6175. PMC 6093093. PMID 30135880.
2-pubmeddev. “Office ergonomics: deficiencies in computer workstation design. – PubMed – NCBI”. www.ncbi.nlm.nih.gov.
3-Negrete, Rodney J.; Hanney, William J.; Pabian, Patrick; Kolber, Morey J. (2013-4). “UPPER BODY PUSH AND PULL STRENGTH RATIO IN RECREATIONALLY ACTIVE ADULTS”. International Journal of Sports Physical Therapy. 8 (2): 138–144. ISSN 2159-2896. PMC 3625793. PMID 23593552.
4-Hsu, Shih-Lin; Oda, Harumi; Shirahata, Saya; Watanabe, Mana; Sasaki, Makoto (2018-8). “Effects of core strength training on core stability”. Journal of Physical Therapy Science. 30 (8): 1014–1018. doi:10.1589/jpts.30.1014. ISSN 0915-5287. PMC 6110226. PMID 30154592.
5-“Posture – Office Ergonomics – Grand Valley State University”. www.gvsu.edu.

How Bret Contreras Builds Those God-Like Glutes
This workout from “The Glute Guy” will give you those toned glutes to add to your shredded aesthetic.
Bret Contreras is a fitness trainer and someone who many see as the world’s expert on glute training. Nicknamed “The Glute Guy”, his website contains everything you need to know about glute training, as well as all things related to sports science.
For many of us, finding the right workouts to really get us going can be difficult. With so many out there, looking for those top workouts that are most suitable for us can be a real challenge. But why not look to professionals, experts, bodybuilders, and trainers for help? They’ve made their life focus to do all things related to health and fitness and it would be a disservice to not listen to them. Plus, they are living proof that these workouts do in fact work.
With Bret’s knowledge and fame as “The Glute Guy”, toning and sculpting your glutes hasn’t seemed easier. Sure, you have to put in the work, but don’t let that deter you from getting a great workout done.
Full Name: Bret Contreras
Weight
Height
Date Of Birth
N/A
6’4’’
07/26/1976
Profession
Era
Nationality
Personal Trainer, Social Media Personality
2010
American
With his expertise in the gym and his personality out of it, Bret has built a massive following for those in-person and online. As someone who knows a thing or two about sports science, he seeks to help others and give them the best advice to further their gains.
About Bret Contreras
Bret Contreras is an American personal trainer and online personality nicknamed “The Glute Guy” for his knowledge and expertise on how best to build those toned and sculpted glutes. He has a variety of credentials with a Master’s from Arizona State University and a PhD in Sports Science from AUT University. The author or co-author of a number of books, as well as the founder of gyms and programs, Bret as earned the reputation as the world’s expert on all things glutes. With his website and massive following on social media, he also has the platform to reach a wide array of people to give them the best advice as they seek to tone and sculpt not only their glutes, but their entire physique.
Bret Contreras Workout
This 4-day workout is one to seriously fire up those glutes, as well as provide for a full body session. A mix of great exercises each targeting specific needs, you can’t go wrong with this full body workout*.
Monday
Exercises
Sets
Reps
Barbell Hip Thrust Pyramid
1 of each
10, 8, 6, 15
Goblet Squat
3
12
Heavy Kettlebell Deadlift
2
15
45-Degree Hyper
2
20
Band Seated Hip Abduction
2
20
Incline Press
2
10
Lat Pulldown
2
10
Tuesday
Exercises
Sets
Reps
Band Hip Thrust
3
10
Walking Lunge
2
50 (25 per leg)
Reverse Hyper
3
10
Lateral Band Walk
3
20
Push-Up
2
AMRAP
Hammer Strength Row
2
10
Thursday
Exercises
Sets
Reps
Barbell Hip Thrust
3
6
Bulgarian Split Squat
2
10
45-Degree Hyper
2
30
Pendulum Quadruped Hip Extension
2
10
Band Side Lying Clam
2
20
Dumbbell Shoulder Press
2
10
One Arm Row
2
10
Friday
Exercises
Sets
Reps
Double Band Hip Thrust
3
20
Cybex Leg Press
3
10
American Deadlift
2
8
Band Standing Hip Abduction
2
20
Dumbbell Bench Press
2
10
Inverted Row
2
10
*Workout from Bret Contreras’ website
Some Of Bret’s Favorite Glute Exercises
Since Bret is “The Glute Guy”, let’s take a look at some of his favorite glute building exercises to give you that definition.
Goblet Squat
The goblet squat is a great exercise to improve strength and mobility and to establish a better movement overall. A great variation of the squat, this can be done with a kettlebell or dumbbell and will work your glutes and quads.
Romanian Deadlift
The Romanian deadlift is a functional movement that works many muscles including your back, legs, glutes, core, and other upper body muscles to build strength and aid in overall performance (1).
Barbell Hip Thrust
A great exercise to use with a barbell, hip thrusts are perfect for lessening knee pain, aiding in better low back health, and promoting glute strength and explosiveness for all your needs (2).
Great Supplement For Post-Workout Growth & Recovery
For those post-workout needs, it is best to find a great protein supplement that will work wonders for all your recovery and muscle building needs. After a grueling and tough workout, nothing beats a great protein shake to really capitalize on all your gains.
Transparent Labs 100% Grass-Fed Whey Protein Isolate
Code GENIRON10 For 10% Off
Transparent Labs 100% Grass-Fed Whey Protein Isolate is organic, non-GMO, and gluten-free, boasting a great formula for a top protein powder. With nothing artificial added, this is a clean protein that is easier on your stomach.
Transparent Labs 100% Grass-Fed Whey boasts an impressive array of eco-friendly accomplishments. It’s organic, non-GMO, and gluten-free. There are no artificial sweeteners — a rarity in a world full of whey protein powder, which are almost always filled with chemical flavorings to disguise the chalkiness of protein. There are also no artificial colorings or preservatives added. If you have a sensitive stomach, allergies, or just care about the environment, this is an excellent whey isolate for you and your body weight goals and is easy to digest compared to a whey concentrate.
Use the promo code GENIRON10 for 10% off! Check out our individual review for Transparent Labs 100% Grass-Fed Whey Protein Isolate here!
Click here for our list of the Best Protein Powders for more great protein products!
Wrap Up
This workout from Bret Contreras offers a full body workout so you can target all of those muscle building, calorie burning, and physique needs. As “The Glute Guy”, Bret works to put a real emphasis on the glutes, but with many accreditations and tons of experience, his knowledge of full body work is immense. With a massive following on social media, Bret works to inspire others to be their best and this workout will help get you to where you want to be yourself.
Generation Iron may receive commissions on purchases made through our links. See our disclosure page for more information.
Let us know what you think in the comments below. Also, be sure to follow Generation Iron on Facebook, Twitter, and Instagram.
*Images courtesy of Bret Contreras Instagram
References
Fisher, J.; et al. (2013). “A randomized trial to consider the effect of Romanian deadlift exercise on the development of lumbar extension strength”. (source)
Neto, W.; et al. (2019). “Barbell Hip Thrust, Muscular Activation and Performance: A Systematic Review”. (source)

The 4 Most Common Lagging Body Parts and How To Fix Them
The Four Most Common Lagging Muscle Groups
Most people have muscle imbalances due to their genetics. A couple of their muscle groups will be laggings as compared to the other muscles. These people make the situation worse by overlooking these muscles or by not training them optimally.
If you go to gyms looking for the most common lagging muscle groups, you are most likely to find a pattern. Since you’re reading this article, we assume you have a lagging muscle group or two which you want to bring up to par.
Calves
Calves are one of the most common weak muscle groups. They also make it to the top of the most stubborn muscle group list. Unlike your upper body muscles, hiding your weak legs is easy. Bros with chicken legs cover them up with baggy track pants.
Training your calves can be different from the other muscle groups. You stand on your calves for the entire day and use them for moving from one place to the other. Your calves can recover quickly from your workouts and you can train them multiple times a week.
Rear Delts
Rear delts are a weak muscle group for most people. We’re sure most people aren’t even aware of their existence. Since the rear deltoids are on your back, it is hard to establish a mind-muscle connection with them since you can’t look at them in the mirror while training.
Rear deltoids are a hard muscle to train. Most people stick to a single exercise for training their posterior delts. You should add variations and target your rear delts from different angles in every workout.
Forearms
Most people spend way too much time training their arms and completely ignore their forearms. Muscular forearms can add to the size of your arms. Your bicep and triceps workouts aren’t enough to develop your forearms.
You need to train your forearms with compound and isolation exercises. Add forearm exercises to your arm days. You could also get hand grippers to train your forearms while you’re sitting idle.
Neck
Only a few other things look more awkward than a guy with big muscles and a tiny neck. If you have never trained your neck, it is time you start. You need to be extra careful while training your neck since it is one of the more delicate muscles.
Lie facedown on a flat bench and use a strap to lift a quarter plate. Move up to heavier weights as your neck gets stronger. Watch the video below to learn a few neck building tips from Mike Tyson.
[embedded content]
Grow Your Weak Muscle With These Tips
1. Train Them At The Beginning of Your Workout
If you look closely, all these muscle groups are usually trained at the end of workouts. You are fatigued by the end of your workouts. You should train your weak muscles at the beginning of your workouts since you’re full of energy and stamina.
2. Train Them Twice a Week
Since these are small muscle groups, they take relatively shorter time to recover from your workouts as compared to the bigger muscles. Schedule your workouts so you have 48 hours before you train the same muscle again.
3. Use Advanced Training Techniques
Most people stick to the same exercises for the lagging muscle groups. You need to constantly change your exercises to shock your muscles and keep them guessing. Use advanced training techniques like supersets, drop sets, intraset stretching to take your workouts to the next level.
Do you have a weak muscle group? Let us know in the comments below. Also, be sure to follow Generation Iron on Facebook and Twitter.

How To Tell If You’re Overtraining
Symptoms of Overtraining
Overtraining is one of the most misunderstood concepts in bodybuilding. The word ‘overtraining’ is casually thrown around in gyms by broscientists warning people who are working too hard.
Most of these broscientists don’t understand what overtraining means. You don’t have to worry about overtraining if you perform a few more reps and sets once in a while. Overtraining isn’t easy, you have to push yourself to the limits to overtrain your body. Your body can take much more than you can imagine.
Weak Nervous System
Here is the Wikipedia definition of overtraining; “Overtraining is the result of giving your body more work or stress than it can handle. Overtraining occurs when a person experiences stress and physical trauma from exercising faster than their body can repair the damage.”
Your central nervous system takes a big hit if you overtrain. You will find yourself falling sick often as your immune system weakens. If you are keeping ill and can’t understand the reason, you should consult a doctor.
Prolonged Muscle Soreness
Your recovery takes a big hit if you’re overtraining. Your muscles might be sore even after a relatively light workout. The soreness might remain for more than a couple of days which can affect your other workouts.
Taking recovery supplements is a good way of handling muscle soreness. Your muscles only repair when they are properly rested. Soreness is a sign that your muscles aren’t recovering, which can set you back on your muscle-building journey.
Exhaustion
Overtraining can make you feel exhausted all the time. If you have been overtraining, you will feel tired even when you wake up in the morning. Extended exhaustion periods can lead to many other problems like loss of concentration, motivation, and depression.
If you’ve been feeling exhausted for no particular reason, it’s a good idea to stay away from the gym for a couple of days. You definitely will return to the gym feeling more motivated than ever before.
Altered Heart Rate
In cases of overtraining, you might also experience altered heart rates. It is a good idea to use a heart rate monitor to analyze your heart rate while working out and throughout the day.
It is normal to have a high heart rate while you’re doing a HIIT workout. But if you’re experiencing an unusually high or low resting heart rate, it is a matter of concern, and you should consult a doctor at the earliest.
Injuries
Overtraining can make you weak which can lead to weaker muscle tissue and joints. If you are overtraining, your body doesn’t get enough time to recover and recuperate from your workouts which can re-aggravating old injuries.
Lifting heavy weights or pushing yourself too hard in the gym can cause frequent injuries. Muscle rehab is your only option if you find yourself in a place like this. Try adding forced rest periods into your routine and change the intensity of your training. If you’re into the active lifestyle, you could try switching to active recuperation sports which are low intensity.
Do you have any symptoms of overtraining? Let us know in the comments below. Also, be sure to follow Generation Iron on Facebook and Twitter.
Instantly Improve Your Squats and Leg Gains with these 5 Tips
5 Tips to Improve Your Squats
Chicken legs are probably one of the most common sights to be seen in gyms around the world. It is no secret leg days are one of the most despised days in the life of a bodybuilder. But make no mistake, a pair of shredded wheels is what separates the men from the boys.
Legs are the foundation of your physique. If you want to have a strong upper body, you need to have a rock solid lower body. Leg presses and leg extensions are cute, but it’s the squats which have proven to be the most effective leg builders.
People don’t like to squat since they are hard to perform. Most of the people who do perform them, don’t do it right. In this article, we will help you fix your form so you can reap the most rewards from this exercise.
1. Don’t Bend Your Back
Most people make the mistake of bending their back while squatting. While a normal arch on the way down is okay, it shouldn’t look like you’re performing half squat and half good mornings.
You can use your nose as a pivot point. While you squat your nose should look like you’re jumping straight into a swimming pool. If it looks like you’re diving into the pool, you’re doing it wrong.
2. Keep Your Head Turned Up
Warming up your lower back and legs before a leg workout is always a good idea. If for some reason you have a stiff lower back or hamstrings, you might have a tendency to bend forward. Doing so will put pressure on your glutes and lower back and take off the stress from your quads.
Keeping your head turned up and looking towards the roof can help you in keeping your back straight. The more you keep your back straight, more will be the tension on your quads.
3. Flair Out Your Knees on the Way Down
While squatting, some people push their hips back which brings their back into the movement as they have to bend forward to complete the movement. The right way of performing a normal squat is to push your knees out and going straight down while keeping your back straight.
The right starting position for a normal squat is to have a shoulder-wide stance with your toes pointing out slightly. Imagine as if you were sitting in between your knees. Don’t push your hips back as if you were to sit on a chair.
4. Keep Your Body Tight
Like every other exercise, squatting isn’t about going through the motions. You need to maintain a mind-muscle connection with your quads throughout the movement. Keep your quads tight and squeeze the hell out of them at the top of the movement.
If you want an intense quad pump, perform this exercise with a constant momentum while keeping your body tight. Don’t pause at the top or the bottom and flex your quads at the starting position.
Breathing is another very important aspect of squatting. While you’re at the starting position, take in a deep breath. Hold your breath and keep your core tight on the way down. Breathing out on the way up will help you generate thoracic pressure.
5. Use Accessories
Using accessories in your workouts can improve the results. A weightlifting belt can help you to generate thoracic pressure and will enable you to lift more weight. Knee wraps and sleeves can provide you support on heavier lifts by giving you that extra push from the bottom of the movement.
A Barbell squat pad is another great accessory which many people diss. Greats like Tom Platz used the barbell squat pad, so you should check your ego before stepping into the squat rack the next time.
How much do you squat? Let us know in the comments below. Also, be sure to follow Generation Iron on Facebook and Twitter.

How To Perform The Landmine Press
The Landmine Press: A Unique Unilateral Exercise For Building Shoulder Strength
While the landmine press is not your conventional type of resistance exercise, it has the potential to develop serious shoulder strength.Considering that the exercise is a unilateral exercise, it may also allow you to eliminate any asymmetries that exist and generally promote shoulder health and function.This article will demonstrate how to perform the landmine press as well as providing detail on the benefits of incorporating the exercise into your training program.
Landmine Press Technique & Muscles Worked
While you may be aware of common shoulder strengthening exercises such as the overhead press, shrugs, and rows, the landmine press is not so well known.The exercise involves the use of a barbell and a landmine holder. The landmine holder is a device that holds one end of the barbell and allows for 360-degree movement.If you do not have access to a landmine holder, find a stable base to place the barbell against (such as the corner of a room).
With one end of the barbell in the holder, the other end of the barbell should be held in one hand. The bar is then pressed through the engagement of the shoulder and arm muscles.
The muscles that are primarily involved in the press are the deltoids and triceps.The deltoids in the shoulder must concentrically contract to bring about extension at the arm whereas the triceps powerfully contract to extend the elbow joint. Due to the fact that the exercise is unilateral, there are a number of scapular stabilizing muscles that are heavily involved in controlling the movement (1).Furthermore, the oblique muscles must also contract to hold the spine in a neutrally aligned position and also prevent any rotation through the trunk.To perform the landmine press, work through the following five steps:Step One: Place the barbell into the landmine and add weight to the other end of the bar (if required).Step Two: With the barbell in contact with the floor, set-up directly behind it. Kneel down and place on the right foot out in front of the body and keep the left knee in contact with the floor. Step Three: Lift the barbell from the floor and place it in the left hand, holding it just in front of the shoulder.Step Four: Before pressing, lift the chest and brace the core tight. Press the bar up and out until you have fully extended at the elbows before returning to the starting position.Step Five: Upon completion of the reps on the left, swap sides and repeat.
Three Benefits of the Landmine Press
While there are a large number of benefits associated with the landmine press, this section will highlight three of the biggest benefits that you should be aware of.
1) Improved Core Stability
While improving pressing strength may be a fairly obvious benefit, improved core stability may not be the first benefit that comes to mind. As a result of the kneeling position and the angle of the press, the core has to work incredibly hard to stabilize the body as the bar is pressed.Therefore, by performing the landmine press frequently you can expect to see an increase in core stability and anti-rotational strength.Having a strong and stable core is highly important for all athletes and lifters who are lifting heavy weights or move weight overhead regularly as it can significantly reduce injury risk and facilitate performance (2).
2) Enhanced Scapular Control
For those who perform overhead movements (like snatches, jerks, & overhead squats), it is imperative that you have efficient scapular control. Having poor scapular control will not only hinder performance but may increase the risk of sustaining a serious shoulder injury. The landmine press is a superb resistance exercise that can significantly improve scapular control.This is primarily due to the angle of the press which highly activates shoulder stabilizers and is quite unlike the majority of other pressing exercises.
3) Increased Pressing Strength
Building strength in the deltoids and triceps will vastly improve the amount of weight that you can press. Therefore, the landmine press can be effectively programmed to improve pressing strength.
It’s also a highly functional exercise as, not only can it increase pressing strength, it can allow us to address any strength imbalances that exist between the shoulders.Furthermore, the combination of improved core stability and scapular control will lead to a more efficient pressing motion.By enhancing movement efficiency, you will also see a substantial improvement in your pressing abilities (3).
Who Should Perform the Landmine Press?
The following section provides detail on the benefits of the landmine press for specific goals and abilities.
1) Strength & Power Athletes
For those who perform overhead exercises, the landmine is an excellent accessory exercise that may help to improve overhead strength, stability, and rectify any existing imbalances.Weightlifters may find the landmine press to be particularly useful for improving snatch and jerk performance whereas powerlifters may experience improvement with their bench press.It may also be useful for those who have limitations when performing an overhead press or for those who are recovering from a shoulder injury.The angle involved in the landmine press may reduce the stress placed on the shoulder joint and consequently allow the lifter to continue to develop their pressing abilities without any issues.
2) Functional Athletes
Those who participate in sports like CrossFit may also find the landmine press to be beneficial to their performance.As highlighted in the earlier section, the landmine press develops many components of fitness – strength, stability, and movement.Therefore, incorporating the landmine press into your training is highly recommended as it will bring about a range of functional adaptations.
3) General Fitness
For general shoulder health and function, the landmine press is one of the best exercises that you can do.It may be particularly beneficial for beginner lifts as not only will it build shoulder strength and stability, it may also help to reinforce good pressing mechanics.As touched on briefly, the landmine press may also be useful for those who are suffering with limitations as the bar is press in front of the body rather than directly overhead.
Landmine Press Variations and Alternatives
There are a number of landmine press variations and alternatives that can be used to alter the demand of the exercise. This section will outline five excellent variations and three alternatives that you can consider using in your training.
Landmine Press Variations
1) Banded Landmine Press
For the banded variation, simply place one end of a resistance band around the front foot and the other around the barbell. The band will increase the amount of resistance that is experienced during the press thus applying additional stress to the working muscles and causing strength adaptations.
2) Standing Landmine Press
Very simply move from the kneeling position to a standing position for this variation. Although the change is simple, the dynamic of the movement changes slightly.By standing during the press, there is a greater need for total body control as the muscles of the legs become more heavily involved in stabilizing the movement.3) Tempo Landmine PressThe tempo variation is the same as the conventional landmine press with the only difference relating to the speed of each press. Manipulating the tempo in this way can significantly increase positional strength, muscle activation, core stability, and coordination.
4) Single Arm Landmine Thruster
This variation is an excellent full-body strengthening exercise that incorporates two exercises – the landmine squat and the landmine press. To perform a single arm landmine thruster, start in a standing position with the weight in hand. Perform a squat and as you rise out of it, press the bar.
5) Single Arm Landmine Push Press
The difference between the landmine press and push press is that the push press requires movement through the hips and knees to assist in the press.For the push press variation, start by standing and hold the bar in hand. Very rapidly dip and drive at the knees and hips and immediately press the bar out.
Landmine Press Alternatives
1) Single Arm Kettlebell Press
Like the landmine press, the single arm kettlebell press can be effectively used to develop scapular control, movement, and unilateral strength.
2) Z-Press
The Z-Press is another pressing exercise that is most commonly used to build positional strength and core stability – this makes it an excellent alternative to the landmine press.
3) Overhead Press
In terms of developing raw shoulder strength, the overhead press is one of the best exercises that can be performed. Nothing quite compares to driving a heavy bar up and overhead.
Final Word
The landmine press is a highly functional strength training exercise that will significantly improve shoulder strength, core stability, scapular control, and movement. It is certainly an exercise that has proven to be highly beneficial for the majority of lifters and athletes.
References:1 – Schory, Abbey; Bidinger, Erik; Wolf, Joshua; Murray, Leigh (2016-6). “A SYSTEMATIC REVIEW OF THE EXERCISES THAT PRODUCE OPTIMAL MUSCLE RATIOS OF THE SCAPULAR STABILIZERS IN NORMAL SHOULDERS”. International Journal of Sports Physical Therapy. 11 (3): 321–336. ISSN 2159-2896. PMC 4886800. PMID 27274418.
2 – Radwan, Ahmed; Francis, Jennifer; Green, Andrew; Kahl, Eric; Maciurzynski, Diane; Quartulli, Ashley; Schultheiss, Julianne; Strang, Ryan; Weiss, Brett (2014-2). “IS THERE A RELATION BETWEEN SHOULDER DYSFUNCTION AND CORE INSTABILITY?”. International Journal of Sports Physical Therapy. 9 (1): 8–13. ISSN 2159-2896. PMC 3924603. PMID 24567850.
3 – Sparrow, W. A. (1983-09). “The efficiency of skilled performance”. Journal of Motor Behavior. 15 (3): 237–261. doi:10.1080/00222895.1983.10735299. ISSN 0022-2895. PMID 15151872.