Tag: Workouts
The Ultimate Guide To The Upright Row
Developing Strength And Size In The Back and Shoulders
For years, the upright row has been used by strength, power, and fitness athletes in order to develop back and shoulder strength and size.
While the exercise itself is fairly straightforward, if performed incorrectly it may inhibit your progress or, even worse, lead to injury.
This comprehensive guide will provide all the detail you require to allow you to perform the upright row safely and effectively.
Three-Step Guide To Performing The Upright Row
While dumbbells, kettlebells, bands, and cables can all be used for the upright row, the following technique is specifically for a barbell upright row.
Work through the following three steps to perform the perfect upright row.
1) Pick Your Grip
Before you even lift the bar from the floor, you need to determine which grip you are going to use.
A wider grip on the bar will emphasize the posterior deltoids while a narrower grip will target the trapezius muscle and biceps to a greater degree (1).
For those who wish to get the best of both worlds, use a grip that is approximately three inches wider than shoulder-width.
Ideally, you should select the grip that is most applicable to you and any sport you participate in. For example, weightlifters should consider using clean and snatch grips when performing the upright row.
2) Stand With The Bar
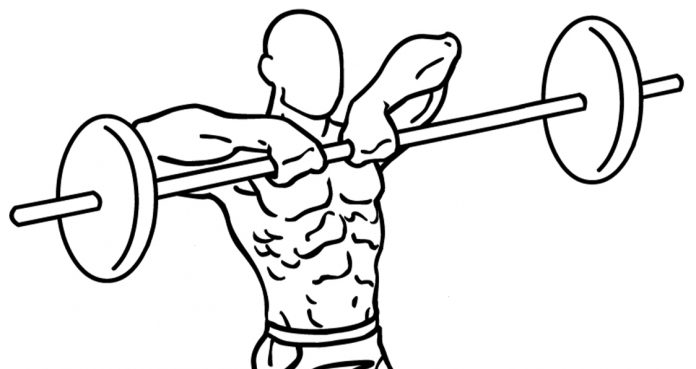
Once you have gripped the bar, lift the bar up to the hips and stand up tall. When lifting any heavy object from the floor, it’s important to lift the chest and keep the core engaged.
Once standing, think about pulling the shoulder blades back and down all while maintaining a tall chest and braced core.
Focus on squeezing the barbell tightly so that the knuckles stay pointed down and the elbows flare out slightly. This will allow you to pull the elbows upward with greater efficiency.
3) Drive The Elbows Up
Powerfully drive the elbows up and slightly out all while keeping the bar as tight to the body as possible.
Letting the bar drift away from the body will interfere with the path of the elbows and will likely cause them to move backward rather than staying over the wrists.
Ensure that you do not excessively load the bar. Use a weight that allows you to use a full range of motion and control the eccentric (lowering) phase.
Upright Row Benefits
The upright row is associated with a number of benefits that will be discussed in the below section.
1) Increasing Shoulder Strength and Hypertrophy
The most obvious benefit of the upright row is increasing strength and size in the shoulders as the movement recruits a variety of muscles around the shoulder joint.
Therefore, for those who aspire to increase shoulder strength or size, pressing abilities, or general strength, the upright row is a great option.
To maximize strength development, it is critical that the technique used is high-quality. Failing to prioritize form may interfere with time under tension and muscle activation thus inhibiting progress.
2) Targeting The Traps
The trapezius muscles play a key role in a number of compound exercises such as the deadlift, squat, and pressing exercising. Having large traps is also a physical feature that many desire.
These muscles are specifically targeted during the upright row and regularly performing this exercise can lead to significant improvements in trap strength and size.
To maximize trap development, use a narrower grip as a wider grip will place more demand on the posterior delts.
3) Enhance Clean and Snatch Performance
In the second pull during the clean and snatch, the lifter must replicate a motion that is not dissimilar to the upright row.
They must explosively pull the bar upwards by elevating the shoulders and elbows all while keeping it tight to the body.
Therefore, becoming proficient at the upright row may transfer directly to a stronger, more efficient second pull during the clean and snatch.
Upright Row Muscles Worked
As highlighted, the upright row specifically targets the shoulder muscles. However, there are many other muscles that must engage to allow the elbows to be pulled upward.
The muscles worked in an upright row include:
Deltoids (anterior, lateral, and posterior)
Trapezius
Rhomboids
Biceps
Who Should Perform Upright Rows?
Before loading the exercise it is crucial to assess whether or not the lifter can successfully elevate the hands while keeping them close to the body without experiencing pain or asymmetry.
Performing the upright row with poor form has been associated with shoulder impingement (2), therefore, caution is required and form must always be the top priority.
While anyone can really perform upright rows, there are specific populations that may gain greatly from them.
1) Powerlifters
Increasing the strength and size of the upper back and shoulders may translate to a better performance with the squat, deadlift, and bench press.
2) Strongmen
The vast majority of strongmen events require a large degree of upper back and shoulder strength. Consequently, the upright row can be used as an accessory to facilitate strength performance.
3) Olympic Lifters
As briefly touched on, there are similarities between the upright row and the Olympic lifts. Practicing the upright row regularly will not only increase strength but will also reinforce the correct movement patterns.
Upright Row Programming Considerations
The load and volume that you perform will determine the fitness component that you predominantly develop.
If you are looking to increase strength, focus on heavier weight and lower reps as studies have consistently shown this to be most effective (3). 4-6 sets of 3-8 repetitions will suffice.
Extremely heavy loads and low reps (1-3) are not recommended as this may lead to the breakdown of form and injury.
For muscle growth, muscle fatigue and time under tension appear to be influential factors (4). Therefore, utilizing a slightly higher rep range may help you achieve this. Focus on 3-5 sets of 8-15 reps.
When performing upright rows for size, concentrate on the muscular contractions and look to increase time under tension as much as possible. Moderate weight is often best for this.
Upright Row Variations
This section will provide five excellent upright row variations that will allow you to maximize upper back and shoulder development.
1) Narrow Upright Row
As mentioned, assuming a narrower grip on the bar will place a greater demand on the traps. Therefore, to optimize trap development, the narrow grip variation is recommended.
As the name suggests, this variation simply involves reducing the distance between the two hands. However, be wary that this variation may place additional stress on the wrists and shoulder if done incorrectly.
2) Clean Grip Upright Row
When performing a clean, the hands are placed on the bar slightly wider than shoulder-width. Therefore, for the clean grip upright row, simply replicate this grip.
For any lifter who regularly performs cleans, this variation may help to improve the second pull both in terms of power production and movement.
3) Snatch Grip Upright Row
The snatch has a much wider grip than the clean. While each lifter’s hand position will likely differ, the grip should be wide enough so that the bar sits at the crease of the hips.
Once the bar is in this position, simply perform an upright row. Because this grip is much wider, there is a greater emphasis on the posterior deltoids.
4) Band or Cable Upright Row
While barbells are excellent resistance training tools, they aren’t the only ones. Bands and cable are superb tools that can accelerate strength development.
One of the biggest benefits associated with bands and cables is that they sustain tension on the muscle throughout the entirety of the movement.
5) Dumbbell Upright Row
Although it is typically possible to lift a heavier weight with a barbell in comparison to a dumbbell, barbells may mask strength imbalances.
Using two individual dumbbells, however, will firstly help you determine whether or not imbalances or asymmetries exist and secondly, allow you to eliminate them.
Alternatives To The Upright Row
Some may find the upright row to be an unsuitable exercise due to previous injury or mobility concerns, for example.
Here are three superb alternatives to the upright row that target similar musculature and allow you to develop strength, size, and performance.
1) Clean / Snatch High Pull
The high pull shares characteristics with the upright row with the primary difference being the involvement of the lower body. It will help to develop full-body strength, timing, positioning, and power output.
To perform a high pull, hinge forward and allow the bar to descend towards the knees before powerfully driving the hips through and simultaneously pulling the bar upwards.
2) Muscle Clean / Snatch
The muscle clean and snatch is an advancement on the high pull and upright row. In terms of developing muscular strength and recruitment, there are few exercises that compare.
For these exercises, the high pull will be performed, however, instead of returning the bar to the hips, it will be pressed directly overhead.
3) Face Pull
Although the plane in which this exercise is different from the upright row, the face pull highly activates the same muscle groups and, therefore, can improve upper back and shoulder strength.
For this, you will need to use a cable or band. Grasp the ends of the equipment with both hands and pull it towards the face all while keeping the elbows high.
Final Word
There is a vast array of upper back and shoulder strengthening exercises, however, the upright row is one of the most effective.
It is particularly useful for those who partake in powerlifting, strongman, and Olympic lifting. Becoming proficient with the upright row may facilitate an improved performance in these sports.
References:
1 – https://pubmed.ncbi.nlm.nih.gov/22362088/ McAllister, Matthew J.; Schilling, Brian K.; Hammond, Kelley G.; Weiss, Lawrence W.; Farney, Tyler M. (2013-01). “Effect of grip width on electromyographic activity during the upright row”. Journal of Strength and Conditioning Research. 27 (1): 181–187. doi:10.1519/JSC.0b013e31824f23ad. ISSN 1533-4287. PMID 22362088.
2 – https://pubmed.ncbi.nlm.nih.gov/24077379/ Kolber, Morey J.; Cheatham, Scott W.; Salamh, Paul A.; Hanney, William J. (2014-04). “Characteristics of shoulder impingement in the recreational weight-training population”. Journal of Strength and Conditioning Research. 28 (4): 1081–1089. doi:10.1519/JSC.0000000000000250. ISSN 1533-4287. PMID 24077379.
3 – https://www.ncbi.nlm.nih.gov/pmc/articles/PMC5131226/ Schoenfeld, Brad J.; Contreras, Bret; Vigotsky, Andrew D.; Peterson, Mark (2016-12-01). “Differential Effects of Heavy Versus Moderate Loads on Measures of Strength and Hypertrophy in Resistance-Trained Men”. Journal of Sports Science & Medicine. 15 (4): 715–722. ISSN 1303-2968. PMC 5131226. PMID 27928218.
4 – https://www.ncbi.nlm.nih.gov/pmc/articles/PMC3285070/ Burd, Nicholas A; Andrews, Richard J; West, Daniel WD; Little, Jonathan P; Cochran, Andrew JR; Hector, Amy J; Cashaback, Joshua GA; Gibala, Martin J; Potvin, James R; Baker, Steven K; Phillips, Stuart M (2012-01-15). “Muscle time under tension during resistance exercise stimulates differential muscle protein sub-fractional synthetic responses in men”. The Journal of Physiology. 590 (Pt 2): 351–362. doi:10.1113/jphysiol.2011.221200. ISSN 0022-3751. PMC 3285070. PMID 22106173.
*Header image courtesy of Everkinetic via the Creative Commons Attribution-Share Alike 3.0 Unported.
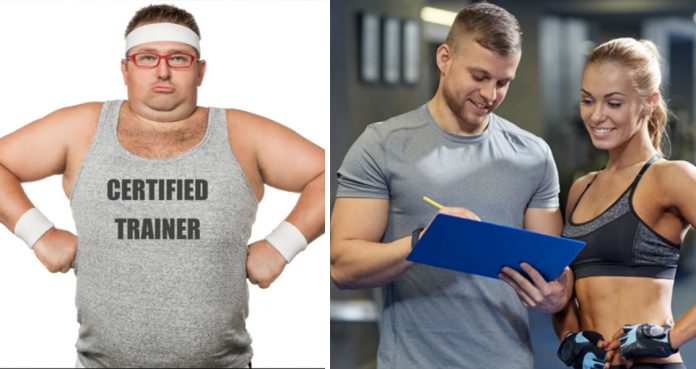
Personal Training Should Be A Strict No And This Is Why
These Are The Reasons Why You Should Never Sign Up For Personal Training
Personal training is one of the biggest profit making services for a gym and its trainers. This is the reason the staff at the gyms push people to sign up for personal training (PT) programs. The newbies are the most prone to the PT sales pitch.
If you’ve just got a gym membership, working out can look intimidating. The trainers at your gym know this and will try to push you into signing up for a PT. No matter how hard they try, you should stay away from it.
1. Not For The Long Run
Staying with a personal trainer forever can be hard even if you want to compete in pro bodybuilding shows. Most people tend to stop taking the personal training services once they get the knack of things in the gym.
While this might be the obvious next step for you, there are chances your personal trainer will not be happy with your decision. Don’t expect help or spot from the trainers at your gym once you’re off the personal training program.
2. Cross Selling
Once you sign up for PT, you’ve established you’re ready to spend handsomely on your health. Many gyms recommend and sell supplements to their customers and make a fat commission on every sale.
Cross selling doesn’t end at supplements. It can even extend to gym gear and any other thing related to fitness and working out. Don’t be surprised the next time your personal trainer finds something extraordinary and wants you to try it.
3. Over Dependence
Getting a personal trainer for yourself is like outsourcing the tension about your health. This can be a good and a bad thing. Over-dependence on your trainer for your training and nutrition plans can be harmful.
Your trainer will love to do all this work since it will keep you dependent on him. You should be actively involved in building your diet and training plans. Make sure you’re questioning and learning from your trainer with every single passing day.
4. No Custom Training Programs
Personal training isn’t as personal as you might think it is. Look at it from the business point of view, the more clients the trainer services, the more he earns. Training clients for the entire day can leave little to no time to work on individual client training programs.
The trainers end up building a generic training plan which all their trainees follow. In worse cases, people follow plans which are available on Bodybuilding.com for free. If you decide to opt for personal training, see to it your instructor builds a custom plan for you.
5. Getting A Wrong Match
No two people are the same. You can’t go with any fitness trainer. You need someone who matches your personality and style and understands where you lack. Your fitness instructor will be with you for the entire time you’re in the gym, choose someone you can jell well with.
Hiring a wrong match can act as a demotivation. You might start skipping your workouts because of your trainer. The best way to avoid this is to ask the trainer for a trial and only finalizing if he is a good fit for you.
Have you ever opted for personal training? Let us know in the comments below. Also, be sure to follow Generation Iron on Facebook and Twitter.
Achieve Mind Boggling Shoulder Gains With These 4 Exercises
A Complete Shoulder Workout
Broad shoulders are a sign of strength and power. Imagine what would Superman look like with tiny shoulders. A study from the University of Albany found that a woman’s sexual satisfaction is strongly linked to her partner’s attractiveness and shoulder breadth.
Going by this research, who wouldn’t want to have a nice set of shoulders. This is easier said than done. Shoulders are one of the hardest muscle groups to develop. Building round shoulder caps requires a combination of compound and isolation exercises.
Shoulders consist of three heads; medial (middle), anterior (front) and posterior (rear). Most people have lagging shoulders because they fail to train all the three heads equally. The rear deltoids are usually the most stubborn among the three.
We have designed this workout keeping in mind an overall development of your shoulders. If you’re stuck on a plateau, you should also experiment with advanced training techniques like supersets, drop sets, rest-pause sets, etc.
1. Military Presses – 3 Exercises 12 Reps
Military presses are a compound exercise which works the medial and the anterior shoulder heads. You should start your shoulder workout with the military presses as they are one of the most taxing exercises.
Since this is an overhead movement, you need to be extra careful while performing it. Ask someone for a spot if you’re going for a PR. You should also be using lifting equipment like a weightlifting belt and wrist wraps for support.
2. Dumbbell Front Raises – 3 Exercises 12 Reps
Dumbbell front raises work the anterior (front) deltoids. Most people make the mistake of going too high while performing this exercise. Raise the dumbbells to your eye level without using any momentum.
Negatives are an important part of the dumbbell front raises. Don’t drop the weights like a bomb, keep the negatives slow and controlled. If you want a better pump, perform unilateral sets. Unilateral sets are when you perform all the reps on one side before moving on to the other.
3. Pec Deck Rear Flyes – 3 Exercises 15 Reps
Most people lack in the rear delt department. They make it even worse by not training their rear deltoids often enough. Since your rear delts are at your back, it is hard to establish a mind-muscle connection with them as you can’t see them in the mirror.
Pec deck rear flyes are an isolation exercise. Using cables help in maintaining constant tension on your rear delts throughout the movement. Pause for a second at the top of the movement and squeeze your rear delts.
4. Cuban Presses – 3 Exercises 12 Reps
[embedded content]
Cuban Presses are an incredibly effective exercise which helps in building overall muscle mass. Hold dumbbells in both hands and place them in front of your quads. Perform an upright row and at the top of the upright row, switch to the shoulder press position.
Complete a shoulder press and return to the starting position by performing a negative on the upright row. Use moderate weights while performing this exercise as it is more brutal than it might look like.
5. BONUS: Barbell Shrugs – 3 Sets 15 Reps
Don’t leave out your traps while training your shoulders. The trapezius is one of the major muscles of the back and is responsible for moving, rotating, and stabilizing the scapula (shoulder blade) and extending the head at the neck.
While performing the barbell shrubs, most people put more weights on the bar than they can handle. Bring your shoulder to your ears and hold them there for a second. You can also perform this exercise using dumbbells.
What day of the week do you train your shoulders? Let us know in the comments below. Also, be sure to follow Generation Iron on Facebook and Twitter.
5 Exercises for Shredded Legs
Get Shredded Legs with these 5 Exercises
Shredded legs are what separate the men from the boys. You need to have strong and muscular wheels as your legs are the foundation of your body. While legs are one of the most important muscles to train, many people around the world skip training them.
You need a combination of compound and isolation exercises in your workouts to take your wheels to the next level. Time under tension, volume and intensity play a major role in developing your legs.
Hack Squats – 3 Sets 15 Reps
Hack squats are one of the most underutilized exercises when it comes to leg training. The hack squat machine helps you to tweak your movement to target your quads from different angles.
Arnold in his book ‘Encyclopedia of Bodybuilding’ said that you are supposed to maintain a full range of motion while performing the hack squats. Place your feet under your body and push your knees forward on the negative motion. Pause at the bottom of the movement and explode back to the starting position.
Leg Extensions – 3 Sets 15, 12, 10 Reps
Most people perform the leg extensions incorrectly. They load the extension machine with more weights than they can handle and use momentum and a jerking movement to lift the weights. The most effective way of doing the leg extensions is to pause for a couple of seconds at the top of the movement.
The positive movement should take one second, hold the weights on the contraction for two seconds, take four seconds on the negative movement and take no rest by racking the weights at the starting point.
Good Mornings – 4 Sets 8 Reps
Since your Hamstrings are at the back of your legs, it is harder to train and develop them as compared to your quads. It also becomes harder to establish a mind-muscle connection with your hams since you can’t see them in the mirror.
Good mornings are a hard exercise to execute and you need to keep the movement slow and controlled to get the best results. If you perform the good morning in a squat rack, set-up safety bars at your belly button level and bend until the barbell touches the safety bars.
Nordic Curls – 3 Sets 15 Reps
[embedded content]
Chances are you might not have seen anybody perform the Nordic curls exercise in your gym. Nordic curls can set your hamstrings on fire and you will need a spotter if you have weak hams.
The lat pulldown machine is the best place to perform this exercise. Put your ankles between the knee pads and the seat and place your knees on the seats. Bend your back so it is parallel to the floor. This will be your starting position. Lower yourself using your hamstrings without moving your back, so your face is 8-10 inches away from the floor.
Cannonball Squats – 3 Sets 15, 12, 10 Reps
Perform the squats at the end of your workouts when your legs are completely exhausted. This way you won’t have to lift super heavy weights and your legs will be warmed up so you will have a better range of motion.
While performing the cannonball squats, you need to stand with the balls of your feet placed together and your toes facing outwards. The cannonball squats is a compound exercise which helps in developing the inner sweep of your quads.
Which is your favorite leg exercise? Let us know in the comments below. Also, be sure to follow Generation Iron on Facebook and Twitter.

The Arnold-Approved Training Program You Need to Try This Week
Try this Arnold-approved workout
If you’ve been around the fitness scene for some time, chances are, you would have come around Arnold’s Encyclopedia of Bodybuilding. In his book, The Governator, among many things, lists his experiences and results using various training programs.
One of the programs Arnold recommends in his book is the antagonistic superset training. Arnie considered them to be better than the usual supersets where you switch from one exercise to the other without any rest in between sets.
Antagonistic Training
In the antagonistic training, you train opposing body parts in the same workout. For example, Schwarzenegger liked to train his chest and back, biceps and triceps, quads and hams in the same workout.
Although there were no studies or research to prove it, Arnold claimed the antagonistic supersets help him gain muscle mass and improved his strength. Researchers have since backed this technique with data and have given Arnold’s claims a clean chit.
Things to Know About Antagonistic Training
You can use the antagonistic training principle of training opposing muscle groups as a superset or take a 2-3 minute rest before alternating the exercise.
Antagonistic training can help you in building pressing strength by alternating the exercise with pulling movements.
It helps in maintaining muscle balance as you’ll be doing the same amount of work on the opposing muscles.
Alternating sets with a 2-3 minute rest in between sets can increase muscular strength as compared to super-setting which annihilate the muscles.
While following the antagonistic training plan, you need to train your opposing muscles in the same plane to get the best results. For eg. – follow bench press with the bent over barbell row.
Develop Symmetry with Antagonistic Training
The antagonistic training is better at developing symmetry and eliminating muscle imbalances than most other training methods. If you’re already suffering from a muscle imbalance, train the lagging muscle before the stronger muscle in the alternate sets.
Antagonistic training ensures you’ll be doing enough work on both sides of the bone to build and maintain muscle symmetry. Alternating between pulling and pushing movements will keep you from overdeveloping some muscle groups which can cause a poor posture.
You could also perform supersets as opposed to the alternate sets in the antagonistic training program but be ready for a hard and grueling workout. Make sure you’re following the same intensity in the pulling and the pushing movements.
Use the Same Angles
A major aspect of antagonistic training is to use the same angles while performing the antagonistic exercises. If you’re performing dumbbell chest presses on an incline bench, turn around and perform dumbbell rows as the alternate set for your back.
In the same fashion, follow up the standing military presses with chin-ups. Using the same angles will ensure the muscles in direct opposition to the prime movers are trained more effectively.
The Arnold-Approved Antagonistic Training Program
Day 1 – Chest / Back
Set 1
Barbell Bench Press – 3 Sets 15-12-10
Bent-Over Barbell Rows – 3 Sets 15-12-10
Set 2
Incline Dumbbell Flyes – 3 Sets 15-12-10
Chest Supported Dumbbell Rows – 3 Sets 15-12-10
Set 3
Chest Cable Flyes – 5 Sets 15
Rear Delt Cable Flyes – 5 Sets 15
Day 2 – Biceps / Triceps
Set 1
Cable Bicep Curls – 5 Sets 15-12-10-8
Cable Tricep Presses – 5 Sets 15-12-10-8
Set 2
Incline Bench Spider Curls – 3 Sets 15-12-10
Incline Bench Skullcrushers – 3 Sets 15-12-10
Set 3
Bent Over Concentration Curls – 3 Sets 15-12-10
Leaning Dumbbell Tricep Kickbacks – 3 Sets 15-12-10
Day 3 – Shoulders / Back
Set 1
Barbell Military Presses – 3 Sets 15-12-10
Weighted Chin-ups – 3 Sets 15-12-10
Set 2
Plate Front Raises – 3 Sets 15-12-10
Straight-Arm Lat Pulldowns – 3 Sets 15-12-10
Set 3
Arnold Presses – 3 Sets 15-12-10
Upright Rows – 3 Sets 15-12-10
Day 4 – Quads / Hams
Set 1
Leg Extensions – 5 Sets 15-12-10-8
Seated Leg Curls – 5 Sets 15-12-10-8
Set 2
Leg Press (Feet Low on Platform) – 3 Sets 15-12-10
Leg Press (Feet High on Platform) – 3 Sets 15-12-10
Set 3
Squats – 3 Sets 15-12-10
Set 4
Stiff-Legged Deadlifts – 3 Sets 15-12-10
Have you ever tried the antagonistic training principle? Let us know in the comments below. Also, be sure to follow Generation Iron on Facebook and Twitter.
*Header image courtesy of Jamie Wyeth under the CC BY-NC-SA 2.0 license.
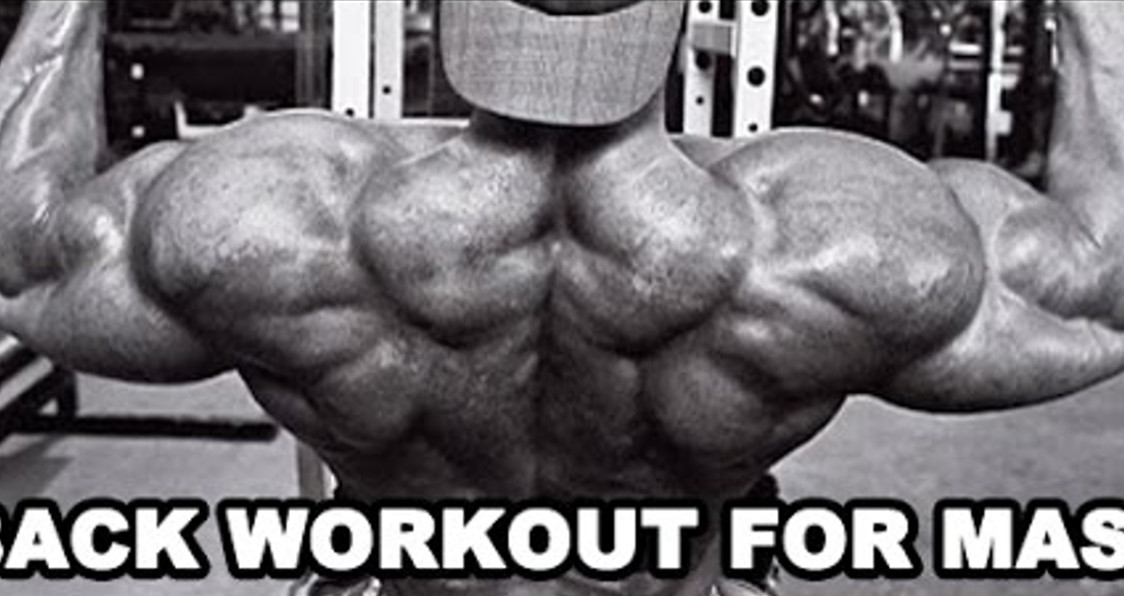
In Depth: How To Workout Your Back For Optimal Mass
[embedded content]
The full deets on a getting a massive back.
Building up a great physique is very much like constructing a skyscraper. It requires a sturdy foundation as well as strong internal structuring and maintenance in order to remain strong and aesthetic. When it comes to building muscle there’s always a delicate balance involved. People’s bodies are all different which means that everyone reacts differently to nutrition and exercise. But for the most part if you eat well, exercise smart, and have perfect form coupled with the optimal weight then gains are no doubt going to be in your future..
Building up every body part is key having impressive symmetry. If you want to have a proportional figure then it means you have to give equal attention to every part of your body. So for example, if you wanted to build up your chest for instance it means you have to work the opposite, or anterior, muscle groups as well. That means training the entire back for optimal growth for both the lats and the pectorals.
Why build up the back?
“Why not?!” would be a pretty adequate response to such a question, but since the devil is in the details, let’s explore the notion for a bit shall we.
First off, let’s consider what the back really does. In reality, the back is perhaps the most important body part to build up. While the front side of our bodies get a tremendous amount of attention, the back is vastly important when it comes to performance. Ask any athlete who has ever had a back injury and they’ll tell you that it is paramount to their overall athletic performance. As said before, everyone needs to build a strong foundation in order to excel and tap into their true potential. While the legs are quite literally the foundation of the human body, and is just as important to strengthen, the back is also a core component of ensuring high level athletic execution.
Coming from a purely aesthetic stand point, the back is also key in being able to make the illusion of massive. While the shoulders may work as the overall frame from size perspective, the back is also paramount if you want to really look jacked. Focusing purely on your arms just simply isn’t going to cut it.
Building the outer and lower lats are going to go a long way in creating the illusion of a tiny waistline. While many man may complain and worry about love handles, the reality is that one of the best ways to mitigate the flaw is by building up the lats in order to cut a broader figure to your upper half. Along with building the shoulders, having great lats are the key to constructing the coveted V-Taper that so many classic bodybuilders were known for possessing.
But building wide lats simply isn’t enough if you want to have total back dominance. You’ll need to add depth to your back as well, meaning training the inner back. Where building the outer and lower lats can be done by performing lat pull downs and pull ups, among other exercises, the muscle for the inner back can be carved out by performing dumbbell, barbell, or cable rows. Deciding which is a matter of preference, but trying a combination of all of them is a key to success.
Still not convinced that you need to make back training your priority? (Who said we didn’t?) If you still need more evidence to the fact then think about every bodybuilding champion who crushed the competition on the way to winning the Olympia. All of them had impressive attributes, including a truly out of this world back.
When it comes to bodybuilding and training advice there are few people out there that can match IFBB pro bodybuilder Benjamin Pakulski in terms of sheer intricate knowledge and experience. The man is an advocate of the scientific approach to getting the body to perform at optimal levels in order to both condition the body as well as acquiring great muscle growth.
The IFBB pro’s YouTube page is dedicated the best advice and knowledge Ben has acquired over years of studying and trial and error. If you’re looking to build an impressive back then we have no doubts that Pakulski’s intricate break down on training the lats is something you’re going to want to see. Check out the video below for some detailed knowledge into how to train the back.
Would you want to train under Ben Pakulski’s tutelage? You can also get a deeper inside look into Ben Pakulski’s bodybuilding journey way back from our original Generation Iron film. Available to stream here.
For more news and updates, follow Generation Iron on Facebook, Twitter, and Instagram.
Managing Editor at Generation Iron, Jonathan Salmon is a writer, martial arts instructor, and geek culture enthusiast. Check out his Instagram, Twitter and Facebook to keep up with his antics.

5 Ways To Bring Up A Lagging Body Part
Follow These 5 Steps To Bring Up Your Lagging Muscle Group
You’re having the perfect workout, you’re all pumped up and your biceps have turned into mountains, but then you look at your toothpick legs and its all over. Most people have a lagging body part which can create a hole in their self-confidence.
There could be a couple of reasons behind the lagging body part. It could either be your genetics or you’re not training the muscle group correctly. A lagging body part needs to be treated differently as compared to the other muscles.
1. Start Your Workouts With The Weaker Muscle Group
Humans have unique genetics and they determine the muscle composition of an individual. Although the most common weak muscle groups are forearms, calves, biceps, and triceps, it may vary for every person.
If you train your lagging muscle group with a stronger muscle group, you should train the weaker muscle at the beginning of your workout. If you have weak calves and stronger upper legs, you should train your calves before you train your quads and hams.
2. Use Advanced Training Techniques
A big reason why you might not be seeing results in the gym could be because your body has got used to your training. You should constantly change your training programs and use advanced training techniques to break the plateau.
Advanced training techniques like supersets, drop sets, negatives, intraset stretching, etc. are a great way to pump blood into your weaker muscles and shock them. Try switching these advanced training techniques with every workout for optimal results.
3. Train The Lagging Muscle Group Twice A Week
If you’re not seeing results you should start training your weak muscles twice a week. You don’t need to worry about overtraining your muscles if you give your body enough time to recover between the workouts.
Schedule your workouts so you have at least 48 hours before you hit the same muscle again. Keep your workouts short and explosive. You should be spending around 45-60 minutes inside the gym, not more than this.
4. Switch Volume and Intensity
Most people make the mistake of sticking to the same volume and intensity for all their workouts. While 3 sets of 12 reps might work for other muscle groups, they won’t budge the needle for your weaker muscles.
Volume refers to how many reps or sets are performed, and intensity indicates how much weight is lifted. Switch your volume and intensity at regular intervals to keep your muscles guessing. The combinations of high reps, low weight and low weight, high reps work the best for lagging muscles.
5. Establish a Mind-Muscle Connection
Bodybuilding isn’t about going through the motions. You need to focus on your muscles and contract them with every single rep. Arnold Schwarzenegger brought the mind-muscle connection to the limelight.
The Governator believes you need to become the muscle to see the best results. If you’re training your biceps, focus all your attention on the bicep and squeeze the living hell out of it at the top of the movement. Arnie is famous for thinking of his biceps as mountains.
Which is your weakest muscle group? Let us know in the comments below. Also, be sure to follow Generation Iron on Facebook and Twitter.
Effective Upper Chest Training
How To Build A Big Chest
Those who are looking to increase the size of their chest often start in the wrong place. For ultimate chest building, it is wise to start with the upper chest and work down; therefore, growing the upper pecs should be made a priority.
Typically, for chest development, the chosen method is to perform heavy bench presses and chest orientated exercises. While there are many superb chest developing exercises, a large number of them place demand on the fibers of the mid to lower pec rather than upper pec fibers. As a result, the upper chest may fail to develop at the same rate thus hampering overall chest building progress.
The Pectorals
The chest muscles are known as the pectorals and there are 4 individual muscles that make up the muscle group. The 4 muscles are the pectoralis major, pectoralis minor, serratus anterior and subclavius. All of these muscles work together to bring about movement around the shoulder.
For those who are looking to increase chest size, it is the pectoralis major that will be of most interest. As the name suggests, the pectoralis major is the biggest and most visible of the 4 muscles. As a result, it is the muscle which have the most profound impact on chest building.
The pec major has 3 independent origin points – one on the clavicle (collar bone), another on the sternum (breast bone) and finally one on the ribcage. As a result, the pec muscle is often divided into 3 different anatomical sections – the clavicular (upper) region, the sternal (mid) region and the costal (lower) region. All three regions insert on the humerus bone found in the upper arm and allow for a range of different shoulder movements (1).
Upper Chest Workout
As mentioned, the upper chest often underdevelops and requires specific attention. The following workout will demonstrate an effective plan for developing upper chest strength and size.
The plan can be used either as a “chest day” workout or may be used as the foundations of a chest-based workout. It is possible to add extra chest exercises to this plan to increase the overall volume of the workout and enhance muscular hypertrophy.
Exercise
Sets x Reps
Rest
Incline Dumbbell Flyes (Low Angle)
3 x 12, 10, 8
45s
Smith Machine Incline Bench Press
4 x 12, 10, 8, 6
60s
Push-Ups with Feet Elevated (Dropset)
3 x failure
30s
The 3 Upper Chest Exercises
This section will briefly break down the movements required for each of the exercises in the program. For those who are strength training novices or for those who are learning the exercises for the first time, always start with low weight and intensity to allow the body time to get to grips with the movements required. As movement proficiency improves, gradually increase the demand of each exercise.
1) Incline Dumbbell Flyes (Low Angle)
A standard dumbbell fly will target the body of the pecs rather than specifically hitting the upper portion of the muscle. In order to place the majority of the stress on the upper chest, place the bench on a low incline. Doing this will maximize upper pec engagement while also minimizing the involvement of the front deltoids in the shoulder
For the incline dumbbell fly, lie back on the bench and press the dumbbells up so that they are directly above the chest – this is the starting point. In a controlled motion, gradually lower the dumbbells to the sides of the body while keeping the arms straight (avoid locking the elbow joint). Drive the chest up as you lower to stretch the pecs out all while ensuring that the shoulders are kept back and down.
Once the arms have lowered to the sides of the body, squeeze the arms together in order to drive the arms back up to the starting position. Avoid banging the dumbbells together when they meet above the chest. Once the dumbbells returns to the starting point over the chest, focus on contracting the pecs momentarily before commencing the next rep.
2) Smith Machine Incline Bench Press
When benching, one of the advantages of using the Smith machine over a barbell is that stabilization is less of a factor. With the barbell, many muscles must contract in order to stabilize the bar as it moves which may take some of the demand away from the upper pecs. Because the Smith Machine runs along rails, there is no need for stabilization which will allow a greater emphasis to be placed on the upper pecs.
For the incline bench press, start by setting the bench at approximately 45 degrees and lie back on it, ensuring that the bar lines up with the chest. Grip the bar with both hands slightly wider than shoulder width. Unrack the bar and then gradually lower the bar towards the chest, stopping an inch above the chest. Stopping just short of the chest will maintain tension in the pecs and eliminate the chances of using momentum.
Pause briefly at the bottom of the rep before driving the bar up powerfully. As with the incline flyes, look to squeeze the pecs at this point and maintain a strong contraction for a second or so. Finally, ensure that the elbows do not lock out during this phase as this will cause the triceps to take control rather than the upper chest.
3) Push-Ups with Feet Elevated
In terms of bodyweight exercises, the push-up reigns supreme for chest development. In the same way that setting the bench on an incline places a greater demand on the upper pecs (2), elevating the feet will also cause the focus to shift to the upper chest. Using dumbbells or push-up handles is a great option for those who struggle with wrist pain and also for increasing the exercise’s range of motion.
To perform the push up, start by placing a bench directly behind the body. Position the hands so that they are directly underneath the shoulders and then place the feet on the bench at approximately hip width. Keeping the body as straight as possible, hinge at the elbows and look to keep them tight to the body as the chest drops down to the floor.
From this position, imagine trying to drive the hands through the floor to propel the body back up to the starting position. Once muscular failure is reached, step down to the floor and continue pressing. This advanced training method is known as a drop-set and has been found to be an effective muscle building method (3).
Muscle Building Essentials
While focusing on developing the upper chest is important for building a full, thick chest, changes in muscle size will not occur by simply following the aforementioned workout plan. Absolutely, strength training is highly important for building muscle size however, this must be accompanied with appropriate nutrition.
The most important factor that will determine whether or not muscle gain is successful or not is the number of calories consumed. For effective muscle building, a calorie surplus must be established. This is simply where one consumes more calories per day than their body requires. If a calorie surplus is not maintained, then optimal muscle growth will not occur (4).
During strength sessions in the gym, individual muscle fibers actually begin to tear at a microscopic level as a result of being exposed to a training stimulus. The body requires these additional calories in order to recover optimally from the stresses of training and repair each fiber. This repairing process causes the muscle fibers to increase in strength and size.
The second nutrition based essential for muscle building is to ensure that enough protein is being consumed. Protein is a crucial macronutrient that the body requires on a daily basis for growth, healing and regulation of body processes. When it comes to muscle building, enough protein must be consumed on a daily basis to, once again, accelerate recovery time from training and promote muscle growth (5).
In summation, failure to consume enough calories or protein, will hinder all muscle building progress regardless of how regularly strength training is taking place.
Final Word
Targeting the upper chest is often the missing component for those looking to build a full chest. Therefore, it is worthwhile selecting a number of resistance exercises that challenge the upper chest to a large degree and cause substantial adaptation. However, without appropriate nutrition, building significant muscle mass will be difficult, if not impossible. Therefore, ensure that one is consuming enough calories and protein in order to onset hypertrophy.
For more news and updates, follow Generation Iron on Facebook, Twitter, and Instagram.
References:
1-Solari, Francesca; Burns, Bracken (2019), “Anatomy, Thorax, Pectoralis Major Major”, StatPearls, StatPearls Publishing, PMID 30252247
2-Lauver, Jakob D.; Cayot, Trent E.; Scheuermann, Barry W. (2016). “Influence of bench angle on upper extremity muscular activation during bench press exercise”. European Journal of Sport Science. 16 (3): 309–316. doi:10.1080/17461391.2015.1022605. ISSN 1536-7290. PMID 25799093.
3-Fink, Julius; Schoenfeld, Brad J.; Kikuchi, Naoki; Nakazato, Koichi (2018-5). “Effects of drop set resistance training on acute stress indicators and long-term muscle hypertrophy and strength”. The Journal of Sports Medicine and Physical Fitness. 58 (5): 597–605. doi:10.23736/S0022-4707.17.06838-4. ISSN 1827-1928. PMID 28474868.
4-LEAF, ALEX; ANTONIO, JOSE (December 1, 2017). “The Effects of Overfeeding on Body Composition: The Role of Macronutrient Composition – A Narrative Review”. International Journal of Exercise Science. 10 (8): 1275–1296. ISSN 1939-795X. PMC 5786199. PMID 29399253.
5-Stark, Matthew; Lukaszuk, Judith; Prawitz, Aimee; Salacinski, Amanda (December 14, 2012). “Protein timing and its effects on muscular hypertrophy and strength in individuals engaged in weight-training”. Journal of the International Society of Sports Nutrition. 9: 54. doi:10.1186/1550-2783-9-54. ISSN 1550-2783. PMC 3529694. PMID 23241341.
Perfecting The Good Morning Exercise
Developing The Posterior Chain With The Good Morning Exercise
For developing the posterior chain, there are very few exercises that compare to the good morning. The fact that the exercise is universally used by top level athletes, strongmen, powerlifters, and olympic lifters, should indicate the effectiveness of this exercise.
The article will review the good morning exercise, the muscles involved, the associated benefits and explain what exactly makes it such a great developer for strength and size. It will also break down the technique required to safely and efficiently perform a good morning and provide information on how to best program it into training.
Muscles Activated
The posterior chain is very simply every muscle found at the rear of the body – from the calf at the bottom of the leg to the traps in the upper back. While all the muscles of the posterior chain contract in some capacity to drive or stabilize movement, there are a number of specific muscles that are responsible for performing a barbell good morning:
– Glutes
– Hamstrings
– Spinal Erectors
– Upper Back Muscles
– Scapular Stabilizers
Good Morning Technique
This section will break down the form for a conventional barbell good morning exercise. There are a number of useful good morning variations that can be performed, however, as stated, the technique explained here is for a conventional good morning.
The most important aspect of the good morning is ensuring that the hips move backwards effectively and that a neutral spine alignment is maintained throughout. This is an important aspect, not only to ensure that the correct musculature is activated, but also to protect the lower back from injury. Flexing or extending the spine under a great deal of load can cause significant injury – specifically disc herniation (also referred to as a slipped disc) (1).
Those who have performed the deadlift, squat or other athletic movements previously may grasp this technique relatively quickly. This is because the movement patterns are very similar to many other strength and athletic exercises.
1) Set a barbell on a rack, just beneath shoulder height. Place the bar on the upper back and grip the bar with both hands, keeping them close to the shoulders. Before unracking, drive the chest up and squeeze the core muscles to protect the back. Lift off and take a few steps back so not to make contact with any part of the rack.
2) Assume a hip-width stance, stand tall and keep soft at the knees. Before hinging the hips, once again ensure that the chest is lifted and the core is braced. From this position, focus on pushing the hips back so that the trunk of the body tips forward while keeping the knees out over the toes and feet flat on the floor. If possible, and without compromising a flat back, tip forward until the chest is approximately parallel with the floor.
3) On reaching this position, reverse the movement by driving the hips through until reaching an upright position. At the end of the movement, focus on squeezing the glutes together. Repeat these steps again for the prescribed number of repetitions.
Good Morning Benefits
It is clear the good morning is an effective posterior chain strength exercise, but what specific benefits are associated with developing these muscles?
Back Health
For many big compound exercises, such as squats, deadlifts and olympic lifts, a large emphasis is often placed on protecting the lower back from injury. This is typically done by squeezing core musculature thus increasing intra-abdominal pressure and stabilizing the spine (2). Failure to do this may lead to flexion of the lumbar spine which can cause injury.
Regularly performing good mornings will increase the isometric strength of the spinal erectors, muscles which are pivotal in spinal stabilization, thus further protecting the back from injury. Additionally, building strong glutes and hamstrings will not only reduce the risk of experiencing a soft tissue or back injury but may also facilitate a greater performance for a number of exercises.
Glute/Hamstring Development
There is good reason why the good morning appears in so many powerlifting and weightlifting training programs. Squats, deadlifts, cleans and snatches all place the lifter in a bent over position where the hamstrings and glutes are exposed to a great load and stress. If these muscles are weak and inefficient, the lift will also be. Research has indicated that regularly performing the good morning will develop hamstrings and glute strength to a large degree (3).
Facilitating Deadlifts & Squats
With every strength based exercise, resisting spinal flexion is crucial for distributing load effectively and reducing injury risk. In addition to this, regularly performing good mornings will improve strength and proprioceptive ability (the body’s understanding of movement). By improving both of these, there will be a consequent positive impact on performance of the squat, deadlift and a variety of other compound lifts.
More specifically, building upper back tension and spinal stability will be specifically useful for lifters during the squat who either struggle to anchor the bar tightly to the upper back or find themselves tipping forward in the squat. There are similarities between the deadlift and the good morning as the movements for both exercises are alike and recruit the same muscles. Therefore, the good morning is an excellent accessory exercise for the deadlift, both in terms of total weight lifted and overall technique.
Although the good morning can be highly beneficial for facilitating better technique for both the deadlift and squat, it should not be over relied on or seen as the only answer for rectifying technique issues. There are a number of factors that must be considered and assessed when looking to improve technique.
Programming Considerations
Good mornings can be used to improve a number of fitness components and are specifically useful for developing strength and causing hypertrophy (muscle growth).
For building muscle mass, the recommendation is to complete 3-4 sets of 8-12 reps. This volume is enough to apply metabolic stress, mechanical tension and cause muscle damage – the 3 mechanisms necessary for bringing about muscular hypertrophy (4).
For strength gains, look to keep the weight heavy and rep range relatively low. Typically no more than 5 reps to be completed per set. However, with heavy loads it is important to be aware that technique is more likely to break down and therefore heighten the risk of sustaining injury. As a result, heavy good mornings are not recommended for many – only those who are advanced lifters or athletes.
If new to the good morning exercise, ensure to start with a light barbell initially and practice regularly. As the movement becomes more automatic, it would then be acceptable to progress and gradually start adding weight to the bar.
Finally, for those who struggle with low back pain, exercise caution. Although the good morning can have a very positive impact on back pain, increasing the weight on the bar places a large deal of stress through the muscles around the hips and the back (5) and therefore, a slight deviation from good technique could exacerbate issues.
The recommendation therefore would be to perform other core strengthening exercises, such as bird dogs, dead bugs and glute bridges, for a period of time to enhance spinal stability before progressing to the good morning. This has been found to be an effective method for reducing injury to the spine and lower extremities (6).
Good Morning Variations
The barbell good morning can be performed from a seated position to maximize tension on the spinal erectors and hamstrings. This is a great variation, however, be sure to reduce the load on the barbell when performing the seated version. The technique involved is similar, however, a wider stance is often required in order to provide space for the trunk to drop in to.
Another brilliant variation of the good morning is the banded version of the exercise. Not only will it effectively fire up all the musculature of the posterior chain, it will also be of great benefit to those who are looking to grasp the movement patterns without the fear of placing a heavy barbell on the back.
For the banded good morning, find a long resistance band, place it under the feet and stand on it. With the other looped end of the band, hinge forward and hook it over the head so that it sits on the upper back. From that position, brace hard, keep the chest lifted and drive up until standing. Reverse the movement, returning to the hinged position and repeat for the desired number of reps.
Final Word
In summation, good mornings are a highly effective developer of posterior chain strength and size. While caution should be exercised for strength training beginners and those with low back issues, the wide range of benefits associated with this exercise means that it is a useful addition to the majority of strength training programs.
References:
1-VanGelder, Leonard H.; Hoogenboom, Barbara J.; Vaughn, Daniel W. (2013-8). “A PHASED REHABILITATION PROTOCOL FOR ATHLETES WITH LUMBAR INTERVERTEBRAL DISC HERNIATION”. International Journal of Sports Physical Therapy. 8 (4): 482–516. ISSN 2159-2896. PMC 3812831. PMID 24175134.
2-Hackett, Daniel A.; Chow, Chin-Moi (2013-8). “The Valsalva maneuver: its effect on intra-abdominal pressure and safety issues during resistance exercise”. Journal of Strength and Conditioning Research. 27 (8): 2338–2345. doi:10.1519/JSC.0b013e31827de07d. ISSN 1533-4287. PMID 23222073.
3-Schellenberg, Florian; Taylor, William R.; Lorenzetti, Silvio (July 17, 2017). “Towards evidence based strength training: a comparison of muscle forces during deadlifts, goodmornings and split squats”. BMC Sports Science, Medicine and Rehabilitation. 9. doi:10.1186/s13102-017-0077-x. ISSN 2052-1847. PMC 5513080. PMID 28725437.
4-Schoenfeld, Brad J. (2010-10). “The mechanisms of muscle hypertrophy and their application to resistance training”. Journal of Strength and Conditioning Research. 24 (10): 2857–2872. doi:10.1519/JSC.0b013e3181e840f3. ISSN 1533-4287. PMID 20847704.
5-Vigotsky, Andrew David; Harper, Erin Nicole; Ryan, David Russell; Contreras, Bret (2015). “Effects of load on good morning kinematics and EMG activity”. PeerJ. 3: e708. doi:10.7717/peerj.708. ISSN 2167-8359. PMC 4304869. PMID 25653899.
6-Huxel Bliven, Kellie C.; Anderson, Barton E. (2013-11). “Core Stability Training for Injury Prevention”. Sports Health. 5 (6): 514–522. doi:10.1177/1941738113481200. ISSN 1941-7381. PMC 3806175. PMID 24427426.

A Killer Circuit Workout To Build Monster Calves
Best Calf Training Circuit To Turn Your Calves Into Bulls
Calves can be one of the most stubborn muscle groups. While it might be hard to grow your calves, only a few other muscles look as dope as a pair of giant and shredded calves. If you’re like most people, performing 2-3 calf exercises won’t do much for your calf gains.
You need to be hitting all the three heads of your calves for optimal calf development. In this article, we’ll give you a circuit workout which will leave your calves begging for mercy. In the workout, you’ll be changing volume and intensity to get the most out of your workout.
Circuit 1 – 3 Sets
Seated Calf Raises (Neutral Feet Placement) – 10 Reps
You’ll be doing performing three rounds of the first circuit before moving onto the second circuit. Seated calf raises work the soleus muscle which will give your calf width towards the outside of your lower leg.
Your calves have two kinds of muscle tissues. The gastrocnemius is a fast-twitch muscle tissue while the soleus is a slow-twitch muscle. You’ll see better results by performing the ten reps of the seated calf raises with a 10-second pause at the bottom of the movement.
Hold and contract your calves at the top of the movement for a second before returning to the starting position. The neutral feet placement means that your feet will be parallel to each other while performing the exercise.
Standing Calf Raises (V-Feet Placement) – 20 Reps
The standing calf raises work the gastrocnemius which is the heart-shaped muscle. While performing the exercise, you’ll place your heels close to each other while the toes will be pointing outwards.
The V-feet placement helps in targeting the inner head of the calves. Since the gastrocnemius is a fast-twitch muscle fiber you’ll be performing 20 reps of the exercise without pausing at the bottom of the movement.
Donkey Calf Raises (A-Feet Placement) – 20 Reps
Donkey calf raises are one of the most underutilized exercises. If you don’t have a donkey calf raise machine at your gym, you can perform the exercise by asking someone to set on your back while you do the calf raises on an elevated platform.
While performing the calf raises, you need to keep your toes next to each other and the heels pointing outwards. The A-feet placement works the outer head of the calves. You’ll be pausing for a second and contacting your calves at the top of the movement.
Circuit 2 – 3 Sets
Leg Press Calf Raises (Neutral Feet Placement) – 20 Reps
While you’re performing a circuit, there should be no rest between exercises. After you’re done with one set of the exercise, rest for 45-60 seconds before starting the next set. The leg press calf presses work the gastrocnemius.
Smith Machine Calf Raises (V-Feet Placement) – 20 Reps
Most people let their egos get the better of them while training calves. Make sure you’re not lifting more weights than you can handle. Following a full range of motion is of utmost importance in calf development.
Seated Single-Leg Calf Raises – 20 Reps
Performing unilateral exercises can help in developing strength and fix muscle imbalances. While performing the calf exercises, you should be on your toes at the top of the movement. Your feet should look like the feet of a ballerina at the contraction point.
How often do you train your calves? Let us know in the comments below. Also, be sure to follow Generation Iron on Facebook, Twitter, and Instagram.