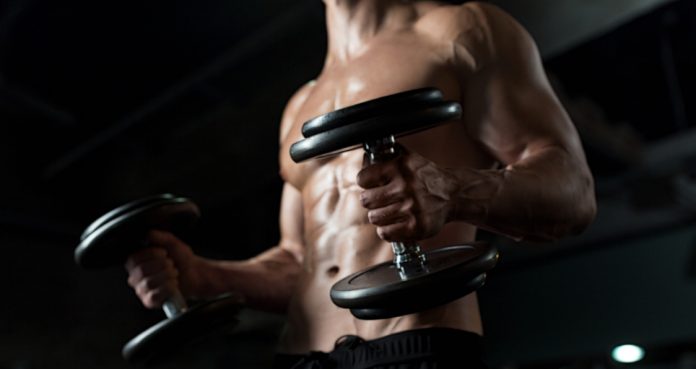
Tag: Workouts

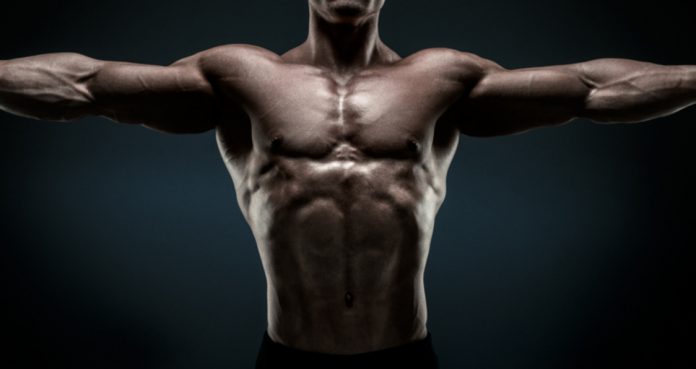
At Home Advanced Bodyweight Chest Exercises
Twelve Exercises That Build Strength and Size
For many, training in a gym may not be possible. This may be due to coronavirus restrictions, health concerns, busy lifestyles, location, amongst many other reasons.
However, it is very possible to make substantial health and fitness improvements without attending the gym.
In addition, not only is training at home convenient, free, and private, you don’t necessarily need equipment in order to enjoy a workout.
This article will briefly provide information on advanced training at home before moving on to detail twelve advanced bodyweight exercises that will help improve chest strength and size.
Advanced Strength Training At Home
When it comes to improving strength, it is imperative that the body is exposed to a training stimulus. As a result of this stimulus, the muscles will be forced to adapt and increase in strength and size.
However, if you have been training for a prolonged period the body will have become highly conditioned and more resistant to change.
Therefore, employing more advanced training exercises and methods can allow you to continue making progress once again (1).
You may assume that advancing your training is not possible without having access to particular gym equipment.
While attending the gym may make this easier, there is an array of advanced bodyweight exercises that require no equipment and allow you to make excellent progress with your strength.
Twelve Advanced Bodyweight Chest Exercises
A common goal, particularly with men, is to improve their chest strength and size. This is something that can be achieved through regular home training.
If you aspire to improve chest strength and size, utilize a number of the following exercises detailed below.
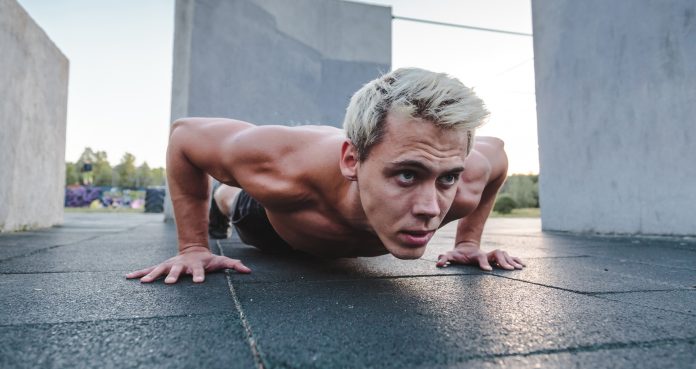
The push-up is the king of bodyweight chest exercise. Therefore, the vast majority of the following exercises are push-up variations.
1) Wide Push-Ups
The wide push-up is one of the most effective strengthening exercises for the pecs. Generally speaking, a wide position recruits the pec major muscle more heavily than a narrow position (2).
Technique:
– Begin with the hands much wider than the chest with the legs fully extended out behind
– Engage the core and glutes in order to keep the back flat and hips in place
– Hinge at the elbows, control the descent, and drop right down to the floor
– Keep the elbows down from the line of the shoulders
– Contract the pecs and extend at the elbows to drive the body back up to the start position
2) Diamond Push-Ups
Although the diamond push-up places more demand on the triceps than the wide push-up, it highly activates the pectoralis minor muscle in the chest.
Technique:
– Begin with the hands directly under the chest and extend the legs fully out behind
– Touch both thumbs and both index finger together to create a diamond shape
– Engage the core and glutes in order to keep the back flat and hips in place
– Hinge at the elbows, control the descent, and lower as far as possible
– Keep the elbows tucked in tight to the ribcage
– Push the hard into the floor and extend the elbows to drive back up to the start position
3) Decline Push-Ups
By elevating the feet and increasing the angle of the body, a greater amount of stress is placed on the pecs.
Technique:
– Begin with the hands directly under the shoulders
– Extend the legs fully out behind placing the feet on an elevated surface (i.e box or chair)
– Engage the core and glutes in order to keep the back flat and hips in place
– Hinge at the elbows, control the descent, and drop the chest towards the floor
– Keep the elbows tucked in and avoid flaring
– Contract the pecs and fully extend the elbows to drive the body back up to the start position
4) One-Arm Push-Ups
The one-armed push-up requires a great degree of core strength, stability, and balance as well as chest and arm strength.
Technique:
– Extend the legs fully out behind
– Place one hand on the floor directly under the shoulder keeping the other hand by the hip
– Engage the core and glutes in order to keep the back flat and hips in place
– Hinge the elbow and control the descent as best as possible
– Drive hard into the floor to propel the body back up to the start position
– Having completed the desired number of reps, swap arms, and repeat
5) Plyo Push-Ups
Be aware that while the explosive push-up variation is an excellent exercise for improving power output, it is an intense exercise!
Technique:
– Begin with the hands directly under the shoulders and extend the legs fully out behind
– Engage the core and glutes in order to keep the back flat and hips in place
– Descend in a controlled manner by hinging both elbows
– As you reach the bottom position, explosively press into the floor to propel the body upwards and lift the hands from the floor
– Land with the hands directly under the shoulders and immediately perform the next rep
6) Gorilla Push-Ups
The gorilla push-up is very similar to the plyo variation and also demands a great amount of power, speed, and control.
Technique:
– Begin with the hands directly under the shoulders and extend the legs fully out behind
– Engage the core and glutes in order to keep the back flat and hips in place
– Descend in a controlled manner by hinging both elbows
– As you reach the bottom position, explosively press into the floor to propel the body upwards
– In mid-air, rapidly slap your chest with both hands before landing
– Land with hands directly under the shoulder and immediately perform the next rep
7) Shuffle Push-Ups
To complete the shuffle push-up you will need a great amount of core strength and stability as well as chest strength.
Technique:
– Begin with the hands directly under the shoulders and extend the legs fully out behind
– Engage the core and glutes in order to keep the back flat and hips in place
– Move one hand from the floor and place it much wider than shoulder-width
– Perform a full push-up and then return the hand to under the shoulder
– Repeat the process using the other arm
8) Crossover Box Push-Up
A further progression on the shuffle push-up is the crossover box push-up. This variation involves crossing the hands over each other which demands focus and good coordination.
Technique:
– Begin by placing the right hand on a box and left hand on the floor
– Ensure that the hands slightly wider than shoulder-width
– Engage the core and glutes in order to keep the back flat and hips in place
– Lift the left hand from the floor, crossover the right hand, and place it on the box
– Once completed, lift the right hand and place it on the floor
– Perform a full push-up and then alternate sides and repeat
9) Resistance Band Push-Up
While this exercise predominantly uses bodyweight, simply adding a resistance band can increase the intensity of the exercise and lead to greater strength improvements.
Technique:
– Begin by holding onto a resistance band and wrap it around the upper back
– Assume the push-up position while holding the band in the same position
– Engage the core and glutes in order to keep the back flat and hips in place
– With hands under the shoulders and body long, control the descent to the floor
– Drive powerfully into the floor to return to the starting position
10) One-Foot Push-Up
By lifting one foot from the floor, the body becomes less stable and the amount of stress placed on the pecs increases.
Technique:
– Begin with the hands directly under the shoulders and extend the legs fully out behind
– Engage the core and glutes in order to keep the back flat and hips in place
– Prior to hinging the elbows, lift one leg off the ground and then begin the descent
– Drop down as far as possible before driving back up to the starting position
– Alternate leg and repeat
11) Plank Push-Up
On the face of it, this exercise looks simple. However, after performing only a few reps you will feel fatigue rapidly building in the chest and the shoulders.
Technique:
– Begin in a forearm plank with elbows directly under the shoulders and legs fully extended
– Engage the core and glutes in order to keep the back flat and hips in place
– Move from the plank position to the push-up position by moving the arms and placing the hands on the ground
– Perform a push-up, drop down to a forearm plank once again and repeat
12) Suspended Chest Dips
Although push-ups are undoubtedly excellent for upper body development, wide dips also effectively work the pecs, shoulders, and triceps (3).
Technique:
– Find an appropriate structure that allows you to hold your body up (i.e corner of a worktop)
– Place the hands flat on the structure and ensure they are slightly wider than shoulder-width
– Push into the structure to lift the body from the floor and bend the knees to ninety degrees
– While keeping the core engaged, hinge the elbows and drop down towards the floor
– Continue to lower until the elbows create a ninety degree angle
– Pushing hard through the hands in order to bring the body back up to the starting position
Final Word
Strength training comes in many different forms. Bodyweight training is an excellent tool that is highly versatile, convenient, and effective.
By incorporating a handful of the advanced bodyweight chest exercises detailed in this article, it is possible to significantly increase pec strength and size.
References:
1 – Krzysztofik, Michal; Wilk, Michal; Wojdała, Grzegorz; Gołaś, Artur (2019-12). “Maximizing Muscle Hypertrophy: A Systematic Review of Advanced Resistance Training Techniques and Methods”. International Journal of Environmental Research and Public Health. 16 (24). doi:10.3390/ijerph16244897. ISSN 1661-7827. PMC 6950543. PMID 31817252.
2 – Kim, You-Sin; Kim, Do-Yeon; Ha, Min-Seong (2016-2). “Effect of the push-up exercise at different palmar width on muscle activities”. Journal of Physical Therapy Science. 28 (2): 446–449. doi:10.1589/jpts.28.446. ISSN 0915-5287. PMC 4792988. PMID 27064571.
3 – Bagchi, Amritashish. “A COMPARATIVE ELECTROMYOGRAPHICAL INVESTIGATION OF TRICEPS BRACHII AND PECTORALIS MAJOR DURING FOUR DIFFERENT FREEHAND EXERCISES”. Journal of Physical Education Research.

How Erin Stern Solidified Herself As A Bodybuilding Icon
This 2X Ms. Figure Olympia champ knows what it takes to win on the pro bodybuilding circuit.
Using Cellucor supplements and knowing exactly what it takes to win on the biggest stages, Erin Stern only uses the best to power her workouts. Winning the Olympia contest twice in the Figure division, she has now re-compositioned her physique to compete in the Bikini division.
About Erin Stern
Erin was born and raised in Florida and spent her school years training to be a professional track athlete. However, after falling short in qualifying for the 2008 Beijing Olympics, Erin turned her attention to bodybuilding.
She began lifting and stepped on stage to win the overall in her first and second shows. And in just three months, Erin became a pro by winning the overall at NPC Nationals.
She’s had an extensive bodybuilding career with many notable results that include:
2X Ms. Figure Olympia Champion
Madrid Arnold Classic Champion
12 IFBB Titles
Cellucor has made it possible for Erin to maximize her training and performance with the best supplements. She has now re-compositioned her body to compete in the Bikini division, and Cellucor supplements continue to power her results.
Erin Stern Workouts
Erin focuses on compound movements, and often incorporates training from her collegiate track and field days to get maximum results. When she can’t hit the gym, she’ll opt for at-home HIIT training or get outside for a quick workout.
Assault Bike or Spin Bike HIIT Workouts
Shorter HIIT day:
4x “Wind sprints”: 15 seconds all out, 30 seconds rest, 15 seconds all out. This is one sprint. 2-4 minutes recovery between “wind sprints.”
HIIT endurance day:
4x 30 second sprints. 2-4 minutes in between.
Legs & Glutes Workout
Glute bridges – 4×8
Leg press EMOM (every minute on the minute) – 5×10
RDLs (1.5 reps) – 3×6
Hack squat (b-stance) superset with Skater squats – 3×8 (each)
Finisher/complex – 1×20 (each)
Dynamic step ups
Reverse lunges
Pop squats
Home Workout with Resistance Bands
For Erin, working out from home requires the 3 C’s: Compound movements, Circuits, and Creativity. This workout below is performed 3 times through with 15 reps per exercise and is roughly 30 minutes long.
Circuit #1
Squats
Bent Over Rows
Bicep Curls
Circuit #2
Good Mornings
Upright Rows
Triceps Kickbacks
Circuit #3
Reverse Lunges
High Rows
Hammer Curls
Circuit #4
Sumo Squat
Shoulder Press
High Incline Fly
Nutrition Tips
When it comes to nutrition, Erin focuses on whole foods, lean meats, whole grains, fruits, and vegetables. Avoiding things like gluten and high-fat dairy, as well as artificial sweets and processed foods, allows her to stay fit and focused for every training day. Her diet is based on high protein, high carb, and low fat with little room for cheat meals. Sticking to a strict diet, Erin knows just what it takes to be the best — and her resume proves it!
Cellucor Supplements with Erin Stern
As a Cellucor Athlete, Erin is always excited and ready to promote their products. Designed with clinically studied ingredients, Cellucor powers you to train harder, go farther, and take your results to the next level!
BCAA Sport
Cellucor BCAA Sport is a great intra-workout supplement designed to maximize hydration and recovery. Packed with BCAAs in a great 2:1:1 ratio, this will allow for better energy, reduced fatigue, and more lean muscle support.
BCAA Sport is a great intra-workout supplement designed to maximize all-day hydration and recovery. With a 2:1:1 ratio of BCAAs for optimal performance, 11 amino acids, and hydrating electrolytes, this supplement helps support recovery and lean muscle growth.
C4 Ultimate
Cellucor C4 Ultimate is a powerful pre-workout supplement designed to increase energy, provide powerful muscle pumps, and enhance focus for peak performance. Effective ingredients and a fully transparent label ensure you get the best for your pre-workout needs.
C4 Ultimate Pre-Workout powers your training with explosive energy, powerful performance, muscular endurance, and extreme focus for the results you want most.
M5 Ultimate
Cellucor M5 Ultimate combines three forms of creatine into a cutting-edge creatine supplement to support muscle growth, strength, endurance, and performance.
M5 Ultimate is a powerful creatine supplement that combines three forms of creatine to support muscle growth, strength, and endurance.
Wrap Up
Erin Stern is one of the most iconic bodybuilders on the pro circuit today. With two Olympia wins, 14 IFBB titles, and a relentless drive, Erin will now transition into the Bikini division to compete at an entirely different level! Cellucor supplements have powered her mission and continue to fuel her results as she enters this new phase of her career in the Bikini division.
Let us know what you think in the comments below. Also, be sure to follow Generation Iron on Facebook, Twitter, and Instagram.
*Images courtesy of Cellucor

Debunked: The Top 5 Myths About Six Pack Abs
BroScience Revealed…
Abs. One of the most common tell tales of a physically fit individual. While we know it comes down to body fat and genetics, we still can’t help but be drawn to a tight set of perfectly ripped abdominals.
Perhaps its nature, perhaps it’s nurture, but even in 2020 people are looking for the perfect formula for the ever elusive 6 pack abs. While there are 8 packs, and sometimes even more, the 6er has always been a standard for a gold standard for a good looking body. Without it you’re like a burger without fries, always missing something. But with lots of buzz comes lots of rumors, and the 6- pack has been a hot topic for a long time.
Some myths start as excuses, some start as perceived truths that have been found out over time, and some are just to save face Either way they’re ruining your gains, and the gains of people around you. Here are some of the 5 top myths about 6-pack abs.
Myth #1 Carbs Are Bad
For the last couple of years carbs have been getting a bad rap. Damn near every fad diet condemns it, and carb loading is all but a thing of the past. What they’re not telling you is complex carbs are good, it’s the simple carbs that give you your spare tire. Things such as bread, processed sugars, sports drinks, and cereals, are all considered simple carbs because they break down easily. Try eating legumes, nuts, and and vegetables instead. All the benefits, none of the drama.
Myth #2 You Can Substitute A Bad Diet For A More Strenuous Workout
There’s an old adage that “abs are made in the kitchen”, and while we’re in the process of throwing out old theories, this one is actually true. Your diet is Quintessential to sculpted abs. The reason we say “sculpted” is because that’s exactly what you’re doing, trying to reveal the art surrounded by subcutaneous fat. So put down the Twinkies, and pack on the extra reps instead.
Myth #3 Eat Right, Work Out, The End…Right?
Wrong. While eating right and working out are definitely essentials, so is rest. By rest we don’t only mean Sleep, which is also a big component, but rest in the sense of being at ease. A state of being without stress. Stress through not sleeping right or a hectic lifestyle can actually build up cortisol levels which make it harder to lose stubborn fat. Take a walk, watch a movie, meditate…just do what you love.
Myth #4 You Can Shape Your Abs
The harsh reality about abs is what you get is what you got. You can’t add an extra pack or change your symmetry. Some abs line up, some don’t, all you can do is do the best with what you were given. However, you can improve muscle thickness and abdominal imbalances with a good workout routine.
Myth #5 The Be All And End All Of All Ab Exercises
While not all ab exercises are created equal, there’s no end all be all of ab exercises. The truth is your abs will get use to even the best exercises over time if you do them consistently. Switch up your exercises and the angles they’re performed to promote new stimulus and muscle confusion.
Are you underwhelmed with you ab development? Let us know by hitting up our comments below or head on over to our official Facebook and Twitter.
Avoid The Skinny Fat Look With This Muscle Building Cardio
Cardio Like a beast.
Yeah, you read the title correctly. As a bodybuilder you probably already have an inherent dislike for cardio training simply because of the effect the practice can have on your muscle growth and maintenance. Consistent steady state cardio will certainly improve your endurance, but it will do nothing for your physique except eat away at that hard earned muscle.
While cardio should certainly be a staple of your program, no matter how much you hate it, it truly depends on the type of cardio you’re performing in the gym that will determine whether or not you see the results you seek. So what exactly should you be doing in the gym and what should you run away from (pun intended)?
No Steady State Cardio
When it comes to burning fat and maintaining your muscle mass, you want to avoid running at one consistent pace. For example, if you’re simply jogging the entire time while you’re doing your cardio but you’re not increasing or decreasing that pace then you can be sure that your body will dip into it’s muscles stores for energy. This is especially true if you find yourself on a cut and in a calorie deficit.
If your cardio levels are boosted yet your lifting numbers either remain consistent or even drop due to the lack of normal energy stores you can bet the body is going to adapt more to the cardiovascular training and your muscle growth will stagnate and even move backwards.
Take It Easy
The best kind of cardio for burning fat and keeping muscle is the kind that doesn’t rip your body apart. Namely, walking. You metabolic rate will rise for sure though it won’t nearly be at the levels that you’d expect from lifting or doing interval training, but it won’t break down your muscle and it will leave with enough energy that you’ll be able to hit the gym hard if you’re doing two-a-days.
Ramp Things Up
The other option for fat loss and muscle maintenance in terms of cardio training is performing HIIT. By doing interval training at high intensity your metabolic rate will skyrocket which means more calories are burned. But unlike steady state cardio HIIT training means you’re pushing your body, specifically your muscle, to the max. Notice how sprinters are always in great shape, lean but still muscular? That’s because they are constantly utilizing their muscle by pushing themselves to their limits.
They also don’t worry about training on a calorie deficit as they need as much energy as possible during their training sessions. The action of sprinting has a similar anabolic response as you’d find in lifting. HIIT including sprinting can be looked at as more muscle building cardio than traditional cardio.
Try out these methods and watch the fat burn away and your muscle continue to grow.
Have any training issues? Let us know by hitting up our comments below or head on over to our official Facebook and Twitter.
How To Perform The Burpee
What Are Burpees?
Not to be mistaken for burpees seeds, burpees are one of the most challenging bodyweight exercises that can be performed and have been found to be an effective bodyweight cardio conditioning exercise (1). One of the best things about the burpee is that equipment is not necessary – all that is required is space. In addition to this, it is a full body exercise which recruits muscles the length and breadth of the body. The muscles of the legs are required to powerfully shoot the legs back in the plank position and also explosively contract in the vertical jump. The upper body and core must support the body weight in the plank and also engage during the press up.
This article will look at 4 key components of the burpee and also provide a number of variations that can be performed for a burpees workout!
How To Perform A Burpee
Burpees come in a number of variations and coaches may teach the movements differently – some require a push-up during the plank phase while others do not. Others do not require a jump at the end of the movement, while others do not. The following coaching points will teach how to perform the conventional burpee from start to finish.
Squat down and place the hands flat on the floor at approximately shoulder width apart
From this position, jump the legs back into a full plank
Hinge at the elbows and drop into a full push up ensuring the chest makes contact with the floor before returning to the plank position (if required, drop to the knees for the push-up)
Jump the feet back to the start position ensuring that the feet are placed wider than the hips
From the deep squat position, powerfully drive upwards into a vertical jump and bring the arms up and overhead
Land safely keeping the knees out and repeat for the prescribed number of reps
Performing Perfect Burpees
Burpees are a very common exercise that often appears in HIIT or Tabata style workouts (2). Typically, the goal of these workouts is to complete as many reps as possible in a set time period which can often cause the exercise to be performed incorrectly or with the absence of good technique. The following points highlight 4 key areas that are crucial when it comes to mastering the burpee.
1) Jump Effectively
Firstly, during the burpees exercise, focus on moving effectively – specifically in the jump. Be aware that this does not necessarily mean moving as fast as possible and completing each rep in as quick a time as possible.By failing to move effectively, it is likely that energy will be wasted and therefore the movement will become more challenging, energy stores will become depleted at a faster rate and fatigue will quickly become a major factor (3). Efficient movement helps to preserve energy, which will make it possible to exercise for a longer period of time, all while maintaining form.
The jump is often an area where energy will be wasted – either through rushing or an out of control jump. Although it’s important to gain height with each jump, it must be controlled to maximise movement efficiency.
2) A Solid Ground Position
Probably one of the most common mistakes is performed during the grounded phase. At this point, the body should be held long and straight in a plank position. Often in this position, the body either begin to sag by the dropping of the hips or the hips are lifted too high. Both of these positions are incorrect and fail to engage the core properly.
The best way to ensure that the correct position is assumed is to place the hands directly underneath the shoulders and maximally shoot the legs out behind the body. Meanwhile, the core should be braced as hard as possible – focus on squeezing the abs tightly. This will increase what is known as intra-abdominal pressure which will help to facilitate a strong plank position and additionally protect the spine and prevent lower back injury (4).
3) Maintaining A Wide Base
When jumping up to the feet from the grounded position, look to keep the feet slightly wider than the hips. Doing so will keep the body more stable and the movements controlled. A wide base of support has been found to facilitate stability (5) thus enhancing movement and preserving energy. If a narrow stance is assumed, stability decreases.
Additionally, by keeping a wide stance, the jump will become straightforward. When jumping, a wide stance is required as a narrow stance will make the movement more challenging and harder to gain height in the jump.
4) Be Powerful In The Jump
With the jump, it’s important to be as explosive as possible. It should involve a powerful drive using the big leg muscles that propels the body upwards. However, for many the jump is nothing more than a small hop which does very little and fails to recruit these muscles to their full potential.
The maximal jump in the burpee trains something known as triple extension which is simply a rapid extension of 3 joints – the hips, knees and ankles (6). Practicing triple extension regularly can help to build full body power, burn many calories and improve overall movement. Therefore, do not sacrifice the jump with the purpose of completing more reps in a short time period, instead, focus on springing up powerfully with each rep.
Burpee Progressions
There are number of progressions that can be performed in order to increase the intensity and challenge of the burpee exercise. Only once proficient form for the standard burpee has been established, should these variations be attempted.
Tuck Jump Burpee
Complete a full burpee and during the jump, drive the knees up powerfully and tuck the knees into the chest in mid-air.
Hand Release Burpee
For this variation, when dropping into the push up, touch the chest to the floor and release the hands from the floor so that the body is fully in contact. Complete the rest of the movement as normal.
Burpee to Jump Lunge
Once again, complete a full burpee however, look to swap out the vertical jump for a jumping lunge. Alternate sides with each rep completed.
Single-Leg Burpee
As the name suggests, complete the full movement on one leg ensuring that the other foot does not touch the floor at any point. Alternate leg with each rep.
Burpee Switch
Complete the first phases of the burpee as normal. In the jump, look to rotate 180 degrees and land safely keeping the knees pushed out.
Lateral Jump Burpee
Perform a standard burpee but look to jump laterally (to the side) rather than vertically. Still focus on being explosive with every jump.
Final Word
When it comes to cardio conditioning, the burpee is one of the best callisthenic exercises that can be performed, providing it is executed with good form. It is also an exercise which is easy to manipulate to increase the demand placed on the body, as highlighted by the vast number of burpee variations.
References:
1-Haddock, Christopher K.; Poston, Walker S.C.; Heinrich, Katie M.; Jahnke, Sara A.; Jitnarin, Nattinee (2016-11). “The Benefits of High Intensity Functional Training (HIFT) Fitness Programs for Military Personnel”. Military medicine. 181 (11): e1508–e1514. doi:10.7205/MILMED-D-15-00503. ISSN 0026-4075. PMC 5119748. PMID 27849484.
2-“Physiology of Fat Loss”. www.unm.edu.
3-Ament, Wim; Verkerke, Gijsbertus J. (2009). “Exercise and fatigue”. Sports Medicine (Auckland, N.Z.). 39 (5): 389–422. doi:10.2165/00007256-200939050-00005. ISSN 0112-1642. PMID 19402743.
4-Hodges, Paul W.; Eriksson, A. E. Martin; Shirley, Debra; Gandevia, Simon C. (2005-9). “Intra-abdominal pressure increases stiffness of the lumbar spine”. Journal of Biomechanics. 38 (9): 1873–1880. doi:10.1016/j.jbiomech.2004.08.016. ISSN 0021-9290. PMID 16023475
5-Henry, S. M.; Fung, J.; Horak, F. B. (2001-2). “Effect of stance width on multidirectional postural responses”. Journal of Neurophysiology. 85 (2): 559–570. doi:10.1152/jn.2001.85.2.559. ISSN 0022-3077. PMID 11160493.
6-Suchomel, Timothy J.; Comfort, Paul; Stone, Michael H. (2015-6). “Weightlifting pulling derivatives: rationale for implementation and application”. Sports Medicine (Auckland, N.Z.). 45 (6): 823–839. doi:10.1007/s40279-015-0314-y. ISSN 1179-2035. PMID 25689955.

How To Get Rid Of Muscle Soreness
DOMS Happen Due To New Workouts
Delayed onset muscle soreness (DOMS) can be one of the most irritating things, especially for people with physically demanding jobs. Muscle soreness can occur on the next day of a workout or the day after. These are a few facts about muscle soreness.
It doesn’t matter if you’re in good shape or not, muscle soreness can happen when you start a new workout program or perform new exercises. New exercises shock your muscles and break them down.
High Chances of Muscle Soreness When You Workout After Long Layoffs
If you’ve been out of the gym for a long time, you can expect to face muscle soreness after your first hard workout. You can minimize the muscle soreness by gradually increasing the intensity of your workouts.
You Can’t Avoid Muscle Soreness
You can’t control DOMS. There are chances you might not experience DOMS after a hard workout and have them after a relatively light workout. Your level of fitness doesn’t affect if your muscles will be sore after a workout or not.
This is How To Get Rid of Muscle Soreness
1. Nutrition
Muscle soreness happens when your muscles are broken down after a strenuous workout. Right after your workouts is also the perfect time to feed your muscles. Your muscles will absorb the most amount of nutrients at this time.
After a workout, have a protein shake or a protein rich diet. Protein is the main building block of your muscles and will help in the quick recovery from muscle soreness. Apart from the protein, follow a balanced diet to meet your macro and micronutrient requirements.
2. Massage
Getting a massage is another effective way of releasing the tension in your muscles. Massage the affected muscle for up to 30 minutes to reduce the soreness. Deep tissue massage or ART (Active Release Technique) is effective at recuperating from sore muscles.
If you don’t want to go for a professional massage therapy, you can ask your spouse or a friend to massage the tense muscles. You can also massage the sore muscles yourself with the help of an electric massager or a foam roller.
3. Rest
Rest is one of the most important aspects of recovery after a workout. No matter how hard you workout, you won’t grow while you’re inside the gym. Your muscles repair themselves and grow while you’re sleeping.
You need at least six hours of sleep every night to recover from your workouts. If your muscles are sore for most of the week, this could be a sign of overtraining. You should take an additional day off from training to recover from your workouts.
4. Active Recovery
On your days off, you don’t have to sit on the couch all day long. You will not be working out and doing the same things which got you sore. Staying active by doing cardio helps in regulating blood throughout your muscles.
Blood carries nutrients to your muscles which help with recovery. Make sure you don’t over-exert your muscles. You can also perform exercises like push-ups, pull-ups, and squats to get a pump without exerting your muscles.
5. Cold and Hot Treatments
Cold and hot treatments can help you with recovery from muscle soreness. Taking a cold shower after a workout is known to help with recovery. You can also apply ice and hot water bags to your sore muscles to speed up the recovery process.
Alternating between applying ice and hot water bags is also an incredibly effective way to get rid of muscle soreness. Using the alternating technique helps you get the best of both worlds. Just make sure you start with the ice treatment and make the hot water bag treatment last twice as long as the ice treatment.
What do you do to get rid of muscle soreness? Let us know in the comments below. Also, be sure to follow Generation Iron on Facebook and Twitter.
How To Perform the Nordic Hamstring Curl
Understanding The Benefits and Uses of This Multi-Functional Exercise
It’s not uncommon for exercises to go through popular phases. Right now, the nordic ham curl appears to be one of those exercises.From top athletes to the general population, the nordic hamstring curl (sometimes referred to as the Russian hamstring curl) is forming part of training sessions. So, why exactly has the nordic ham curl rapidly grown in popularity?This article will detail how to perform the Nordic ham curl, discuss the many reasons behind why it is such an effective resistance exercise and detail considerations to be made in regards to the exercise.
50Performing the Nordic Hamstring Curl
The Nordic hamstring curl is primarily an isolation exercise for the hamstrings. The exercise involves starting from a kneeling position and hinging forward from the knees. While the conventional method requires a partner to anchor you, it can still be performed without the need for a partner.This section will detail how to execute the Nordic hamstring curl safely and effectively.
Step One: Start by kneeling down and anchor the feet to the floor. This can be done using a partner or by using weight or appropriate apparatus. Anything that has an opening a few inches from the floor and allows you to lock the feet in position will suffice. Place something soft under your knees to protect them.Step Two: Prior to hinging forward, push the chest high, pull the shoulders back and squeeze the abs to ensure that the trunk of the body is held upright.Step Three: Begin to fall towards the floor by moving through the knees only. Resist gravity for as long as you can as you hinge forward.
Step Four: As you near the floor, place both hands on the floor and then perform an explosive push-up to propel the body back up to the starting position.
Nordic Hamstring Curl Benefits
The main reason that the nordic hamstring curl has become so popular in recent times is that there have been a vast number of studies looking at the benefits of the exercise.The results have indicated that there are many benefits associated with regularly performing the Nordic ham curl.The exercise has been linked to significantly improving the strength of the hamstrings. More specifically, the eccentric strength of the hamstring has been found to significantly increase (1).A concentric contraction occurs when muscle contracts and shortens whereas an eccentric contraction refers to the contraction that occurs when a muscle lengthens.During the nordic ham curl, the hamstring muscles slowly eccentrically contract under tension as the body drops towards the floor. This helps to explain why the hamstring eccentric strength is significantly improved through performing the Nordic ham curl.This increase in eccentric strength has a direct impact on reducing the risk of injury to the hamstring (2). Considering that hamstring is a commonly injured site, performing the Nordic ham curl regularly is particularly recommended for athletes and sportspeople.As well as enhancing strength, further studies have indicated that the exercise can also bring about substantial hamstring growth (3).Lastly, the nordic can serve as an excellent exercise for developing sprinting ability (4) and therefore, should be used by those who participate in sports that demand short, sharp bursts of sprinting.
Nordic Ham Curls vs Glute Ham Raises
Another common posterior strengthening exercise is the glute-ham raise and there are a number of similarities between the two exercises.Both are bodyweight-based resistance exercises that focus primarily on knee flexion. The difference between the two is the equipment used.While Nordics don’t typically require any equipment, the glute-ham raise uses something known as a GHD (glute-ham developer). This piece of equipment puts the body at a more optimal angle for working the hamstrings (and glutes) and increases the range of motion.While the glute-ham raise may be slightly more effective, it’s important to recognize that both exercises are effective for developing strength and can be used to fulfill different needs and demands.
Can Nordics Improve Deadlift Performance?
Many may conclude that strengthening the hamstrings through Nordic ham curls will increase deadlift performance as the hamstrings play a major role in the deadlift. However, this is not necessarily the case.While Nordics are associated with an array of benefits, it may not directly impact your ability to lift heavy.The reason for this is that the nordic ham curl primarily develops hamstring eccentric strength. When it comes to heavy deadlifts, it is concentric strength that is most important.Therefore, increasing the eccentric strength of the hamstrings will have little to no impact on the amount of weight that you can pull from the floor.
Another consideration to make is that the nordic ham curl is knee-dominant exercise whereas deadlifts are hip-dominant exercises. Consequently, Nordics are not really specific to strength sports as they train the hamstrings in a different manner.If you are looking to increasing hamstring in a sport-specific manner, hip-dominant exercises such as stiff-leg deadlifts, back extensions, and reverse hypers, are recommended. However, be aware that there are occasions where poor hamstring eccentric strength can hinder your performance.When performing nordic ham curls, if you find that you are struggling to resist gravity and drop immediately you may have poor hamstring eccentric strength.
If this is the case, it may be beneficial to perform Nordics to increase eccentric strength.
Final Word
If you are an athlete, the nordic ham curl can serve as a practical and effective exercise for enhancing eccentric strength, improving muscle size and reducing the risk of injury. However, it may not be the most optimal choice for improving powerlifting performance.
References:
1 – Ditroilo, Massimiliano; De Vito, Giuseppe; Delahunt, Eamonn (2013-10). “Kinematic and electromyographic analysis of the Nordic Hamstring Exercise”. Journal of Electromyography and Kinesiology: Official Journal of the International Society of Electrophysiological Kinesiology. 23 (5): 1111–1118. doi:10.1016/j.jelekin.2013.05.008. ISSN 1873-5711. PMID 23809430.
2 – Ribeiro-Alvares, João Breno; Marques, Vanessa B.; Vaz, Marco A.; Baroni, Bruno M. (2018-05). “Four Weeks of Nordic Hamstring Exercise Reduce Muscle Injury Risk Factors in Young Adults”. Journal of Strength and Conditioning Research. 32 (5): 1254–1262. doi:10.1519/JSC.0000000000001975. ISSN 1533-4287. PMID 28459795.
3 – Seymore, Kayla D.; Domire, Zachary J.; DeVita, Paul; Rider, Patrick M.; Kulas, Anthony S. (2017-05). “The effect of Nordic hamstring strength training on muscle architecture, stiffness, and strength”. European Journal of Applied Physiology. 117 (5): 943–953. doi:10.1007/s00421-017-3583-3. ISSN 1439-6327. PMID 28280975.
4 – Ishøi, Lasse; Hölmich, Per; Aagaard, Per; Thorborg, Kristian; Bandholm, Thomas; Serner, Andreas (2018-07). “Effects of the Nordic Hamstring exercise on sprint capacity in male football players: a randomized controlled trial”. Journal of Sports Sciences. 36 (14): 1663–1672. doi:10.1080/02640414.2017.1409609. ISSN 1466-447X. PMID 29192837.
3 Reasons Why You Should Perform Explosive Lifts
Lifting explosively can change your training for the better.
When it comes to bodybuilding there are so many different methods that can be used to build muscle and burn fat that often times it can become confusing as to what exactly you should be doing when you get into the gym. There’s a notion that lower weight and higher reps can get you shredded.
Others talk about the fact that the only way to make your muscle grow is to lift heavy, while many others point out the fact that it doesn’t matter how heavy the weight is as long as you’re getting the proper contraction. In a way all of these statements are true which can drive a bodybuilder nuts trying to figure out which method is right for them. But one ideology that isn’t discussed nearly enough is the idea of lifting explosively.
While many may equate explosive lifting to powerlifting and weightlifter principles it can be a great way for a bodybuilder to get shredded fast. Rather than just always having your muscles experiencing tension at the bottom of the lift it’s a good idea to lift explosively as well. Everyone’s body works different of course, but lifting explosively is going to enhance your training.
1. Build More Strength
When you’re at the bottom of your lift rather than hold the position, exploding up will give you enhanced explosive power. It will help your body get used to the feeling of putting every ounce of muscle to work and strengthening the whole as a result.
2. Increased Muscle Recruitment
Speaking of muscles working together, by performing an explosive lift you’re more likely to recruit even more muscle fibers while performing your average lift. Whether it’s the squat or the bench press, by lifting explosively you are engaging a wider variety of muscle than you normally would have during a slow lift.
3. Burn Fat
What better reason is there to lift explosively. Not only will you be building muscle while you’re performing your lifts but you will also be eradicating fat. The principle works similar to HIIT as your metabolic rate increases with every explosion from the bottom to the top of the lift. Taking two seconds to reach the bottom of your lift then exploding upward will raise your metabolic rate that’s sure to help burning fat even when you’ve completed your training.
Do you lift explosively? Let us know in the comments and follow Generation Iron on Facebook and Twitter. Also, be sure to share, like, and comment to show your support.
5 Exercise Swaps to Build Strength and Size
Adapting Strength Training
There may be times in the gym where you have to find alternative exercises to adjust training to cater for specific situations. One of the most common issues is injury. Often when injury strikes, training ceases entirely. However, this does not have to be the case as often it is possible to work around the injured site.
It is also not uncommon to attend the gym with the session all planned out, only to find that the gym is extremely busy and the equipment you need is being used.Instead of just skipping over the exercise, look to replace it with another effective exercise that will work the same muscle groups and movements.
The 5 Muscle Building Replacements
The following 5 exercises have been designed to allow you to continue training and build muscle size, no matter what scenario you are faced with.
Whether you are looking for some exercise variations or are restricted through injury, the following 5 exercises can simply and easily be swapped into the majority of training programs.
1) Reverse Grip Bench Press (Swapped for Incline Bench Press)
When it comes to bench pressing, a very common mistake is to allow the elbows to flare out and consequently place the shoulders in a compromised position.
An underhand grip prevents the elbows from flaring out to the sides and as a result, reduces the chances of sustaining an injury (1).In addition to increasing the risk of shoulder injury, this error also fails to effectively activate the upper pectorals, thus reducing the effectiveness of the exercise.While the incline bench has been found to increase activation of the upper pecs by 10%, an underhand grip has been found to increase this even further – by as much as 30%!Therefore, those looking to promote shoulder health and improve the strength and size of the upper pecs should utilize an underhand grip when benching.
Coaching Points:
Lie back on the flat bench and initially lift the bar from the rack using an overhand grip
In a controlled manner bring the bar over the chest and drop it down to the lower portion of the pecs
Let the bar rest on the chest and carefully switch from your overhand grip to an underhand grip ensuring that hands are slightly wider than shoulder-width
For every rep, ensure that the bar starts over the face and is dropped to the lower chest
Once contact is made with the chest, drive it back up in a slight arc so it returns to over the face
2) Barbell Power Row (Swapped for Single-Arm Dumbbell Rows)
Single-arm dumbbell rows are excellent for developing single limb strength and stability. However, when short on time, consider using a barbell to simultaneously work both sides.
Using a barbell will also allow you to lift a heavier load than the dumbbell will due to the improved stability associated with the barbell.Lifting a heavier load will place greater stress on the back and therefore cause it to adapt at a greater rate.The dumbbell row is often utilized as it does not place the same kind of stress on the lower back that the barbell row does (2).However, in the same way that a bench is often used to stabilize the spine in a dumbbell row, consider using a power rack during the barbell row to reduce lower back stress.Simply place the barbell on the rack after each rep to promote back health and reduce the risk of injury.
Coaching Points:
Set the pins slightly below the knees and start with the loaded barbell resting on the pins
Tip forward and grip the bar with an overhand grip that is shoulder-width apart
Brace the core and drive the chest up to protect the spine
Rip the bar into the waist while preventing the elbows from flaring and then return to the pins
3) Bent-Over Dumbbell Lateral Raise (Swapped for Cable Rear Delt Flies)
One of the biggest benefits of using the cables is that they effectively maintain tension on the working muscles throughout the duration of the exercise.However, if the cable machine is being used, it is possible to work the rear delts using dumbbells instead.One of the advantages of using dumbbells is that unlike the cable or rear dealt fly machine, they are portable and can be performed practically anywhere.Another positive is that heavy dumbbells are not required for this exercise; light loads will effectively get the rear delts firing. This makes it a perfect “at-home” exercise.Coaching Points:
Pick up a pair of dumbbells and stand tall before gently pushing the hips back to cause the trunk to lean forward
Keeping the arms extended, let the weight hang down with the palms facing each other
Engage the rear delts and squeeze between the shoulder blades to drive straight arms out to the sides of the body until approximately parallel with the floor
Hold the contraction for a moment before lowering the dumbbells under control
This exercise can also be performed while seated on a bench.
4) Step-Up (Swapped for Squats)
Although the squat should form a vital part of the majority of training programs, there may be times that it may have to be avoided or replaced with an alternative.On this note, it is important to recognize that the leg press is not a like-for-like swap for the squat considering that biomechanical differences that exist between the two (3).The squat tends to activate the hamstrings and glutes to a large extent whereas the leg press tends to limit the involvement of both of these muscle groups.A more suitable alternative is the step-up – which is practically a one-legged squat. Either barbells or dumbbells can be used for this exercise.When executing the step-up, ensure that the box or bench you select places the thigh in a position that is parallel with the floor. Any higher than parallel will fail to properly engage the glutes, quads, and hamstrings.Coaching Points:
Stand in front of the box with either a bar on the back or dumbbells in hand
Keeping the chest up and core tight, place the foot on the box and drive through the heel powerfully to rise up
Step onto the box with the other foot and then reverse the entire movement back to the floor
5) Cable Leg Raise (Swapped for Leg Extensions)
While the leg extension is a powerful isolation exercise for the rectus femoris (quad muscle), it may place undue stress on structures around the knee (4).Considering the fact that the rectus femoris muscle encompasses both the knee and hip joint, the cable leg raise may be a more effective alternative.The main difference between the two exercises is that the leg remains entirely straight during the cable leg raise, rather than hinging the knee in the leg extensions.Coaching Points:
Set a cable pulley to the lowest point, attach an ankle strap and secure the strap around the ankle
Standing tall and straight, engage the muscles of the legs to raise the leg out in front of the body until it reaches parallel with the floor
In a controlled manner, lower the leg until the foot touches the floor slightly behind the standing foot
Final Word
There is no reason to be stuck when injury strikes or when your favorite piece of gym equipment is being used. Instead, consider adopting a number of the aforementioned exercises to allow to exercise to continue.
References:
1-Bhatia, Deepak N.; de Beer, Joe F.; van Rooyen, Karin S.; Lam, Francis; du Toit, Donald F. (2007-8). “The “bench-presser’s shoulder”: an overuse insertional tendinopathy of the pectoralis minor muscle”. British Journal of Sports Medicine. 41 (8): e11. doi:10.1136/bjsm.2006.032383. ISSN 1473-0480. PMC 2465431. PMID 17138640.
2-Fenwick, Chad M. J.; Brown, Stephen H. M.; McGill, Stuart M. (2009-3). “Comparison of different rowing exercises: trunk muscle activation and lumbar spine motion, load, and stiffness”. Journal of Strength and Conditioning Research. 23 (2): 350–358. doi:10.1519/JSC.0b013e3181942019. ISSN 1533-4287. PMID 19197209.
3-Escamilla, R. F.; Fleisig, G. S.; Zheng, N.; Lander, J. E.; Barrentine, S. W.; Andrews, J. R.; Bergemann, B. W.; Moorman, C. T. (2001-9). “Effects of technique variations on knee biomechanics during the squat and leg press”. Medicine and Science in Sports and Exercise. 33 (9): 1552–1566. doi:10.1097/00005768-200109000-00020. ISSN 0195-9131. PMID 11528346.
4-D’Lima, Darryl D.; Fregly, Benjamin J.; Patil, Shantanu; Steklov, Nikolai; Colwell, Clifford W. (2012-2). “Knee joint forces: prediction, measurement, and significance”. Proceedings of the Institution of Mechanical Engineers. Part H, Journal of Engineering in Medicine. 226 (2): 95–102. ISSN 0954-4119. PMC 3324308. PMID 22468461.
3 Ways To Save Your Knees On Leg Day
You can’t workout if you don’t have knees to stand on.
When it comes to training injuries there’s no doubt that the most common, not to mention most irritating, are knee injuries. There’s nothing worse than to fall prey to a knee injury, particularly since it will slow a great deal of your progress. If you looking to have some mammoth wheels, some well defined quads and massive calves then a knee injury will kiss all that goodbye. With a knee injury your progress with the squat, deadlift, and numerous other exercises will be halted.
But it doesn’t have to be that way. The thing about knee injuries is that the occurrence is so common that there has been plenty of research into injury prevention. If you’re looking to hit the gym hard on leg day without having to worry about injuries, then do yourself a favor and take some of these tips under consideration.
It’s All In The Warm Up
First thing’s first, if your warm up looks like crap then your knees are likely to end up feeling the same way. If you want to ensure that you’ll have healthy knees after a hard training session then you better be sure to warm up properly. The key is not to jump into the deep end and start lifting heavy right off the bat.
Take your time with the warm up and use lighter weight, being sure to work on form and technique before all else. This will get your muscles prepped for the hard training to come and the mental focus on form will have you perfecting the movement even as you move up in weight. Try some leg extensions at a lighter weight and get the blood pumping before deciding to hit the leg press.
No Lockout Needed
Locking your knees during exercise can ultimately spell trouble for your joints by the end of your training session. Keeping a slight bend in the knees will prevent all the weight from being transferred to the joints. The whole point of training is to build the muscle not to stress your joints beyond repair. Keeping that tension will help work the muscle itself as well as save your joints from punishment.
Choose Your Cardio Wisely
Yes, cardiovascular training should be apart of your routine as a bodybuilder, but many people go about cardio training the wrong way. They believe that you have to do long distance running on the road or treadmill to get in their cardio. A better way to perform your cardio training is to pick an exercise and equipment that will supplement your leg training.
The elliptical and the stationary bike are two pieces of equipment that provide less stress on the knees as well as offering the cardio benefits you need. Running is a high impact activity. When you’re going to squat you don’t want to be worried about shin splints and other running related issues. Your legs should be fresh and strong in order to complete the workout to the best of your ability. That means when you decide to do your cardio choosing low impact exercise machines like the elliptical and the bike are key to better performance.
What nagging injuries set you back during your training? Let us know by hitting up our comments below or head on over to our official Facebook and Twitter.