Tag: Workouts
Laying Down The Law: 5 Rules For Fat Burning You Need To Follow
Heed and obey for a shredded physique.
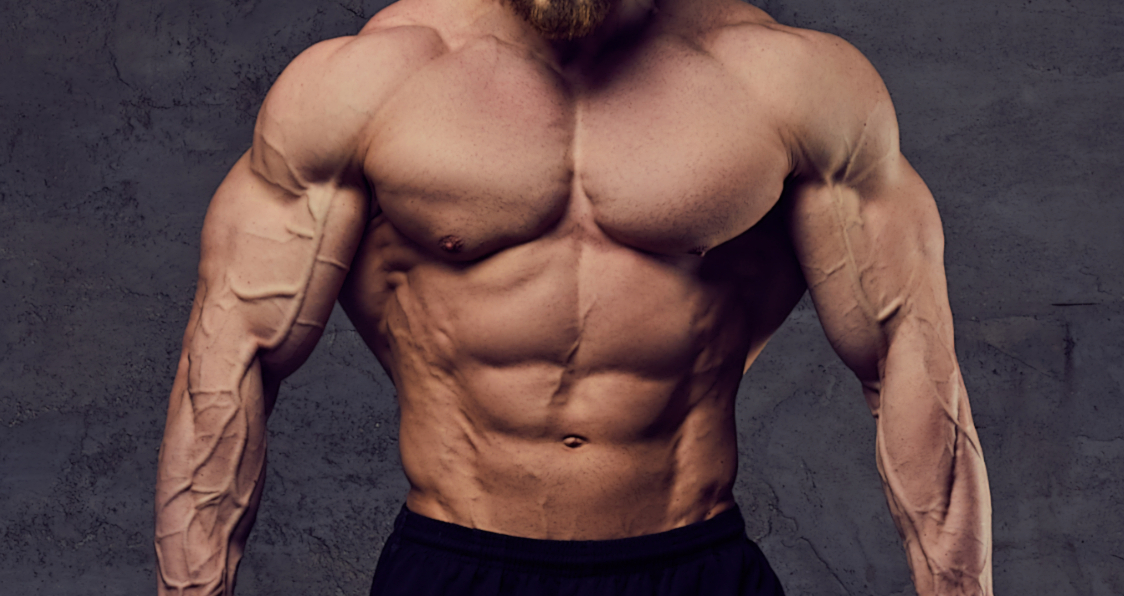
When it comes to health and fitness there’s no topic that’s given more attention than burning fat. No matter your fitness level, burning fat is always at the top of anyone’s list of things to do and with good reason. Even if you have tremendous musculature you’d be hard pressed to prove it if you have a layer of blubber hiding all of that muscle.
The only way to reveal the shredded abs and powerful pectorals is by training to burn off all the excess fat. But what principles should you keep in mind if you mean to make consistent and steady progress? You want to burn the fat and keep it off as well. So here’s some great things to keep in mind on your fat burning journey.
1. Diet is Paramount
If you want to burn fat then the first thing you need to worry about is what you’re putting into your mouth. You have to have a balanced diet and one that’s going to work best with your body. Whether that means having balanced macronutrition or going on a ketogenic diet, you must choose a diet plan that’s going to optimize your performance as well as your body’s fat burning capabilities. Supplements can provide great boosts to any diet, including fat burners to shed that unwanted fat, or protein supplements to increase fullness.
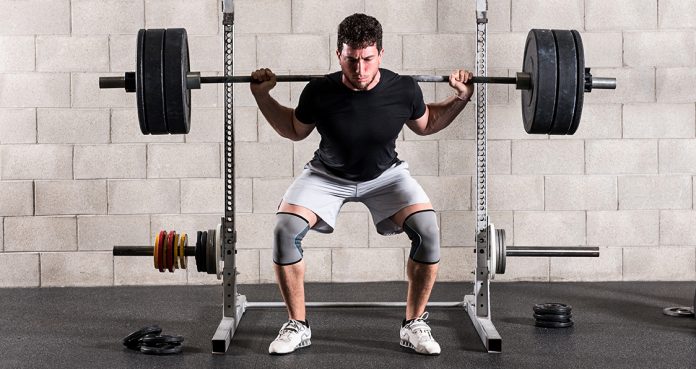
2. Compound Movements are King
Training the correct way is also paramount to burning fat. You want to build strength as well as burn fat which means you better have the compound movements mastered. That means being well versed in the bench, squat and deadlift. These big three powerlifting exercises should be staples in any workout for they work multiple muscle groups and allow for a serious increase in strength and calorie burn.
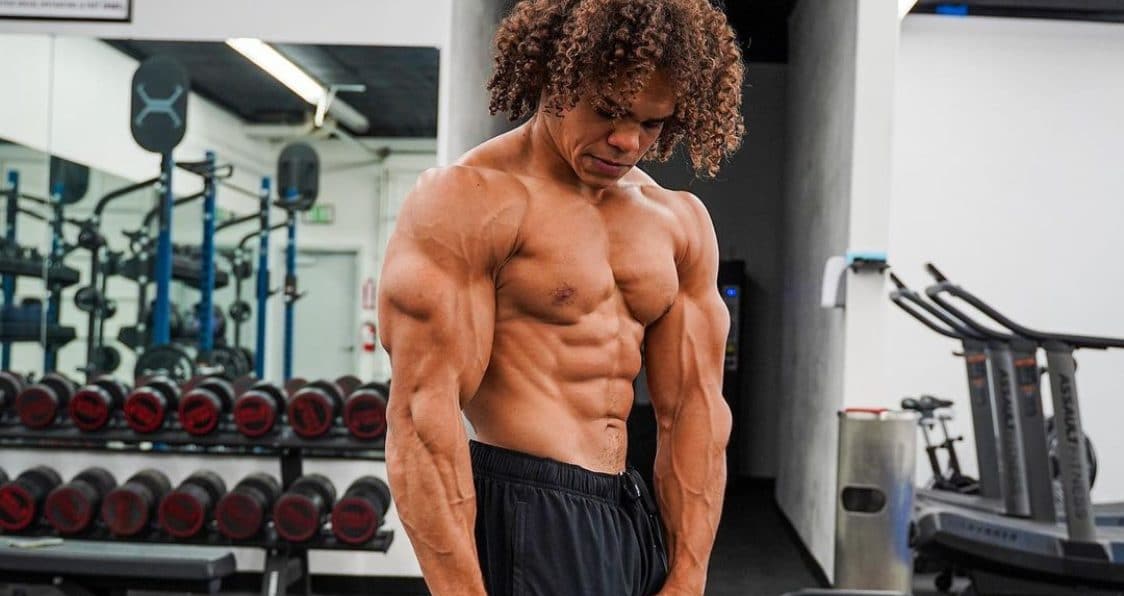
3. Prioritize Building Muscle
If you haven’t picked up on it by now, then here’s your chance to be informed. You’re going to want to focus on building up your muscle. This all works in tandem with having a proper diet as well as training in a manner that promotes muscle building. Training for both strength and muscle growth are two important elements for burning stubborn fat. Adding drop sets to your workouts are a great way to target muscles deep within to really promote growth and adding a protein concentrate or isolate can really promote a great diet and muscle growth.
4. Choose The Correct Training Split
You can’t train the same body part day in and day out. You’ll have to switch things up depending on the day in order to burn fat throughout the body, but more importantly grow muscle in all the important muscle groups of the body. Training legs one day, arms another, and back in a systematic way will ensure that you’re building a well muscled and powerful physical frame. Knowing which muscle groups to pair together can really increase your chances of substantial growth.
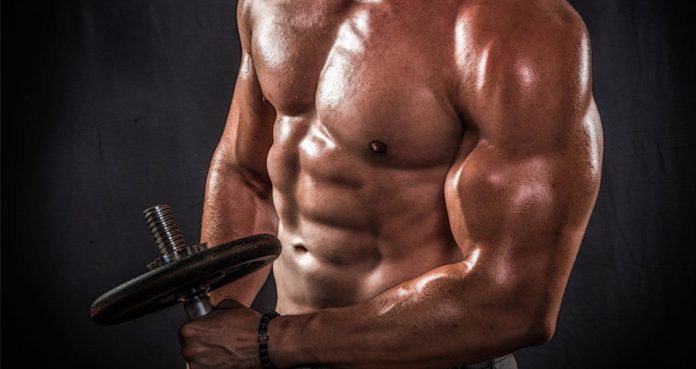
5. Boost Your Metabolic Rate
Long sustained cardio used to be considered the trick to burning pesky fat, but newer studies have proven that the best way to raise your metabolic rate and burn fat through a 24 hour period is to perform interval training. This kind of training puts the body in an oxygen deficit and ensures that your body is burning calories, particularly fat, even after you’re done training. Try high-intensity interval training to save time in the gym and really feel a great burn.
What are your training priorities? Let us know by hitting up our comments below or head on over to our official Facebook and Twitter.
Fifteen Essential Lower Body Exercises To Add To Your Training
Lower-Body Workouts That Build Serious Strength
While the thought of “leg day” tends to put some gym-goers off, training your lower body is extremely important.Performing lower-body workouts and strengthening the legs can have an array of positive effects including enhanced movement, greater stability, reduced injury risk, and even facilitate weight loss.
There is an abundance of lower body exercises that can be performed to help you achieve any or all of these goals.
This article will highlight fifteen essential lower body exercises that you should consider adding to your workouts. It will also provide some lower body training guidelines to keep you on the right track.
The Fifteen Lower-Body Exercises
1) Dumbbell Squat
The dumbbell squat is an excellent exercise that will develop the glutes and quadriceps as well as building core strength and stability.
Stand upright ensuring that your feet are placed underneath the hips
Hold a pair of dumbbells so that they are by the sides of the hips
Lift your chest, pull your shoulders back and down, and engage the core
Bend at the hips and knees and drop the backside down towards the floor
Continue descending until your thighs are parallel with the floor
Pause briefly and then powerfully drive upward to stand
2) Goblet Squat
The goblet squat is very similar to the dumbbell squat and works the same muscle groups. The only difference between the two is the position of the dumbbell.
Begin by standing upright and placing the feet directly under the hips
Using one dumbbell only, hold it vertically and cup the top end with both hands
Hold the dumbbell tight to the chest and ensure that the elbows point directly down
Lift your chest, pull your shoulders back and down, and engage the core
Bend at the hips and knees and drop the backside down towards the floor
Continue descending until your thighs are parallel with the floor
Pause briefly and then powerfully drive upward to stand
3) Bulgarian Split Squat
This is a unilateral (single-limb) exercise that primarily works the glutes and quads of the front leg. It is also a demanding exercise in terms of balance and stability.
Begin by placing a bench directly behind you and hold the dumbbells by the hips
Lift the left foot from the floor and reach back to place it on the bench
Keep the chest up and core engaged to keep your trunk upright
Begin to lower your back knee towards the floor by bending the front knee and hip
Descend until your front thigh is approximately parallel with the floor
After taking a brief pause, drive through the front leg to return to the starting position
Once completing the prescribed reps, swap sides and repeat
4) Lateral Lunge
The lateral lunge requires movement out to the side rather than forward or backward. This exercise places a significant load on the glutes, quadriceps, and adductors.
Start by standing upright ensuring that the feet are directly under the hips
Hold two dumbbells at arm’s length so that they start by the hips
Lift the chest, keep the shoulders down, and engage the core
Keeping the right foot planted, take a step out to the side with the left foot
Push your hips back and bend at the left knee only to drop down towards the floor
Allow the dumbbells to lower to either side of the left knee
Descend until the left thigh is parallel to the floor, pause, and then return to standing
Alternate sides and repeat
5) Glute Bridge
The posterior chain refers to all of the muscles that run up the rear side of the body. The glute bridge is an effective developer of the posterior chain.
Begin by lying flat on your back with your hands by the sides of your hips
Bend the knees to bring the feet in close to the backside ensuring the feet stay flat
Engage your core muscles and engage your glutes to drive your hips from the floor
In this position, a straight line should be formed from the shoulders to the knees
Hold this position for a moment before returning to the floor and repeating
6) Camel
The camel is a squat variation exercise and, therefore, it works similar muscles to the squat. The narrow stance used in this exercise places a greater demand on the quads.
Start in a kneeling position with the tops of the feet on the floor and backside resting on your heels
Hold a dumbbell in both hands by grasping the end and keep it tight to the chest
Lift the chest, pull the shoulders back, and squeeze the core muscles
Drive the hips right through to create a straight line from the knees to shoulders
In a controlled manner, drop the hips back down to the feet and repeat
7) Resistance Band Single Leg Deadlift
As well as developing hamstring and glute strength, the single leg deadlift demands core strength, stability, coordination, and balance.
Start by placing a miniband around the left foot and grip it with the right hand
Stand up straight and ensure the feet are directly under the hips
Keep a slight bend in the knees, engage the core, and keep the chest up
Lift the right foot from the floor and then hinge forward by pushing the hips back
Let the right leg kick back and continue to hinge until your torso is parallel to the floor
Return to the starting position by driving the hips through
Once reps have been completed, alternate sides and repeat
8) Forward Lunge
Although both feet are in contact with the ground, the forward lunge can really be considered a unilateral exercise with the front leg doing the majority of the work.
Begin with the feet directly under the hips and the dumbbells held by the sides
Drive the chest up, pull the shoulders back and down, and engage the core
Take a substantial step forward and bend the knees to drop down towards the floor
Descend until the front thigh is parallel with the back knee a couple of inches from the floor
Pause momentarily before pushing hard through the front leg to return to standing
Alternate sides and repeat
9) Reverse Lunge
For the reverse lunge, instead of stepping forward as with the forward lunge, you must take a step backward. This change places more demand on the posterior chain muscles.
Begin with the feet directly under the hips and the dumbbells held by the sides
Drive the chest up, pull the shoulders back and down, and engage the core
Take a substantial step backward and bend the knees to drop down towards the floor
Descend until the front thigh is parallel with the back knee a couple of inches from the floor
Pause momentarily before pushing hard through the front leg to return to standing
Alternate sides and repeat
10) Curtsy Lunge
While less conventional than the forward and backward lunge, the curtsy lunge is excellent for developing glute strength and joint stability.
Begin with the feet directly under the hips and the dumbbells held by the sides
Drive the chest up, pull the shoulders back and down, and engage the core
From there, step your left foot back and outside the right foot
Descend until the front thigh is parallel with the back knee a couple of inches from the floor
Pause momentarily before pushing hard through the front leg to return to standing
Alternate sides and repeat
11) Clamshell
The clamshell is a simple isolation exercise that particularly targets the glutes. This exercise can be performed with or without a resistance band looped around the knees.
Lie on your right side, stack the ankles and knees and rest your head on your arm
Bring your feet in so they align with your backside and create a 90-degree angle at the knees
While keeping the core engaged and feet together, raise the left knee as far as possible
As the left knee lifts, ensure that the right hip stays in contact with the floor
At the top position, squeeze the glutes tightly and then return to the start
Once reps have been completed, swap sides and repeat
12) Standing Single Leg Calf Raise
To concentrate on building the calves, perform the single leg calf raise. Not only is this a simple exercise to grasp, it highly activates the calf to maximize strength development.
Place the front of the right foot on an elevated surface so that the heel hangs off
Hold a single dumbbell in the right hand and hold it by the hip
While keeping the core tense, drive up onto the toes and lift the heel as high as possible
Slowly lower back to down the starting position
Complete the prescribed number of reps before alternating sides
13) Seated Calf Raise
The seated variation of the calf raise is another effective isolation movement. The benefit of this variation is that heavier dumbbells can be used.
Begin by sitting upright on a bench with feet flat on the floor
Place two dumbbells on the lower thighs
Engage the core and then lift the heels from the floor as high as possible
Slowly lower back to down the starting position and repeat
14) Step-Ups
While step-ups primarily build quad, hamstring, and glute strength, the single leg stance and unstable nature of movement causes the core to maximally engage.
Begin by placing a bench directly in front of you
Stand tall with the feet under the hips and dumbbells held at arm’s length
Lift the chest, pull the shoulders back and down, and engage the core
Place the left foot onto the bench so that the hip, knee, and ankle create 90-degree angles
From there, drive into the bench to lift the body up until you are standing upright
Control the descent and return to the starting position
Alternate sides and repeat
15) Resistance Band Single Leg Lift
To build the size and strength of the glutes, focus on the single leg lift. This isolation places all of the demand onto the large glute muscles causing them to adapt and improve.
Begin by lying on your right side and place a miniband around your ankles
To provide comfort and stability, use the right arm to prop yourself up
Keep the legs straight and stacked on top of each other
Engage the core muscles before lifting left leg up as far as possible
Lower to the starting position and repeat for the given number of reps
Alternate sides and repeat
Lower Body Workout Guidelines
This section will cover three key considerations that must be made when it comes to designing and performing lower-body training workouts.
Workout Structure
Choosing a selection of the above exercises will give you a great workout, however, it’s important that the exercises you select are performed in the correct order.With all strength-based workouts, you should begin with the exercises that are the most demanding and work the biggest muscle groups.This means prioritizing compound (multi-joint) exercises over isolation (single-joint) exercises.
Furthermore, when it comes to exercise selection, choose exercises that work a range of different movement patterns and muscle groups.This approach will ensure that all muscle groups develop equally thus reducing the risk of developing imbalance or asymmetry.
Training Frequency
How often you train your lower body depends on your goals, level experience, and preference.
For example, an individual who is looking to maximize their muscular strength and size may need to train a lot more frequently to optimize progress (1).
A general recommendation, however, is to train the lower body three times per week.
Training Volume
Training volume is the total amount of work that is performed during a workout. Sets, reps, and weight all constitute training volume.So, how much volume should you be using? Once again this is dependent on your training goal.
For those who are looking to primarily improve strength, focus on lifting heavy weight for a low rep range (between one and five reps) (2).To maximize muscle size, the traditional understanding is to use moderate weight and rep ranges (between six and twelve). However, it appears that muscle growth is influenced more substantially by increasing the total training volume, regardless of the loading scheme used (3).
Final Word
If you are serious about building strength, you must regularly train your lower body. Utilizing the fifteen exercises and applying training guidelines outlined in this article will ensure that you make the most optimal strength progress possible.
References:
1 – https://www.ncbi.nlm.nih.gov/pmc/articles/PMC6036131/ Ochi, Eisuke; Maruo, Masataka; Tsuchiya, Yosuke; Ishii, Naokata; Miura, Koji; Sasaki, Kazushige (2018-07-02). “Higher Training Frequency Is Important for Gaining Muscular Strength Under Volume-Matched Training”. Frontiers in Physiology. 9. doi:10.3389/fphys.2018.00744. ISSN 1664-042X. PMC 6036131. PMID 30013480.
2 – https://pubmed.ncbi.nlm.nih.gov/25853914/ Schoenfeld, Brad J.; Peterson, Mark D.; Ogborn, Dan; Contreras, Bret; Sonmez, Gul T. (2015-10). “Effects of Low- vs. High-Load Resistance Training on Muscle Strength and Hypertrophy in Well-Trained Men”. Journal of Strength and Conditioning Research. 29 (10): 2954–2963. doi:10.1519/JSC.0000000000000958. ISSN 1533-4287. PMID 25853914.
3 – https://www.ncbi.nlm.nih.gov/pmc/articles/PMC6303131/ SCHOENFELD, BRAD J.; CONTRERAS, BRET; KRIEGER, JAMES; GRGIC, JOZO; DELCASTILLO, KENNETH; BELLIARD, RAMON; ALTO, ANDREW (2019-1). “Resistance Training Volume Enhances Muscle Hypertrophy but Not Strength in Trained Men”. Medicine and Science in Sports and Exercise. 51 (1): 94–103. doi:10.1249/MSS.0000000000001764. ISSN 0195-9131. PMC 6303131. PMID 30153194.
How Uzoma Obilor Builds That Perfect Bodybuilding Physique
Uzoma Obilor brings us this workout to seriously boost strength and sculpt that perfect bodybuilding physique.
Uzoma Obilor is a professional bodybuilder and fitness icon competing in the Classic Physique division. With a massive following of fans, he uses his platform to spread great content and inspire others to work for a shredded physique like himself.
When it comes to working hard, looking to those athletes and professional bodybuilders is a great way to boost all our gains. They’ve done it before and are living proof of what can happen when you grind in the gym and perform these exercises to the fullest. So many websites and influencers claim to know exactly how to get a massive and shredded physique but at the end of the day, why not look to those who do this every single day in order to compete against the best in the world. With the right approach, that perfect aesthetic is just around the corner.
Uzoma Obilor is a fitness icon on stage and online and these workouts can boost your growth and aid in sculpting that perfect bodybuilding physique.
Full Name: Uzoma Obilor
Weight
Height
Date Of Birth
185-195 lbs.
5’6’’
06/13/2021
Division
Era
Nationality
Classic Physique
2010
American
Uzoma’s training routine uses progressive overload and pyramid sets in order to see real progress. This full week workout is one to greatly influence growth by offering a variety of exercises and working to tackle every muscle group. The best workouts can make that precious time worthwhile so you too can get the best physique possible.
About Uzoma Obilor
Growing up, Uzoma wasn’t the most active kid. He enjoyed playing video games and moved around a bit before settling in Las Vegas. But, even still, it would take some time for him to discover weight training, but once he did, he was hooked. A wrestler and football player, his goal from lifting was to build strength and size but he took to this quickly and dove right into lifting.
After crafting and sculpting his physique overtime, Uzoma decided to give some bodybuilding shows a try. He loved to compete and his strong work ethic made him a known name on the circuit. In 2017, he earned his pro card at the age of 21 and there has been no stopping him since. Now a professional bodybuilder and digital fitness icon, Uzoma hopes to inspire others to work hard like him to reach their goals.
Uzoma Obilor Training Routine
When it comes to training, Uzoma focuses on progressive overload and pyramid sets to really spark that desired growth. Progressive overload allows him to add weight over time to see the best results while continuing to see progress as well. This allows for increased growth slowly overtime. Pyramid sets work to increase weight during your workout until failure, then lowering back down once those muscles are fatigued. As a result, Uzoma has crafted a physique others envy and this training routine will explain how and why.
Workout #1: Chest
Exercises
Sets
Reps
Bench Press
3
10
Incline Dumbbell Flys
3
10
Push Press
3
12
Cable Fly
3
12
Incline Press
3
10
Workout #2: Shoulders
Exercises
Sets
Reps
Seated Military Press
3
10
Standing Overhead Press
3
10
Lateral Raise
3
12
Front Raise With Cable
3
12
Overhead Press With Barbell
3
10
Shrugs
3
15
Workout #3: Legs
Exercises
Sets
Reps
Leg Press
3
8
Leg Extension
3
10
Hack Squat
3
8
Banded Squats
3
10
Hamstring Curls
3
10
Workout #4: Back
Exercises
Sets
Reps
Deadlift
3
8
Lat Pulldown
3
10
Bent Over Bar Row
3
10
Wide Grip Pull-Ups
3
12
Cable Row
3
10
Workout #5: Arms
Exercises
Sets
Reps
Close Grip Bench Press
3
10
Alternating Dumbbell Curl
3
10
Single Arm Triceps Extension
3
10
EZ Bar Curl
3
8
Hammer Curl
3
10
Triceps Pushdowns
3
12
Reverse Curl
3
10
Straight Bar Triceps Pushdowns
3
12
Ab Workout
Exercises
Sets
Reps
Leg Lifts On Bench
3
15
Scissor Kicks
3
20
Bicycles
3
20
Hanging Leg Lifts
3
12
Hanging Crunches
3
12
Featured Supplement For Pre-Workout Energy & Pumps
When it comes to his training, Uzoma uses his own supplements of choice to boost all areas of his performance and health. With the right supplementation routine, you are well on your way to also having the best results. Staples like protein powders, intra-workout BCAAs, and creatine can all greatly affect your muscle growth and recovery while others like fat burners and testosterone boosters can work for your overall needs when it comes to health and wellness. Having the right supplements means you are one step closer to really maximizing your true potential.
Kaged Muscle Pre-Kaged
Code GENIRON10 For 10% Off
Kaged Muscle Pre-Kaged is great for those looking to increase performance and intensity with a high-quality pre-workout. Great ingredients and a quality blend make this unstoppable for your pre-workouts needs.
Increase the performance and intensity of your workout with this high quality pre-workout powder available from Kaged Muscle. Kaged Muscle Pre-Kaged is unmatched in terms of ingredient quality and synthesis of the blend of proteins. Kaged Muscle lab tests every batch to make sure each is fully loaded as advertised — 274 mg pure caffeine, 2 g taurine, 6.5 g fermented BCAAs, 6.5 g pure l-citrulline, and 2 g of their patented betapower blend. It’s an unbeatable combination that is guaranteed to supercharge any workout with great pre-workout ingredients from supplements to increase muscle and promote weight loss.
Price: $39.99
Use code GENIRON10 to save 10%! Check out our individual review for Kaged Muscle Pre-Kaged here!
Check out our list of the Best Pre-Workout Supplements for more great pre-workout products!
Wrap Up
This workout from Uzoma Obilor is sure to fire up those muscles to grow as you seek the best in terms of physique and those desired goals. As an accomplished bodybuilder and fitness icon, Uzoma knows exactly what needs to happen to see those gains come to life and this workout is proof of the results when you grind away at a great training routine. On top of that, a solid supplementation plan, paired well with any training plan, can influence your goals and help you see results like Uzoma himself.
Let us know what you think in the comments below. Also, be sure to follow Generation Iron on Facebook, Twitter, and Instagram.
*Images courtesy of Uzoma Obilor Instagram

Calum Von Moger Chest Workout For Golden Era Aesthetics
Build pecs with this Calum Von Moger chest workout that the bodybuilding Gods would be proud of.
You have got to be living under a rock if you have never heard of Calum Von Moger, and especially if you are on Instagram. Today when bodybuilders are criticized for steroid use and bloated guts, Calum’s symmetrical physique and golden-era aesthetics make him stand out. Heck, some people even call him the modern-day Arnold Schwarzenegger. The similarities are so striking that he is sometimes referred to as Arnold 2.0. Calum even appeared in the 2018 feature film ‘Bigger’ where he plays the role of a young Arnold Schwarzenegger.
WATCH: Arnold Schwarzenegger Compares Modern Bodybuilding To Pregnancy
Looking like Arnie is no coincidence. When asked about his physique goals, Calum said that –
“I’m not interested in any of today’s bodybuilders. That doesn’t appeal to me at all. It’s not what I want to look like, it’s not what I want to be, it’s too much. What I like are the old classic physiques. That’s my favorite. Quality over quantity. Bodies made in the ’60s and ’70s. Aesthetic, with perfect symmetry and proportion. My ultimate goal, would be to build a body like that one day. But then again, probably just a little bit better.”
The Calum Von Moger Story
https://www.instagram.com/p/B_0H_uDJxZL/
Calum grew up in a small Australian town called Geelong. He was a skinny kid growing up. Calum’s first encounter with weights happened at age 14 when his elder brother asked him if he wanted to tag along to the gym. And by the gym, we mean an old warehouse with basic equipment and rusty dumbbells.
Although people compare Calum to Arnold Schwarzenegger, his motivation for lifting came from watching Steve Reeves in ‘Hercules.’ He then knew what he wanted to look like when he saw Arnold Schwarzenegger in the critically acclaimed documentary ‘Pumping Iron.’
Conquering The Stage
After years of hard work in the gym, Calum started competing in local shows. He won his first bodybuilding competition in 2010, and shortly after that, in 2011, he qualified for WFF Junior Mr. Universe competition. Calum subsequently won the NABBA Junior International championship and Jr. Mr. Universe titles.
Calum had an incredible run from 2011 to 2016 where he won almost all the shows he competed in.
An opportunity presented itself in 2017 when NPC and IFBB introduced the Classic Physique division. Calum Von Moger set his eyes on getting the pro card and starting training for the newly introduced division. His journey preparing for the NPC/IFBB league was chronicled in Generation Iron 2.
WATCH: Video Of Calum Von Moger Tearing Bicep With Chris Bumstead
Things then took a turn for the worse when Moger suffered two serious injuries (November 2017 and April 2018) that prevented him from training at full capacity. In November 2017, Calum suffered a bicep tear that was followed by a knee injury incurred during cliff climbing in late April 2018.
WATCH: Calum Von Moger Injured Falling Down A Cliff
But if you know Calum, you know that keeping him out of action is impossible. He treated these injuries as setbacks and had his eyes set on winning the big titles. His recovery and return to training at full capacity are narrated in the documentary feature film Calum Von Moger: Unbroken. We highly recommend watching the movie to experience Moger’s grit, discipline, unwavering determination to win, and passion for the sport.
Road To Mr. Olympia
https://www.instagram.com/p/CHmOakph7Cg/
Calum Von Moger won the NPC Universe title in 2020 and earned his pro card. Not only has he recovered but is at his prime. He is now a serious threat to the reigning Mr. Olympia Classic Physique champion. But before he can compete for the Mr. Olympia title, he needs to earn a qualification.
In our interview with Calum, we asked him to tell us more about his future competing plans. Although he does not have an exact show in mind, he expects to compete in his first pro show in August or September 2021. He is utilizing the off-season to improve his physique so that he can bring his best package to the pro stage.
[embedded content]
Although the chances of Calum competing in the 2021 Mr. Olympia are bleak, we look forward to seeing him wear the Mr. Olympia Classic Physique crown soon.
Before we get to Calum’s chest workout routine, we need to talk about his new tattoo. Before stepping on stage for his pro card, Calum got a phoenix tattoo on his arm. Not only does it look dope, but the rising phoenix is the perfect metaphor for his comeback.
Calum Von Moger Chest Workout
“I train by instinct. Which means I don’t follow the rules others have made that might work for them. I always use exercises that I know work for me and I generally warm up at the start for 1-2 sets then complete 3 working sets.”
Go Heavy or Go Home
Calum uses heavyweights and low reps to annihilate his muscles. He uses a pyramid structure in his workouts and increases weights with each set.
Moger relies heavily on compound exercises like deadlift, bench press, squat, and barbell rows. If you are someone who likes spending time on machines, this workout is not for you.
Calum Von Moger Chest Training Routine
1. Pec Deck Fly – 3 Sets 8-12 Reps – 1-2 Minute Rest
https://www.instagram.com/p/Bge1efCgyDW/
Steps:
Sit on the machine with your back against the pad.
Place your feet flat on the floor.
While maintaining a slight bend in your elbows, grab the handles at your chest level.
Pull your arms towards your body until the handles are in front of your chest.
Hold and squeeze your pecs at this position for a couple of seconds.
Return to the starting position and repeat for desired reps.
In this workout, you will be starting with isolation (single-joint) exercise to pre-exhaust your pectoral muscles before you get to the compound lifts. It will ensure you get the same amount of muscle stimulation without having to go super heavy.
Remember: This workout is not just about going through the motions. You have to lift as heavy as you can and target failure with each set. If you hit failure on the first set of 12 reps, increase the weight in the next set so that you hit failure on 10 reps.
2. Incline Bench Press – 4 Sets 8-12 Reps – 1-2 Minute Rest
Steps:
https://www.instagram.com/p/CJ6yp29BOtU/
Grab the barbell with a slightly wider than shoulder-width grip.
Plant your feet firmly on the floor.
Unrack the bar and hold it above your chest while your elbows are locked out.
With a controlled motion, lower the bar until it is a few inches away from your chest.
Press the bar in a straight line back up to the starting position while exhaling.
Repeat until failure.
Many noobs make the mistake of bouncing the bar off their chest. While this might help in the eccentric motion while lifting heavy, it also increases the risk of a shoulder or pec injury.
If you are a beginner or an intermediate lifter, make sure you have a spotter while performing the compound lifts. You should follow a full range of motion while performing all the exercises in the workout.
3. Flat Machine Chest Press – 4 Sets 8-12 Reps – 1-2 Minute Rest
You could use a flat bench or a seated chest press machine for this exercise. For this tutorial, we will use the seated chest press.
Steps:
Place your back against the pad and plant your feet on the ground.
Adjust the handles so that they are at your middle chest level.
Push the handles by extending at your elbows.
Return to the starting position with a controlled motion.
Don’t lock out your elbows at the top of the movement. Doing so takes off the tension from your pectoral muscles and puts it on your shoulders and elbows.
Repeat for reps.
Most people make the mistake of rushing through the machine exercises. Follow a rep-tempo where you can maintain a mind-muscle connection. Your pecs should be filled with lactic acid and begging for mercy by the end of your set.
4. Dips – 3 Sets 12-15 Reps – 1-2 Minute Rest
Steps:
Grab the parallel bars and raise yourself above them by extending at your elbows. Lock your elbows at the top of the movement as you get ready to begin the exercise.
Bend your legs at your knees so that your lower legs are parallel and your upper legs are perpendicular to the floor.
Tilt your torso forward slightly (20-30 degrees) and slowly lower yourself until your shoulders are just below your elbows.
At the bottom of the movement, your lower arms should be perpendicular, and your upper arms should be parallel to the floor.
Return to the starting position explosively.
Do not lock out your elbows at the top of the movement.
Repeat for recommended reps.
Chest dips are a reminder that you do not always need heavy weight to build muscle mass.
On the other hand, if you are an advanced lifter and knocking out 12-15 reps is too easy for you, feel free to use a weight belt to add resistance. Even with a bodyweight exercise, your goal will be to progressively overload your muscles.
5. Incline Dumbbell Fly – 4 Sets 8-12 Reps – 1-2 Minute Rest
Steps:
Set the bench at a 60-degree angle to the floor.
Grab a dumbbell in each hand with a neutral (palms facing each other) grip.
Lie down on the incline bench while maintaining the natural arch of your back.
Press the dumbbell towards the ceiling by extending at your elbows.
While maintaining a slight bend in your elbows, slowly lower the dumbbells to your sides until you feel a stretch in your chest.
Exhale and bring the dumbbells back to the starting position.
Repeat for recommended reps.
Upper pecs are one of the most stubborn muscle groups. Although the incline dumbbell flyes might feel like an easy exercise, it takes a solid mind-muscle connection to make the most of this lift. If you do not have a muscle-ripping pump by the end of your set, you might be going a little too heavy.
6. Dumbbell Pullover – 4 Sets 8-12 Reps – 1-2 Minute Rest
Steps:
Lay face up on a bench with your feet firmly planted on the ground.
Maintain a slight arch in your back.
Grab a dumbbell at one end with both hands.
While slightly bending your elbows, press the weight over your chest.
Without letting your lower body or hips move, move the dumbbell over your head, and lower it to the floor.
Keep lowering the dumbbell until you feel a stretch in your pectoral muscles.
Pull your arms back to the starting position.
Repeat for reps.
Tip: If you feel a stretch in your lats at the bottom of the movement, bring the dumbbell closer to your head by bending at your elbows and pulling them towards your chest.
The dumbbell pullover is an incredibly effective exercise for building a V-taper. It is a tried-and-tested movement from the golden age of bodybuilding.
Calum Von Moger Diet
https://www.instagram.com/p/Bs2otbQhiKR/
You obviously cannot look like Calum if you do not eat like him. Here is Moger’s bulking diet plan:
1. Breakfast
4 eggs
Banana
Milk
2. Snack
Protein shake
3. Luch
Chicken
Rice
4. Snack
Protein shake
5. Dinner
6. Snack
Protein shake
Nutella
Toast
As you might have noticed, Calum Von Moger loves his protein shakes. If you want to know more about the best protein supplement on the market, we have put together a guide for you.
Related: Best Protein Powder Supplements For Strength & Size (Updated 2021)
Conclusion
Calum Von Moger might be blessed with perfect bodybuilding genetics, but what sets him apart is his dedication and discipline. Even after suffering two career-threatening injuries, he turned around his physique in a short time and won a pro card.
You now have the workout and diet program you need to build pecs like Moger and Arnold. We will be waiting to see your progress pics. Best of luck!
Do you think Calum Von Moger can win the Mr. Olympia show in his first attempt?
Let us know in the comments below. Also, be sure to follow Generation Iron on Facebook, Twitter, and Instagram.
6 Things You Should Do Before Every Workout
Preparation is key.
While the main event gets all the glory, preparation is the backbone for any viable feat, from marathon running to bodybuilding. As the great (and often times violent) Bobby Knight once said “Most people have the will to win, but few people have the will to prepare to win.” With that being said, what is it the optimal way to prepare, what’s the optimal way to prime your body to get the most out of your workout and your genetics?
While everyone is different, we’ve come up with 6 staples pretty much everybody (and we do mean every body) should do before undergoing a heavy workout.
Nutrients
“I eat for function, not for taste”, listen to Jay Cutler. Before a significant workout you want to eat a mix of carbs and protein. You’re meal plan however doesn’t have to taste like complete cow dung however – try eating some toast with almond butter, chop up some fruit and put it on top.
Fruits like bananas and apples work well because they’re complex sugars, which digest slowly, giving you a steady source of energy. As for timing it’s up to you. An hour is standard time but the key is to know how YOUR body works. We can give out the best tips but ultimately – everyone is different.
Hydrate
The American College of Sports Medicine recommends that active people drink 20 ounces of water prior to exercise. While hydration varies on age, weight, and multiple other factors, if you want to prevent, fatigue, dizziness, and cramping you probably want to sip on some water throughout the day. Chugging it all at once can actually cause you to become sick by stripping you of vital nutrients, or at the very least cause multiple potty breaks. Moderation is key.
Stretch
We know not all top athletes do it – but let’s just say unless you’re a perfect genetic freak… you probably should fit stretching into your routine. Stretching before a workout is vital to getting the most out of a session. Muscle fibers can get tangled, knotted, and sore – you want to ease the fibers and get them as close to prime time condition as possible. Before your next workout try using the foam roller before your next workout. Yes it hurts and it’s a little annoying but it will pay massive dividends when you can get it that extra set pain free.
Review your workout
Reviewing your workout is key. Besides getting you more organised so you don’t forget a set, it also mentally prepares you for the lifts you’re about to do. Also, it allows you to focus solely on the workout at hand without having to spend any mental energy worrying about what’s next. This is all about mindset. This might sound obvious but don’t get distracted by other life issues. Review your routine. Get in the zone. And make sure each and every rep counts.
Aerobic Warm-up
We know “manly” men don’t do cardio, but guys who want to be fit do. In this ever forward changing world – the idea that cardio is for “sissies” is a silly concept. A short aerobic warm-up not only increases muscle temp, blood flow, and core temp, but also warms up your tendons. Try jumping on the rowing machine for 10 minutes at a moderate pace. It will give you a little perspiration and prevent injuries. Many may fear that the cardio will cause weight loss and shrinking muscles… but that’s why you keep it simple. Don’t over do it. It’s a warm up people. Not a race.
Drills
Drilling focuses in on functionality. You want to go through all the muscles groups you will be using in your main workout with little to no weight. This gets your body warmed up and primed for the exact motions you will be using. Think of this as a combination of an aerobic workout and stretching. It’s a great way to get your body primed for some real gains later on.
There you go. The staples you’ll need before a big workout. Tweak the list above according to your body and level of fitness.
How to Continually See Progress in the Gym
Build muscle and see progress after workout by using these tips.
Progress isn’t always linear. In fact, unless you’re a novice lifter, progress may be fairly stagnant at times. You’re not always going to be blessed with noobie gains. The kind of gains someone makes when they just start lifting and can get basically get bigger just by looking at a set of dumbbells.
The longer you train, the harder it is to see progress. And as you mature into your training age, the more important the details of your training become to elicit adaptation.
Here are some proven methods you can incorporate into your program to continually see progress in (and out of) the gym.
USE INDICATOR EXERCISES
While working out is obviously better than doing nothing, it lacks any clear direction. You mosey around the gym looking for something to do without any clear goals. Training, on the other hand, implies each of your workouts act as “building blocks” to your ultimate goal. In order to understand which goals you should be setting and to add meaning to your workouts, you can use indicator exercises.
Indicator exercises or indicator lifts are movements you use to gauge your progress overtime. They tell you whether or not your program is actually working! If you can lift heavier weight or successfully complete more reps overtime, then you’re doing something right. If not, it may be time to revaluate your approach to training.
Why You Should Use Indicator Exercises
Performance-based goals lead to aesthetic-based outcomes. Training to perform better will ultimately make you look and feel better.
They give intent to your workouts. That alone, will spark a fire under your ass and breed new life into your training.
They give you direction. No more wandering around the gym trying to figure out what you’re doing next or which machine you’re going to use as a seat warmer. You’ll know which exercises you should be doing because they should only be ones that benefit your indicator lifts.
They increase the intensity of your workouts. Indicator exercises give you something clear to train for and, as a result, increase the intensity of your workouts.
How to Choose Your Indicator Exercises
Pick 3-4 lifts for your indicator exercises. As Joe DeFranco recommends, it’s ideal to use upper and lower body movements. This stops you from deviating too heavily into one direction of training and allows for a more well-rounded program.
Your indicator exercises don’t have to be the major barbell lifts, either. On the contrary, most people would find benefit in using joint-friendlier alternatives when setting strength goals in the gym.
At the end of the day, there’s no right or wrong way to choose your indicator lifts. But here are some suggestions to help you get the ball rolling.
Examples of Upper Body Indicator Exercises
Chin-Up
Bench Press
Floor Press
Examples of Lower Body Indicator Exercises
Trap Bar Deadlift
Box Squat
Rear Foot Elevated Split Squat
Once you determine which indicator exercises you’ll use to gauge the success of your program, it’s relatively easy to decide which exercises to do throughout your program. Just pick the ones that will improve your indicators.
ADJUST YOUR RANGE OF MOTION
An exercise’s range of motion is determined by the distance your joints are moving during the lift. This has direct implications on the amount of time your muscles are under load or stress during an exercise and, as a result, can significantly affect how your body responds.
Not all range of motions were created equal. If you can’t do full ROM biceps curls with 20lb dumbbells, it’s probably not a great idea to let ego take over and do ¼ reps with the 40’s. Often times, simply reducing the weight you’re lifting and performing an exercise through it’s full intended range of motion will elicit the muscle adaptation you’re looking for.
That said, a greater range of motion doesn’t always mean a better range of motion. Sometimes, partial reps can be very beneficial from a hypertrophy and strength perspective.
You can use partial reps by reducing the ROM of an exercise in order to overload a portion of the lift or place greater emphasis on a particular muscle group. A few examples include:
High box squats to increase lockout strength in the back squat and quad development.
Floor presses to increase lockout strength in the bench press and triceps development.
Rack pulls to increase lockout strength in the deadlift.
Partial overhead dumbbell presses to emphasize the delts.
Most people complaining about not seeing progress in the gym are the same ones who have a “broken record” training program. They do the same shit day after day, week after week, year after year.
A simple and highly effective way to continually elicit muscle adaptation is to introduce various ranges of motion throughout your program.
PAIR EXERCISES WITH SUPERSETS OR TRI-SETS
Pairing exercises together into a superset (two exercises performed back to back) or even a tri-set (three exercises performed one after the other) offers great benefits, including:
Time management. Accomplish more work in your training session.
General conditioning. Supersets and tri-sets are proven ways to improve your overall conditioning.
Added mobility work. I know, you’d rather read the dictionary in it’s entirety than do mobility or stretching. I get it. That’s why pairing mobility drills in between your lifting sets might be something to consider. You’re going to be resting anyways, so you can kill two birds and get some necessary mobility in. You’ll feel better and you’ll recover better. Both of which are pretty damn important if you want to lift and build muscle.
Muscle development. This one should be obvious. And there are a ton of ways you can organize your supersets and trisets to see continuous progress and battle the monotony of your stale workouts. Read my article on Best Supersets to Build Muscle for some ideas.
Summary
The longer you train, the harder it becomes to see progress. Use these strategies throughout your program to battle stagnation in the gym and to continually elicit muscle adaptation.
The Ultimate At-Home Barbell Workouts
The Only Training Tool You Need To Build Strength
The barbell is the ultimate strength training tool. There is a good reason why the strongest men on earth predominantly use barbells in their workouts.
Barbells are highly versatile yet simple pieces of equipment that allow you to perform a vast number of upper and lower body resistance exercises.
Furthermore, when it comes to free weights, there is no other piece of kit that allows you to lift as heavy as the barbell. This makes them an ideal piece of equipment for building serious strength at home.
This article will provide an at-home barbell only training program and guidelines to help you to make the most optimal progress possible.
The Barbell Only Workout
As the name suggests, the following training program utilizes the barbell only. You will not need any other piece of training equipment other than the barbell and weight plates.
The following section firstly provides information on training structure before moving on to detail the individual barbell workouts.
Training Structure
The barbell training plan is a three-day plan with the option of an additional accessory session.It follows a traditional split with a leg workout, chest and triceps workout, and a back and biceps workout to complete.The purpose of the accessory session is to increase total weekly training volume and is more speed focused.
This session is non-compulsory. If you are feeling fatigued from the other sessions, you may wish to skip the accessory session.
While the training structure can be adjusted to suit your lifestyle and preferences, the following table maps out the ideal weekly structure:
Day
Training
Monday
Legs
Tuesday
Off
Wednesday
Chest, Triceps, and Abs
Thursday
Off
Friday
Back and Biceps
Saturday
Accessory Day
Sunday
Off
Session One – Legs
Exercise
Training Volume (Sets x Reps)
Back Squat
4 x 8
Walking Lunge
3 x 20
Stiff Leg Deadlift
2 x 15
Standing Calf Raise
3 x 12
Front Squat
3 x 10
Farmers Walk
3 x 30 seconds
The primary exercise in this workout is the back squat. There are few exercises that compare to the squat for leg development.However, although the exercise does place a great demand on the quads and glutes, it also requires a great amount of work from the core muscles.
Walking lunges are an excellent unilateral (single-limbed) strengthening exercise. Although both feet are in contact with the ground during this exercise, the front leg does the majority of the work.
During the walking lunge, it is imperative that you keep the chest up and core engaged to enhance balance and stability.
While the squat and lunge place a great emphasis on anterior (front) muscles, the stiff leg deadlift highly activates the posterior muscles such as the hamstrings, glutes, and low back.
The standing calf raise which is an isolation exercise that specifically targets the calf muscles. To maximize range of motion, place the front of the feet on an elevated surface.
In terms of total weight lifted, front squats will not allow you to lift as heavy as back squats, however, they do place a greater demand on the quadriceps, core strength, and mobility.Finally, to perform the farmers walk, simply pinch two weight plates in each hand and walk. This exercise specifically develops core and grip strength.
Session Two – Chest, Triceps, and Abs
Exercise
Training Volume (Sets x Reps)
Bench Press
3 x 15
Incline Bench Press
3 x 8
Close Grip Bench Press
2 x 20
Seated Military Press
4 x 12
Tricep Skullcrushers
3 x 10
Barbell Rollout
2 x 20
The bench press is the ultimate chest developer which explains why this session begins with three bench press variations.Out of all of the variations, the conventional bench press will allow you to lift the most weight and maximize strength progress.Moving on to the incline press which particularly targets the upper portion of the pectorals (chest) and the anterior deltoids (shoulder).
Shifting your grip influences muscle activation. Typically, a wider grip places more stress on the pecs while a narrower grip hits the triceps (arms) more.
Therefore, the purpose of the narrow bench press is to develop tricep strength and size.
The military press is a challenging exercise that will continue to work the chest, shoulders, and triceps. Performing it from a seated position negates the involvement of the lower body muscles.
Skullcrushers are an isolation exercise that targets the triceps and can lead to significant improvements in arm strength and size.
This session finishes with the barbell rollout which is undoubtedly one of the most challenging but highly effective core exercises that can be performed.
Session Three – Back and Biceps
Exercise
Training Volume
Deadlift
4 x 8
Bent Over Row
3 x 12
Pendlay Row
3 x 8
Shrugs
4 x 15
Bicep Curl
3 x 15
Reverse Grip Bicep Curl
3 x 15
As with squats, the deadlift is a supreme exercise that works the entire posterior chain and the core. It is a particularly effective developer of the back which explains it’s inclusion in this session.Moving on to bent over rows which target the latissimus dorsi which are the powerful, wing-like muscles found in the back.Next, you are to complete the Pendlay row. This is similar to the bent row, however, instead of holding the bar in a suspended position, the bar is pulled from and returns to the floor with each rep.
The Pendlay row requires a greater level of mobility but will allow you to work on explosive power more so than the bent over row.Shrugs are a heavy accessory exercise that particularly works the trapezius muscles. These are the distinctive muscles that are located either side of the neck.You’ll finish this session by completing two bicep-focused exercises – the conventional bicep curl and a reverse grip curl.
Because curls are a single-joint movement, both of these exercises highly activate the biceps. The reverse grip also places a great demand on forearm extensors and grip strength.
Session Four – Accessory Day
Exercise
Training Volume
Sit-ups
2 x 20
Plank
2 x 45 seconds
Upright Row
3 x 12
Front Raise
3 x 15
Snatch Grip Deadlift
2 x 15
As highlighted, this accessory day is non-compulsory, however, performing it regularly will facilitate a faster improvement in strength.The session begins with some core work – sit-ups and planks. While these are perhaps not the most exciting exercises, they are undoubtedly effective developers of the core muscles, specifically the abdominals.
Moving on next to the upright row which is an efficient developer of the shoulders and the upper back. With this one, ensure you keep the barbell tight to the body as you vertically row.Another highly effective isolation exercise is the front raise. This particularly targets the shoulders while also demanding a great deal of core strength and stability.The session concludes with a deadlift variation known as snatch grip deadlift. This refers to the extremely wide grip assumed during the Olympic lift, the snatch.Having an extremely wide grip on the bar places more demand on the upper back musculature and grip.
Optimizing Your Progress
There are a number of areas that you should prioritize in order to make the best progress with your training. This section will highlight four key aspects to focus on.
Technique
One of the most common mistakes that you’re likely to see with barbell-based training is either rushing the movement or overloading the bar.
Both of these mistakes tend to cause exercise technique to break down. Not only does this reduce the effectiveness of the exercise, it may also increase the chance of sustaining an injury.
Therefore, take your time with each exercise and prioritize technique first as this will ensure that you are performing the exercise safely and effectively.
If any of the aforementioned exercises are new to you, avoid the temptation to immediately lift heavy. Instead, spend the first couple of weeks with light weight to allow the nervous system to get to grips with the movement patterns and gradually add weight from there.
Progressive Overload
Regardless of whether you are a beginner or an advanced lifter, progressive overload is a principle that must be applied to your training if you want to improve.
Progressive overload involves gradually increasing the training intensity of your workouts over time. The simplest way to do this is to gradually add weight to the barbell.Strength training places a stimulus on the body that forces it to adapt and improve. However, as the body becomes more familiar with this stimulus, adaptations will slow and cease.
By consistently applying progressive overload to your training, the training stimulus changes which continually forces the body to adapt (1).
Nutrition
While physical training is of great importance and can have an array of benefits, eating well is of equal importance.
Firstly, ensure that you are consuming the right number of calories per day for your training goal. If you are looking to increase muscular strength and size, you may need to up your calorie intake.
Ensure you are consuming enough protein every day. Protein plays a key role in post-workout recovery and consequently influences improvements in muscle growth and strength (2).It is also important that you eat a wide range of fruits and vegetables to optimize health and function.
Tracking
If you want to ensure that you are progressing at the correct rate, it’s vital to track each training session and your nutrition.
Studies have consistently shown that those who track make better progress than those who don’t (3).Although you have the workouts already scheduled, the weights that you use for each exercise are not prescribed.Therefore, you will need to keep a log of the weight that you use for each exercise. As the weeks progress, gradually add weight to each lift and log your progressions.
In terms of nutrition, if you are upping your calorie intake to maximize muscle growth, tracking your daily calorie intake will ensure you are consuming the right amount.
Final Word
There are many different strength training methods to choose from, however, few can compare to barbell training.By following the barbell only training program and guidelines outlined in this article, it is possible to make significant advancements in both strength and physique.
References:
1 – https://www.ncbi.nlm.nih.gov/pmc/articles/PMC3438871/ Lorenz, Daniel S.; Reiman, Michael P.; Walker, John C. (2010-11). “Periodization”. Sports Health. 2 (6): 509–518. doi:10.1177/1941738110375910. ISSN 1941-7381. PMC 3438871. PMID 23015982.
2 – https://www.ncbi.nlm.nih.gov/pmc/articles/PMC6566799/ Carbone, John W.; Pasiakos, Stefan M. (2019-05-22). “Dietary Protein and Muscle Mass: Translating Science to Application and Health Benefit”. Nutrients. 11 (5). doi:10.3390/nu11051136. ISSN 2072-6643. PMC 6566799. PMID 31121843.
3 – https://www.ncbi.nlm.nih.gov/pmc/articles/PMC5568610/ Ingels, John Spencer; Misra, Ranjita; Stewart, Jonathan; Lucke-Wold, Brandon; Shawley-Brzoska, Samantha (2017). “The Effect of Adherence to Dietary Tracking on Weight Loss: Using HLM to Model Weight Loss over Time”. Journal of Diabetes Research. 2017. doi:10.1155/2017/6951495. ISSN 2314-6745. PMC 5568610. PMID 28852651.
Get Bulletproof Shoulders with this Essential Stability Workout Program
Get bulletproof shoulder stability.
Daily life wreaks havoc on our shoulders. Between sitting for hours hunched over a computer and behind a steering wheel, we’re constantly curled over with lousy posture. According to the Mayo Clinic, there’s a direct link between poor posture and shoulder pain.
The shoulder is one of the most important joints in the body, designed to promote a wide range of three-dimensional movements. There’s a reason we shoulder a burden rather than knee or hip one.
Runners would never hit the trails without stretching. But lifters routinely tackle some heavy iron without prepping the shoulders. To go from a typical day of sitting in a hunched-over position to some full-blown lifting is a recipe for shoulder injuries and long-term ailments. Even if you lift first thing in the morning, you’re still feeling the cumulative effects of daily sitting.
By taking just a few minutes to perform the following movements at the start of a workout – or even on an off day or non-shoulder day – we can improve our posture and shoulder stability while reducing the risk of injury and improving our performance in the gym.
Shoulder Squeezes
What it does: This counteracts the impact of sitting all day and also mimics the proper movement of the shoulders during lifting.
How to do it: Instead of thinking in terms of squeezing your shoulder blades together, think in terms of pulling them back and then down, as if toward your back pockets. This not only resets your posture from sitting hunched over a computer or behind a steering wheel, but it also moves the shoulders the way they’re meant to move during pressing lifts. This move can be done throughout the day, not just during this routine.
How many? 2 sets of 10 reps with 30 seconds rest between sets.
Stair Stand
What it does: This also counteracts the impact of sitting all day by resetting your posture.
How to do it: Stand on the first step of a staircase. With one hand holding onto a railing or wall, edge back until your heels are off the step and hanging in midair. Let your body’s weight press down into the heels.
How many? One minute on each side, allowing your shoulders to drop back and down and your posture to reset.
Reverse Hand Clasp
What it does: This is a good test of your shoulder mobility.
How to do it: Stand with one hand behind your neck and your elbow pointing up. Use your other hand – or your other hand gently pulling a rope or towel held on both ends – to pull your elbow down. You’ll likely find this easier on your dominant side (i.e. right-handed people pointing the left elbow up). Unlike a lot of stretches, you can make fairly quick progress on this one if done daily, to the point where you can forego the towel or rope and gradually grasp hands on both sides.
How many? 2 sets of 10-second holds on each side.
90/90 Stretch
What it does: This opens up your shoulders while stretching the muscles of your middle and upper back, counteracting the effects of sitting all day.
How to do it: Lie on the ground on your left side with legs tucked into the torso at a 90-degree angle. Keep both arms straight parallel to your knees. Keeping the knees together and on the ground, rotate your chest and right arm to the right, putting your back on the ground. Hold for two seconds and return to starting position.
How many? 2 sets of 10 reps to each side with 30 seconds rest between sets.
Cat/Cow
What it does: This compound yoga move strengthens and stabilizes the shoulders while also improving flexibility to the lumbar and cervical spine.
How to do it: Start on all fours with hands beneath your shoulders and knees on the ground. Inhale, dropping your chest as you push your hips and shoulder blades back into cow position. Lift your chin and chest and gaze forward. For cat, exhale as you draw your belly button to your spine and round your back toward the ceiling like a cat.
How many? 2 sets of 10 reps of each with 30 sec. rest between sets.
Plank
What it does: Your shoulders are doing much of the work for this familiar exercise that promotes overall core stability.
How to do it: Lie in a prone pushup position with forearms resting on the floor, elbows under shoulders and bent 90 degrees. Push up off the elbows, tucking your chin so your head is in line with your body. Keep head in line with the spine and belly button drawn in. Hold for one minute.
How many? 2 sets of 60 seconds with 60 seconds rest between sets.
Side Plank
What it does: This challenges shoulder stability as well as the obliques.
How to do it: Start on the ground on your left side with your left forearm on the ground and your elbow under your shoulder. Push up off your elbow, creating a straight line from ankle to shoulder. Your hips should be off the ground and only the side of your bottom foot and your elbow should be on the ground. Hold for 30 seconds or do 10 reps of 3 seconds each.
How many? 2 sets of either of the above options.
Child’s Pose
What it does: This yoga resting pose is effective for stretching out the shoulders.
How to do it: From a kneeling position, touch your big toes together and sit on your heels. Separate your knees about hip-width apart and lay your torso down between your thighs. Place your hands on the floor along your torso, palms up, and release the fronts of your shoulders toward the floor. You should feel the weight of the front of the shoulders pulling the shoulder blades wide across your back.
How many? Hold pose for 30 seconds, rest 10 seconds, repeat.
Pete Williams is a NASM-certified personal trainer and the author or co-author of several fitness books, including Core Performance.
How To Master the Overhead Press
The Ultimate Shoulder Exercise for Size & Strength
The overhead press is well renowned as a strength and size builder, not just for the shoulder but for the chest, back, and core muscles too.There is no denying that it an impressive-looking exercise however, often those who are eager end up hurting themselves by overloading the bar.If you are unfamiliar with the overhead press, use the recommended exercise guide found in this article to allow you to gradually work up to a full overhead press.This article will also highlight an array of overhead press variations as well as providing detail on how to effectively perform the press.
Overhead Press Technique
To perform the overhead press, start by setting up a bar on a rack at shoulder height. Assuming a hip-width stance, use a shoulder-width grip on the bar and unrack.Before pressing the bar, squeeze the core muscles and the glutes to prevent the trunk and hips from moving. Push hard and drive the bar upward keeping it close to the face. Fully extend the elbows and finish with the bar directly overhead. Maintain a high chest and core brace as you reverse the movement and drop the bar back down to the upper chest.
Building up to Overhead Press
If you are a beginner or have never performed the overhead press previously, consider using the dumbbell seated overhead press first.For the dumbbell seated overhead press, start by setting a bench upright so that the upper back is firmly against the bench to prevent overarching.Using the seated version will reduce the demand on the core (1) and therefore allow you to focus more intently on the pressing movement.Dumbbells are an excellent tool when learning new exercises as they allow for greater control and a fuller range of motion.
Practicing the seated dumbbell overhead press will allow the nervous system to adapt and get to grips with the movement patterns required for the overhead press. Additionally, it will build a base level of strength first to suitably prepare you for progressing onto the barbell overhead press.After mastering the seated dumbbell overhead press, progress onto a standing dumbbell overhead press which will increase the need for stability and demand on the core muscles (2).Once you feel competent with the standing dumbbell overhead press, it’s time to move onto the barbell overhead press.
Overhead Press Coaching Points
When performing the overhead press, keep the following 4 coaching points in mind to allow you to complete reps efficiently.
1) Use a Shoulder-Width Grip
Using a grip that is too wide can adversely impact your pressing ability and cause you to lift less weight.Ideally, you should use a shoulder-width grip on the bar and look to keep the elbows tucked in so that they are directly under the wrists. This will put you in the most optimal position to press from.
2) Keep the Wrists Mobile
To allow for a solid press, it is important that both wrists are mobile so that they can flex backward slightly when holding the bar.If you can get the wrists in the correct position, the pressing motion will be much smoother. Good general mobility will also allow the elbows to slightly flare out during the upward drive.
3) Shoulder Blade Engagement
Prior to driving the bar up and overhead, ensure that you squeeze tightly between the shoulder blades.When pressing the bar upward, focus on powerfully engaging the shoulder muscles to initiate the movement. Also on the way back down, maintain tension through the shoulders to promote safety.
4) Adjust Head Position
The bar should start in contact with the upper chest. This means that when you press the bar, you will have to shift the head back to allow the bar to move straight up.Failing to do this may result in the bar catching you in the chin or the nose which is evidently something that you want to avoid.
5) Lift the Chest
Throughout the duration of the rep, it is crucial that the chest is lifted and kept high. This will keep the upper back strong and stable thus facilitating a more efficient press.Letting the chest drop can decrease shoulder stability and therefore may heighten the risk of experiencing a serious shoulder injury – especially if using a heavy load.
Overhead Press Variations
There are a number of overhead press variations which you may wish to use for a number of different reasons.For example, if you find the barbell overhead press too challenging you may wish to regress by selecting a slightly easier variation like the dumbbell overhead press.
Dumbbell Overhead Press
The movement patterns of the barbell and dumbbell overhead press are the same. However, using dumbbells will work both sides individually and therefore will work the shoulders in a slightly different way.Although this variation is excellent for beginners as they get to grips with the overhead press, those who are accomplished with the overhead press can still benefit from it.When it comes to the barbell press, imbalances can easily be masked. The dumbbell press will give a greater indication to whether one side is stronger than the other.This explains why it may be beneficial for more advanced individuals to perform the dumbbell variation on occasion, to check and see if strength levels are well balanced.A final benefit associated with the dumbbell overhead press is that dumbbell requires a greater degree of stability than barbells. As a result, smaller stabilizing muscles in the shoulder must contract to control the weight. Regularly performing the dumbbell variation may, therefore, lead to healthier shoulders.
Military Press
Often the overhead press and military press are confused and seen as the same exercise, however, they are distinct. The difference between these exercises is the width of the stance. The overhead press uses a hip-width stance wjhereas the military press brings the feet close – like a soldier standing at attention.This small change has a big impact on the dynamic of the exercise. Although the pressing motion remains unchanged, stability becomes more of a factor due to the narrow base of support.As a consequence, glute and core muscles must powerfully engage to facilitate stability, balance, and control. As a result of the increased demand for stability, it may be necessary to use a slightly lighter weight than you use for the conventional overhead press.
Push Press
In the overhead press, the lower extremities do not move however, the push press recruits the muscles in the legs to assist in the press. This makes it an excellent exercise for those who are finding it challenging to complete the overhead press.It can also effectively be used when reaching muscular failure in the overhead press. It’s fine to switch to push press mid-set to allow you to complete a few more reps and apply maximal stress to the shoulders.To perform the push press, start in the same position as the overhead press. Dip the hips and bend the knees so that you drop into a quarter squat before powerfully extending.The momentum generated from the extension of the knees and hips should then translate into pressing the bar directly overhead (3).
Thruster
There are great similarities between the thruster and the push press. However, for the thruster, you drop into a full squat rather than a quarter squat, before pressing overhead.Considering that the thruster incorporates both a full front squat and overhead press, it is the most challenging full-body variation in the list.With such a vast array of muscle groups being involved, the thruster will rapidly raise the heart rate which makes it a superb exercise to utilize in HIIT training or circuits.If you do decide to use the thruster in this way be conscious of your form as fatigue builds. Fatigue can adversely interfere with form thus increasing the risk of sustaining an injury.
Kettlebell Press
As with the dumbbell overhead press, the kettlebell variation is a superb exercise that can be used to reinforce the movement patterns of the overhead press.Because of the way the kettlebell is positioned, stability may be more of a challenge with this variation (4).Focus intently on pressing straight up in order to maintain shoulder integrity and reduce the risk of injury. Pressing out to the side or letting the weight shift backward can place undue strain on the shoulders.To perform the kettlebell variation, bring the kettlebells up to the shoulders and check that the elbows are directly under the wrists. Keep the chest up and core braced as you press the kettlebell directly upward. As you press, rotate the arm 90 degrees so that the palms are facing forwards at the top position.
Final Word
All serious lifters and athletes should be performing overhead work on a regular basis. For comprehensive, full-body development, the overhead press and variations of the overhead press should play a key role.
References:
1 – Saeterbakken, Atle Hole; Fimland, Marius Steiro (2012-05). “Muscle activity of the core during bilateral, unilateral, seated and standing resistance exercise”. European Journal of Applied Physiology. 112 (5): 1671–1678. doi:10.1007/s00421-011-2141-7. ISSN 1439-6327. PMID 21877146.
2 – Saeterbakken, Atle H.; Fimland, Marius S. (2013-07). “Effects of body position and loading modality on muscle activity and strength in shoulder presses”. Journal of Strength and Conditioning Research. 27 (7): 1824–1831. doi:10.1519/JSC.0b013e318276b873. ISSN 1533-4287. PMID 23096062.
3 – Soriano, Marcos A.; Suchomel, Timothy J.; Comfort, Paul (2019). “Weightlifting Overhead Pressing Derivatives: A Review of the Literature”. Sports Medicine (Auckland, N.z.). 49 (6): 867–885. doi:10.1007/s40279-019-01096-8. ISSN 0112-1642. PMC 6548056. PMID 30924081.
4 – DICUS, JEREMY R.; HOLMSTRUP, MICHAEL E.; SHULER, KYLE T.; RICE, TYLER T.; RAYBUCK, SHAWN D.; SIDDONS, CHELSEA A. (June 1, 2018). “Stability of Resistance Training Implement alters EMG Activity during the Overhead Press”. International Journal of Exercise Science. 11 (1): 708–716. ISSN 1939-795X. PMC 6033506. PMID 29997723.
Eight Best Dumbbell Exercises for Your Biceps
Here are dumbbell exercises to work into your bicep routine.
The biceps figure into most moves in the weight room and everyday life and yet advocates of core training and functional movement suggest time spent isolating the biceps could be better spent on movements that target more areas of the body at once.
The core crowd has a point, though there’s nothing like a rigorous biceps-focused workout to produce the sleeve-bursting guns you want. When it comes to isolating the biceps, dumbbells do a better job than machines, barbells, and even chin-ups. And if you’re still looking for more benefit for your workout time, consider that studies suggest that the biceps help stabilize the shoulders.
In this 30-minute dumbbell workout to build your biceps, we’ll hammer through four sets of these eight moves in a circuit fashion, alternating between pushing and pulling movements, so we can produce maximum results with minimal time, resting only briefly between sets.
Pete Williams is a NASM certified personal trainer and the author or co-author of several books on performance and training.
1. Bicep Curls
What it does: It’s simple yet challenging and a mainstay of any bicep workout.
How to do it: Stand with feet shoulder-width apart and biceps at your sides. Keeping your elbows still, lift the dumbbells to your shoulders as you rotate your palms to the ceiling. Keep your back still and stomach tight. Return to starting position.
How many? 4 sets of 10 reps.
2. Farmer’s Carry, Racked Position
What it does: The traditional farmer’s carry is an effective full-body move that also challenges endurance as you increase distance carried. By carrying the dumbbells in a racked position (heads of dumbbells at shoulder level) we isolate the biceps.
How to do it: Carrying the dumbbells in a racked position, walk for 30 seconds – 15 seconds out and back or in a loop around the gym.
How many? 4 sets.
3. Four-in-One
What it does: This keeps your biceps under tension for four sets in one.
How to do it: Start with light dumbbells and curl 10 times. Next curl halfway, pausing for a second just above your navel at each of 10 reps. After that, take the dumbbells up and descend just below your pecs, again pausing for a second before returning for 10 reps. Finally, do 10 more full reps.
How many? 4 sets
4. Dumbbell Row
What it does: Though it’s more of a back and shoulder exercise, it targets the biceps. By placing this move between two curl exercises, it allows us to keep moving without rest.
How to do it: Place a dumbbell on either side of a flat bench. Place your left leg on the bench, bending forward from the waist until your upper body is parallel to the floor. Place your left hand on the other end of the bench for support. Grab the dumbbell off the floor with your right hand while keeping your back straight. Lower to the floor. Do 10 reps and switch sides.
How many? 4 sets of 10 reps per side.
5. Hammer Curls
What it does: The neutral grip targets the forearms but also hits the biceps.
How to do it: Standing with feet shoulder-width apart, hold a set of dumbbells with a neutral grip so your hands face each other. Curl the dumbbells to shoulder height, keeping hands facing each other. Pause at the top of the lift, squeezing the biceps, and then lower to starting position.
How many? 4 sets of 10 reps.
6. Renegade Rows
What it does: It’s a simple yet challenging move that hits the biceps and also the back, shoulders, and triceps.
How to do it: Start in the top position of a pushup with your hands on dumbbells shoulder-width apart. Row one dumbbell toward the side of your body while balancing on the opposite hand and feet. Pause for one second at the top and return the weight slowly to the start position. Repeat on the other side.
How many? 4 sets of 10 reps per side.
7. Split Dumbbell Curl to Press
What it does: It isolates the biceps while also targeting the shoulder and overall core strength.
How to do it: Stand holding dumbbells at your sides and resting your front foot on a bench at mid-thigh height. Perform a biceps curl then press the weight over your head. Do 10 reps then put the opposite foot on the step for your next set.
How many? 4 sets of 10 reps.
8. One-Arm, One-Leg, Dumbbell Row
What it does: A variation on the traditional one-arm row works the biceps while also challenging the hamstrings.
How to do it: Keep your non-lifting hand balanced on a dumbbell rack or bench.
Extend the corresponding leg of your lifting hand back. Not only does this push you to work each side independently, as with a traditional one-arm row, but you work your hamstrings while inevitably lowering the dumbbell deeper.
How many? 4 sets of 10 reps to each side.
For more news and updates, follow Generation Iron on Facebook, Twitter, and Instagram.