Tag: Workouts
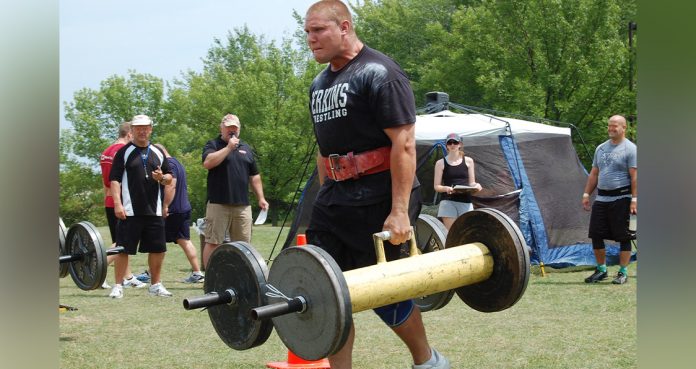
The Ultimate Guide to the Farmers Walk
One of the Best Exercises for Developing Full Body Strength and Size
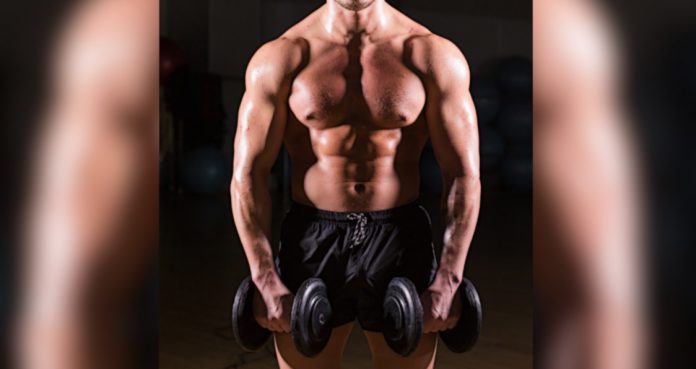
In terms of full-body development, there are few resistance exercises that can compare to the farmers walk.Not only is it a highly effective exercise it is also one of the most basic exercises to perform as all that is required is picking up heavy weight and walking with it.Often due to its simplicity, the farmers walk can be overlooked and more technically challenging exercises are selected instead.However, if you aspire to build full-body strength, size, and stability, then it is worthwhile considering the farmers walk.
Farmers Walk Technique
Although the exercise is very simple in both principle and execution, it is always worthwhile paying specific attention to a number of areas.First and foremost it is important that the weight is picked up safely from the floor. Therefore, squat down, lift the chest, flatten the back, grab the weight and then drive through your heels to stand.Before taking your first step, ensure that the shoulders are back & down, the chest is lifted and the core muscles are braced.As you take forward steps, it is crucial that you keep the head up and don’t allow it to drop down as this may encourage the shoulders to move out of position.Having this forward head position and allowing the shoulders to round should be avoided as it will place a great amount of strain through the neck, shoulders, and upper back.The length of the strides you take depends on the weight being used as with lighter loads you may be able to safely take longer strides whereas heavy loads typically require shorter strides.
Be aware that the farmers walk can be performed using a range of equipment; depending on which piece of kit you are using the technique may be subtly altered.Consider your training goals and experience to determine whether to use heavy loads and short distances or lighter loads and longer distances.If your goal is to improve raw strength, there is no denying that a heavy load and a short distance will be of the greatest benefit (1).It is possible to use the farmers walk to facilitate changes in the cardiovascular system too by utilizing lighter loads and increasing duration. Sets of 2 minutes or more are recommended for cardio improvements.If you have never performed the farmers walk or are a beginner to resistance training, start with light loads to allow you to master the technique first – specifically maintaining the upright position.
Farmers Walk Muscles Work
As mentioned, the farmers walk recruits muscle groups throughout the body and can be considered a full-body exercise. The following muscles are all engaged in the farmers walk:
Arms
Holding heavy weight in both hands puts a great deal of stress through the arms and the muscles of the biceps and triceps must isometrically contract in order to stabilize the shoulder and elbow joint.In addition, forearm muscles are heavily recruited in the farmers walk so that a solid grip on the weight is maintained. As a result, grip strength will drastically improve with regular practice.
Back & Shoulders
A great load is also placed on an array of muscles found in the back and shoulders with the trapezius muscle being specifically targeted.The traps must stay contracted throughout the farmers walk to keep the shoulders back and down. Doing this effectively will enhance the stability of the shoulder joints.
Core
For core development often too much emphasis is placed on ab-specific exercises rather than heavy compound exercises.The core muscles are highly activated during the farmers walk as they must support the trunk and work to keep the body upright throughout the duration of the exercise.Squeezing core muscles through bracing is imperative to protect the spine & lower back from shear stress and for enhancing farmer walk performance.
Legs
While all other listed muscle groups isometrically contract, the muscles of the legs must constantly concentrically and eccentrically contract to cause locomotion.Walking primarily requires effort from the glutes, quads, hamstrings, and calves. There are also a number of other muscles in the legs that must contract either to stabilize or cause movement.
Farmers Walk Benefits
Regardless of your level of experience, the farmers walk can be of substantial benefit for the majority of athletes and lifters. It is undoubtedly one of the most “functional” exercises going and its benefits extend far beyond the confines of the gym walls and into day-to-day life.This section highlights 3 of the biggest benefits associated with the farmers walk.
Core Strength
Although performing the farmers walk regularly will generally work to enhance full-body strength, there are two areas that are particularly targeted – core and grip strength.The muscles of the core must contract powerfully and maintain this contraction throughout the walking phase of the movement in order to enhance stability (2).When thinking about engaging your core, imagine that you are about to be punched in the stomach. Automatically you will activate all the muscles in the trunk to withstand the impact.Working the core in this fashion will place great stress on the core muscles thus causing a significant adaptation in strength & consequent stability.Building core strength is highly recommended as it can assist with day-to-day activities, facilitate better performance in the gym and reduce back pain.
Grip Strength
The second evident area that will be strengthened through the farmers walk is your grip. Typically you will find that your grip is what goes first, rather than the muscles of the legs or core.Routinely performing heavy lifts (such as the farmers walk) will apply a great force through the hands and forearms which will cause them to increase in strength.As with developing core strength, improving grip strength will not only facilitate a greater performance with other lifts in the gym, it can assist in everyday duties and tasks.You may have seen straps being used by many gym-goers for a variety of heavy lifts. The purpose of the straps is to support the wrists and reduce the overall strain they experience (3).Some argue that going strapless with the farmers walk will increase grip strength to a much greater degree whereas others believe that straps are essential for performance and injury reduction.The recommendation is to avoid using straps until you reach a certain point. If you are lifting 50% or more of your bodyweight in one hand, start using straps to lower the risk of sustaining injuries like tendonitis.
Facilitates Performance
The farmers walk is an excellent choice to improve full-body strength and stability; therefore, performing the farmers walk may lead to a better performance with many other compound exercises.As touched on, improved core strength and grip strength can lead to a direct improvement with any and all exercises which place a demand on the core and grip.Any exercise that involves pulling serves as a prime example. Deadlift, pull-ups, bent rows, shrugs, and lat pulldowns all require a large degree of core and grip strength.Improved bracing and breathing may also have a significant knock-on impact on resistance training generally (4). Being capable of bracing effectively will enhance stability and consequently facilitate a better performance throughout a range of free weight exercises..
Farmers Walk Variations
There are a number of farmers walk variations that can be utilized. The type of equipment you use or the manner in which you use it will slightly alter the demand of the farmers walk.Standard – Using heavy farmers bars, dumbbells or kettlebells, grab the individual weights, stand up tall and walk as far as you can. Single – Grab one heavy weight, rather than two. This will place a greater demand on the core muscles as they must work harder to keep you upright and stable as you walk.Barbell: Grip a heavy bar and perform and deadlift to lift it from the floor before commencing the farmers walk.Overhead Dumbbell: Grab two dumbbells and drive them up and lockout so that they are in the overhead position and walk with them. The overhead position places an increased demand on the core and shoulders.Overhead Barbell: In the same fashion, press a heavy barbell overhead and lockout. Keeping the bar directly overhead, begin to walk with it.Uneven Farmers Walk: Select two different weights – one heavier than the other – and hold them in either hand. Carry the weights for a determined length and then switch the weights to the opposing hand and repeat.Trap Bar: Stand in a loaded trap bar, grab the handles and deadlift so that you are standing with it. Walk as far as you can with it, taking moderate strides so not to make contact with the bar.
Final Word
Although the farmers walk is often underutilized in strength training due to its simplicity, it has real potential to significantly build full-body strength & stability. Therefore, the majority of people will find that the farmers walk is a worthy addition to their strength training.
*Header image courtesy of stu_spivack under the Creative Commons Attribution-Share Alike 2.0 Generic
References:
1 – Schoenfeld, Brad J.; Contreras, Bret; Vigotsky, Andrew D.; Peterson, Mark (December 1, 2016). “Differential Effects of Heavy Versus Moderate Loads on Measures of Strength and Hypertrophy in Resistance-Trained Men”. Journal of Sports Science & Medicine. 15 (4): 715–722. ISSN 1303-2968. PMC 5131226. PMID 27928218.
2 – Clark, David R.; Lambert, Michael I.; Hunter, Angus M. (July 16, 2018). “Contemporary perspectives of core stability training for dynamic athletic performance: a survey of athletes, coaches, sports science and sports medicine practitioners”. Sports Medicine – Open. 4. doi:10.1186/s40798-018-0150-3. ISSN 2199-1170. PMC 6047949. PMID 30014195.
3 – Coswig, Victor S.; Machado Freitas, Diogo Felipe; Gentil, Paulo; Fukuda, David H.; Del Vecchio, Fabrício Boscolo (2015-12). “Kinematics and Kinetics of Multiple Sets Using Lifting Straps During Deadlift Training”. Journal of Strength and Conditioning Research. 29 (12): 3399–3404. doi:10.1519/JSC.0000000000000986. ISSN 1533-4287. PMID 26595133.
4 – Tayashiki, Kota; Maeo, Sumiaki; Usui, Seiji; Miyamoto, Naokazu; Kanehisa, Hiroaki (2016-09). “Effect of abdominal bracing training on strength and power of trunk and lower limb muscles”. European Journal of Applied Physiology. 116 (9): 1703–1713. doi:10.1007/s00421-016-3424-9. ISSN 1439-6327. PMID 27377782.
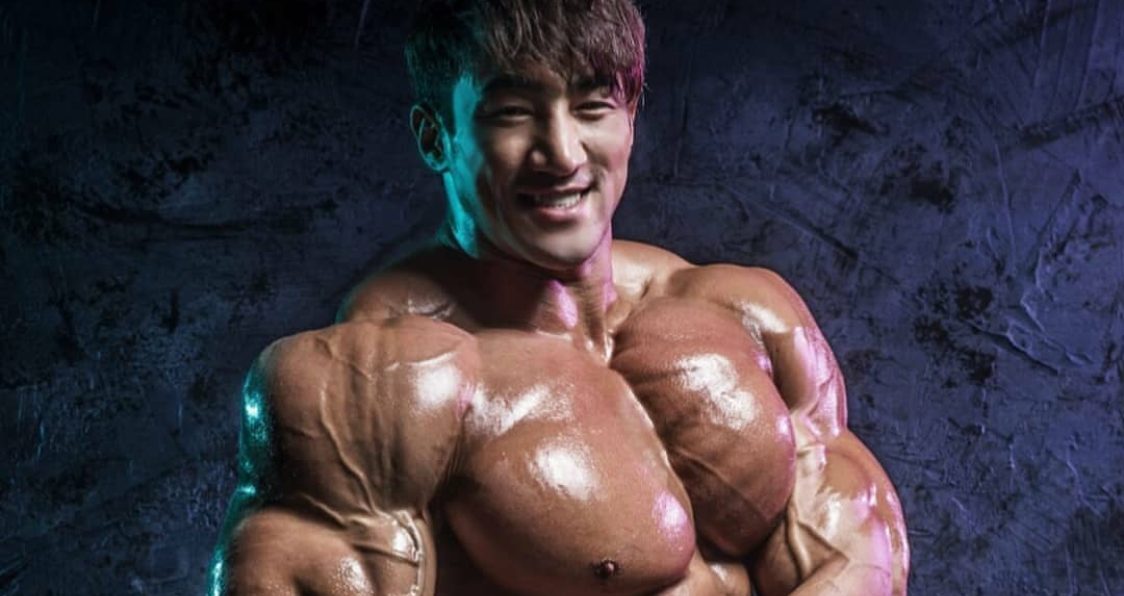
How Chul Soon Hwang Works Out For A Classic & Chiseled Physique
This workout from Chul Soon is one to give you a great classic physique.
Chul Soon Hwang is a Korean Bodybuilder with a chiseled physique that gives him the classic, old school look. As a successful bodybuilder winning numerous contests, he has also appeared in commercials and TV shows and is a national and international sensation.
When it comes to our workouts and the inspiration we need to see a shredded and classic physique we will love, we need to look to bodybuilders and professional athletes who have done these workouts before. They are living proof of what can happen when you put your mind to it for they’ve done all these workouts before. With so many websites and influencers claiming to know exactly what works, looking to those professional bodybuilders for advice will prove worthwhile for all your gains.
Chul Soon Hwang has made a name for himself both at home and abroad and this classic, old school physique reminds those bodybuilding fans of the older days when that massive aesthetic was chiseled and beyond defined.
Full Name: Chul Soon Hwang
Weight
Height
Date Of Birth
215-225 lbs.
5’10’’
09/01/1983
Profession
Era
Nationality
Bodybuilder, Celebrity Personal Trainer, Fitness Model
2010
Korean
As someone who understands the importance of nutrition and training, Chul works hard to stay in those strict guidelines, but enjoys diversifying things so they stay interesting. That old school physique is cool and one to certainly envy and this workout from Chul can get you on your way to that chiseled aesthetic.
About Chul Soon Hwang
Chul began weightlifting at a young age for the main reason of respect. He wanted those around him to see him as something admirable. At first, his long training sessions of nearly 2-3 hours were not as efficient as they could have been. Once he realized this, Chul began to follow a structured workout program, focused on his diet, and changed his mindset so he could see the gains he wanted most.
Once that physique began to take shape, he started competed in bodybuilding competitions and shows, and would soon become a well-known force, working as a celebrity personal trainer and appearing in commercials, magazines, and TV shows. Using his platform, Chul seeks to better the lives of those around him and inspire others to get as big and defined as they want.
Chul Soon Hwang Training Routine
When it comes to his training, Chul focuses on compound movements to work many muscle groups and save time. His exercises reflect those of the Golden Era which give him that classic and old school look. Strength and size are beyond important and the balance between those should never be overlooked.
Day #1: Back
Exercises
Sets
Reps
Wide-Grip Cable Pulldown
3
10
Close Grip Rows
3
10
Seated Rows (Normal Grip)
3
8
T-Bar Row
3
8
Rack Pull
3
10
Pull-Ups
3
Until Failure
Day #2: Chest
Exercises
Sets
Reps
Dumbbell Chest Press
3
10
Incline Machine Press
3
10
Cable Chest Fly
3
12
Pec Deck Machine
3
12
Dumbbell Fly
3
10
Day #3: Legs
Exercises
Sets
Reps
Hack Squat
3
10
Leg Press
3
10
Hamstring Curl
3
12
Leg Extension
3
12
Standing Calf Raise
3
15
Day #4: Biceps & Triceps
Exercises
Sets
Reps
Single Arm Triceps Extension
3
10
Preacher Curl with EZ Bar
3
10
Close-Grip Bench Press with Triceps Focus
3
10
Barbell Curl
3
12
Single Arm Preacher Curl
3
8
EZ Bar Skullcrushers
3
12
Day #5: Shoulders
Exercises
Sets
Reps
Standing Overhead Press
3
10
Dumbbell Alternating Front Raise
3
12
Lateral Raise
3
12
Reverse Pec Deck Machine
3
10
Dumbbell Rows
3
10
Featured Supplement For A Chiseled Aesthetic
For those looking to get a massive and chiseled aesthetic, having the right supplements on your shelf can be a game changer. Things like pre-workouts, which can boost energy and provide for muscle pumps, and intra-workout BCAAs, which can burst through fatigue and enhance recovery, are great for those pre- and mid-workout needs. Something like a protein powder can work to boost growth and recovery and others like creatine, super greens, mass gainers, and multivitamins will each work in their own respective way so you get the most out of your training and nutrition routines.
But a fat burner is something that can work to kickstart your metabolism and shed that unwanted fat so you get a lean and shredded aesthetic others will certainly envy. The best part is, this fat burner from Kaged Muscle is stim-free, so you get all the benefits minus the side effects of stimulants.
Kaged Muscle Clean Burn
Code GENIRON10 For 10% Off
Kaged Muscle Clean Burn is a great stim-free fat loss solution to tackle any weight loss needs. With great fat burning ingredients and a powerful formula, this is great for weight loss or weight management.
Kaged Muscle Clean Burn is a great stim-free fat loss solution to help tackle any and all weight loss needs. Designed with cutting edge and premium ingredients, this will work to offer thermogenic weight loss and is loaded with active ingredients. An effective supplement for losing weight, as well as weight management, Clean Burn offers the best fat burning benefits in a special blend with the right combination of powerful ingredients. Getting lean and ripped has never been more possible with clean burn.
Use code GENIRON10 for 10% off! Also, check out our individual review for Kaged Muscle Clean Burn here!
Check out our list of the Best Fat Burners for more great fat burning products!
Wrap Up
This workout from Chul Soon Hwang is certainly one to give you that chiseled and shredded aesthetic bodybuilding fans will admire. That old school look reminds fans what the sport used to be and this workout from Chul is great for seeing the gains you want most. The right training routine can greatly influence your gains so you see the best when it comes to your training and performance goals. Having a solid supplementation shelf can also give you the best when it comes to pumping your body with the essentials to grow. Give this workout from Chul Soon Hwang a try and see what it can do for all your gains today.
Let us know what you think in the comments below. Also, be sure to follow Generation Iron on Facebook, Twitter, and Instagram.
*Images courtesy of Chul Soon Hwang Instagram
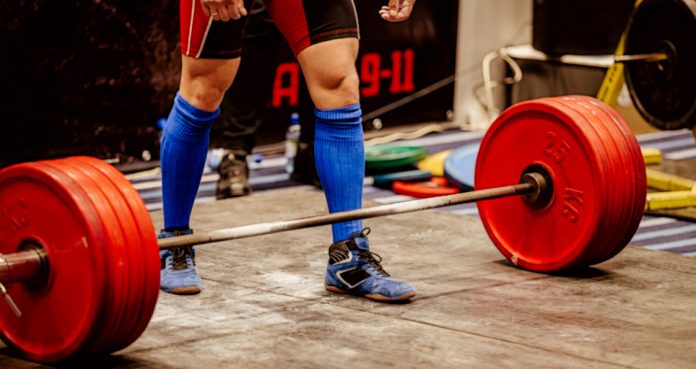
Clean Up Your Form: Performing The Power Clean
The Olympic lift of champions.
Anyone who is anyone in the bodybuilding community has incorporated the power clean at least once in their training routine. The exercise is a classic amongst athletes who require strength and the building of muscle groups. But are you performing the lift correctly?
The key to seeing results in the gym is performing an exercise multiple times with good technique and avoiding injury at all costs. We’ve already touched on the keys to avoiding injuries in the gym and coupled with learning the proper technique, you’ll be performing the power clean and press with general ease, turning yourself into a beast in the process.
Front Squats from Racked Position
A great way to learn proper technique for the power clean is to start off in the racked position and perform front squats with the bar. By placing the barbell in a squat rack the user can walk up to the bar until it touches their neck, lift it from the rack and perform front squats while the bar rest on the deltoids.
This motion is essential to performing the lift once you’re confident with the technique. Wrist flexibility will prove to be another essential to performing the technique correctly. If the wrists remain stiff the likelihood of injury raises exponentially. Warming up the wrists by doing wrist circles will prove beneficial to maintain wrist health.
Once the bar is resting on the delts and your grip is secure, lift the bar and step back away from the rack and begin performing squats. Keep the hips back and bend down, being sure that your knees don’t move forward in front of your toes. Performing such an action would put added stress on the knees which could prove pretty damaging.
Complete the squat by standing back straight being sure to keep the back straight to avoid putting unneeded pressure on the back. Performing this action continuously will help you get into the proper motion when it comes time to performing the entire lift.
Grip
There are two grips used for the power clean: the hooked grip and the close grip. The hooked grip requires you to put the thumb over the bar while the fingers hook around the some. The closed grip is a normal overhand grip on the bar with the thumbs on the outside of the fingers like making a fist. Like everything there’s a give and take with every different technique. Though the closed grip is much more comfortable and natural for most, beginners and advanced alike, the hooked grip allows you to lift more weight.
The Lift
Remember the front squats explained before? Well this is where you can put that technique to good use. There are a few specific motions that must be followed when you’re going to perform the entire power clean. Firstly, the initial pull will give you the leverage needed to perform the catch. Approach the barbell, close enough for your shins to touch the metal, being sure to stand at the center of the bar. Bend at the waist, then bend the knees and grab hold of the bar with a overhand grip.
The key to the initial pull is to keep the bar close to your thighs once you lift for added leverage. The lift should be an explosive motion from squatting position, knees bent, back straight, elbows flared, and hips back. You then push up from squatting position and lift with your legs. Once the bar is past your knees, push forward with the hips in order to stand in a more straightened position, keeping your arms loose all the while.
The Catch
Once the bar is lifted up, use your toes, ankles, knees, and hips to carry the bar up past the hips, past the stomach and up to the shoulders. The key to completing the catch is by squatting down again and positioning yourself under the bar, spreading your feet a bit wider for stability.
Remember to maintain a sturdy grip and to perform all of this in a quick motion. Bending the elbows and being sure that the upper arms are parallel to the ground, the bar will fall into the palms completing the catch. Once the bar is caught it’s all a matter of using your legs to stand up straight and complete the lift.
The power clean is an impressive exercise for bodybuilders, power lifters, and other athletes looking to gain functional strength. Remember, it’s all in the technique. You can’t use just one body part or the other to pull off this lift, it’s all in a matter of using your entire body all at once to pull off things off without a hitch.
What’s your opinion on this Olympic lift? Let us know what you think in the comments below and follow us on Facebook and Twitter.
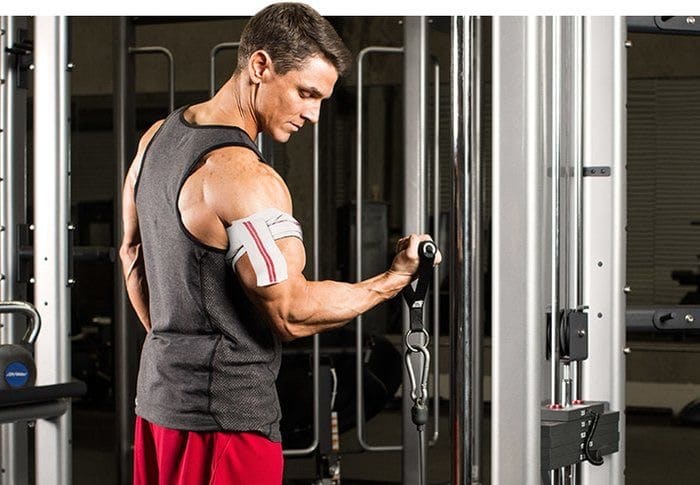
The Ultimate Guide To Blood Flow Restriction Training (BFR Calf Workouts Included)
Everything you need to know about blood flow restriction training
There comes a point in every lifter’s life when he cannot seem to make any progress, no matter how hard he tries. The plateau can cause despair and confusion in his ongoing struggle. Most people can relate to the scene, but not the pros. Pros incorporate advanced training techniques in their training routines, and so should you.
What are advanced training techniques?
We are glad you asked.
Follow the same exercises long enough, and your muscles will catch up to your training style. As soon as your body gets used to your workouts, it will stop responding, and your gains will begin to taper off. You will then need to shock your muscles to stimulate muscle growth and break through the overhead ceiling.
Enter advanced training techniques.
Advanced training techniques shock your muscles by adding variety and increasing the intensity of your workouts. Most advanced techniques overload your muscles by increasing your muscle’s TuT (time under tension).
Also Read: How To Increase The Time Under Tension To Maximize Your Gains
Types of Advanced Training Techniques
1. Superset
A superset is when you perform two or more exercises in succession without any rest. It could include training agonist and antagonistic muscles groups.
Related Read: Best Supersets to Build Muscle
2. Dropset
It includes progressively decreasing resistance after every set (with no rest in between) until you hit failure.
3. Intraset Stretching
The intraset stretching technique includes holding resistance at the ‘stretched’ position after you have completed the desired number of reps of an exercise. After pausing at the bottom of the movement for 10-15 seconds, you then perform the same number of repetitions you did previously without racking the weight.
4. Negatives
While performing negatives, your training partner (or coach) helps you through the concentric phase of the exercise so that you can perform additional reps on the eccentric part of the motion. Lower the weight in a slow and controlled manner while performing negatives.
5. Rest-Pause
Perform as many reps as possible, rest for a few seconds, then perform additional repetitions. Repeat until you hit absolute muscle failure.
While most advanced techniques make you lift heavy or increase your muscle’s TuT, blood flow restriction training does things differently.
Pre-Requisites For Advanced Training Techniques
1. They Are Not For Everyone
They are called ‘advanced’ training techniques for a reason. If you are a beginner or an intermediate lifter, you should stick to orthodox bodybuilding exercises. Only think about adding an advanced training technique to your routine when you have milked the good old lifts.
Years of experience in the gym and knowledge of the body are needed to make the most of ATTs. They get you the best results when orchestrated with strategically planned regimens.
2. Don’t Push Yourself Too Hard
Many novice lifters are too hard on themselves when they can’t budge the needle in the right direction. They throw logic and reasoning out of the window and try to add as many ATTs as they can possibly think of in their workouts.
Several techniques (like BFR) should be used during planned overreaching, whereas techniques like prioritization can be followed throughout the year.
Remember: going crazy with ATTs can stagnate progress as it increases the risk of overtraining and injury.
3. Switch Them Up
Follow the same advanced training techniques for too long, and you’ll end up where you started. We understand that you love dropsets, but if you don’t want them to lose their charm, you shouldn’t perform them at the end of every set. Treat ATTs like creatine. Cycle them to get the best results.
Blood Flow Restriction Training
Blood flow restriction (BFR) training is also known as occlusion training, hypoxic training, KAATSU, and ischaemic training. BFR training includes restricting blood flow to your target muscle groups for building strength and size.
How Blood Flow Restriction Training Helps In Building Muscle
BFR training cuffs hinder the flow of oxygenated blood to the target muscles and prevents deoxygenated blood from returning out.
It forces blood to stay inside your target muscles throughout the set resulting in a nasty pump.
This process creates a by-product accumulation effect and induces an oxygen-low muscle state. It stimulates anaerobic adaptations that are favorable for muscle growth.
Blood flow restriction training causes a swelling effect on muscles and a buildup of metabolites, such as lactic acid, that stimulate muscle growth.
The direct fatigue to muscles caused by the bands forces the nervous system to recruit fast-twitch muscle fibers. These fast-twitch fibers have the highest capacity to grow.
But isn’t restricting blood flow to a muscle bad?
Well, it is bad if you are restricting blood flow for long periods. A typical BFR set does not last longer than 60-seconds, so we are good here. BFR of veins increases your blood’s lactate concentration. It helps you work out at a lower intensity while giving the feeling of a much harder workout.
Yes, there are mind games at work here too. When your brain thinks your body is experiencing a physical challenge, it signals the pituitary gland to release more growth hormones. GH (growth hormones) are responsible for building muscle mass and strength.
To put all BFR safety worries to rest, St. Mary’s University conducted a study. The research found that compared with low-load training, low-load BFR training is more effective, tolerable, and therefore a potential clinical rehabilitation tool.
Another study concluded that BFR training led to no prolonged reduction in muscle function or increase in indications of muscle damage in blood tests.
Benefits of Blood Flow Restriction Training
Improves strength.
Better muscular hypertrophy.
Increases aerobic capacity.
Different Types of Blood Flow Restriction Training Equipment
1. KAATSU Device
Have you ever seen a bro walking around with cuffs in the gym? No, he is no Christian Grey looking for his Anastasia Steele. Those cuffs are known as KAATSU devices. These cuffs are specialized BFR training tools used to restrict venous blood flow.
2. Pressure Cuff
If you want to take your BFR training a step further, you should invest in a pair of pressure cuffs. With this BFR equipment, you can dial in the exact amount of pressure you want around your muscles. We recommend this to people who know what they are doing.
3. Knee and Elbow Wraps
Blood flow restriction training on a budget doesn’t get better than this. Knee and elbow wraps are incredibly effective substitutes for dedicated BFR equipment.
Which type of band should you use?
A 2012 study of 116 people indicated a measurable difference in using narrow and wide cuffs in BFR training. Wide BFR cuffs restrict flow at a lower pressure and can be less effective than narrow cuffs. BFR training is all about chasing the pump, and you will have to try different bands tied at varying pressures to find out what works best for you.
Most Common Mistakes While Blood Flow Restriction Training
1. Tying The Bands At The Wrong Place
While BFR training, you should only wrap at the top of the arm or leg. You can wrap your arms for a shoulder or chest workout and your legs for a glute workout.
According to research, compared to a 13+ cm cuff, a 5-9 cm cuff reduces the risk of occluding the arteries. For the same reason, if you are using knee or elbow wraps for BFR training, you should wrap them at the top of your limbs in a layered manner rather than a spiral down the arm or leg.
2. Your Blood Flow Restriction Bands Are Too Tight
Some people make the mistake of tying the bands too tight. Overly tight bands/cuffs could lead to a restriction of both – arteries and veins. Here is a high school biology lesson for you:
Arteries – bring blood to muscles.
Veins – take blood away.
For a maximal swelling response, you want blood coming to the muscles and staying there. Meaning – you want the arteries to work just fine but restrict the veins.
In fact, there is evidence that if you occlude both arteries and veins, you might end up decreasing muscle growth at the site wrapped.
You can solve this problem by modifying perceived pressure on blood flow during BFR training. Wrap your muscles at a perceived pressure ranging between 0-10, with 10 being the tightest.
Perceived pressure of 7 out of 10 for legs and 6 out of 10 for arms provide the best result. A 10 out of 10 perceived pressure will result in total restriction of both – arteries and veins.
3. Skipping Warm-Ups and Cool-Downs
Before you begin your BFR workout, you should perform a light warm-up of around five minutes (walking or cycling), followed by 15 unwrapped reps with the weight you will use for your first BFR set. Doing this routine will get your blood pumping.
After your blood flow restriction exercise, you should take off your cuffs/wraps and stretch out your muscles. Stretching can help flush out the built-up lactic acid in your muscles.
4. Going Too Heavy
Perform a blood flow restriction set at the same intensity as a normal warm-up set. You don’t need to be lifting more than 30-50% of your one-rep max (1RM) while performing any BFR exercise. Going heavier than this will only sabotage your form and won’t add anything to the bottom line.
The primary advantage of BFR is that it can help increase muscle size while training at low intensities. A study shows that training at 40% of your 1RM can be the sweet spot for blood flow restriction training. Going heavier than this does not increase muscle fiber recruitment.
5. Performing BFR Training Every Day
Although blood flow restriction training causes greater fatigue immediately after a training session, there are no increases in muscle damage or declines 24 hours later.
Since this type of training has low recovery demands as compared to high-intensity training, it can be followed on alternate days. A study found that 2-3 days of BFR training per week is best for gains in strength and muscle.
6. Not Training To Failure
Blood flow restriction training recruits the larger, fast-twitch muscle fibers. These fibers are either activated by heavy resistance or fatigue. Research shows that the closer you get to muscular failure, the greater is the fast-twitch muscle-fiber recruitment. So, training to failure in low-intensity conditions is necessary for optimal muscle fiber recruitment while performing BFR training.
Blood Flow Restriction Calf Workout
Calves are one of the most stubborn muscle groups. Since you use your calves throughout the day, they are accustomed to taking a beating and might not respond to your vanilla calf workouts. BFR calf workouts help trap the blood inside your calves during your sets. The pump can provide the necessary stimulus required for turning your calves into full-grown bulls.
1. BFR Calf Resistance Training Routine
a) Standing Calf Raise
1 Set – 30 Reps (20-30% of your 1RM)
30-seconds rest
3 Sets – 15 Reps (30-40% of your 1RM)
30-second rest after each of the three sets
b) Seated Calf Raise
1 Set – 30 Reps (20-30% of your 1RM)
30-seconds rest
3 Sets – 15 Reps (30-40% of your 1RM)
30-second rest after each set
The beauty of BFR training is that it can take your gains to the next level while making minor adjustments to your existing routine. You don’t need to be doing weird and complicated exercises for breaking the plateau.
2. BFR Walk Training For Calve
Walk at a brisk pace for 3 minutes
Rest for 1 minute
Repeat 4 times for a total of 20 minutes
You don’t have to be a bodybuilder to make the most of BFR calf training. Research shows that walking while wearing BFR bands can result in increased muscle size in the thighs and lower legs.
You could perform the second calf workout on a treadmill or out in the open. Using a treadmill gives you the option to add resistance by walking on an incline.
Most people make the mistake of placing the BFR cuffs just below or above their knees while training calves. There are superficial nerves in these areas, and wearing bands too close to the joints increases the risk of causing nerve damage.
While training lower or upper legs, BFR bands should be placed at the top of the thighs.
Conclusion
Blood flow restriction training can help increase muscle growth as a standalone training routine and even as part of your regular training program. We recommend using BFR training on a light recovery day or for annihilation at the end of a workout.
BFR training can be a godsend for people recovering from an injury. This advanced training principle causes very little muscle damage and can be used during de-loading periods to supplement as much as 60 percent of the high-intensity workload.
Do you use blood flow restriction technique in your workouts?
Let us know in the comments below. Also, be sure to follow Generation Iron on Facebook, Twitter, and Instagram.
Double Up: A New Way To Build Even More Upper Body Mass Twice A Week
Taboo no more.
We all want a big chest. There are few things in this world that speaks for themselves like walking into a room with gorilla like pecs. While many of you guys will chalk it up to gear and supplements, the truth is you have to put in the hard work. But even with the intention there, are you maximizing your training to let your hard work show?
Training chest twice a week is a great way to add size, strength, and aesthetics to your upper body, but a lot of builders hit both days on the same note. Training heavy that first day is highly recommended but if you think you can go HAM on the second day you’re in for a rude awakening. It’s called surgery. We’re going to show you how to hit that second chest day off the week with trisets and giant sets that will have your heart racing and muscles twitching in no time.
Triset 1
Hammer strength banded flat chest press (4 sets of 10, rest 15 secs)
Contract for a half of a second at the top of every rep, and limit the range of motion at the bottom of this movement. Really work the top half, because you want to keep as much tension on the pecs as possible.
If you find the exercise to be too rough on the shoulders, try it without the resistance band.
Dumbbell side lateral raise (4 sets of 15, rest 60 seconds).
*Go straight from one exercise to the other for a Giant set.
With this exercise you want to concentrate on being strict in your movements. Put your ego aside and go to lower weights if you have but make sure you keep perfect form for all 15 reps… yes, even the last ones.
[embedded content]
Single arm high row – 4 sets of 10, rest 15 seconds – Both sides
You want a full range of motion with a stretch at the top and a slight flexing of the lats and scapular retractors in contracted positions.
[embedded content]
TRISET 2
Single arm dumbbell row – 3 sets of 10 reps, 15 seconds rest.
Complete this exercise with a full range of motion, giving you a squeeze at the top and a stretch at the bottom, letting your shoulder blade rotate and your rib cage..
Cable Crossover – 3 sets of 10-15 reps, 15 sec rest
Keep in mind that throughout the movement, the arms and torso should remain stationary; the movement should only occur at the shoulder join. You can hit different muscles by varying the point in front of you where your arms meet.
Prone-Incline dumbbell rear delt raise – 3 sets of 20, rest 120 secs
This last set will knock your socks off and give you that hurt so good you’re looking for. Remember to keep strict form, locking your core and hips – go through the full range of motion to truly feel the burn, no cheating.
Well there you have it, your second day upper body workout. This should give you the work you need to maximize that raging chest as well as keeping you injury free by being the Ying to the heavy day Yang.
The Most Effective Compound Exercises For All Levels of Experience
Building Full Body Strength Through Compounds
When it comes to strength training, there are two types of exercise that compose strength training programs – compound and isolation.
While isolation exercises focus on one muscle group, compound exercises rapidly build strength by targeting a number of muscle groups across many joints (1).
As well as most effectively developing strength, compound exercises also burn more calories, improve proprioception, and elevate the heart rate to benefit the cardiovascular system.
This article will outline three beginner, intermediate and advanced compound exercises that are highly recommended due to the vast number of benefits associated with them.
Compound Exercises for Beginners
If you are new to resistance training, it is important that care is taken. Movements should smooth and controlled not rapid and jerky as this may increase the risk of injury.
For each of the following exercises, perform 3 sets of 10-12 reps ensuring that you take a 45 – 60-second rest between each set.
1) Walking Lunge
For the walking lunge, start with feet underneath the hips and hands on the hips. Before stepping into the lunge, push the chest up and squeeze the core muscles.
Step forward and bend the knees to lower the hips and drop the back knee towards the floor – stop just prior to making contact with the floor. The knee should be directly over the top of the foot in this position.
Focus on the drive from the leading leg and push hard through the heels to bring the body back up to standing. Step forward into the lunge once again but this time using the alternate side.
During the lunge, it is imperative that the trunk is held in an upright position as this will facilitate good form and reduce the risk of injury.
[embedded content]
2) Wide Lat Pulldown
Start by attaching a long bar to the lat pulldown machine. Drop the knee pads on the machine so that the thighs are tight to the pads when seated. This will prevent you from being pulled upward.
When gripping the bar, place the hands slightly wider than shoulder-width and use an overhand grip.
Before pulling hard on the bar, take a breath, push the chest up and squeeze the core to prevent the trunk from moving. Breathe out and you pull the bar down to the upper chest.
When pulling, ensure that you draw your shoulders and upper arms back and down as this will most effectively target the lats.
Once the bar touches the chest, pause for a second to squeeze all the muscles of the back before extending the arms and breathing in as you return to the original starting position.
Remember that throughout the movement the trunk should stay fixed and movement should only be occurring at the arms.
[embedded content]
3) Dumbbell Goblet Squat
For the dumbbell goblet squat, set up by placing the feet slightly wider than shoulder-width. Flip a dumbbell vertically and hold it with both hands ensuring that it stays close to the chest.
Keep the head looking forward, lift the chest, pull the shoulders back and brace the core muscles prior to dropping into the squat.
In a controlled fashion, drop the hips back and down and gradually lower down towards the floor. As you squat, ensure that you are pushing the knees out and avoid any inward movement.
At the bottom of the squat, pause for a split second before returning to standing by powerfully driving through your heels to propel the body upwards.
Be aware that everybody’s squat technique will likely vary for a number of reasons (2) – some can drop deeply without any limitations whereas others will reach a specific point where form begins to deteriorate due to limitations.
Compound Exercises for Intermediates
For intermediates, lifting a greater volume is possible as technique, movement, and proprioceptive abilities should now be well established.
As a result, it is recommended to perform 4 sets of 8 – 10 reps for each of the following exercises. Take a minimum 60-second rest on completion of a set.
1) Barbell Bent-Over Row
Pick up the barbell using an underhand grip that is approximately shoulder-width apart. Keeping the chest lifted and shoulders back, hinge at the hips so that the trunk leans forward.
In this position the spine should be in a neutral position, head lifted and the arms hanging perpendicularly to the floor. The legs should be kept relatively straight with a very slight bend maintained.
Brace the core and breathe out and you drive the bar into the body. Pin the elbows in tightly to the ribcage as they pass and squeeze tightly between the shoulder blades at the top of the movement.
In a controlled manner, gradually begin to drop the bar back down ensuring that the core is still braced in order to prevent being pulled out of position.
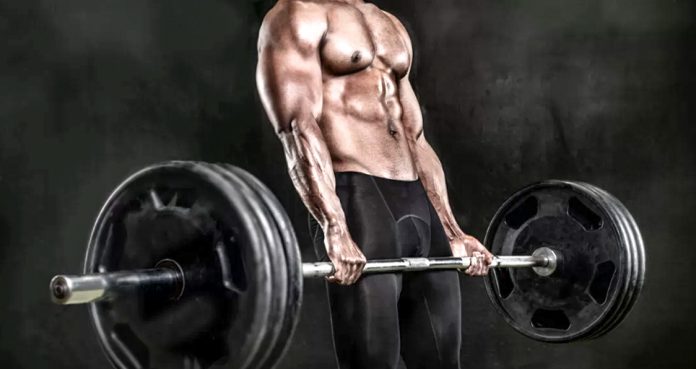
2) Barbell Deadlift
Start by assuming a hip-width stance, placing the feet directly underneath the barbell. Keeping the chest high, push the hips back and bend the knees slightly to drop down to the bar.
Grip the bar with an overhand, shoulder-width grip. Take a big breath and actively engage all of the core muscles to protect the back and maintain a neutral spinal position (3).
Drive hard through the heels ensuring that the bar stays as close to the body as possible as it rises. As the bar passes the knees, powerfully drive the hips through and squeeze the glutes.
Begin to lower the bar back to the floor by pushing the hips back, once again keeping the bar tight to the body and core muscles engaged.
[embedded content]
3) Box Squat
Set up in a squat rack and place a box or a bench directly behind you. Ensure that the squat rack is adjusted so that the bar sits at an appropriate position for your height.
Get under the bar and place it on the backs of the shoulders and grip the bar with a grip that is slightly wider than the shoulders. Before lifting off, push the chest up and squeeze the core muscles.
Step back and assume a hip-width stance while pointing the toes out. From this position, start to drop the hips back and down and keep the knees wide until your glutes make contact with the box.
As soon as contact is made with box, push hard through the heels to drive up and out of the squat.
Compound Exercises for the Advanced
For the final group of exercises, the recommendation is to perform 8 – 10 reps and take a 60 – 90-second rest post-set.
1) Inverted Row
For the inverted row, use a Smith’s machine or set up a bar in the rack at approximately waist-height. Grip the bar using an overhand grip that is slightly wider than the shoulders.
From this position, bring the feet forward so that you are suspended underneath the bar. The body should be held straight and long with only the heels in contact with the floor.
While holding this position, pull the body upward until the chest makes contact with the bar. When performing this action, focusing on pulling the shoulder blades back and down.
Pause at the top of the row to squeeze the upper back muscles before gradually extending through the elbows to return to the starting position.
2) Barbell Clean and Press
Start the barbell clean and press by assuming a shoulder-width stance and place the feet directly underneath the bar. Drive the hips back and slightly bend the knees to drop down to the barbell.
Grip the bar using an overhand grip that is approximately shoulder-width apart. Ensure the hips are down, the chest is high, the core is tight, the arms extended and the head lifted prior to lifting.
Drive powerfully through the heels and explosively drive through the hips so that the bar is propelled up to the chest. As the bar rises, aim to keep as close to the body as you can.
Catch the bar in the front rack position so that it rests on the front of the shoulders. From this position, quickly dip the knees and hip before explosively driving through the heels to drive the bar overhead.
Reverse the movement in a controlled fashion to bring the bar safely back down to the floor.
3) Barbell Bench Press
Lie back on a bench and adjust the body position so that the eyes align with the barbell. Grab the bar using a grip that is slightly wider than shoulder-width.
Before lifting the bar from the rack, squeeze the core and press through the heels. Lift the bar and bring it directly over the chest while keeping the arms extended.
Breathe in and gradually drop the bar down to the lower chest. Pause for a moment as the bar makes contact with the chest. From there, powerfully drive the bar back up until it is directly over the chest again.
Focus on the squeeze of the chest muscles as you drive the bar up and ensure that you fully-extend at the elbows. Hold at the top position for a moment before dropping the bar once again.
[embedded content]
Final Word
While a vast array of useful compound exercises exist, the aforementioned exercises will prove to be an effective strength developer while catering for your current level of experience.
References:
1 -Gentil, Paulo; Soares, Saulo; Bottaro, Martim (2015-6). “Single vs. Multi-Joint Resistance Exercises: Effects on Muscle Strength and Hypertrophy”. Asian Journal of Sports Medicine. 6 (2). doi:10.5812/asjsm.24057. ISSN 2008-000X. PMC 4592763. PMID 26446291.
2 – Lorenzetti, Silvio; Ostermann, Mira; Zeidler, Fabian; Zimmer, Pia; Jentsch, Lina; List, Renate; Taylor, William R.; Schellenberg, Florian (July 17, 2018). “How to squat? Effects of various stance widths, foot placement angles and level of experience on knee, hip and trunk motion and loading”. BMC Sports Science, Medicine and Rehabilitation. 10. doi:10.1186/s13102-018-0103-7. ISSN 2052-1847. PMC 6050697. PMID 30026952.
3 – Hodges, Paul W.; Eriksson, A. E. Martin; Shirley, Debra; Gandevia, Simon C. (2005-09). “Intra-abdominal pressure increases stiffness of the lumbar spine”. Journal of Biomechanics. 38 (9): 1873–1880. doi:10.1016/j.jbiomech.2004.08.016. ISSN 0021-9290. PMID 16023475.
This Is The Rep Range You Should Be Doing To Build The Most Muscle Mass
The right range. The best gains.
If you want to start an argument between fitness experts – talk about the “perfect” rep range. You’ll get anywhere from a hundred reps to one. Okay, so we might be over exaggerating but there’s no question that everyone has their own idea in mind when they talk about the “right” amount of reps you should be doing. Well we’re going to open up that argument once again… and we’ll also finish it.
First we’re going to make cases for each, high rep ranges (15 reps or more), medium rep ranges (5-15 reps), and low rep ranges (1-5 reps). Then we’ll weigh in with the definitive answer on the ideal rep range for building mass.
Low rep ranges (1-5)
This rep range is primarily for strength. While it will definitely add mass to your frame as well as cutting fat, there’s one missing piece to this puzzle – Time under tension (TUT). It has repeatedly been shown that TUT is necessary for optimal muscle fiber growth. With a less than 30-60 second rep range, you might find yourself coming up short on muscle gains.
High rep range (15 reps or more)
A high rep range is best for endurance. Commonly associated with fat loss and toning, more and more evidence is starting to show that builders can lose just as much fat with medium to high reps depending on the intensity of the exercise. This range is best for skill specific exercises. For example if you’re working on your baseball swing, or practicing your throwing arm – this not optimal for muscle building however.
Medium rep range (6-15 rep range)
Not too soft and not too tight. This is an old eastern philosophy adage that could pay dividends on your muscle gains. The medium rep range proves to win all across the board, being associated with fat loss and the most Muscle mass. This range combines time under tension with the 75% of one rep weight needed to stimulate muscle fibers. This rep range also shreds fat without losing muscle.
While the medium rep range has been declared the mass building king, we recommended combining all rep ranges for the most complete physique. High rep ranges after a medium set can provide a serious pump and low rep ranges can add strength to your massive gains. Whatever body type you’re looking for, the results are in, train accordingly.

Top Training Tips For Ab Development
8 Underrated Methods That Will Transform Your Ab Training
When it comes to ab training there are many different methods in existence. In the pursuit of strong, well-defined abdominals, most individuals concentrate on one specific method.
Some individuals will look at isometric exercises where they remain entirely rigid, others will focus on exercises that move the limbs in a variety of different ways.
Still others believe that weight machines are the way forward while some argue that bodyweight is all that is required for efficient abdominal development.
Regardless of which method you believe to be best, everyone can benefit from learning new abdominal training techniques in order to comprehensively develop the abs.
This article will provide you with 8 ab training secrets that can transform your training and bring about significant improvements in abdominal strength and definition.
8 Abdominal Training Secrets
Before looking at the 8 underrated abs techniques, it must be emphasized that while training these muscles may build strength and improve muscle tone, they will not give you a six-pack (1).
This can only be achieved by restricting calories so that body fat is reduced to the point where the muscles become visible. (2)
While it is clear that it is proper nutrition that will reveal the abdominal muscles, it is still important that we train the abdominal muscle group regularly.
1) Round The Back
For almost every single resistance exercise, rounding the back is something that is to be avoided. In fact, it’s likely that you’ve spent much time teaching yourself how to keep the spine neutral.
It is absolutely imperative that the spine is neutral during exercises like deadlifts, squats, rows and any bent-over exercises. It is done in order to prevent injury occurring to the spine.
For exercises that target the abdominals however, you may have to unlearn this skill as maintaining a flat back will limit the degree of abdominal contraction.
It’s not uncommon to see gym-goers performing exercises, like the cable crunch, with a flat back which causes them to bend at the hips rather than the waist.
By bending at the waist, the rectus abdominis shortens and fully contracts whereas bending at the hips causes an isometric contraction and the abdominals remain the same length.
You may have heard it said that spinal flexion exercises are risky, however, often the risk is overstated. Your spine is designed to bend and therefore, exercises like crunches are entirely legitimate.
Simple crunches will not cause lower back pain if performed properly, however, performing the same abdominal workout for months and months may cause overuse injuries or low back problems.
Therefore, variety is extremely important for abdominal training. Ensure to add in some sagittal and lateral abdominal work as well as performing crunches.
2) Target Specific Areas
Isolation exercises can be useful when it comes to developing the abdominals. An isolation exercise is simply an exercise that entirely focuses on working one muscle.
While it may not be entirely possible to isolate particular portions of certain muscles, it is possible to emphasize one area over another.
Core training tends over the past few years have revolved around developing the core overall with a particular focus on the transverse abdominis.
While this is undoubtedly a good focus to have, there is value in targeting the upper and lower portions of the abdominals.
For the upper areas, use exercises that stabilize the lower body and focus on curling the back so that the ribcage is pulled down towards the hips.
To effectively target the lower areas, flip it around. Stabilize the upper body and bring the pelvis up towards the ribcage.
The cable crunch is an example of an effective “upper ab” exercise whereas a hanging leg raise serves a great example of a “lower ab” exercise.
A few ab exercises actually involve the pelvis and ribs move towards each other simultaneously to bring about a peak abdominal contraction. This type of exercise targets the upper and lower abs equally.
Finally, all exercises which involve twisting, rotation or lateral movement will effectively work the oblique muscles. Side bends are a great example of an effective oblique-focused exercise.
3) Use Progressive Overload
When performing ab routines most individuals use the same amount of sets, reps, and weight every time.
The problem with this is that the muscles have adapted to the point that they comfortably deal with the stress of this workout, therefore, they fail to adapt further.
Consider the other work you do in the gym. With heavy lifting, you are always aspiring to improve by lifting heavier or for a greater total volume. The same principle should apply to your ab training.
Progressive overload is the process of gradually adding more load over time to ensure that the body continually adapts. It is absolutely foundational to all strength training (3).
When considering ab training, you should program, execute and apply progressive overload in the same way as you would with other resistance exercises.
Here are the 3 most common methods of applying progressive overload:
– Increasing the weight– Increasing total volume (sets x reps)– Reducing rest periods
Look to improve in one variable at a time and ensure that the increments are gradual. Focusing on all three and overloading too quickly will more than likely cause regression rather than progression.
4) Start with Loaded Resistance
The abdominals are primarily made up of slow-twitch muscle fiber (4) which are particularly resistant to fatigue, however, this should not mean that you use high-reps only.
Although there is a greater percentage of slow-twitch, the abdominal region also contains many fast-twitch fibers that respond best to low-to-moderate rep ranges.
Keeping this in mind, to develop these fast-twitch it may be useful to start your routines with weighted ab exercises using a low-to-moderate rep range.
A useful recommendation is to use a weight that brings you to the point of muscular failure while still allowing you to perform 8-12 reps.
If using bodyweight exercises, you can still increase this resistance by manipulating your body position. The best examples of this are seen in ab / TRX rollouts.
5) Use Holds
Peak-contraction training involves consciously squeezing the muscle at the top of the rep for a short period of time. Adding this method to a number of ab exercises can increase the overall intensity.
Let’s say you can comfortably complete 12 reps of the hanging leg raise. Adding a 1-second hold at the top of the leg raise will suddenly make the 12 reps feel much more challenging.
By using the peak-contraction technique you may find that you perform fewer reps than before simply because the muscles are put under a greater load – this is totally fine.
Remember that movement quality and exercise intensity are much more important than reaching a predetermined rep target.
6) Maintain Time Under Tension
When using machines, if the weight makes contact with the stack, muscle tension immediately dissipates and the training stimulus disappears.
While it may be evident when this occurs with machine-based exercises, it may be less clear with bodyweight exercises.
During all bodyweight exercises which involve lying flat on your back, look to keep the shoulder blades off the floor as resting them on the floor will reduce the time under tension.
Again, don’t concern yourself too much with the number of reps you perform, instead, focus on maintaining muscle tension throughout the exercise.
7) Be Aware of Your Hip Flexors
The hip flexors are the muscle group responsible for generating movement around the hips, as the name suggests. For a number of exercises it is possible to work the hip flexors instead of the lower abs.
An exercise where this is commonly seen is the hanging leg raise. During the leg lift, if the lower back remains entirely flat, it is likely that the hip flexors are doing the work.
For exercises that involve anchoring the lower body, it is also possible to drive through the thigh muscles rather than engage the abdominals to pull the torso up.
Often, the hip flexors will become too heavily recruited when exercise technique is incorrect or less than optimal. Therefore, it is important to assess your technique regularly.
8) The Importance of the Plank
The plank plays a part in many gym-goers ab workouts – and rightly so! It is one of the best core exercises for strength, stability, and function.
Let’s consider the movement patterns and requirements for a number of heavy compound lifts – deadlifts, squats, bench, bent rows, overhead presses and so on.
Bracing and maintaining a strong torso is pivotal to all of these exercises and certain points of specific exercises actual resemble a plank and activate ab muscles in a similar fashion (5).
Therefore, developing planking and bracing abilities can have a positive impact on your performance with other resistance-based exercises.
Check out our Abs Exercise Guide here for exercises and further instructions.
Final Word
Abdominal training does not have to be boring or mundane. Utilizing these methods, varying your abdominal workout on occasion and effectively applying progressive overload will yield excellent results.
References:
1-Vispute, Sachin S.; Smith, John D.; LeCheminant, James D.; Hurley, Kimberly S. (2011-09). “The effect of abdominal exercise on abdominal fat”. Journal of Strength and Conditioning Research. 25 (9): 2559–2564. doi:10.1519/JSC.0b013e3181fb4a46. ISSN 1533-4287. PMID 21804427.
2-Redman, Leanne M.; Ravussin, Eric (January 15, 2011). “Caloric Restriction in Humans: Impact on Physiological, Psychological, and Behavioral Outcomes”. Antioxidants & Redox Signaling. 14 (2): 275–287. doi:10.1089/ars.2010.3253. ISSN 1523-0864. PMC 3014770. PMID 20518700.
3-Lorenz, Daniel S.; Reiman, Michael P.; Walker, John C. (2010-11). “Periodization”. Sports Health. 2 (6): 509–518. doi:10.1177/1941738110375910. ISSN 1941-7381. PMC 3438871. PMID 23015982.
4-Häggmark, T.; Thorstensson, A. (1979-12). “Fibre types in human abdominal muscles”. Acta Physiologica Scandinavica. 107 (4): 319–325. doi:10.1111/j.1748-1716.1979.tb06482.x. ISSN 0001-6772. PMID 161688.
5-van den Tillaar, Roland; Saeterbakken, Atle Hole (June 13, 2018). “Comparison of Core Muscle Activation between a Prone Bridge and 6-RM Back Squats”. Journal of Human Kinetics. 62: 43–53. doi:10.1515/hukin-2017-0176. ISSN 1640-5544. PMC 6006542. PMID 29922376.
Want The Ultimate Upper Body? Dips And Pull Ups Are The Trick
Never overlook these exercises.
Building an aesthetic physique is a goal that every bodybuilder should aspire to. Not everyone is capable of packing on as much muscle as a Phil Heath or a Kai Greene. Most people will only reach a certain level of muscle growth. If you’re a fan of mass monsters and wish to aspire to that body type, go for it. Track your macros closely, get that pump and get some gains. But if you’re genetically incapable of doing such a thing, which let’s face it most of are, then you’re probably going to have to settle for building an aesthetic, if not massively muscled, physique.
For most men and some women, building the upper body is a priority, not solely for aesthetics but for functional strength as well. Core strength is paramount for any athlete. Whether you’re looking to swing a golf club or build a massive chest, the core of your body plays a major role in perform the even the most simplest of actions.
The core of your body is like an engine and working it can improve upon your overall fitness. But since building muscle is definitely your priority, you should definitely use these two methods for building a strong upper body: dips and pull ups.
What makes these two so special? Well let’s dissect it.
Works Multiple Muscle Groups
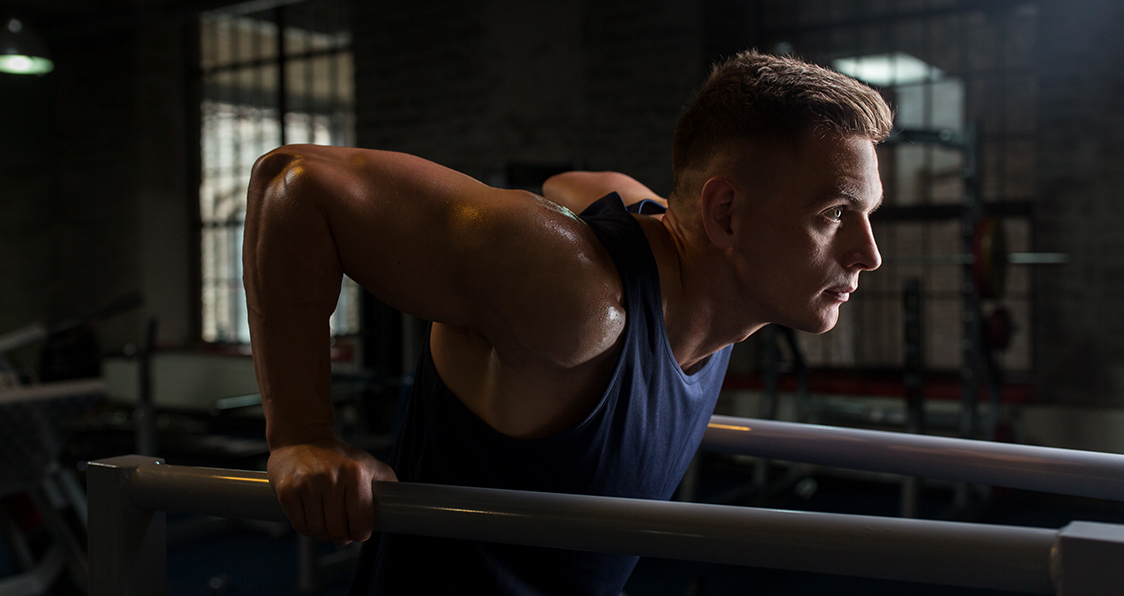
Dips and pull ups are great for working more than one muscle group. The dip is essentially a pushing exercise that can not only work your chest, but your triceps and delts as well. The pull up works your back, specifically the lats in the upper quadrant. Pull ups are also great for working your biceps. The whole key to maximizing the potential of each exercise is to utilize proper form and technique.
If you swing your legs while doing pull ups to much of the focus will be shifted to your arms doing all the work rather than your lats. By focusing on keeping your legs steady it can essentially work your lower body as well. The dips can work your chest from different angles and, depending on how deep your reps are, can either completely focus on your pecs or multiple different muscle groups for an overall upper body workout.
[embedded content]
They Are Versatile
As athletes we are always looking to master a particular workout or technique. With pull ups and dips, the possibility of mastery near impossible. What does that mean exactly? Well, of course it’s possible to master the form and technique of the exercises, but they’re also very versatile.
If bodyweight dips and pull ups start to lose their luster, then you can always switch to using chains or a weighted vest or belt to further challenge yourself. Once your strength level grows you can challenge yourself by setting personal rep records. No matter how you look at it, there are always different ways to make pull ups and dips new and fresh.
Are dips and pull ups apart of your workout regimen? Let us know in the comments and forums. Also, be sure to follow Generation Iron on Facebook and Twitter.

The Ultimate Guide to Progressive Overload
How To Progress Your Training Without Lifting Heavier
Adding more weight to each and every one of your lifts is often seen as the ultimate method for progressively overloading your training.
However, there are other methods of progressive overload that can be used in order to advance your training and continuously build strength and size.
Sometimes, lifting a heavier weight is simply not possible. You may have been experiencing great progress with your strength and then all of a sudden you hit a wall.
This article will provide 3 different methods that you can use to keep you moving in the right direction when you find that you cannot add any more weight.
Progressive Overload Principles
Progressive overload is the process of gradually placing more stress on the body to ensure that it continues to adapt and improve (1).
The principle behind progressive overload is that, after a while, the body becomes accustomed to the training stimulus and has adapted to the point where it can comfortably deal with it.
Because the body is able to cope with the training stimulus, the rate of adaptation slows and may even cease.
Increasing the amount of stress that the body is exposed to will cause the body to begin adapting once again.
3 Progressive Overload Methods
Increasing the load that you are lifting is one way of increasing stress, however, there are other methods that are equally as effective and can be particularly useful for those who have reached a plateau.
1) Increase Rep Range
Firstly, it’s important to recognize that you can complete more repetitions than is thought “conventional.”
For example, some strength-focused individuals swear by sets of 5 x 5 and would argue that completing more than 5 reps is not of great benefit.
However, one of the most effective methods of progressive overload is increasing the number of reps.
Let’s say you are following a program that incorporates 5 x 5 strength sets and you have been using the same weight for a few weeks. By now, 5 reps at this weight is very doable.
Therefore, it is absolutely fine to add in an extra rep or two, if you can manage. Within a few weeks, you may find that you can complete 8-9 reps at this weight.
The load doesn’t change at all with this method; use the same weight with each session and look to perform extra reps.
Adding reps to each session will evidently make the exercise more challenging and apply a greater amount of stress to the body which will consequently force it to increase in strength.
The general understanding over the years with rep ranges is that 1-5 reps are best for strength development (2), 6-12 for hypertrophy and 12+ for endurance.
While it is true that adding on additional reps may take you out of the specific rep range for strength or hypertrophy, it is in no way detrimental.
In fact, a number of well-renowned strength programs use sets of 15 or more to improve both strength and muscular size.
Remember that to bring about significant change, the goal is to increase the amount of stress that the body experiences. Therefore, moving out of a specific rep range is of secondary importance.
Using a higher number of reps is not only a great way to increase the amount of stress but it can also serve to vary training sessions and keep them interesting.
While adding reps is an effective method of progressive overload, adding reps indefinitely is perhaps not the best method.
By all means, add reps up to a certain point but avoid indefinitely adding reps. Instead, it may be more appropriate to add more weight or use other progressive overload methods.
A good rule of thumb if using the high rep approach is once you can comfortably perform sets of 12 reps over 2 consecutive workouts, add either 5% more for upper body exercises or 10% more for lower body exercises.
This method will ensure you stay within the rep range for hypertrophy and still apply progressive overload in an effective manner.
2) Increase Sets
Another simple progressive overload method is to increase the number of sets you perform for each exercise.
In a similar way to increased reps, increasing the number of sets will add more stress to the working muscles which will force them to adapt.
Volume is a crucial factor in hypertrophy (3) and also for testosterone and human growth hormone production – therefore, it should be a key consideration in all hypertrophy training programs.
There are many training programs that utilize high sets in – some good examples are German Volume Training (GVT), Gironda’s 8 x 8 and FST-7.
German volume training is an extreme example of high set training as the program focuses on 10 sets of 10 reps with many of the exercises.
Meanwhile, Gironda’s program uses 8 sets of 8 reps while the FST-7 concentrates on 7 sets of 10-12 reps.
While these types of programs may be effective, it is important to note that they are unsuitable for beginners & novices and should only be used by those who are at an advanced level.
The reason for this is that firstly, beginners do not need this kind of volume in order to make significant adaptations in strength and size.
For beginners, making progress is fairly straightforward as their body has never experienced a strength training stimulus previously. Therefore, a small amount of stress can bring about large changes (4).
Secondly, if too much stress is applied, overtraining is a distinct possibility. Overtraining occurs when training volume is too high and the body is unable to deal with the associated stress.
Not only will the body fail to adapt and improve, regressions in performance, strength & size may occur. In addition, a greater level of tiredness & fatigue may be experienced.
Those who have trained for a prolonged time period are best suited for these types of programs as their body is already highly conditioned and can, therefore, more effectively deal with the training stimulus.
For beginners, it is absolutely fine to add a set or two to their exercises and use this as a method of progressive overload, however, extreme set workouts should be avoided.
3) Reduce Rest Periods
For those of you who use a stopwatch and time your rest periods between sets, consider this final method of progressive overload.
The amount of rest that is taken between sets is dependent on the weight lifted and the number of repetitions performed.
For strength work (1-5 reps), the recommendation is to rest for 3-5 minutes between sets while for hypertrophy (6-12 reps) the rest period is shortened to 1-2 minutes.
By reducing the rest periods between sets, the body begins consequent sets in a below optimal state as the shorter time period does not allow the body to fully recover.
Lactate levels and hydrogen ions numbers may be slightly elevated and pH levels may not have normalized which means that you carry over some fatigue into the following sets (5).
Performing sets in this state once again places a greater amount of stress on the body and therefore leads to incremental adaptations to strength & size.
Progressive Overload Applications
While all 3 of these methods are undoubtedly effective for bringing about significant change, they should not all be utilized at the same time.
As discussed earlier, overtraining is a possibility if the level of applied stress is too high. Adding sets, reps and reducing rest periods simultaneously will add excessive stress.
Instead, focus on one method at a time and use this method until you begin to see progress slow or stall. Once you have reached this point, switch to another method and repeat the process.
Finally, it is vital that you understand that overloading the body must be gradually progressive.
This may seem like an obvious statement to make, however, far too often individuals attempt to progress too quickly and end up overtraining.
Progressing too quickly can predispose you to overtraining. Once again, this comes down to the fact that the body is unable to deal with rapidly increasing demands and stresses.
In the same way that it is important that you are gradual with increasing weight increments, be gradual with adding sets, reps and reducing rest time.
Instead of attempting to add 5 reps immediately, focus on just 1 or 2 more reps each session. Similarly, start by just adding 1 set to each exercise rather than adding 3 or 4.
Final Word
It is very possible to make substantial progress with your strength training without focusing solely on the amount of weight you are lifting.
Gradually adding sets, reps and reducing rest periods will effectively add the stress required to bring about desired changes in strength and size.
References:
1-Lorenz, Daniel S.; Reiman, Michael P.; Walker, John C. (2010-11). “Periodization”. Sports Health. 2 (6): 509–518. doi:10.1177/1941738110375910. ISSN 1941-7381. PMC 3438871. PMID 23015982.
2-Schoenfeld, Brad J.; Grgic, Jozo; Ogborn, Dan; Krieger, James W. (2017-12). “Strength and Hypertrophy Adaptations Between Low- vs. High-Load Resistance Training: A Systematic Review and Meta-analysis”. Journal of Strength and Conditioning Research. 31 (12): 3508–3523. doi:10.1519/JSC.0000000000002200. ISSN 1533-4287. PMID 28834797.
3-Schoenfeld, Brad J.; Contreras, Bret; Krieger, James; Grgic, Jozo; Delcastillo, Kenneth; Belliard, Ramon; Alto, Andrew (01 2019). “Resistance Training Volume Enhances Muscle Hypertrophy but Not Strength in Trained Men”. Medicine and Science in Sports and Exercise. 51 (1): 94–103. doi:10.1249/MSS.0000000000001764. ISSN 1530-0315. PMC 6303131. PMID 30153194.
4-Baker, J. S.; Davies, B.; Cooper, S. M.; Wong, D. P.; Buchan, D. S.; Kilgore, L. (2013). “Strength and Body Composition Changes in Recreationally Strength-Trained Individuals: Comparison of One versus Three Sets Resistance-Training Programmes”. BioMed Research International. 2013. doi:10.1155/2013/615901. ISSN 2314-6133. PMC 3780552. PMID 24083231.
5-Rahimi, Rahman (December 1, 2005). “Effect of Different Rest Intervals on the Exercise Volume Completed During Squat Bouts”. Journal of Sports Science & Medicine. 4 (4): 361–366. ISSN 1303-2968. PMC 3899651. PMID 24501549.