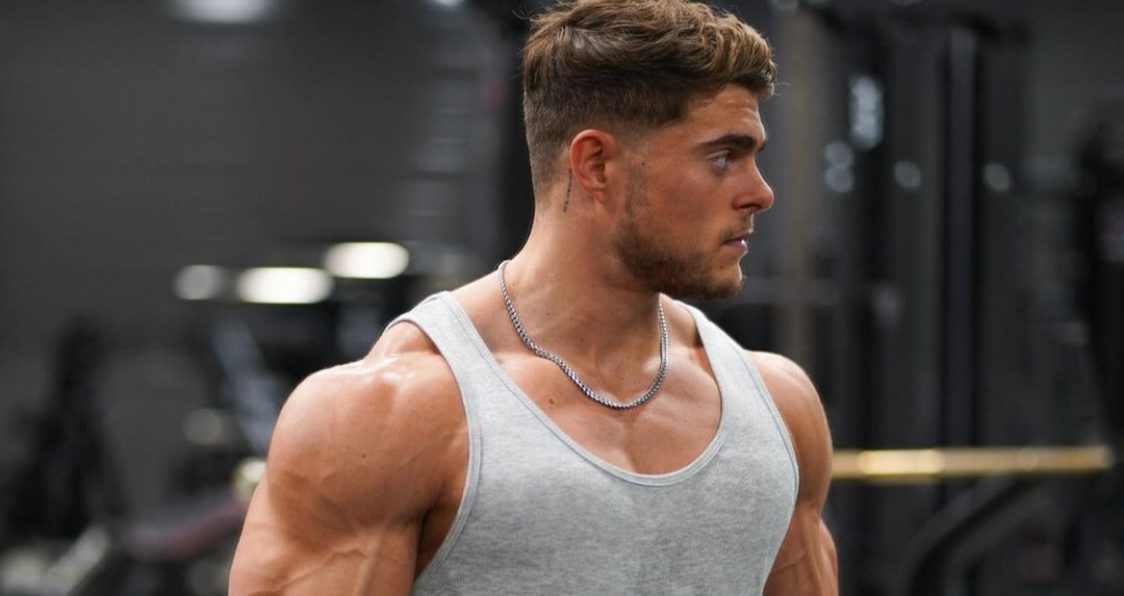
Tag: Workouts

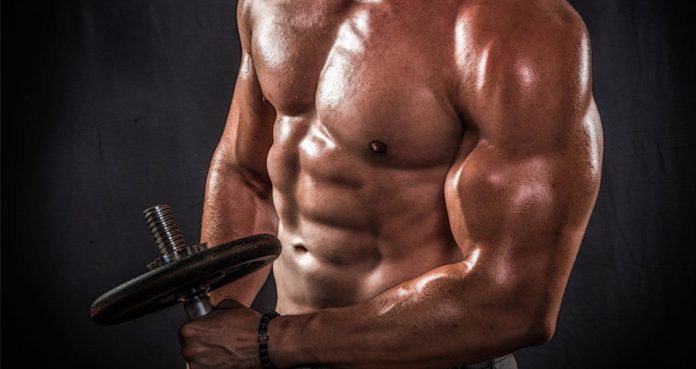
Benefits of Trap Bar Deadlifts For Bodybuilders
The trap bar is one specialty bar you need to add to your workouts.
The trap bar, also called the hex bar given its shape, it an amazing piece of equipment in the gym that some people may not know about. Considered one of the smartest inventions for gym equipment in the past few decades, this bar offers a great alternative to the traditional barbell. As a safer option for fitness junkies and gym-goers of all skill levels, the trap bar can be found in most gyms and the benefits are incredible.
The trap bar deadlift is an exercise that anyone of any skill level can do to get the most out of their deadlifts without the added stress and strain of a conventional one. As an extremely beneficial exercise, the trap bar deadlifts will work to build strength and explosive power while also limited the risk of injury.
As a complex movement, the deadlift requires the use of so many different muscles and joints with the proper coordination, balance, and technique for maximum benefit. But the trap bar allows for a more stable lift without sacrificing any of the gains a deadlift can provide (1). After hearing what the trap bar has to offer, the choice between a traditional deadlift and a trap bar deadlift may become that much easier for you.
Trap Bar Deadlifts Vs. Traditional Deadlift
A traditional deadlift is one of the big three powerlifting exercises and can greatly improve your muscle growth with a host of other benefits. The traditional deadlift uses a barbell while the trap bar deadlift, of course, uses the trap bar and while there are similarities, the differences are enough to potentially change your mind. Both exercises require lifting heavy weights off the floor in a hinge pattern with similar movements to achieve muscle growth.
The barbell deadlift, however, has a slightly greater peak in the spine and hips, while the trap bar deadlift has a larger peak knee movement. The trap bar deadlift has more squat-like elements than the barbell deadlift, but similar to the barbell deadlift, it has twice as high of the demand on the glutes, hamstrings, and quads with a similar range of motion to the barbell deadlift. The barbell deadlift may exhibit higher activation of the hamstrings, spine, and biceps (2), while the trap bar deadlift can be higher for your quads. It is a preference, for those closely linked to powerlifting would most likely choose the barbell deadlift, but the overall benefits of the trap bar deadlift are now something to consider.
Benefits Of A Trap Bar Deadlift
Safer Alternative
With the trap bar deadlift, the weight is centered within the body as opposed to in front of it which creates a great balanced position to keep strain off of your lower back. It also requires slightly less range of motion since it is higher off the ground also reducing the risk of injury. The trap bar deadlift is great for beginners to build strength quickly and execute solid form as well as for more established athletes looking for a safer way to get the benefits of a deadlift without the added risk of a more conventional one.
Lower Body Builder
Hitting your hamstrings, glutes, and quads, the trap bar deadlift is a great way to build lower body strength. With more of a squat-like movement than a traditional deadlift, your quads will be fired up increasing muscular growth and muscular endurance. It also increases the amount of mechanical tension provided which is the amount of weight lifted and its impact on muscle growth (3). As a safer alternative, you can lift more weight and increase your capacity for lower body muscle growth.
Promotes Explosive Power
With more weight and a shorter distance to lift, you can increase your power output resulting in a higher level of power and explosiveness (4). This is great for athletes whose sports require a certain level of power to generate high performance, or for gym-goers looking to gain benefits for other exercises requiring a certain level of power to perform them.
Solid Transfer To Other Sports
For powerlifters and strongmen, the trap bar deadlift is a great exercise to diversify pulling strength without risking the lower back. Athletes in more formal sports can increase their jumping abilities and improve their athletic stances for more balance and support. As a safe alternative to the traditional deadlift, the trap bar deadlift is a great exercise to maximize their performance and stay physically healthy in the process.
How To Do A Trap Bar Deadlift
The starting position begins with you standing in the middle of the trap bar. With a flat back and tight core, bend your knees and grab the handles with your arms extended. There will be a slight pull on your hamstrings before you begin to drive. Pull the bar upwards and extend your hips and knees while squeezing your glutes. Keep your back in the same neutral position and reverse back down to the starting position.
Wrap Up
For those who love to deadlift, it is a great exercise and a staple in the world of powerlifting. But the constant strain on your lower back and the increased risk of injury can be something everyone wants to avoid. The trap bar deadlift is one of those exercises that is great to minimize the risk while also getting every benefit that a traditional deadlift provides. As a safe alternative to increase lower body strength and promote explosive power, the trap bar deadlift is something to heavily consider incorporating into your daily workouts. Check out other exercises to do with a trap bar and elevate your overall performance to the next level.
Let us know what you think in the comments below. Also, be sure to follow Generation Iron on Facebook, Twitter, and Instagram.
*Images courtesy of Envato
References
Gentry, Mike; Pratt, David; Caterisano, Tony (1987). “Introducing the Trap Bar”. (source)
Andersen, Vidar; Fimland, Marius S.; Mo, Dag-Andre; Iversen, Vegard M.; Vederhus, Torbjorn; Rockland Hellebo, Lars R.; Nordaune, Kristina I.; Saeterbakken, Atle H. (2018). “Electromyographic Comparison of Barbell Deadlift, Hex Bar Deadlift, and Hip Thrust Exercises: A Cross-Over Study”. (source)
Schoenfeld, Brad J. (2010). “The mechanisms of muscle hypertrophy and their application to resistance training”. (source)
Camara, Kevin D.; Coburn, Jared W.; Dunnick, Dustin D.; Brown, Lee E.; Costa, Pablo B.; Galpin, Andrew J. (2016). “An Examination Of Muscle Activation And Power Characteristics While Performing The Deadlift Exercise With Straight And Hexagonal Barbells”. (source)
This 1000-Rep Arm Workout Will Add 2-Inches To Your Arms
“I should stop training my arms” – said no one ever.
If you are anything like most lifters, you love training your arms. A devout Roelly Winklaar fan, you start thinking about your next week’s bicep workout while performing the last set of dumbbell bicep curls.
Even though people love training their pythons, how many of them do you think are content with their progress? One of the reasons why people train their arms so often is that they are not satisfied with their workouts.
Most of the time, the problem is not with the lifter’s intent or performance but is with the workout routine itself.
If you cannot resist flexing your guns in car windows as you walk past them, have hit a plateau, or want to spice up your training, the 1000-rep arm workout is for you.
Introduction To The 1000-Rep Arm Workout
1. The 1000-rep arm workout is pretty straightforward and doesn’t contain any technical mumbo jumbo.
2. You will be doing five sets of 20 reps for five bicep and tricep exercises each, equaling 1000 reps total.
3. For the best result, strictly stick to the prescribed exercises, sets, reps, and rest periods.
4. The 1000-rep arm workout can be longer as compared to your vanilla workouts. Plan your gym sessions accordingly.
5. Since the 1000-rep arm workout employs extreme volume and intensity, you should not perform it every week. Start by following this program every alternating week and then switch to performing it once every three or four weeks.
The 1000-Rep Arm Workout From Hell
1. EZ Bar Curl – 5 Sets 20 Reps
The 1000-rep arm workout will take a toll on your joints, and the EZ bar can make your life a little easier. Before you begin training, perform at least a couple of warm-up sets with lighter weights.
Steps:
Stand upright while holding an EZ bar with a narrower-than shoulder-width grip.
As you breathe in, curl the barbell by bending at your elbows until your lower arms are perpendicular to the floor.
Make sure you are not using momentum to lift the weights.
Slowly return to the starting position and repeat for recommended reps.
2. Straight Bar Pushdown – 5 Sets 20 Reps
Alternate between bicep and tricep exercises so that your muscles are getting enough rest between sets.
Steps:
Stand facing a cable pulley machine with a shoulder-wide feet placement.
Set the pulley at the highest position.
Grab the straight bar attachment with an overhand grip.
Pin your elbows to your side as you push down the bar until your lower arms are perpendicular to the floor.
Return to the starting position and repeat.
3. Cable Curl – 5 Sets 20 Reps
You need to contract your biceps and triceps with every rep if you want to get the most bang for your buck. Going through the motions for the sake of it is not going to get your results. Establish a mind-muscle connection with your arms and squeeze the life out of them with every rep.
Steps:
Stand upright with a shoulder-wide stance while facing a cable pulley machine attached at the lowest setting.
Grab an EZ bar with an underhand grip.
Curl the bar while having your elbows glued to your sides.
Return and repeat.
4. Overhead Cable Extension (Rope Attachment) – 5 Sets 20 Reps
Since this is a high-intensity workout, don’t worry about following a rep tempo or going slow. Pump out the recommended repetitions with a decent speed, and let the intensity do its magic.
Steps:
Set the pulley at the highest adjustment.
Grab the rope attachment and face away from the machine.
Bend over at your waist until your torso is at a 60-degree angle with the floor.
Extend your arms straight and contract your triceps at the top of the movement.
Return to the starting position and repeat.
5. Double-Arm Dumbbell Hammer Curl – 5 Sets 20 Reps
As fatigue starts to kick in, feel free to lighten the weights but do not compromise on form and intensity. If you don’t feel a pump after 20 reps, it’s a sign that you need to lighten the weights and focus on contracting your muscles.
Steps:
While standing with a shoulder-wide stance, grab a dumbbell in each hand with a neutral grip (palms facing each other).
Keep your elbows at your sides and curl the dumbbells towards your shoulders.
Pause and squeeze the life out of your pythons at the top of the lift.
Do both arms at the same time.
6. Lying Extension With Rope Attachment – 5 Sets 20 Reps
Steps:
Place a flat bench beside a cable pulley attached to the lowest setting.
Lie down with your back placed on the bench and your head next to the pulley.
Grab the ropes with both hands and perform a skull-crusher type movement.
Don’t let your elbows flare out as you perform the exercise.
7. Seated Barbell Curl – 5 Sets 20 Reps
Steps:
Sit on a flat bench and place a flat barbell on your thighs.
Grab the bar with a shoulder-width grip.
Curl the weights from the top of your thighs towards your shoulders.
Return to the starting position with a slow and controlled motion.
This exercise works on your bicep peaks.
8. Double-Arm Dumbbell Kickback – 5 Sets 20 Reps
Steps:
Stand upright with a shoulder-wide stance and grab a dumbbell in each hand with a neutral grip.
Bend over at your lower back until your torso is at a 60-degree angle with the floor.
Lift your elbows until they are slightly above your torso. Bring the dumbbells close to your chest.
With your elbows pinned at this position, extend your arms straight.
Contract your triceps at the top of the movement.
Return to the starting position and repeat.
9. EZ Bar Reverse Curl – 5 Sets 20 Reps
Steps:
Stand upright while facing a cable pulley attached at the highest setting.
Grab the EZ bar attachment with an overhand grip.
With your elbows pinned to your sides, curl the bar by bending at your elbows.
Contract your biceps at the bottom of the movement.
10. Bench Dip – 5 Sets 20 Reps
Steps:
Place two flat benches parallel to each other.
Sit down on a bench and place your hands next to your thighs.
Place the balls of your feet on the second bench.
Hinging at the elbow, lower your body down as far as you can, or until your upper arms are parallel to the floor.
Extend your arms straight to get back to the starting position.
Rest – 2 Minutes
After every set, make sure you are not resting for more than 120 seconds. Two minutes are all you need for catching your breath and ATP replenishment. By the end of the workout, you will be running on fumes, and you will have the most insane sleeve-ripping arm pump.
Conclusion
The 1000-rep arm workout routine will train your guns from every angle. It will help break plateaus and ensure overall arm development. While we recommend following the exercises mentioned in the article, you could use substitutes or perform your favorite lifts, given they target the muscles in the same way.
In the weeks where you will not be performing the 1000-rep arm workout, you can follow your usual (read: vanilla) bicep and tricep training routines.
How often do you train your arms?
Let us know in the comments below. Also, be sure to follow Generation Iron on Facebook, Twitter, and Instagram.

Best Cardio Methods For Bodybuilders Who Hate Running
A little bit of cardio does wonders.
We’ve heard it a million times – “I love working out I just hate running.” Since we were young running has been touted as the ultimate form of cardio. Those weekend warriors with their Nike spandex gear don’t make it any easier. With watches that track every step and instagram pictures to boot – these guys wear every mile as a badge of honor.
Well we’ve got news for those guys. While running is definitely good in moderation, too much of constantly pounding the pavement will wreck your joints especially your knees. Compounded with the massive size of most bodybuilders it’s no wonder it’s not every athlete’s cardio of choice. Well good news. We’ve got 5 five exercises just as good…nay, BETTER than running that will be right up your alley.
20 minute 10 meter sprint
We first heard about this one Men’s Health. The first thing you need to do is mark out a length of 10 meters (about 10 steps), this will be your work area. You want to cover that 10 meter distance once within one minute (too easy right?). Now you want to cover 10 meters 2x within the same amount of time. Keep going until you can complete 20 meters in one minute.
This exercise starts slow but gets turned up real fast. Don’t cheat in the beginning, trust us you’ll need the rest. Mere mortals will make it to about 13, studs will make it to 18, and Gods will make it to 20 meters in one minute. Which one are you?
Burpees
Ah this brings me back to my military days. You start off straight up, arm to sides. You then drop down and complete a full push up, you get back up into starting position and then jump high into the air with arms extended. When you land, get back down into pushup position and repeat.
Performing just 10 reps fast can rev your metabolism as much as a 30 second all out bike sprint, burning 2 calories per burpee for a 180 lb man. Aim for 10 burpees within 60 seconds.
Kettle Bell Swing
This explosive cardio exercise works the big muscles around your glutes and quads, and sends your heart into overdrive, according to research from the University of Wisconsin.
In a recent study participants burned 2o calories per minute with an average heart rate of 93% of their max, sustained over a 20 minute workout.
Next time someone invites you to go for a run, tell them you’d rather protect your joints and raise your heart rate instead.
The Most Effective Exercises For Building The Biceps
Bicep Peak Developing Workouts
Although developing the arms is important for physique, it’s vital that they are not overdeveloped in comparison to the rest of the body.
For a comprehensive aesthetic look, all muscle groups should be developed at a similar rate otherwise the body may look out of proportion.
Strategic Muscle Growth
Instead of having the sole aspiration of developing the arms, it is important to use a more targeted approach.
If you are a bodybuilder, the goal is to develop a look that is aesthetically pleasing. Having 25-30 inch arms that don’t fit the rest of your body is not a good look.
Therefore, be wary of using exercising the arms too frequently and instead focus on being smart with your training and training quality.
For optimal bicep development, incorporate bicep work into your back or shoulder and tricep workouts. This will ensure that mass develops at an equal rate throughout a range of muscles.
Utilizing this method will not lead to building a significant amount of full-body mass but will also develop the bicep peaks optimally and proportionally.
Two Bicep Peak Developing Workouts
As mentioned earlier, the following two workouts should be incorporated into either back day or shoulder & tricep day.
For each of the following exercises, it is recommended to perform 1-2 warm-up sets. These sets should involve approximately 50% of the weight that you will use for the working sets.
In addition, ensure you only complete 3 or 4 reps and avoid working to muscular failure. The purpose of a warm-up is to enhance the mind-muscle connection and reduce injury risk (1).
Workout 1
Exercise
Sets x Reps
Barbell Curls
1 x 60-100 reps
Cable Hammer Curls – Rope Attachment
1 x 60-100
Workout Instructions & Technique
The first workout uses just one set and high reps. The reasoning behind this is because the biceps are primarily made up of slow-twitch, type 1 muscle fiber.
This means that biceps recover more quickly than other muscles and are more resistant to fatigue which is why it is recommended to train the biceps twice per week.
The sessions do not have to be excessively long, as demonstrated with workout 1. The recommendation is to use workout 1 in conjunction with a back workout.
This is because the biceps will have already experienced a great deal of stress during the back-based resistance exercises and therefore using a high-rep set works the biceps in a different way.
The 2 sets will take no longer than 5 minutes and will effectively force blood into the biceps, causes a build-up of fatigue and onset bicep growth
Barbell Curl
For the barbell curl, select a weight that is 30% below your 10 rep max for barbell curls. For example, if you can complete 10 curls at 100lbs, you would use 70lbs.
Start by aiming for 20-25 reps with this weight before slashing the weight by half and completing as many as you can.
If you reach the point of failure before 60 reps, drop the weight by half once again and continue until you complete a minimum of 60 reps.
Using 70lbs as an example starting weight, complete 20-25 reps, drop the weight down to 35lbs and work to failure; drop down further to 17.5lbs, if necessary.
When gripping the bar, use a grip that is slightly wider than shoulder-width to target the inner head of the bicep. In addition, move the weight onto the outer palms if possible.
In terms of pace, focus on a 2-second concentric contraction, squeeze the biceps tightly and then control the eccentric contraction, taking 3-4 seconds to return the bar to the hips
Cable Hammer Curl
For the cable hammer curl, the rope attachment means that you will use a neutral grip (palms facing each other) which will effectively work the brachialis muscle.
However, as you drive the load upward look to supinate your grip (turn the palms upwards). Doing this will effectively engage both bicep peaks.
Workout 2
Exercise
Sets x Reps
Superset 1:Barbell CurlTriceps Pushdown
2-3 x 8-12
Superset 2: Machine Preacher CurlsSeated Barbell Military Press
2-3 x 8-12
Superset 3:Concentration CurlsReverse Grip Tricep Pushdown
3 x 10-15, 1 x 20-25
Workout Instructions & Technique
The second workout utilizes 3 supersets and should be performed on shoulder & triceps days.
Because the exercises are supersetted do not rest at all until you have completed all of the reps. However, do take a 60-90 second rest between each superset.
Barbell Curl & Tricep Pushdown
For superset 1, use your 10 rep max weight for the 3 sets, after completing the warm-up sets. Ensure that you are using a shoulder-width grip for the curl.
It is imperative that you do not pyramid up during the warm-up sets as you want to avoid fatiguing the biceps prior to the working sets – remember, 3 or 4 reps will suffice.
For both of the exercises in this superset, cadence is highly important. As with workout 1, use a 2 second concentric and a 3-4 second eccentric.
Machine Preacher Curl & Seated Barbell Military Press
For the machine preacher curl, the main emphasis must be on the eccentric (or negative) portion of the exercise as eccentric training has been found to accelerate the rate of muscle growth (2).
In the preacher curl, the shoulder should be relatively relaxes as the upper arm is supported by the bench which should allow for a greater drive and control.
Look to bring the weight up by 1 second and use a 4-5 second descent to maximally load the biceps.
Concentration Curl & Reverse Grip Tricep Pushdown
When performing concentration curls, often it is the case that less weight is better. The focus of the exercise should be on the control and squeeze of the biceps, not the amount of weight lifted.
Focusing on the contraction can cause a greater degree of muscle activation (3) and consequent burn. Therefore, avoid the temptation to go excessively heavy and choose a weight that facilitates control.
To get the most out of the concentration curl, utilize a wrist twist at the top of the movement. Start with the dumbbell in a neutral grip, as you curl upward, supinate your grip.
At the very top of the movement, turn the wrist a little further to maximize supination. Imagining you are trying to get the pinkie to touch the nose is a good way to maximize wrist twist.
With the sets of 10-15 reps, select a weight that will allow you to complete a minimum of 10 and bring you to the point of muscular failure.
For the final set of 20-25 reps, drop the weight by 30-50%. The weight you use is dependant on how fatigued your muscles are at that point.
Final Word
The above workouts should bring about significant changes in bicep peak size for all individuals regardless of your level of conditioning. However, it may be particularly beneficial for those of beginner and intermediate level.
Look to perform these workouts for a period of 4-6 weeks before assessing how your body has adapted to this training stimulus. Feel free to then experiment with loads and rep ranges to see what works best for you.
References:
1-Herman, Katherine; Barton, Christian; Malliaras, Peter; Morrissey, Dylan (July 19, 2012). “The effectiveness of neuromuscular warm-up strategies, that require no additional equipment, for preventing lower limb injuries during sports participation: a systematic review”. BMC Medicine. 10: 75. doi:10.1186/1741-7015-10-75. ISSN 1741-7015. PMC 3408383. PMID 22812375.
2-Roig, M.; O’Brien, K.; Kirk, G.; Murray, R.; McKinnon, P.; Shadgan, B.; Reid, W. D. (2009-08). “The effects of eccentric versus concentric resistance training on muscle strength and mass in healthy adults: a systematic review with meta-analysis”. British Journal of Sports Medicine. 43 (8): 556–568. doi:10.1136/bjsm.2008.051417. ISSN 1473-0480. PMID 18981046.
3-Calatayud, Joaquin; Vinstrup, Jonas; Jakobsen, Markus Due; Sundstrup, Emil; Brandt, Mikkel; Jay, Kenneth; Colado, Juan Carlos; Andersen, Lars Louis (2016-03). “Importance of mind-muscle connection during progressive resistance training”. European Journal of Applied Physiology. 116 (3): 527–533. doi:10.1007/s00421-015-3305-7. ISSN 1439-6327. PMID 26700744.
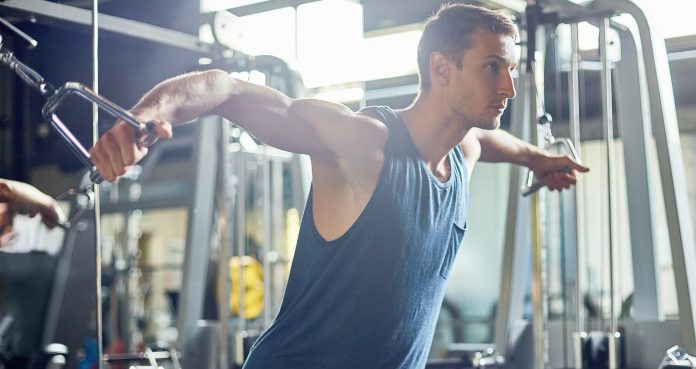
How To Perform The Cable Face Pull
The Ultimate Exercise for Building Strong Shoulders
The face pull is one of the most effective resistance exercises for developing the muscles of the upper back and shoulders.
One of the biggest benefits associated with this exercise is that it specifically targets the rear deltoids which are so often neglected during strength training.
Developing strength in the posterior delts will not only build general shoulder strength but it can also help to rectify postural issues and prevent muscular imbalances from forming (1).
This article will provide a step-by-step guide to the face pull, assess the benefits, investigate common errors and cover two simple face pull modifications.
Cable Face Pull Form & Muscles Worked
The cable face pull primarily works the shoulder muscles – the deltoids. More specifically, the movement places great stress on the posterior portion of the delt.
As well as the deltoids, the face pull works the rhomboids, trapezius and rotator cuff muscles.
Although the face pull is considered an intermediate level of difficulty, the movements involved are fairly straightforward.
If you suffer from shoulder or back problems, speak to your doctor or physical therapist first and always follow their recommendations closely. Additionally, if you ever experience pain during the face pull, stop immediately.
For an effective cable face pull, follow the subsequent 4 steps.
Step 1
Start by adjusting the cable machine so that the pulley is situated slightly above your head. Attach a rope to the pulley and with both hands, hold the rope at either end ensuring that the palms face each other.
While holding onto the rope, take a few steps backwards until the arms are fully extended. From this position, lean back slightly (no further than 20°) and contract all your trunk muscles.
Step 2
Before pulling, ensure that there is some tension the cable by pulling a little so that the weight comes away from the weight stack.
Prior to starting the drive phase, pull the shoulders back and down to prevent the shoulders from rolling or hunching.
Step 3
Pull powerfully in towards the forehead letting the elbows flare out to the sides to maximize the action of the rear delts.
As best as possible prevent the elbows from dropping and look to maintain a neutral grip on the rope throughout.
Step 4
Once you have pulled the weight in to the face, keep the core engaged and in a highly controlled fashion, reverse the movement by slowly extending at the elbows.
Considerations
Face pulls are best programmed into training as an accessory exercise and are specifically recommended at the end of a back workout – 2 sets of 20 reps each will suffice.
Be aware that it is unlikely that you will need a heavy weight to effectively work the shoulder. Use lighter weights and concentrate on keeping the movements smooth and controlled.
Benefits Associated with the Face Pull
In terms of upper back and shoulder strength development, the face pull is an excellent choice. Not only will strength substantially increase, the exercise also promotes posture.
Many individuals suffer from rounded shoulders which is where the shoulders are significantly pulled forward; focusing too heavily on chest and front deltoid development can cause this.
The face pull will strengthen the rear delts and consequently prevent the shoulders from moving forward.
Having strong shoulders is pivotally important for assisting in a wide range of day-to-day activities and for athletic movements- any actions that involve pressing, pulling, and arm rotations.
For the athlete or lifter, building strength and size in the shoulders will facilitate an improved performance for a range of exercises – such as overhead press and bench press.
The deltoids are responsible for driving and controlling all overhead movement. For example, they must contract to allow you to reach high shelves, take a basketball shot or placing a child on your shoulders.
Typically, the deltoids are divided into 3 distinct sections – the anterior (front), middle and posterior (rear) deltoid (2) – with each section playing its own role in causing shoulder movement.
Because the deltoids have these 3 sections, it is vital that you use a range of resistance exercises to hit the delts from different angles and facilitate comprehensive gains.
A combination of exercises such as shoulder presses, lateral raises, front raises, rear delt flyes and face pulls will lead to effective development the shoulder muscles.
However, more often than not, too much emphasis is placed on the anterior and middle deltoid. As a result, these sections develop well but the posterior delt is neglected.
The reason for this is that the majority of pushing and pressing exercises primarily require effort from the front and middle delt.
Overdevelopment of these sections and underdevelopment of the posterior delts is what causes muscular imbalances, postural problems, shoulder pain and injury (3).
Considering all of these points, the importance of performing posterior delt focused exercises, such as the face pull, should be clear.
Common Face Pull Errors to Avoid
There are 2 errors which are most commonly seen with the face pull exercise and they are often connected to each other.
Poor Form
It’s important to remember that the purpose of this exercise is to work the rear delts, therefore, if you fail to feel these muscles working, assess your form.
Ideally, you should feel fatigue building in the backs of the shoulder and into the upper back between the shoulder blades.
If you are feeling it more in the biceps and back, it is likely that you are either pulling too low and letting the elbows point down rather than out or are failing to maintain a neutral grip.
If you are pulling and the arms are not at right angles to the body, you will be performing a pull down rather than a face pull.
Using Excessively Heavy Weight
The second common error is to use a weight that is simply too heavy. The deltoids are a relatively small muscle and therefore do not have the capacity to pull extremely heavy loads.
If lifting too heavy, it is likely that a number of muscles outwith the rear delts will contract to assist the movement. This will only lessen the stress placed on the rear delts.
Furthermore, attempting to lift an excessively heavy load will likely cause form to deviate significantly or utilize momentum rather than muscular contraction alone.
If form begins to break down, a combination of heavy weight and improper movement may contribute towards injury.
Consider reducing the load if you find that you are using momentum during the pull, are failing to control the weight on the way back down or find that the body is constantly being pulled forward.
Face Pull Regression and Progression
Depending on your level of experience and training goals, it may be necessary to modify the face pull.
Resistance Band Face Pull
If you have limited equipment or have never performed the cable face pull previously, it may be useful to start with a resistance band face pull.
Simply attach the resistance band to a high resistance point (something like a pull-up bar, for example) and complete exactly the same face pull movement as you would with the cable.
Be aware that if you are already highly conditioned or have trained the posterior delts previously, resistance bands may not provide a big enough challenge for you.
If you have access to neither resistance bands or a cable machine, focus on using an array of dumbbell exercises to work the rear delts.
Although not a like-for-like replacement for the face pull, exercises like the banded and dumbbell rear delt fly are highly effective for rear delt development (4).
Underhand Face Pull
Changing the grip to underhand can present a new proposition and increase the challenge of the exercise. As a result, when using this progression, ensure you stick with lighter weights and promote control.
If it is your goal to build muscle size, consider completing this modified face pull in a seated position.
Being seated will keep the trunk more stable, negate lower body involvement and increase the demand on the upper back and shoulders.
Final Word
Considering the benefits of strengthening the posterior delts, the majority of individuals will profit from programming in rear delt specific exercises into their training.
The face pull is an excellent resistance exercise that will effectively build shoulder strength, prevent muscular imbalances and promote posture & general shoulder health.
References:
1-Schory, Abbey; Bidinger, Erik; Wolf, Joshua; Murray, Leigh (2016-6). “A SYSTEMATIC REVIEW OF THE EXERCISES THAT PRODUCE OPTIMAL MUSCLE RATIOS OF THE SCAPULAR STABILIZERS IN NORMAL SHOULDERS”. International Journal of Sports Physical Therapy. 11 (3): 321–336. ISSN 2159-2896. PMC 4886800. PMID 27274418.
2-Elzanie, Adel; Varacallo, Matthew (2019), “Anatomy, Shoulder and Upper Limb, Deltoid Muscle”, StatPearls, StatPearls Publishing, PMID 30725741,
3-Kim, Mi-Kyoung; Lee, Jung Chul; Yoo, Kyung-Tae (2018-3). “The effects of shoulder stabilization exercises and pectoralis minor stretching on balance and maximal shoulder muscle strength of healthy young adults with round shoulder posture”. Journal of Physical Therapy Science. 30 (3): 373–380. doi:10.1589/jpts.30.373. ISSN 0915-5287. PMC 5857441. PMID 29581654.
4-Bergquist, Ronny; Iversen, Vegard Moe; Mork, Paul J; Fimland, Marius Steiro (March 23, 2018). “Muscle Activity in Upper-Body Single-Joint Resistance Exercises with Elastic Resistance Bands vs. Free Weights”. Journal of Human Kinetics. 61: 5–13. doi:10.1515/hukin-2017-0137. ISSN 1640-5544. PMC 5873332. PMID 29599855.
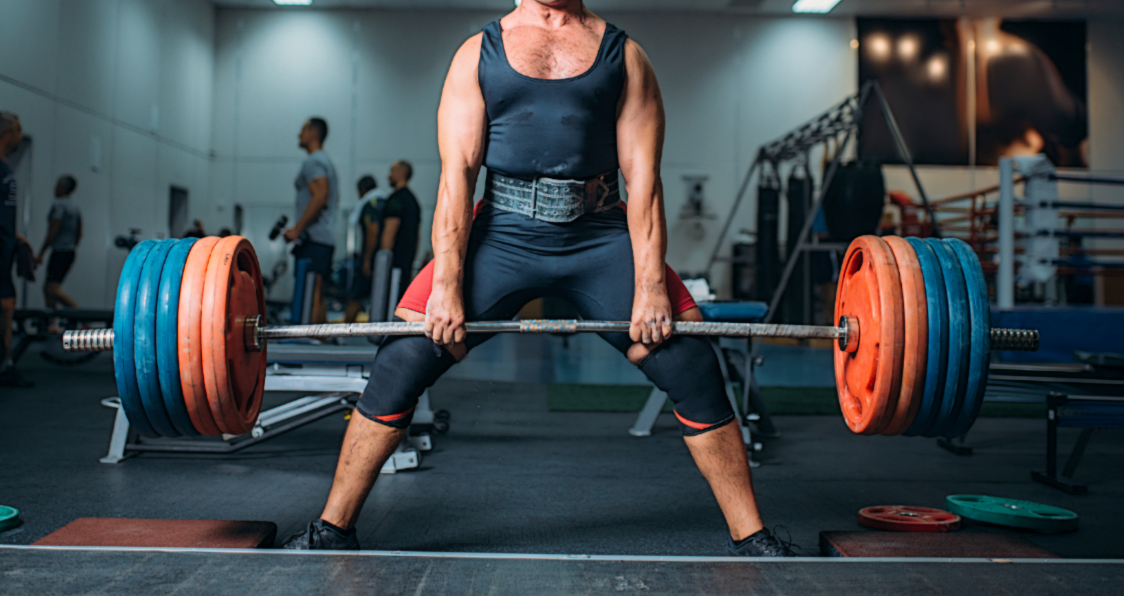
The Ultimate Guide to the Sumo and Conventional Deadlift
The Importance of the Deadlift
Very few exercises can compare to the deadlift in terms of its ability to simultaneously develop strength, muscle size, power, and athleticism.
It is clear that the deadlift should be a staple exercise for every athlete and avid gym-goers. However, which type of deadlift should you be performing?
There are many arguments that can be made in favor of both the conventional and sumo deadlift, however, the purpose of this article is not to discuss conventional vs sumo, rather it will provide a guide to both.
It will investigate the kinematics of both movements, help you to understand when to use each stance and provide tips to allow you to establish which stance suits you best.
Kinematic Differences Between the Conventional and Sumo Deadlift
There are a number of apparent visual differences that can be seen between both the conventional and sumo deadlift.
With that being said, both movements have a large number of form similarities including a neutrally aligned spine and head, activated lats and hips, strong grips and engaged core musculature.
The more advanced lifter may be able to pinpoint specific differences between both stances and have a greater understanding of force transfer and muscle activation.
In terms of muscles activated, the sumo places a great demand on the glutes, hips and legs whereas the conventional stance recruits the low back and hamstrings more heavily.
While both lifts activate the same muscle groups, certain muscle groups are activated at different rates.
A recent study found that the rate of activation of the vastus medialis and lateralis (quadricep) were greater during a sumo deadlift.
Similarly, the rate of medial gastrocnemius and tibial anterior activation were significantly different between both deadlift styles (1).
This highlights that both upper and lower muscle groups of the leg are activated in different fashions.
The sumo involves a much wider stance than the conventional which significantly changes the biomechanics of the exercise.
The sumo stance places the trunk in a much more upright position and also alters the position of the thighs (2).
In addition to this, the feet are more significantly turned out and the grip on the bar tends to be narrower in the sumo in comparison to the conventional.
All of these slight technique adjustments contribute toward altering the kinematics of the sumo when compared to the conventional deadlift.
How To Perform the Sumo and Conventional Deadlift
This section will explain how to effectively setup and execute both the sumo and conventional deadlift.
As you will see, once the set-up has been completed, the execution of both exercises are the same.
The Conventional Deadlift:
– Start with feet hip-width apart– Place the feet directly underneath the bar with toes slightly pointed out– Drop down to the bar by pushing the hips back and hinging the knees– Ensure that the hips are higher than the knees– Grip the bar tightly with hands approximately shoulder-width apart– Lift the head, drive the chest up, squeeze between the shoulder blades and brace the core– Drive powerfully through the heels and keep the bar tight to the body– Drive the hips into the bar by squeezing the glutes at the top of the rep– Reverse the movement and drop the bar back to the floor
The Sumo Deadlift:
– Start with feet wider than hip-width– Place the feet directly underneath the bar and turn the toes out (approximately 40 – 45 degrees)– Drop down to the bar by pushing the hips back and hinging the knees– Ensure that the hips are higher than the knees– Grip the bar tightly with hands slightly narrower than shoulder-width apart– Lift the head, drive the chest up, squeeze between the shoulder blades and brace the core– Drive powerfully through the heels and keep the bar tight to the body– Drive the hips into the bar by squeezing the glutes at the top of the rep– Reverse the movement to drop the bar back to the floor
Determining Your Deadlift Stance
For those athletes or highly conditioned individuals, it would be wise to use both deadlift styles in training.
There is a lot to be gained by performing both styles – especially if you have only ever performed one style.
To determine which deadlift stance you should focus on, you can ask yourself a couple of questions that will help to guide you.
Firstly, which style looks and feels most athletic and most natural? Secondly, with which method can you lift the most weight?
If the answer to both questions is the same, it would be wise to stick with that stance.
If you have never performed the deadlift, it is recommended to start with the conventional deadlift first and then move onto the sumo at a later date, if necessary.
Don’t be under any illusions, the sumo stance is equally as challenging as the conventional deadlift, so be prepared to spend time working on it.
If you are beginning to deadlift using a new stance, it is recommended to use a lighter weight and start from the blocks rather than the floor. Over time, gradually work down to the floor.
Doing this will facilitate the process of learning the new technique while simultaneously allowing you to build strength.
Having attempted both the conventional and sumo deadlift for an extended period, it should eventually become clear which stance allows you to lift the most efficiently lift heavy weight.
Be aware that it can take time to understand which stance suits you best.
Even if you feel like you have great technique, it may be the case that there are stabilizing and supporting muscle groups that are not quite strong enough yet to facilitate a powerful deadlift.
Given time and patience, these muscles will strengthen and you may then find that the stance you believed to be best is actually inferior to the other.
Conventional and Sumo Deadlift Considerations
It is true that the stance that allows you to lift the heaviest load should be prioritized as lifting the heaviest loads possible, in a safe manner, will certainly have the greatest impact on your strength levels (2).
However, it is also useful to look at the mechanics of the movement as this can often be the key to unlocking pure strength.
With both stances, the bar should move in as straight a line as possible from the floor directly up to the hips. Any deviation from this path will impede performance.
Allowing the bar to drift away from the body will cause the body to expend and waste energy as it fights to maintain control.
However, moving the bar in a smooth, vertical path will preserve energy and therefore has the potential to facilitate performance.
Keeping this in mind, it is important to select the stance that facilitates this most efficient bar path.
Let’s say that you can lift heavier with the conventional deadlift but your technique for the sumo is much cleaner and the bar move more efficiently, it may be worthwhile shifting focus for a time.
A more efficient lift will allow you to train with greater intensity, frequency, and volume – all which have a direct impact on strength gains and muscle growth.
There is no denying that limb and trunk lengths have an impact on deadlift performance.
Research has indicated that those with long limbs may be at a mechanical advantage when it comes to performing the deadlift (3).
Furthermore, another study has found that the conventional style may be more suitable for those with longer torso whereas those with shorter torsos may be better at sumo. (4)
However, there’s nothing that can be done to change your body type.
Instead, your focus should be placed on the things that can be controlled – factors such as attitude, technique, strength levels and muscle size.
The final consideration that must be made is the training goal that you have set for yourself.
For example, if you are a competitive powerlifter, then it would make sense to predominantly focus on the stance that will allow you to lift the heaviest in a competition.
A useful rule of thumb when deadlifting for powerlifting is to use your competition stance 80% of the time and use other variations for the other 20%.
If your goal is to generally improve strength levels then a mixture of both the conventional and sumo deadlift will lead to efficient strength improvements.
3-Day Deadlift Sample Program
The following 3-day program has been designed with the conventional deadlift being the preferred stance. If you perform the sumo, simply swap around the conventional and sumo exercises.
Day
Exercises
Sets x Reps
1
1) Conventional Deadlift2) Front Squat3) Good Mornings4) Leg Extensions
5 x 53 x 53 x 12-153 x 12-15
2
1) Sumo Deadlift2) Back Squat3) Hyperextensions4) Leg Curls
5 x 53 x 53 x 12-153 x 12-15
3
1) Conventional Deadlift2) Barbell Lunges3) Glute Bridge4) Calf Raises
5 x 53 x 63 x 12-153 x 12-15
Final Word
Both deadlift stances will effectively train muscle groups the length and breadth of the body while accelerating strength and power improvements.
While it is true that there are differences between the two deadlift variations, both have their place within a strength program.
If you are unsure which stance suits you, try them both and employ a number of the above tips to help make things more clear.
For more news and updates, follow Generation Iron on Facebook, Twitter, and Instagram.
References:
1-Escamilla, Rafael F.; Francisco, Anthony C.; Kayes, Andrew V.; Speer, Kevin P.; Moorman, Claude T. (2002-4). “An electromyographic analysis of sumo and conventional style deadlifts”. Medicine and Science in Sports and Exercise. 34 (4): 682–688. doi:10.1097/00005768-200204000-00019. ISSN 0195-9131. PMID 11932579.
2-Schoenfeld, Brad J.; Contreras, Bret; Vigotsky, Andrew D.; Peterson, Mark (December 1, 2016). “Differential Effects of Heavy Versus Moderate Loads on Measures of Strength and Hypertrophy in Resistance-Trained Men”. Journal of Sports Science & Medicine. 15 (4): 715–722. ISSN 1303-2968. PMC 5131226. PMID 27928218.
3-Lockie, Robert G.; Moreno, Matthew R.; Orjalo, Ashley J.; Lazar, Adrina; Liu, Tricia M.; Stage, Alyssa A.; Birmingham-Babauta, Samantha A.; Stokes, John J.; Giuliano, Dominic V.; Risso, Fabrice G.; Davis, DeShaun L. (2018-11). “Relationships Between Height, Arm Length, and Leg Length on the Mechanics of the Conventional and High-Handle Hexagonal Bar Deadlift”. Journal of Strength and Conditioning Research. 32 (11): 3011–3019. doi:10.1519/JSC.0000000000002256. ISSN 1533-4287. PMID 29045317.
4-Cholewa, Jason M.; Atalag, Ozan; Zinchenko, Anastasia; Johnson, Kelly; Henselmans, Menno (August 1, 2019). “Anthropometrical Determinants of Deadlift Variant Performance”. Journal of Sports Science & Medicine. 18 (3): 448–453. ISSN 1303-2968. PMC 6683626. PMID 31427866.
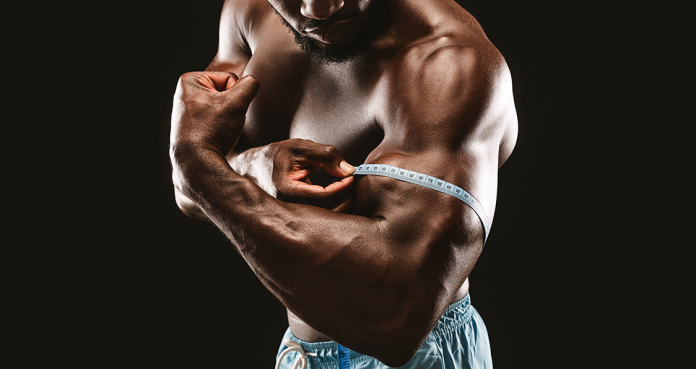
Top 5 Exercises For Bulging Biceps
Buy some tickets to this gun show.
If there’s one thing that draws people to weightlifting and maybe even bodybuilding as a whole – it’s getting bigger muscles to show off. Biceps are one of the top muscles that people want to have bulging and flexing at all times. It’s one of the main muscles that people can always see – so when you catch someone checking them out, you can wink and give a little nod of satisfaction.
To help you get those massive biceps that you crave or maybe just to help you make them a little bigger than they already are – here is our list of the top five exercises to boost bicep mass.
#5. Preacher Curls
Preacher curls are a fantastic exercise to help boost the building of muscle mass in your biceps. This exercise isolates your biceps allowing for full range of motion without the additional involvement of your shoulder muscles – thus maximizing work done to your biceps.
Simply sit on a preacher bench and rest the back of your arms on the pad. Adjust the seat so that your armpits are in line with the top of the pad. Grab onto the bar with your hands shoulder-width apart and palms facing outward – then start to curl.
#4. Reverse Grip Rows
Reverse Grip Rows will place a greater stress and pressure on the biceps as opposed to straight rows – this makes them better at targeting the bicep muscles. Once again, isolating the biceps specifically is the best way to maximize muscle growth – making this another excellent addition to your bicep workouts.
To perform Reverse Rows, stand erect while holding a barbell with the palms facing up. Bend your knees slightly and bend at the waist (make sure to keep your back straight).Lift the barbell while keeping your torso stationary and keeping your elbows close to your body. At the top contracted position, squeeze your back muscles and hold for a second – then slowly lower the weight back to starting position.
#3. Cable Bicep Curls
Cable curls are an excellent way to take care of that deep tissue muscle fiber. Because of the constant tension from the cable – hitting that area of your biceps is a perfect way to really bulk up those muscles as you train. You can also use a rope attachment to mix up the workout and really maximize how you pump your arms up.
Make sure to slightly bend your knees to take the stress off of your back. Curl and bring your hands towards your shoulders until you reach maximum contraction of the biceps. Then slowly return to the original position.
#2. Concentration Curls
If you do this exercise while sitting, you will strongly prevent the amount of moment that goes into the execution of the exercise – one again isolating and emphasizing the bicep muscle (getting the point yet?).
While holding your upper arm stationary, curl the weight forward while contracting the biceps. Make sure only the forearms move. Continue this movement until the dumbbells are at shoulder level. Then slowly return to the original position.
#1. Barbell Bicep Curls
The classic and king to bulking up your biceps. The key to this exercise is to make sure you get the full range of motion and don’t let momentum cause you to lean back as you lift. This common mistake will prevent the biceps from truly getting the workout you want them to have. Barbell curls will allow you to lift much more weight than many of the other exercises we put on the list – allowing you to really power up those biceps with this exercise.
While standing, hold the barbell at shoulder width grip. Palms facing forward and elbows close to the torso. Curl the weights up until shoulder level and then slowly lower the bar back down to original position. Easy as pie.
Between these five exercises you should already be on the path to truly mammoth biceps. Once you start to notice the difference – feel free to show them off. Find any excuse to show off those arms you worked so hard for.
What is your absolute favorite bicep workout? Sound off in the comments below and share your thoughts. You an also share with us on Facebook or Twitter as well. Stay pumped.
How This Richard Duchon Workout Can Increase Strength & Definition
This workout from Richard Duchon can boost your gains and increase strength while also giving you great definition.
Richard Duchon is a bodybuilder, fitness model, and YouTuber with a massive following on social media. Using his platform to help others, he posts progress pictures and shares workout advice so others can get a shredded physique using his helpful techniques and tricks.
We all want that one workout that can work to boost our gains. But it can be hard to find. Too often do we struggle to piece together a good workout plan and never once think to look at professional bodybuilders or athletes for inspiration. They are living proof of what can happen when you work hard and keep a good mindset and their workouts will work. Whether you perform their workout exactly, or pick and choose between certain exercises, you can greatly influence your gains for the better.
Richard Duchon has amassed a massive following given his hard work and dedication to his body and craft. His workouts are challenging but are proof of what can happen when you put your mind to it.
Full Name: Richard Duchon
Weight
Height
Date Of Birth
185 lbs.
6’0’’
10/08/1998
Profession
Era
Nationality
Bodybuilder, Fitness Model, Social Media Personality
2010
Dutch
With the right approach to strength training, his diet, and supplementation routine, Duchon knows exactly what is required to keep his body strong and defined while also aiding in his overall lifestyle and career. This workout of his has great potential to boost your gains and will most certainly give you a body others will envy.
About Richard Duchon
Richard Duchon is a bodybuilder, fitness model, and social media personality with a massive following on social media. Born in the Netherlands, he has always been active but really only found this passion after he combined his love of shooting vlogs and fitness into creating exercise focused content. It was only matched by his shredded physique and the choice to create and share his knowledge with others became clear. Now with a massive following, he shares what he knows to help others while also making fun and engaging content worthy of following.
Richard Duchon Training Routine
This workout from Richard Duchon will see each muscle group worked on one day to really focus on building that vital strength. With some unique exercises and others being those essential staple ones, you get a really nice, well-rounded workout to target all of your needs. Also, a nice mix of compound and isolation exercises allows you to work many muscles at once while also targeting sole muscles to give you the best chance at growth. For those looking to do some cardio, sprinkle it in if you would like but really put an emphasis on strength training to keep on that muscle and see that definition.
Day #1: Chest
Exercises
Sets
Reps
Dumbbell Chest Press
3
10
Cable Chest Fly
3
10
Dumbbell Fly
3
10
Bench Press
3
8
Day #2: Shoulders
Exercises
Sets
Reps
Side Raise
3
12
Single Arm Dumbbell Overhead Press
3
10
Cable Face Pull
3
10
Lateral Raise with Hold
3
8
Front Raise
3
12
Day #3: Legs
Exercises
Sets
Reps
Lunges
3
15
Romanian Deadlift
3
10
Leg Press
3
8
Leg Extension
3
10
Walking Lunges
3
15
Calf Raise
3
12
Seated Calf Raise
3
12
Day #4: Arms
Exercises
Sets
Reps
Barbell Curl
3
10
Overhead Extension
3
10
Hammer Curl
3
10
Triceps Pushdown
3
12
EZ Bar Curl
3
10
Skullcrushers
3
8
Dips
3
8
Single Arm Pushdowns
3
10
Day #5: Back
Exercises
Sets
Reps
Seated Lat Pulldown
3
10
Seated Cable Row
3
10
Dumbbell Row
3
12
Straight Arm Rope Pulldown
3
10
Lat Pullovers
3
8
Featured Supplement For Strength & Definition
When it comes to boosting your gains and aiding in your overall training, performance, health, and wellness, it is important to have a solid supplementation routine on your shelf to aid in all things gains. Pre-workouts can give you great energy boosts and muscle pumps while protein powders can work to increase growth and recovery by pumping you with that vital protein. Other supplements like fat burners, testosterone boosters, and multivitamins can all work in their own respective ways to give you the best when it comes to aiding in training and your overall health. But for those looking to increase strength and size to see great gains to definition and that shredded aesthetic, a creatine supplement is certainly something you should try for its ability to greatly impact your look and feel.
Transparent Labs StrengthSeries Creatine HMB
Code GENIRON10 For 10% Off
Transparent Labs Creatine HMB is clean and effective for tackling all of your strength building needs. With no artificial additives or preservatives, what you get is pure creatine with added HMB for better strength.
Transparent Labs Strength Series Creatine HMB is well worth the price and is one of the best creatine products for pure creatine. It has no added artificial flavors, fillers, preservatives, or coloring, which means the body isn’t wasting energy metabolizing useless chemicals — just pure creatine. Transparent Labs creatine is infused with HMB, or β-Hydroxy β-Methylbutyrate, which has been proven to increase muscle strength and lean body mass while decreasing fat mass and boosting focus. At a good price, this is a one of the best creatine products on the market to buy for bulking.
Price: $39.00/ 30 servings
Use the promo code GENIRON10 for 10% off! Check out our individual review for Transparent Labs StrengthSeries Creatine HMB here!
Check out our list of the Best Creatine Supplements for great muscle building products!
Wrap Up
This workout from Richard Duchon is one to certainly help build strength and add to your overall definition. That shredded physique you want most requires hard work and sheer discipline, but with the right approach to strength training, nutrition, and supplementation, you are well on your way to a body others will envy. Taking advice from the pros is the best way to make this happen and Richard Duchon is no different. Give this workout a try and see what this workout can do for all your gains today.
Let us know what you think in the comments below. Also, be sure to follow Generation Iron on Facebook, Twitter, and Instagram.
*Images courtesy of Richard Duchon Instagram
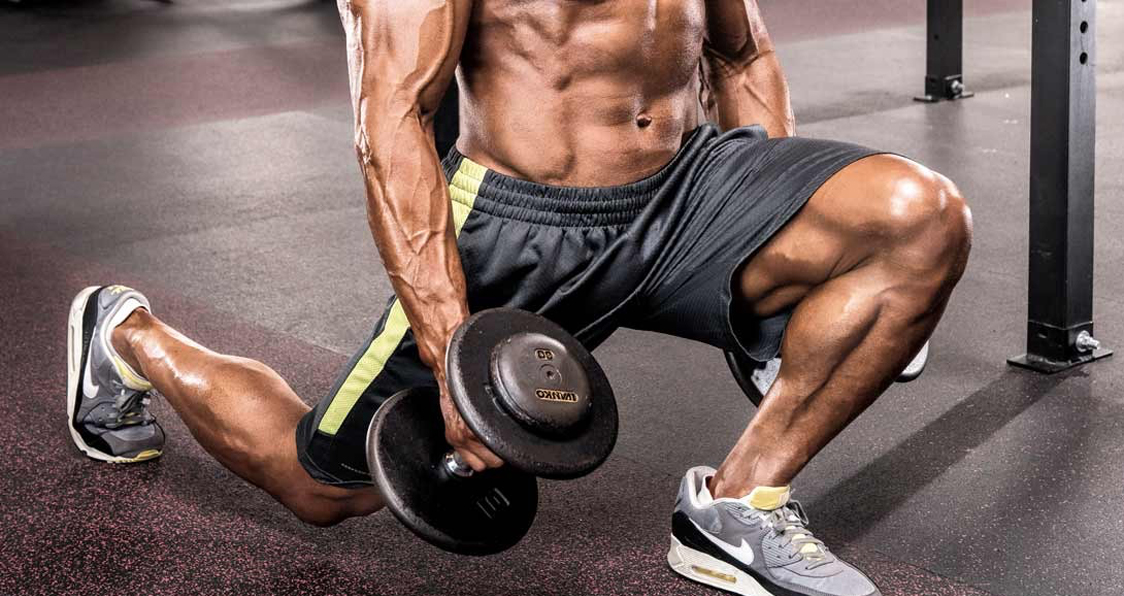
Build Shredded Legs With This Dumbbell Workout
There can be many reasons why people don’t want to use a barbell. It could be because of a back pain or your general dislike for the barbell that you want to stay away from it. It is said compound movements with a barbell are the best way to build big legs.
This is complete BS! Your muscles have no idea if you’re using a barbell or dumbbells. All they know is if you have trained them to failure. You can completely eliminate barbells and other machines from your leg workouts and still build monster wheels.
1. Goblet Squats – 3 Sets 15 Reps
Goblet squats can be a life saver if you’re suffering from a back injury. This exercise forces you to keep your back straight and hence eliminates all the tension from it. Goblet squats target your quads and will leave you limping by the time you’re done with this exercise.
Stand with your feet slightly wider than shoulders width apart. Hold a dumbbell in front of your chest with both your hands. Perform a squat until your hams touch your calves. Keep your back straight, and head and chest up.
2. Dumbbell Lunges – 3 Sets 15 Reps On Each Leg
The range of motion is the key while performing this exercise. Most people make the mistake of placing their feet way too far apart or way too close to each other. Use weights with which you can complete 30 reps in one set.
Your front knee should not extend farther than your big toe and the quad of the second leg should be parallel to the calf of the front leg while you’re at the bottom of the movement. This is the optimal position to perform dumbbell lunges.
3. Dumbbell Romanian Deadlifts – 3 Sets 10 Reps
Dumbbell Romanian deadlifts are one of the best exercises to target your hams. Using dumbbells instead of a barbell will help you increase your range of motion. Barbells can limit your motion by making you follow a straight line of movement.
Using dumbbells lets your arms free and you can follow a movement where you have the greatest amount of tension on your quads. Most people complain about lower back recruitment while using a barbell, this problem is eliminated when you use dumbbells.
4. Dumbbell Step Ups – 3 Sets 12 Reps On Each Leg
Dumbbell step ups are a complete leg buster. This exercise will set your quads on fire. If you don’t have access to an elevated platform at your gym, you can use a flat bench for this exercise.
Stand while facing the platform with dumbbells at your sides. Step onto the platform with your right foot, extend your right leg and hip at the top of the movement. Place your left foot on the platform as well. Step down with your left foot and repeat with the right leg.
5. Dumbbell One-Legged Deadlifts – 3 Sets 12 Reps On Each Leg
Dumbbell one-legged deadlifts are a unilateral exercise. Unilateral exercises are the ones which work one side of your body at a time. This can help with developing the muscles and strength on your weaker side.
One-legged deadlifts help with isolating the hamstring and establishing a mind-muscle connection. Hamstrings can be a hard muscle group to train and develop as you can’t see them in the mirror and hence it becomes harder to develop a connection with them.
Have you ever tried a dumbbells only leg workout?
Let us know in the comments below. Also, be sure to follow Generation Iron on Facebook and Twitter.
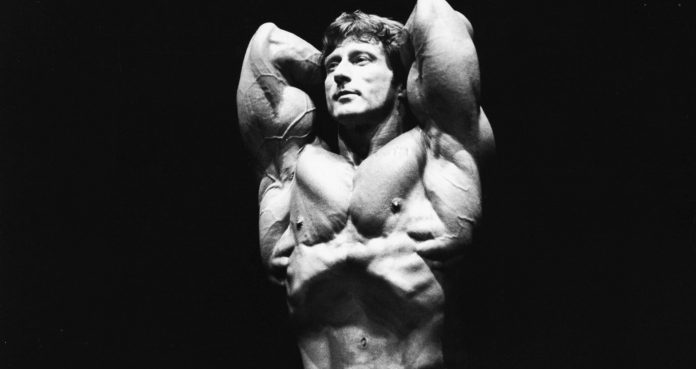
Look Like Frank Zane With These 5 Brutal Vacuum Exercises
“Here I come to save the day!”
The above quote is a catch-phrase from Mighty Mouse, a 1940’s cartoon that still has an impact to this day. The iconic character is a small mouse with big powers and an even bigger heart who… well, saves the day. So why are we writing about this on a bodybuilding site? Just as iconic as the cartoon itself, is the way Mighty Mouse was drawn, his hip to waist ratio was out of this world.
Much like many cartoon strongmen and super heroes, the over exaggerated massive chest and V-taper was truly inspiring to the concept of “mass muscle.” I remember thinking as a kid, “Can anyone have a body like that?” As builders we’re constantly striving for perfection in areas most people don’t even see. Well, we’re here to tell you that you can have that mighty mouse profile and we’ll show you how.
We know what you’re thinking, “How could I possibly have a waist like that? That’s stuff’s all genetics, I can’t change my bone structure.” Well you’re right. Barring some very painful and probably expensive surgeries you’re stuck with the hip length you have. However, it is possible to customize your workout towards attaining a more classic physique as well as getting you the classic V-shape of a Golden Era God.
The transverse muscle (TVA) is a band like muscle that runs along the sides of your midsection. It’s there to stabilize your spine and core, nature’s weightlifting belt if you will. Without a stable spine, one aided by proper contraction of the TVA, the nervous system fails to recruit the muscles in the extremities efficiently, and functional movements cannot be properly performed. The TVA and lumbar multifidus support posture and control deep breathing during power movements therefore affecting a persons cardio as well as symmetry.
Cool. Now that you know what it is how can you train it? Well, we thought that you’d never ask. Here’s the key points in learning how to vacuum your stomach.
Standing
Stand upright and place your hands on a desk (or elevated flat surface, hip height is ideal)
knees slightly bent with back humped slightly (placing weight on desk
Place your chin on your chest.
Deeply inhale and exhale sharply.
As you exhale, expand your chest and bring your stomach in as far as possible. Hold the pose but Do Not Hold Your Breath!
On your back
Lie on your back. For example while in a tanning bed or other firm surface.
Reach your arms over your head and keep your legs flat and straight.
Begin by exhaling your air.
Lift your chest and arch your back.
Draw in your stomach for seconds at a time.
Continue to try and hold your stomach in for longer and longer periods of time.
Kneeling
Begin on all fours with your shoulders vertical over your elbows and wrists, hips over your knees, and your neck in a neutral position.
Exhale, then pull your navel in as close to your spine as possible.
Weighted Dumbbell pullovers
Lie on upper back perpendicular to bench.
Flex hips slightly.
Grasp one dumbbell from behind or from side with both hands under inner plate of dumbbell.
Position dumbbell over chest with elbows slightly bent.
(Keeping elbows slightly bent throughout movement) lower dumbbell over and beyond head until upper arms are in-line with torso.
Pull dumbbell up and over chest. Repeat.
Pull down crunch
This one’s simple. Have a seat on a pull down machine and perform your best vacuum pose. Hold it while at the same time reaching up and grabbing the pull down bar. Keep your arms straight up and use your breath to slightly pull the power up and down on your inhales and exhales. Still not getting it? Check out the instructional video above.
So now that we’ve given you the building blocks to perfecting your V-shape is there anything we left out? Do you have exercises that you use to keep your symmetry on point? Let us know in the comment section below. Feel Free to respond with a picture message if you see any massive changes due to these exercises.