Tag: Workouts
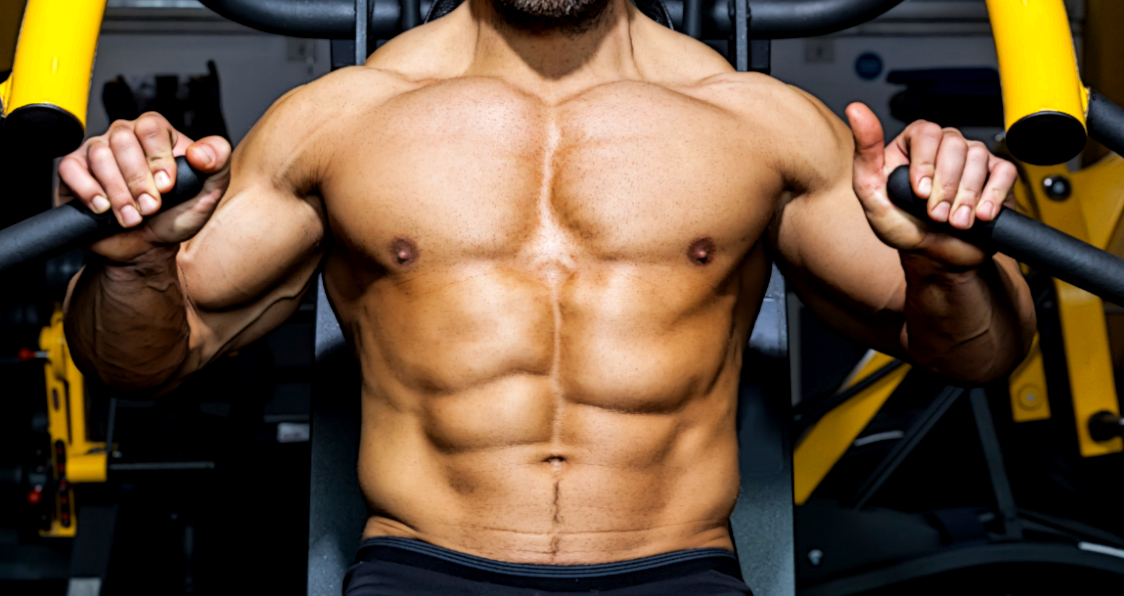
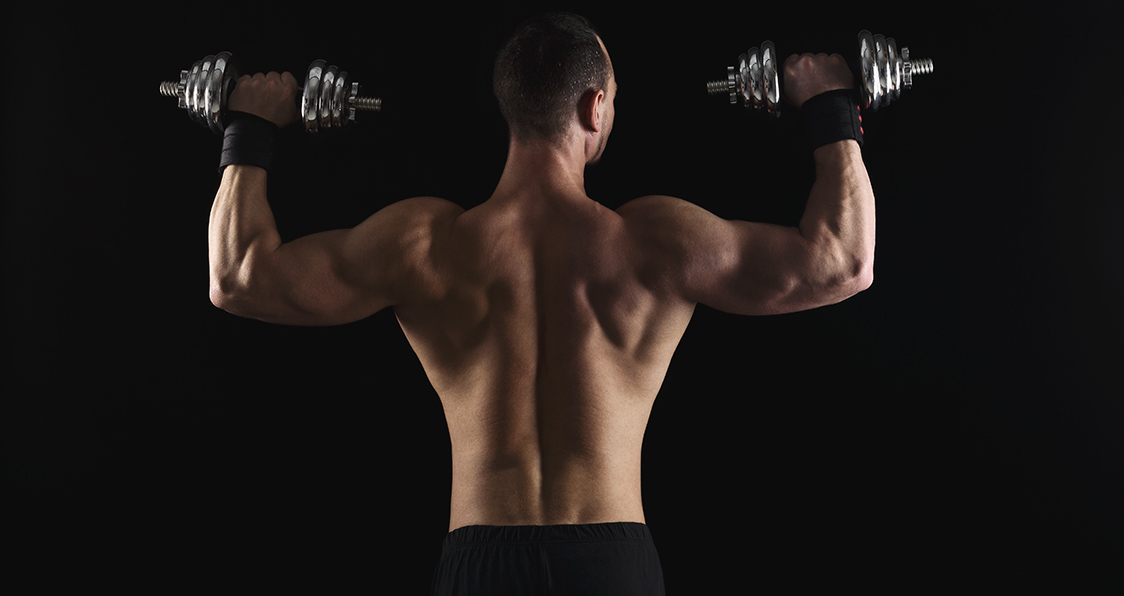
Can You Handle The Wrath Of Frank McGrath’s Workout?
The Wrath of McGrath.
Bodybuilding is all about sacrifice. If you intend on being a pro bodybuilder it means time away from your family and friends, having a strict diet and training method. Essentially what you give to the sport will be what you get out of it. You have to want it bad enough to put up with the suffering that you must endure to see meaningful progress. Everyone has to endure trials and tribulations, but no matter what issues you are faced with it must not push you off the track to greatness. Each workout must be daring and push you not just to the limit but past it.
Frank “The Wrath” McGrath is a true inspiration for any athlete to admire. He’s a man who trains hard in the gym and gives his all in his endeavor to becoming a renowned pro bodybuilder. The Canadian IFBB Pro has faced his fair share of adversity during his career. Not only has he suffered numerous training injuries, including a torn triceps muscle, but McGrath was also involved in a car accident that left him severely injured.
Few men could come back from such a situation and still have the drive to push themselves hard in the gym. But The Wrath only used his dire situation as motivation to get back into pro shape. He didn’t let his injuries hold him back, instead choosing to push himself past his limits and attain an even more impressive form than ever before.
Looking at his training regimen it’s no secret as to why he was able to fight through the pain and anguish he endured to get himself back into exceptional shape. His tough training likely gave him the mental strength to come back from injury and make a return to form. Take a look at the proud Canadian’s training program that made him into the massive, vascular beast that he is today.
Day 1: Chest
Incline Barbell Press
4 sets x 12-6 reps
Flat Dumbbell Press
4 sets x 12-8 reps
Incline Dumbbell Flyes
3 sets x 12-8 reps
Dumbbell Pullovers
3 sets x 12-10 reps
Cable Crossovers
4 sets x 15-12 reps
Day 2: Back
Wide Grips Chins
4 sets x 10 reps
Barbell Rows
4 sets x 12-6 reps
T-Bar Rows
4 sets x 12-8 reps
Underhand Grip Pulldowns
3 sets x 12-10 reps
Day 3: Off
Day 4: Legs
Leg Extensions
4 sets x 20 reps (warm-up)
Leg Press
4 sets x 20-12 reps
Hack Squats
4 sets x 15-10 reps
Lunges
3 sets x 15-12 reps
Stiff-legged Deadlifts
4 sets x 12-8 reps
Lying Leg Curls
4 sets x 15-10 reps
Day 5: Delts
Barbell Military Press
4 sets x 12-6 reps
Seated Side DB Lateral Raises
4 sets x 12-8 reps
Bent Rear Delt Lateral Raises
4 sets x 12-10 reps
Hammer Strength Machine Press
3 sets x 12-10 reps
DB Shrugs
4 sets x 12-8 reps
Day 6: Arms
Barbell Curls
4 sets x 12-6 reps
Alternating Dumbbell Curls
4 sets x 12-8 reps
Preacher Machine Curls
4 sets x 15-10 reps
Close Grip Bench Press
4 sets x 15-8 reps
Skullcrushers
4 sets x 12-8 reps
Pushdowns
4 sets x 15-10 reps
Day 7: Off
Final Thoughts
At the end of the day, one of the most important things a person can do to prevent plateaus is mix up the variations in their workout. While consistency is important, repeating the same exact workout for months or even years at a time will start to cause frustration when you start seeing less and less results.
This breakdown of Frank McGrath’s workout might be just the shot in the arm you need to start mixing things up, pushing you past your perceived limits, and into a new level of growth and strength.
Does your training program look anything like Frank McGrath’s? Let us know in the comments below and be sure to follow Generation Iron on Facebook and Twitter.
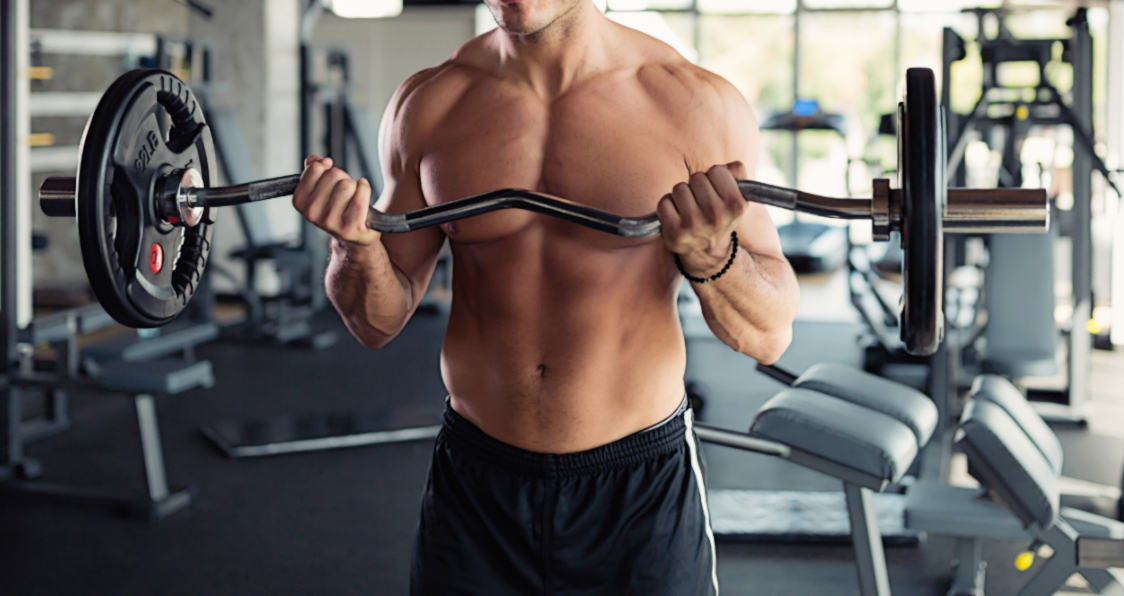
5 Exercises for Building Balanced Biceps
Developing Both Heads of the Biceps
Depending on how you train the arms, it is possible to overdevelop one head of the bicep and under develop the other.
As a result, the arms may not look full. It is not uncommon to come across individuals whose biceps look great from the side, but flat when viewed from the front.
Similarly, it is possible to build the biceps so that they look large from the front but formless from the side. The reason that this asymmetry occurs is because the two heads of the biceps are not being trained equally.
Everybody knows that the biceps brachii can be found in the upper arm, but few people are aware of the fact that the muscle has two-heads. The biceps consist of both a short and long head which, when contracted, cause flexion to occur at the elbow joint (1).
While the heads run parallel with each other, the short head runs along the inside of the upper arm. By building size in the short head, the arm will look fuller when observed from the front.
The long head meanwhile can be found on the outside of the upper arm and is most clearly seen when flexing the bicep. Considering that there is often asymmetry between the two, is it actually possible to work the heads individually and improve the balance between bicep heads?
While it is certainly possible to place more stress on a specific head, there does appear to be a certain degree of confusion as to which method is best.
There is some evidence to suggest that the type of grip used, grip width (2) and elbow positioning (3), amongst other factors, can determine which head is activated most. However, while these factors may contribute towards bicep development, often genetics will play the biggest role (4).
If you find that one bicep head is severely lagging behind and refusing to adapt, it may come down to genetics. As a result, the best method that you can adopt is to trial a number of different bicep resistance exercises and training techniques to see what brings the best results.
Resistance Exercises for Maximal Bicep Development
When it comes to bicep training, the bicep curl is the obvious, go-to exercise. However, there are a multitude of variations that can be used in order to build bicep head size.
Here are a number of powerful and effective bicep exercises for increasing mass in both the long and short head.
1) Long Head Exercise 1 – Alternating Incline Dumbbell Curl
Seen as one of the best long head exercises, the alternating incline dumbbell curl is an excellent place to start.
To safely and effectively perform this exercise, start by setting a bench on a 30 degree angle and select two dumbbells which are slightly lighter than normal.
The incline position will place more demand on the biceps and therefore you will quickly find that you cannot lift the same kind of load as you can with a standard dumbbell curl.
Lie back on the bench and start with the arms extended and hanging by the sides. This will ensure that the exercise begins with the biceps being fully stretched out.
The grip you use is entirely up to you however, it is recommended to start by using a hammer grip (palms facing each other) and switching to a supinated grip as you curl the weight up.
When using this method, think about pressing the thumb against the inner plate of the dumbbell which will make supinating the hand more challenging.
If using a supinated grip throughout, press the pinky against the inside plate of the dumbbell which will place more force through the thumb side of the bell and facilitate a greater bicep stretch.
The biggest error that is often made with this exercise (and many bicep orientated exercises in general) is moving the elbow away from the side of the body as the weight is lifted.
Imagine screwing the elbow in tightly to the ribcage as you perform this exercise to prevent this from occurring.
To add intensity, complete max incline reps before sitting upright and continuing to failure again. Finish off by standing and working to failure once more.
2) Long Head Exercise 2 – Standing Barbell Curl
Providing a narrow grip is assumed and the elbows are kept tight to the body, the barbell curl is an excellent long head isolator.
To properly perform this exercise, using a narrow grip grab a barbell and stand up tall. Push the chest up, pull the shoulders back and pin the elbows tightly to the sides.
From this position, flex at the elbow only, drive the weight upward and squeeze. Maintaining a slight forward lean from the trunk to maximize the tension going through the biceps.
Those who curl the weight up while maintaining a 90 degree angle at the elbow will fail to apply maximal stress to the biceps.
Again, thinking about the elbows, those who allow them to travel back and forth will also reduce stress from the biceps and move it on to the front delts (shoulders).
A final error often seen in the barbell curl is to keep the wrists flexed throughout the duration of the exercise or at to flex at the top of the movement.
In the same way that moving the elbow reduces bicep tension, flexing the wrists will shift the stress of the biceps and onto the forearm musculature instead.
If you struggle with this, think about letting the wrists “sag” when you grip the barbell which will prevent any wrist flexion.
3) Long Head Exercise 3 – Barbell Drag Curl
This exercise involves using either a barbell or the Smith’s machine.
From a standing position, grip the bar with the hands just outside the hips. From this position, look to drag the barbell up the body by pushing the elbows back. Continue dragging until the bar reaches the upper chest.
Because this exercise involves a restricted range of motion you may not find it to be highly effective for bicep development. However, many claim that it targets the long head effectively.
4) Short Head Exercise 1 – Preacher Curl
It is believed that to target the short head of the bicep, the elbows must be placed in front of the body.
This therefore makes the preacher curl the ideal exercise for short head development. Unfortunately, it is an exercise which is commonly performed incorrectly.
Many individuals drive their chest against the pad and place the full arm in direct contact. From there, they grab the bar with a narrow grip and allow the elbows to flair out.
As they drive the bar upward, they flex the wrists and lean backwards to facilitate the drive.
The issue with performing the preacher curl in this manner is that it once again fails to maximally activate the biceps and place a large amount of stress on the muscle.
For an efficient preacher curl, start by standing – this means raising the pad to chest height. Place only the lower portion of the tricep on the pad rather than the full upper arm.
The elbows should be approximately shoulder width apart but the hands should grip the bar slightly wider than shoulder width. Additionally, a slight backward trunk lean should be established.
As you contract the biceps, lean forward with the trunk to maintain bicep tension. As with the previous exercise, utilize a wrist “sag” if necessary to prevent the wrists from flexing excessively.
A number of individuals prefer to stop slightly short of full extension, however, working to a full range of motion is highly recommended to maximize the amount of stress placed on the muscle (5).
5) Short Head Exercise 2 – Spider Curl
Finally, the spider curl is an excellent exercise, not only for short head development, but also to ensure that you use a full range of motion. It is also practically impossible to “cheat” with the spider curl.
For the exercise, set up facing a preacher bench. Adjust the pad so that the supports of the bench don’t restrict movement. Lean over the top of the bench and let the arms hang down.
From that position, the movement is then exactly the same as the preacher curl.
As with the incline dumbbell curl, the body position means that you are likely to lift a lighter load than normal.
To add intensity to the spider curl, have a training buddy who can help you complete a number of forced repetitions after you have reached absolute muscular failure.
Final Word
At the end of the day, it makes very little difference knowing whether or not it is possible to fully isolate either bicep head. For optimal development, it makes sense to hit the biceps from a multitude of angles anyway.
Therefore, to grow full looking arms, consider using a number of the aforementioned bicep exercises while taking care to develop both the long and short head equally.
For more news and updates, follow Generation Iron on Facebook, Twitter, and Instagram.
References:
1-Tiwana, Manpreet S.; Varacallo, Matthew (2019), “Anatomy, Shoulder and Upper Limb, Biceps Muscle”, StatPearls, StatPearls Publishing, PMID 30137823
2-Marcolin, Giuseppe; Panizzolo, Fausto Antonio; Petrone, Nicola; Moro, Tatiana; Grigoletto, Davide; Piccolo, Davide; Paoli, Antonio (July 13, 2018). “Differences in electromyographic activity of biceps brachii and brachioradialis while performing three variants of curl”. PeerJ. 6. doi:10.7717/peerj.5165. ISSN 2167-8359. PMC 6047503. PMID 30013836.
3-Oliveira, Liliam F.; Matta, Thiago T.; Alves, Daniel S.; Garcia, Marco A.C.; Vieira, Taian M.M. (March 1, 2009). “Effect of the shoulder position on the biceps brachii emg in different dumbbell curls”. Journal of Sports Science & Medicine. 8 (1): 24–29. ISSN 1303-2968. PMC 3737788. PMID 24150552.
4-“Genes critical for muscle development and function in Caenorhabditis elegans identified through lethal mutations”. The Journal of Cell Biology. 124 (4): 475–490. February 2, 1994. ISSN 0021-9525. PMC 2119919. PMID 8106547.
5-Baroni, Bruno M.; Pompermayer, Marcelo G.; Cini, Anelize; Peruzzolo, Amanda S.; Radaelli, Régis; Brusco, Clarissa M.; Pinto, Ronei S. (2017-8). “Full Range of Motion Induces Greater Muscle Damage Than Partial Range of Motion in Elbow Flexion Exercise With Free Weights”. Journal of Strength and Conditioning Research. 31 (8): 2223–2230. doi:10.1519/JSC.0000000000001562. ISSN 1533-4287. PMID 27398917.

The Pros and Cons of the Push, Pull, Legs Training Split
The pros and cons of push, pull, legs.
Everyone is looking for the perfect training split that will completely revolutionize their gains and bring about the best results. For each individual the results will vary, but realistically there’s no wrong way to split your training. Most training splits are designed based on the individuals ability to train on a consistent basis.
Some people love total body training, especially if they’re strapped for time. Some individuals enjoy breaking up their training on two specific body parts per training session. Really, it’s all subjective and a matter of preference.
That said, each training split has its own benefits and drawbacks. For instance, a popular training split like push, pull, legs is one that many athletes conform to. While there may be some great benefits to this training method, there are also some drawbacks to look out for in order to get the most out your training.
Pro
One great thing about the push, pull, legs program is the emphasis on training specific muscle groups. Push days consist of training all the pushing muscles including the chest, triceps, and shoulders. Pull focuses on biceps, back and is usually paired with ab work as well. Leg day consists of training the collective lower half.
This kind of split allows for some very specific focus and in turn some great recovery time for every targeted muscle group. Because you’ll be working antagonist muscles every other day, it allows the muscles from the previous day to get some adequate rest and recovery, a major key to building quality muscle.
Con
Sounds great right? What could be the down side to training in this manner? Well, while the split still allows you to train the entire body, depending on the intensity of your training session and your lacking body parts, the split may not attack your weak points nearly as much as they should in order to allow them to improve.
For example. If you have lacking in the leg department, most of the split is focused on the upper body. The two days spent training the upper body is necessary to overall growth, but with one day to focus on your lagging legs, it can throw everything off. The split would require modification in order to give your weak points the attention that they need.
This can be compounded if your weaknesses are in multiple areas including the legs, biceps, back and triceps for example. That means additional time would be needed to be put on each aspect of the split. If the split isn’t handled properly you could easily burn yourself out, leaving little time for recovery.
Every training split is going to have its pros and cons. That’s not to say you shouldn’t be using the push, pull, legs program. It’s obvious that the training split has offered great success to many athletes, so it’s definitely something to be experiment with.
For more news and updates, follow Generation Iron on Facebook, Twitter, and Instagram.
Managing Editor at Generation Iron, Jonathan Salmon is a writer, martial arts instructor, and geek culture enthusiast. Check out his Instagram, Twitter and Facebook to keep up with his antics.
The Ultimate Workout To Build Ripped Hamstrings
Build Jacked Hamstrings With This Workout
Want to know what ripped hamstrings look like? Imagine a few steel chains running under the paper thin skin at the back of your legs. These chains are what are used to lower and raise your torso when you bend forward to touch your toes or in exercises like the deadlifts.
Hamstrings can be a stubborn muscle group to develop. It’s hard to establish a mind-muscle connection with the hamstrings as they’re at the back of your legs and you can’t look at them in the mirror while training.
Lying Leg Curls – 4 Sets 15 Reps
You’ll be performing a combination of isolation and compound exercises in this workout to smoke your hams. The compound lifts help in building strength and size of the muscle and the isolation movements improve the conditioning.
You’ll start off with the lying leg curls (an isolation exercise) to activate and engage your hams. The concentric (upward) movement should be explosive, and the eccentric should be slow and controlled.
Sumo Squats – 3 Sets 12-10-8 Reps
The sumo squats target the hamstring and abductors primarily. Stand with your feet placed more than shoulder-width apart and point your toes outwards. You should go as deep as possible without leaning forward to target your hamstrings optimally.
If you have trouble performing the barbell sumo squats, you can use a dumbbell. Stand on an elevated platform (like aerobic steps) and take the same stance as you would during the barbell squats.
Hold a dumbbell with both your hands while your arms are fully extended towards and perpendicular to the floor. Your arms will remain in the same position throughout the exercise.
Dumbbell Deadlifts – 3 Sets 12-10-8 Reps
Remember the steel chain reference at the beginning of the article? You need to bring it in practice in the dumbbell deadlifts. Place your toes on quarter plates to better isolate and recruit your hamstrings.
Maintain a slight bend in your knees and lower your torso by bending at your hips while pushing them back and focusing on your hamstrings. Keep your back arched and go as low as you can without recruiting your lower back.
Supersets
Standing Hamstrings Curls – 3 Sets 20-15-12 Reps
Standing hamstrings curls are an isometric exercise which helps in building conditioning and fixing any muscle imbalances. If you don’t have access to a standing hamstring curl machine, you can use a leg extension machine.
GHD Hyperextensions – 3 Sets 10 Reps
Superset the standing hamstrings curls with the GHD hyperextensions. The GHD hyperextensions were brought into the mainstream by CrossFit athletes and are an incredibly effective exercise to annihilate your hamstrings.
Barbell Hip Thrusts – 3 Sets 12-10-8 Reps
Barbell hip thrusts are one of the most underutilized exercises when it comes to hamstring training. Although the hip thrusts can help you in building meaty hams, you should avoid them if you have an impending lower back injury.
Place your upper back on a flat bench while you have a barbell placed across your groin. Use padding around the barbell to avoid it from digging in when you thrust. Hold and contract your hams at the top of the movement for a couple of seconds before returning to the starting position.
Header image courtesy of Envato Elements
Do you train your hamstrings and quads on the same day? Let us know in the comments below. Also, be sure to follow Generation Iron on Facebook and Twitter.

Kai Greene’s Top 10 Training Tips
Kai Greene Workout Special – GET BIG!
Training for bodybuilding means having patience, dedication, and a true desire to want to change your physical form. That also means having a strong mental gain to go along with your physical prowess. The mental game is what sets an amateur apart from a pro. It many fields, athletic or otherwise, the mental game can be the absolute key to either victory or defeat. No one knows this better than Kai Greene.
But not everyone is going to have a powerful metal game right out of the gate. For many people it’s not as simple as waking up one morning with an epiphany. Sometimes it takes the wisdom of a mentor, the ideologies of a seasoned veteran to bolster your confidence and boost not only your mental game, but offer adequate knowledge to the mechanics of your physical game as well.
Well if you’re an avid bodybuilding fan then you should already know the name Kai Greene. The talented bodybuilder has a wealth of knowledge that few athletes possess and now he’s willing to share it to the masses in the hopes that it will improve everyone’s bodybuilding approach.
Kai Greene’s Current Stats
Nickname: The Predator, Mr. Getting It Done
Division: Men’s Open (currently not competing)
Birth date: 7/12/1975
Height: 5’8″
Competition Weight: 248 lbs
#1. First Things First – Mind Muscle Connection
The number one factor in training is the mind-muscle connection. Practicing your poses between sets will eventually have your mind and muscles speaking the same language. Kai used to do pushups everyday until he reached 100 a day. This method really helped him to connect his mind with the pecs because of the continuous resistance he put on the muscle group day in and day out.
The iso-tension effect of flexing the muscles between sets can help to hit the muscle fibers that a set may miss. This can help to target those muscle fibers in the next set. Posing isn’t just something you do on a stage in front of an audience. It should be part of your bodybuilding program in order to really hit all areas of a given muscle group.
#2. Reps, Reps, Reps
In regards to reps, Kai rarely goes under 10 and may do more than 20 depending on how he’s feeling on that particular day. Kai never tries to limit himself as far as rep ranges are concerned. Like mentioned before, he prefers to go by feel and let his muscles determine how many reps they can handle. Sometimes letting the muscles call the shots rather than the mind can yield even further growth as the muscles can take even more punishment than your mind can imagine.
#3. No Half Assing
Speaking of reps, when it comes to contracting and stretching the muscles, Kai avoids half reps. Rather than focus on getting the weight up it’s all about getting that perfect stretch at the bottom of the lift while getting the best contraction possible at the top of the lift. Stretch, hold, and squeeze. There might be an allure to hitting that higher weight – but you’re cheating yourself out of real hypertrophy.
#4. The Cure For Lagging Calves
Where training calves are concerned, Kai alternates his heels either in or out during calf raises as a means of attacking both the inner and outer parts of the calves. Rather than doing separate sets, Kai pauses during the set and changes the position rather than rest. He will alternate this position with pauses each time as a means to really thrash every part of the calf.
#5. Search Your Feelings
If you want to be able to really hit a muscle correctly then you have to go by feel. As Kai puts it, the weight is simply the tool that you utilize. Focusing on lifting the weight itself makes no sense. Just like it was stated before – you should be focusing entirely on the muscle being hit. Don’t focus on the weight! It’s important to know your body. To understand it. This is essential if you want to reach real size on a pro level.
6. It’s all about hypertrophy – not amount of weight.
It’s not about lifting more weight. It’s about bodybuilding not weightlifting. Bodybuilding is more concerned with contracting the muscles against consistently greater amounts of resistance to achieve hypertrophy. The number of weight is not important. The contraction and hypertrophy is. If you have to drop the weight to make better movements, so be it.
7. Warm ups are key.
A great, high paced warm up before hitting your chosen body part will help to give you great conditioning, to maintain lower body fat throughout the year and also helps with recovery time in between sets. This is an essential component to Kai’s workout regimen. The body will get used to this pace and help keep the body firing on all cylinders.
8. We know you hate running but…
Cardiovascular training should be maintained all year around in order to maintain a leaner physique throughout the year. It will also help the body operate efficiently under oxygen deficiency. Shorter rest periods will also help to improve the body’s functionality and conditioning through a hard workout.
9. Leg day, all day.
For Kai Greene – if he’s training his legs that’s the only muscle group he focuses on for the day. Why? Because he can’t physically muster up the power train anything else. That’s the key tip here: when you train your legs you should be putting them through so much hell that you can’t do anything else. Kai Greene has some of the best legs in the IFBB because in between exercises he is dead on the floor. A full blast of intensity from start to finish.
10. It’s all on you.
You’re responsible for your own success. You can’t allow yourself to rely on anyone or anything else to build your success. It’s the willingness to sacrifice and to motivate yourself that will lead you to the body that you seek. Many people focus on end results, but the real goal is to motivate yourself day in and day out to get into the gym and get to work. There’s no coach, no training partner, no well wisher that’s going to push you to train. It has to be on you and the passion you have for building what you perceive as the ultimate physical form.
Here below is a more detailed breakdown on his workouts, diet and supplementation.
On Monday’s, it’s Chest and Calves
Kai Greene performs 6 exercises in one day, for a total of 3 to 4 sets and 15 reps. He also adds calves into this routine with each exercise being performed for a minimum of 4 sets and 10-15 reps.
1. Full Bench Press (3 sets, 12 reps)
2. Dumbbell Fly (3 sets, 12-15 reps)
3. Arm Pullover (3 sets, 15 reps)
4. Decline Bench Press (3 sets, 15 reps)
5. Seated Calf Raise (4 sets, 15 reps)
6. Standing Calf Raise (4 sets, 15 reps)
On Tuesday’s, it’s Shoulders and Forearms
On Tuesday, Kai focuses on his shoulders and forearms workout routine. There are 8 exercises within Greene’s shoulders and forearms routine.
1. Arnold Press (3 sets, 10-12 reps)
2. Lateral Raise (3 sets, 10-12 reps)
3. Neck Press (3 sets, 10-12 reps)
4. Dumbbell Front Raise (3 sets, 10-12 reps)
5. Shrugs (3 sets, 15 reps)
6. Reverse Curls (3 sets, 8-12 reps)
8. Hammer Curls (3 sets, 13-15 reps)
On Wednesday’s, it’s Back day
Kai performs a back routine that focuses on 4 exercises. Every set is around 12-15 reps.
Lats Pulldown (3 sets, 12-15 reps)
2. Barbell Pullover (3 sets, 12-15 reps)
3. Seated Cable Rows (3 sets, 12-15 reps)
4. Bent-Over Barbell Rows (3 sets, 12-15 reps)
On Thursday, it’s Leg day
Kai Greene performs his bodybuilding leg routine for 6 exercises. Each exercise is performed for 3 to 4 sets and 10-15 reps.
1. Squats (3 sets, 10-12 reps)
2. Lying Leg Curls (3 sets, 10-12 reps)
3. Deadlifts (3 sets, 10-12 reps)
4. Lunges (3 sets, 10-15 reps)
5. Seated Calf Raise (4 sets, 10-15 reps)
6. Standing Calf Raise (4 sets, 10-15 reps)
On Friday, it’s Arm day
On Friday, Greene performs an arms workout routine by doing 6 different exercises varying between 10-15 reps.
Hammer Curls (4 sets, 12-15 reps)
2. Reverse Curls (4 sets, 12-15 reps)
3. Preacher Curls (4 sets, 10-12 reps)
4. Bicep Curls (4 sets, 10-12 reps)
5. Dumbbell Kickbacks (3 sets, 12-15 reps)
6. Triceps Pulldown (3 sets, 12-15 reps)
Saturday is cardio day
On Saturday, Greene performs an hour long cardio session on the stair master.
Kai Greene Diet
Kai Greene follows a strict bodybuilding diet that on and off season that comprises of 1.8 grams of protein for each pound of his body mass and 0.5 grams of healthy fats per pound of body weight. He takes his pre-workout at least thirty minutes before starting the workout. And he finishes off his workouts with a protein shake.
Here is Kai Greene’s diet:
Meal 1
6 ounces of grilled chicken
6 egg whites
¼ shredded cheddar cheese
Meal 2
2 scoops of Chocolate Protein Powder
2 cups of Almond Milk
Meal 3
6 ounces of grilled steak
1 teaspoon Flaxseed Oil
2 cups of Brown Rice
Meal 4
6 ounces of boneless Chicken Breast
4 stalks of Asparagus
1/3 cup of quinoa
Meal 5
7-ounces of Wild Salmon
2 medium-sized yams
5 ounces of baked potato
Suppplements
Kai Greene strictly uses the following supplements to help propel his gains:
Find Kai Greene’s tips helpful? Let us know in the comments and forums. Also, be sure to follow Generation Iron on Facebook and Twitter.

Avoid These Training Mistakes To Get The Most Out of Your Workouts
The Mistakes To Avoid In Your Workouts
As much as you would like to have perfect workouts, small mistakes can deprive you of that happiness, especially if you’re a beginner. Most people make the mistakes listed in the article and by doing so leave gains on the table.
Read the article and carefully critique yourself if you’re making the mentioned errors. You might be making the mistakes without realizing it. You’ll notice a substantial improvement in your physique over time by fixing these errors.
Quantity Over Quality
Some people make the mistake of lifting too heavy when they should be focusing on their form. Your muscles don’t know how much weight is on the bar, your ego does. Leave your ego on the door when you enter the gym. Ego lifting does nothing more than increase the chances of injury in the gym.
Focus on your form and contracting your muscles with every repetition. You should also have a strong mind-muscle connection during your workouts. Achieving a pump can be a good indicator if your mind-muscle connection and muscle contractions are on point.
Letting The Intensity Drop
Many people let all their hard work go in vain by letting the intensity drop after they are done with a set. If your goal is to lose weight or build muscle mass, you should keep the intensity of your workouts as high as possible.
Give yourself a deadline and complete the workout within the specified time. Don’t waste the time between sets by using your phone or talking to people. Use the rest time to pose and stretch out the muscle.
Unstructured Training
Some people follow a vanilla training program which isn’t designed for their body. Your workout program should cater to your strengths and weaknesses. You should focus on building up your weaknesses while polishing your strengths to build a symmetrical physique.
Thoroughly analyze your body and look for lagging muscle groups. Design your training so it follows a structured approach to all your muscle groups. You’ll see your weaknesses disappear and aesthetics improve as you follow a customized training plan.
No Warm-Ups Or Cool-Downs
Many people start working out as soon as they hit the gym and walk out right after their last exercise. You are leaving gains on the table by not giving your body the proper warm-up and cool-down.
Prime your muscles for your workout session by stretching them out and doing a couple of lightweight warm-ups. Your muscles are filled with lactic acid and many other toxins after a workout and you can flush them out with a cardio session or foam rolling.
No Tracking
It’s incredibly important to set goals before you start training. Starting training without a goal is like leaving your home without a pre-determined destination. Once you have a goal, write it down on paper and track your progress weekly to ensure you’re heading in the right direction.
Track your body measurements, workouts, and how much weight you use on certain exercises. If you’re improving in all the aspects, keep going or otherwise make the necessary adjustments.
Header image courtesy of Envato Elements
Are you making any of these mistakes? Let us know in the comments below. Also, be sure to follow Generation Iron on Facebook and Twitter.
Build Yoked Traps With This Workout
Workout For Building Mountain-Like Traps
Although the traps or trapezius muscles are the top-most muscles on the body, they are also one of the most overlooked muscle groups. Yoked traps can add to the overall aesthetics of your physique and can make you look stronger.
Most people train their trapezius muscles by doing a couple of exercises at the end of their shoulder workouts. In this workout, we’ll focus primarily on the traps so that they look like a couple of mountains rising out the top of your shoulders.
Dumbbell Upright Rows – 3 Sets 12-10-8 Reps
Dumbbell upright shrugs are an incredible exercise to build the size in the traps. Most people make the mistake of using momentum by swinging back and forth to lift the dumbbells. Doing so takes the tension off the traps.
Make sure you stretch out your traps at the bottom of the movement to recruit all the muscle fibers. Prefer dumbbells over a barbell in the upright rows as you can get a better range of motion.
Dumbbell Shrugs – 3 Sets 12 Reps
Shrugs are a staple in a trap workout. While shrugs are one of the easiest exercises to perform, most people screw up their form by lifting heavier weights than they can handle. Grab a dumbbell in each hand extended at arm’s length with a slight bend in your elbows.
Lift up your shoulders explosively with an aim to touch your ears with your shoulders. Return to the starting position with a slow and controlled movement. Keep your neck and back straight throughout the exercise and don’t use momentum by jerking at your knees.
Superset
Farmer’s Carry – 3 Sets 12 Steps on Each Side
Farmer’s carry is a compound movement and can also help in building overall strength and muscle mass. Grab a heavy dumbbell in each hand and walk around in the gym. Focus on building the tension on your traps.
Rack Deadlift – 3 Sets 12 Reps
Deadlifts are yet again a compound exercise which can add a lot of volume to your back. We limit the range of motion of the deadlifts in this workout to focus primarily on the trapezius muscle.
Machine Shrugs – 3 Sets 15 Reps
You need the right balance between the compound and isolation exercises to build monstrous traps. Machine shrugs are an isolation exercise which can help in improving the conditioning of the traps.
If you don’t have access to a machine shrug machine at your gym, you can use a shoulder press machine by standing on the seat and grabbing on to the handles. Being creative inside the gym can take you a long way.
Behind-The-Back Barbell Shrugs – 3 Sets 12-10-8 Reps
Behind-the-back barbell shrugs are different as compared to the orthodox barbell shrugs. You should consider lifting comparatively lighter weights as it’ll be harder to maintain balance while performing the exercise with a barbell behind your hamstrings.
Performing the behind-the-back barbell shrugs will target the front side of your traps. With the barbell shrugs, you’ll have trained your traps from all the possible angles in this workout.
Header image courtesy of Envato Elements
Which is your favorite muscle group? Let us know in the comments below. Also, be sure to follow Generation Iron on Facebook and Twitter.

4 Reasons Why The Clean-Reverse Lunge Will Perfect Your Legs
Beyond the squat.
We’ve touched a lot on how leg day is perhaps the most dreaded day in a bodybuilder’s workout schedule. It’s rough, it’s tough, and it can be draining if you’re training correctly. It’s a day that’s meant to separate the men from the boys and can be a truly taxing day on the body. But a bodybuilder doesn’t look at the hard days as something to avoid. Instead, a bodybuilder seeks out the tougher times and uses them as the key to making further improvements to their bodies.
The rule of thumb for leg day is that squats are the key exercise to getting your legs as powerful as possible. It’s a notion that rings true, that’s why everyone is adamant about including the king of exercises into a leg program. But if you want to make the kind of improvements you need to build superior size and definition in your legs, then squats can’t and won’t be the only exercise that’s integrated into your routine.
The Clean-Reverse Lunge is great exercise that can be extremely beneficial to giving you some great leg development. Besides adding variety to your exercise, this exercise can offer the user a number of great improvements to their physique, technique, and form.
So why should you start doing the clean-reverse lunge? Well here are four reasons that could convince you to add this exercise to your workout.
Fixes Imbalances
As a bodybuilder, symmetry is a very important aspect of creating an aesthetic physique. When performing certain exercises like the squat or barbell bench press, compound movements, imbalances can occur if one side is doing more work than the other. The clean-reverse lunge is great because it can fix those imbalances not only in the legs, but the core and upper back as well.
Strengthens Upper Back
Speaking of which, this exercise is also great for strengthening the upper quadrants of the back. By holding the bar in the clean or front squat position you engage your upper body tremendously with this movement. When performing the actual lunge, the time in which your body is under tension ultimately will require you to have good posture which improves overall upper body strength – including your lats and traps. The improved posture will also translate to improving your deadlifts as well.
Strengthens Core
The exercise can also be great for improving your core strength as well. While holding the barbell in the clean or front squat position, your abs will be getting a phenomenal workout. For the same reasons that make the squat such an awesome exercise, the clean-reverse lunge is an exercise that targets multiple muscle groups, not only improving your legs, but the entire body as well.
Knee Friendly
For many people who resent leg day the biggest complaint is that the workouts that they’re performing are killing their knee joints. It’s hard to get through a rough exercise if your knees are racked with pain. The movement of the clean-reverse lunge allows for the shins to remain vertical which takes a great deal of stress off of the knees. It’s an exercise that promotes quad development, but not at the costs of destroying your knees.
Are you a fan of the clean-reverse lunge? Let us know in the comments below and be sure to follow Generation Iron on Facebook and Twitter.

Build Up Your Abs With This Core Thrashing Circuit
How To Build Your Abs Using A Core Circuit.
If your training goals consist of building solid slabs of muscle while chiseling away at unwanted body fat in the process, the use of high intensity bouts of conditioning needs to be an absolute cornerstone in your aesthetics programming. This is especially true for tightening your core.
While there are too many types of conditioning methods circulating the industry to keep track of, one attribute that many lack is intensity. Want to get the most out of your conditioning? Try getting after it when your body and mind are close to the point of absolute exhaustion at the tail end of a training session. This is where real gains are made, and the real athletes are separated from the soft pretenders.
Not only will maximally exerted conditioning sessions skyrocket your metabolic rate, they will help you achieve a higher level of testicular fortitude in the process, building a foundation of pride and accomplishment that follows you through whatever path you choose to follow.
LOADED CARRIES
There is no doubt that the traditional farmers carry is a great way to teach and develop proper shoulder and trunk alignment under some heavy ass loads that require concentrated effort to move, let alone execute with pristine form. While the staple carry will always have its place in conditioning programming, slight variations of the loaded carry can help emphasize a movement pattern of muscle group being trained through the addition of direct and muscle specific conditioning.
If you want to be absolutely sure to thrash your shoulders, core and hips simultaneously while squeezing every available ounce energy out of your body, putting the final nail in your training day coffin, the cross body carry (CBC) is a powerful variation of the loaded carry.
Performing the cross body carry paired with the static push up hold has the ability to generate a huge amount of metabolic stress through the shoulders and core, while increasing your heart rate and exertion to near maximal levels.
THE SUPERSET
Executing the cross body carry followed by a violently tensioned static push up hold at the tail end of your upper body emphasized training days will leave your shoulders trembling, your core on fire, and your eyes searching for the nearest garbage can in case your lunch is coming out for an encore appearance.
To see what you’re really made of, minimize rest periods while using near-maximal loads for the given time intervals. A good starting weight will be holding 75% of your body weight in the bottom hand and 50% in the hand positioned overhead. If this six-minute addition to your upper body-training day doesn’t leave you on the ground in sheer exhaustion by the last round, buck up and go heavier next session..
KETTLEBELL CROSS BODY CARRY
COACHING POINTS- CBC
Choose loads that are near maximal while still keeping your spine and shoulders in a neutral position at all times..
Use a slightly heavier load in the bottom hand- Challenge yourself! Start off with a load of 75% of your bodyweight in your bottom hand and 50% in your hand positioned overhead..
Assume a slow and steady walking speed that can be maintained throughout the set..
Shorten your stride length. Think one foot directly in front of the other keeping your feet well under your center of gravity..
Alternate the left and right hand positions for each set you complete. Do not switch your hand positions mid set while you are on the clock!
PUSH UP ISO-HOLD
COACHING POINTS- PUSH UP HOLD
Start in quadruped position and activate your core by maximally squeezing your abdominal wall and upper extremities..
Prep your shoulders by stabilizing your shoulder blades down and back, externally rotating the shoulder joint..
One leg at a time, step back and place feet at shoulder width apart while squeezing your body as hard as you possibly can to maximize full body tension..
Hold maximal tension in your glutes, core and shoulders simultaneously..
Maintain maximal tension for the duration of the hold, and remember, if you aren’t shaking you aren’t really generating that much tension..
PROGRAMMING
This conditioning superset is ideal for a tag on for any upper body emphasized training day. If you feel like you have a little fuel left to burn before shooting down that $8 gluten free smoothie of yours, grab some KB’s and get after it. The first time through, use the programming parameters below. From there, it’s in your hands! Get as crazy as your body, or mind, will allow!
1A KB CROSS BODY CARRY 6 sets / 20 seconds / 10 seconds rest
1B PUSH-UP ISO-HOLD 6 sets / 20 seconds / 10 seconds rest
*Note that for the CBC, each set will alternate arms in the up and down position. Ex. set 1 right arm up, left arm down to the side, set 2 left arm up, right arm down to the side
Dr. John Rusin is not your run-of-the-mill physical therapist. His innovative vision and knowledge brings together high-performance strength and hypertrophy programming with cutting-edge, pain-free training methodology. With more than a decade of elite level training experience and advanced degrees in both exercise science and physical therapy, Dr. Rusin develops performance, regeneration, and aesthetics programs for some of the world’s best power athletes, NFL and MLB athletes, Gold-Medal Olympians, competitive powerlifters and bodybuilders.
6 Best Exercises For Building Boulder Shoulders
Build Broad Shoulders With These 6 Exercises
“Broad shoulders don’t look nice,” said no one ever. Shoulders can be one of the hardest muscle groups to develop. Only a few people follow the right training routine to achieve big shoulders.
You need to follow a holistic approach in your training to achieve shoulders which look like massive boulders. Building round and big shoulder take much more than performing a few shoulder presses.
Arnold Presses
Arnold presses are one of the best shoulder exercises for overall shoulder development. Named after the Governator himself, the exercises can help in building round shoulder caps which look like the top of football helmets.
Sit on a chair while holding a dumbbell in each hand with a supinated (palm facing inwards) grip. At the beginning of the movement, hold the dumbbells at your shoulder level while keeping your elbows bent.
Rotate your arms as you lift the dumbbell over your head. Your palms should be facing forward at the top of the movement. Rotate your palms to the starting position as you lower the dumbbells.
Dumbbell Front Raises
The dumbbell front raises primarily work the anterior deltoids. The exercise helps in developing the separation between the chest and shoulders. Don’t make the mistake of using momentum by swinging back and forth to lift the dumbbell while performing the front raises.
Hold a dumbbell in each hand at your sides extended at arms length. Your palms should be facing your thighs at the starting position. Elevate your right arm while maintaining a slight bend in your elbow until it’s parallel to the floor. Return to the starting position and repeat with your left arm. Alternate between arms for the recommended reps.
Leaning Cable Side Lateral Raises
Using cables in your workout helps isolate your muscles which can build definition and conditioning. Side lateral raises work the medial delts. Stand beside the cable pulley machine so that your right arm is next to the pulley machine.
Hold the D-bar attached to the low pulley with your left arm. Lean toward your left side and elevate your left arm until it is parallel to the floor. Return to the starting position and repeat for the recommended reps. Repeat on your right side.
Seated Smith Machine Presses
Using a smith machine gets you the best of the isolation and compound movement worlds. Smith machine presses work the medial deltoids while keeping constant tension on your shoulders.
Place a chair under the smith machine bar so that anterior delts are directly under the barbell throughout the movement. Maintain a full range of motion to get the best results while performing all the exercise mentioned in the article.
Chest Supported Dumbbell Rear Delt Raises
Rear deltoids are one of the weakest muscle groups for most people. Since your rear delts are a stubborn muscle group, performing the exercise on an incline bench adds an isolation aspect to better target the muscles.
Adjust the incline bench so that it is forming a 60-degree angle with the floor. Grab a dumbbell in each hand with a supinated (palms facing inwards) grip extended at arms length. Elevate the dumbbells to your sides while maintaining a slight bend in your elbows until they are parallel to the floor. Repeat for the recommended reps.
Barbell Shrugs
Barbell shrugs work your trapezius muscles. Traps are a major muscle group which covers most of the upper back and the posterior of the neck. Shrugs are one of the easiest exercises to perform and yet many people do them wrong.
Hold the barbell with a shoulder-wide pronated (palms facing inward) grip. While maintaining a slight bend in your elbows, lift your shoulder as high as you can without using jerking. Hold at the top of the movement for a couple of seconds before returning to the starting position.
Which is your favorite shoulder exercise? Let us know in the comments below. Also, be sure to follow Generation Iron on Facebook and Twitter.