Tag: Workouts
Get Super-Strong with The Best Powerlifting Exercises + Workout
Powerlifting is all about getting strong in the squat, bench press, and deadlift. Between them, these three exercises test and develop your entire body. As such, powerlifters are among the strongest people on the planet. Many famous strongman competitors started as powerlifters, and some continue to compete in both disciplines.
Most gymgoers are familiar with squats, bench presses, and deadlifts and do them as part of their leg, chest, and back workouts. However, these movements are the priority in powerlifting, and all other exercises are secondary, chosen to improve their performance.
In this article, we take a look at the squat, bench press, and deadlifts and reveal the best accessory exercises you can use to increase your strength in these key lifts. We’ve also got a powerlifting-inspired training program for you to try.
Powerlifting Exercises – The Big Three
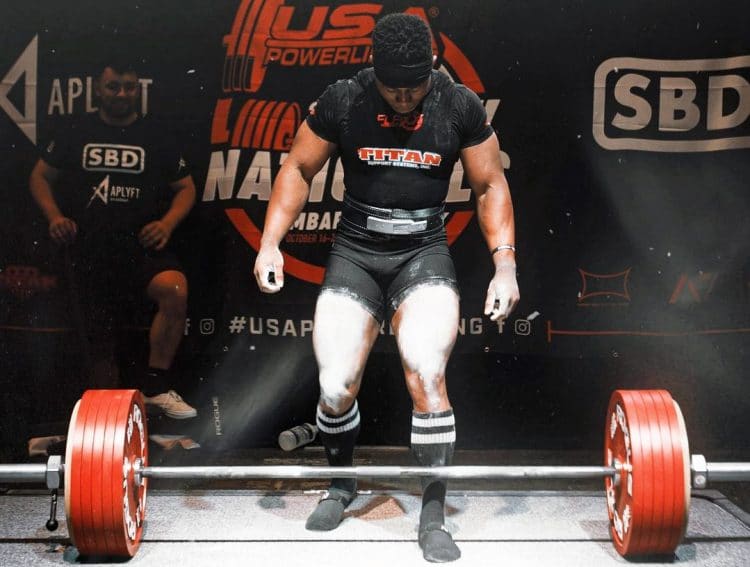
Russel Orhii / Instagram
The competitive lifts in powerlifting are often called “the big three” and are the barbell back squat, bench press, and deadlift. Each powerlifting exercise is governed by rules so that all competitors perform each exercise in a similar fashion. This ensures that performances can be compared and judged fairly.
Needless to say, the squat, bench press, and deadlift should always be at the top of any list of powerlifting exercises.
Barbell Back Squat
Target muscles: Quadriceps, gluteus maximus, hamstrings, abductors, adductors, core.
Powerlifting meets start with the barbell back squat. Lifters have three attempts and perform a single rep. For their squat to count, powerlifters must descend until their thighs are at least parallel to the floor. This is deeper than many recreational exercisers squat and takes flexibility, mobility, and practice.
Because of the danger of failing a rep, squats should always be performed in a power rack or with strong spotters on hand.
Steps:
Rack and hold your barbell across your upper back. It should not rest on your neck. The lower you can hold the bar, the shorter the lever from the weight to your hips will be, and that means less stress on your lower back. This is called a low-bar squat.
Stand with your feet about shoulder-width apart, toes turned slightly outward.
Pull your shoulders down and back, brace your core, and inhale deeply.
Bend your knees and hips and squat down until your thighs are parallel to the floor. Push your knees out as you descend. Take care not to round your lower back, as doing so can lead to injuries.
Drive your feet into the floor and stand up straight. Exhale as you ascend.
Rerack the bar or reset your core and do another rep.
Tips:
Experiment with your stance width to see what feels strongest and most comfortable.
If squats hurt your neck, you’re resting the bar too high. Move it further down your back so it’s resting on a pad of muscle and not directly onto bones.
Wear knee sleeves to support and protect your joints if necessary.
Use a lifting belt to increase intra-abdominal pressure and support your lumbar spine.
Wear hard-soled shoes to increase your stability and balance, e.g., weightlifting shoes.
Bench press
Target muscles: Pectoralis major, triceps, deltoids, rotator cuff.
Most exercisers are very familiar with the bench press as it’s a popular chest exercise. However, the powerlifting bench press is slightly different, as the aim is not to build muscle but to lift as much weight as possible.
A lot of powerlifters, especially in the lighter divisions, bench press with a very pronounced back arch. This reduces the distance the weight has to travel, which saves energy and should lead to a bigger lift. In powerlifting, the bar must briefly touch your chest, and you cannot press it back up until the referee tells you to.
Steps:
Lie on the bench so your eyes are directly under the bar. Grip the bar with a slightly wider than shoulder-width grip.
Push your upper back into the bench and drive your feet into the floor. Pull your shoulders back and down, inhale, and lift your chest up toward the barbell. Brace your core. Make sure your entire body is tense.
With help from a spotter, unrack the bar and hold it over your chest.
Without moving your feet, bend your arms and lower the bar to the highest point of your chest. Tuck your elbows in as the bar descends. Pause for 1-2 seconds with the weight touching but not resting on your chest.
Drive the bar up and slightly back until your elbows are straight, letting your arms flare out slightly as the weight ascends.
Rerack the bar or reset and do another rep.
Tips:
Use wrist wraps to support your wrists when lifting very heavy weights.
Move your feet closer to your hips to increase your arch, making sure you keep your butt on the bench.
Squeeze the bar as hard as possible to increase upper body tension and strength.
Try to push the bar up as fast as you can to blast through your sticking point.
Imagine pulling the bar apart to maximize upper back engagement and increase stability.
Deadlift
Target muscles: Hamstrings, gluteus maximus, quadriceps, latissimus dorsi, trapezius, rhomboids, biceps, forearms, core.
Powerlifting competitions end with the deadlift. In many instances, the result of the meet hangs on the deadlift. Powerlifters have a choice between conventional and sumo deadlifts. While the muscles involved in these exercises are similar, stance width affects how much work they have to do.
Narrow-stance conventional deadlifts involve more back, glutes, and hamstrings engagement, while wide-stance sumo deadlifts hit the quads and glutes more.
Prospective powerlifters should try both types of deadlifts to see which one they prefer.
Read more about Sumo vs. Conventional Deadlifts here.
Sumo deadlift steps:
Position your barbell so it’s roughly nine inches from the floor. Stand behind the bar and adopt a wide stance so your feet are close to the weight plates. Turn your toes out slightly. The bar should be almost touching your shins.
Hold the bar with a shoulder-width overhand or mixed grip. Your back should be slightly arched, arms straight, shoulders down and back, and hips higher than your knees. Brace your core and inhale.
Drive your feet into the floor and extend your knees, keeping the bar close to your legs. Do not round your lower back.
As the bar passes your knees, push your hips forward to finish the lift.
Stand up straight but do not lean back or bend your arms, which could cause injury.
Push your hips back, bend your knees, and lower the weight back to the floor.
Release the bar and stand up, or reset your core and grip and perform another rep.
Conventional deadlift steps:
Position your barbell so it’s roughly nine inches from the floor. Stand behind it with your toes under the bar, feet about hip to shoulder-width apart.
Reach down and hold the bar with an overhand or mixed grip.
Straighten your arms, pull your shoulders down and back, and brace your abs. Your lower back should be slightly arched, with your hips lower than your shoulders.
Without bending your arms or rounding your lower back, drive your feet into the floor and stand up. Push your hips forward as the bar passes your knees.
Stand up straight but do not lean back or bend your arms, which could cause injury.
Push your hips back, bend your knees, and return the weight to the floor.
Release the bar and stand up, or reset your core and grip and perform another rep.
Tips:
Use lifting chalk to maximize your grip and prevent slipping.
Wear flat-soled shoes or lift barefoot for increased stability.
Use a weightlifting belt to support your lumbar spine.
Imagine you are jumping with a weight in your hands to blast past your sticking points more easily.
Do at least some of your sets with a double overhand grip and with your mixed grip reversed to avoid developing muscle imbalances.
Powerlifting Exercises – Accessory Lifts
While you can get big and strong doing nothing but squats, bench presses, and deadlifts, this is not the ideal way to maximize your performance. Powerlifters use accessory exercises to improve their performance in the big three lifts.
Accessory, sometimes called assistance, exercises help strengthen the weak links that might otherwise hold you back. These exercises are usually performed after the main lift for the day, or during a separate workout.
You should choose your accessory exercises according to your weaknesses. For example, if you round your lower back during squats and deadlifts, you need to strengthen your spinal erectors and core to prevent this problem.
These are the best powerlifting accessory exercises for the squat, bench press, and deadlift.
1. Paused squat
Target muscles: Quadriceps, gluteus maximus, hamstrings, abductors, adductors, core.
Paused squats involve stopping at the midpoint of each rep for 3-5 seconds. This breaks the eccentric/concentric stretch-shortening reflex, which forces you to work harder on the ascent. This is a good exercise for improving speed out of the hole and reinforces proper squat depth.
Steps:
Adopt your normal squat stance.
Descend smoothly and then pause with your thighs parallel to the floor. Hold this position for 3-5 seconds, maintaining tension throughout your body.
Drive your feet into the floor and stand up as powerfully as possible.
Reset your core and repeat.
Tips:
Start light and increase weights gradually; this exercise is harder than it looks.
Do not relax during the pause. Instead, stay tight and keep your chest up and knees out.
Try to explode out of the pause to increase muscle power and engage your muscles fully.
2. Box squats
Target muscles: Quadriceps, gluteus maximus, hamstrings, abductors, adductors, core.
Like paused squats, box squats break up your descent and ascent, so you have to work harder to stand up. However, resting on a box means you also have to control the speed of your descent and have a depth target to aim for. If you sometimes find yourself squatting too shallow, this exercise could help.
Steps:
Stand with your back to a knee-high bench or box and adopt your normal squat stance.
Push your hips back, bend your knees, and descend until your butt touches the platform. Keep your chest up.
Drive your feet into the floor and stand back up.
Rest your core and repeat.
Tips:
Place to foam pad on your box to avoid shock-loading your spine.
Stay tight on the box – do not relax.
Lower the height of the box as your mobility and flexibility improves.
3. Leg press
Target muscles: Quadriceps, gluteus maximus, hamstrings, abductors, adductors.
Leg presses allow you to strengthen your legs without using your core or back muscles. Needless to say, strong legs are critical for a big squat! If your back and core are tired after squats or deadlifts, a few sets of leg presses will allow you to continue strengthening your legs. However, your primary focus should always be squats and squat variations. Leg presses are not one of the big three!
Steps:
Sit on your leg press machine with your lower back and butt pressed into the seat. Place your feet on the footrest, shoulder to hip-width apart.
Unrack the weight, bend your knees, and descend as deeply as you can without rounding your lower back.
Push the weight back up and repeat.
Rerack the weight on completion.
Tips:
Experiment with the position of your feet to determine what feels the most comfortable and effective.
Keep your core braced and your lower back pressed into the seat throughout. Do not allow your lower back to round, as doing so can cause severe injuries.
Leg press machine designs vary, so ensure you know how to use the machine in your gym. Ask an instructor if you are unsure.
4. Bulgarian split squat
Target muscles: Quadriceps, gluteus maximus, hamstrings, abductors, adductors.
Barbell back squats are a bilateral or two-legged exercise. However, it’s common to have one leg stronger than the other. Slight strength imbalances are no problem, but more significant differences can lead to injuries and could hurt your performance. Bulgarian split squats are an excellent exercise for fixing left-to-right strength imbalances and improving balance and hip mobility.
Steps:
Stand with your back to a knee-high bench. Bend one leg and place your foot on the bench with your laces facing downward. Hop forward into a split stance.
Bend your legs and lower your rear knee down to within an inch of the floor.
Stand back up and repeat.
Switch legs and do the same number of reps on the other side.
Tips:
Hold dumbbells or use a barbell to make this exercise harder.
Pause at the bottom of each rep to make this exercise more challenging.
Lean forwards slightly from your hips to increase glute and hamstring engagement.
5. Squat jumps
Target muscles: Quadriceps, gluteus maximus, hamstrings, abductors, adductors.
While powerlifting squats are invariably performed slowly, your intention should always be to move fast. Trying to explode up out of the hole increases muscle recruitment and helps you avoid stalling partway up. As such, it makes sense to include low-load but high-speed exercises in your powerlifting squat workout.
Steps:
Stand in your normal squat stance.
Bend your legs and descend down to parallel.
Using your arms for added momentum, jump up as high as possible.
Land on slightly bent knees to absorb the shock of landing and repeat.
Try to minimize ground contact time between jumps – imagine the floor is hot.
Tips:
Do this exercise on a mat for comfort and safety.
Increase the load by holding dumbbells in your hands or a barbell on your back.
End your set when your jump height starts to decrease.
6. Paused bench press
Target muscles: Pectoralis major, deltoids, triceps.
Competition-style bench presses involve pausing with the bar touching your chest. This stops lifters from bouncing rather than pushing the bar up. Paused bench presses prepare you for powerlifting meets and also increase your strength off your chest, which is a common sticking point for many lifters.
Steps:
Adopt your usual bench press position and unrack the weight.
Bend your arms and lower the bar to your chest.
Pause with the bar touching your chest for 3-5 seconds.
Drive the weight back up and repeat.
Tips:
Use less weight than usual, as pausing makes the load feel heavier.
The longer you pause, the more difficult this exercise becomes.
Do not relax with the bar on your chest. Instead, stay tight like a compressed spring.
7. Close grip bench press
Target muscles: Deltoids, pectorals major, triceps.
While bench presses are usually described as a chest exercise, the triceps are equally involved. However, because the triceps are smaller and weaker than the pecs, invariably, they fail first. Close grip bench presses emphasize your triceps and can help make them less of a liability. Stronger triceps usually mean a bigger bench press.
Steps:
Lie on your bench and hold the bar with a shoulder-width grip. Plant your feet on the floor, push your upper back into the bench, and lift your chest.
Unrack the bar and hold it over your chest.
Bend your arms and lower the bar to your sternum. Keep your upper arms tucked into your sides throughout.
Drive the weight back up and repeat.
Tips:
Experiment with the width of your hands to see what feels most comfortable and effective.
You can also combine close grip bench presses with a pause to make them more demanding.
Avoid doing very close grip bench presses, which can be hard on your wrists, elbows, and shoulders.
8. Wide grip bench press
Target muscles: Pectoralis major, deltoids, triceps.
Wide grip bench presses emphasize your pecs, which are the engine that drives your bench press. Isolation exercises like dumbbell flys and cable crossovers are great for building bigger pecs but won’t do much for your strength. Wide grip bench presses are a critical accessory exercise if you want to press more weight.
Steps:
Lie on your bench and hold the bar so your hands are about six inches wider than your regular grip.
Plant your feet on the floor, push your upper back into the bench, and lift your chest.
Unrack the bar and hold it over your chest.
Bend your arms and lower the bar to your sternum. Keep your upper arms tucked into your sides throughout.
Drive the weight back up and repeat.
Tips:
Keep your upper back engaged to take stress away from your shoulders.
Do this exercise with a pause for a more challenging workout.
Experiment with the width of your hands to see what feels most comfortable and effective.
Read also: Learn how to absolutely nail the wide grip bench press to push your chest muscles to the max!
9. Floor press
Target muscles: Pectoralis major, deltoids, triceps.
Bench presses can be hard on your shoulders. It’s no coincidence that many powerlifters also suffer from chronic shoulder pain. Floor presses allow you to keep working on your bench press while giving your joints a well-deserved break. They’re also excellent for increasing triceps and lockout strength.
Steps:
Lie on the floor with your legs bent and feet flat. Hold your barbell over your chest using a medium-width grip. Press your upper back into the floor and lift your chest up.
Bend your arms and lower the bar until your elbows and triceps lightly touch the floor.
Press the bar back up and repeat.
Tips:
Lower the weight slowly to avoid jarring your elbows.
You can also do this exercise with straight rather than bent legs.
Try using dumbbells instead of a barbell to see which you prefer.
10. Plyo push-up
Target muscles: Pectoralis major, deltoids, triceps.
Plyometric or plyo push-ups develop explosive strength. After pausing, it can be hard to get the bar moving off your chest, which is where your explosive strength comes in. Plyo push-ups are one of the best upper body power and speed exercises around, and you don’t need any equipment to do them.
Steps:
Adopt the push-up position with your arms, legs, and body straight. Brace your core.
Bend your arms and lower your chest to within an inch of the floor.
Explosively extend your arms and push yourself up so your hands leave the floor.
Land on slightly bent elbows, lower your chest back down to the floor and repeat.
Tips:
Do this exercise on a mat for comfort and safety.
End your set when you start losing height.
Try to minimize ground contact time between reps by imagining the floor is hot.
11. Paused deadlifts
Target muscles: Hamstrings, gluteus maximus, quadriceps, latissimus dorsi, trapezius, rhomboids, biceps, forearms, core.
The most common sticking point in the deadlift is as the bar passes your knees. This is because you are in a mechanically disadvantageous position, as the bar is also furthest from your base of support. Paused deadlifts address this common weakness and should help you blast through this sticking point more easily.
Steps:
Set up for sumo or conventional deadlifts as usual.
Drive your feet into the floor and pull the bar up to about knee height. Pause for 3-5 seconds.
Push your hips forward and stand up straight to complete the lift.
Lower the bar back to the floor, reset your core and grip, and repeat.
Tips:
Stay tight during the pause, and do not allow your lower back to round.
The longer you pause, the more demanding this exercise becomes.
Don’t go too heavy too soon, as paused deadlifts are far more challenging than regular conventional or sumo deadlifts.
12. Romanian deadlifts
Target muscles: Hamstrings, gluteus maximus, erector spinae, rhomboids, biceps, forearms, core.
Romanian deadlifts target your posterior chain, which is the engine that drives your deadlift. Posterior chain is the collective term for your glutes, hamstrings, and lower back. Weakness in this area will not only reduce your deadlift performance but could also open you up to injuries. As such, Romanian deadlifts are doubly-important for powerlifters.
Steps:
Stand with your feet hip-width apart, knees slightly bent. Hold a barbell in front of your thighs with a mixed or double overhand grip. Brace your core and pull your shoulders back and down.
Hinging from your hips, lean forward and lower the bar down the front of your legs as far as your flexibility allows.
Stand back up and repeat.
Tips:
Do not round your lower back, as doing so can lead to injury.
Tuck your chin in and lengthen your neck to avoid stressing your spine.
Push your hips back and keep your weight on your heels to maximize posterior chain engagement.
Read also: Learn how to build a powerful posterior chain with Romanian deadlifts, or RDLs for short.
13. Good mornings
Target muscles: Hamstrings, gluteus maximus, erector spinae, core.
Good mornings get their name because, when you do this exercise, it looks like you are bowing to greet a Victorian-era friend! Weird images aside, this is an excellent posterior chain exercise and, because it doesn’t involve your arms, won’t tax your already overworked forearms and grip.
Steps:
Rack and hold a barbell across your upper back like you are doing squats. Stand with your feet shoulder to hip-width apart and knees slightly bent.
Hinging from your hips, lean forward as far as your flexibility allows. Do not round your lower back.
Stand back up and repeat.
Tips:
Use a squat bar pad for comfort.
Pull the bar down onto your upper back to step it moving as you lean forwards.
Push your hips back and keep your weight on your heels to maximize posterior chain engagement.
14. Barbell hip thrusts
Target muscles: Hamstrings, gluteus maximus, erector spinae, core.
This is another posterior chain exercise. However, unlike the previous few movements, it puts very little stress on your lower back, providing a welcome break for that already hard-working group of muscles. Barbell hip thrusts will improve your lockout strength and give you a better-looking butt.
Barbell Hip Thrust
Steps:
Sit on the floor with your upper back against a stable bench. Rest and hold a barbell across your hips. Bend your legs and plant your feet firmly on the floor.
Drive your feet into the floor and push your hips to form a straight line with your knees and shoulders.
Lower your butt back down to the floor and repeat.
Tips:
Use a bar pad or folded mat for comfort if required.
Drive your heels into the floor and not the balls of your feet to maximize hamstring and glute engagement.
You can also do this exercise with a dumbbell instead of a barbell or using one leg instead of two.
15. Ab wheel rollouts
Target muscles: Core, latissimus dorsi, triceps.
Your core can make or break your deadlift. Core is the collective term for the muscles of your midsection, which act like a weightlifting belt during deadlifts, squats, and most other strength training exercises. If your core fails, your midsection will collapse, and some of the force generated by your legs or arms will get lost. A rounded lower back is also weaker and more prone to injury.
Rollouts are one of the most powerlifting-specific core exercises, as they also involve your lats and triceps, both of which are very active during deadlifts.
Ab Wheel Rollouts
Steps:
Kneel down and place your ab roller on the floor in front of your legs. Hold the handles with an overhand grip. Brace your core and straighten your arms.
Push the roller away from you and lower your chest toward the floor.
Keeping your arms straight, use your core to pull the roller back up to your knees.
Tips:
Kneel on an exercise mat or foam pad for comfort.
The further you roll the wheel away from you, the more demanding this exercise becomes.
Reduce your range of motion if this exercise causes lower back discomfort.
Four-Day Powerlifting Workout
While the exercises listed above will make you stronger, you’ll get much better results from your training if you follow a more structured program. This workout plan emphasizes the big three powerlifts and also includes several complimentary accessory exercises to balance your musculature and improve your performance.
However, before beginning any of these workouts, make sure you prepare your muscles and joints with an appropriate warm-up. Begin with 5-10 minutes of easy cardio followed by dynamic mobility and flexibility exercises for the joints and muscles you’re about to use.
Finish off your warm-up with a couple of progressive sets of your first exercise to dial in your technique and get your nervous system ready for heavier weights.
Read more about warming up for strength training here.
Your Training Week
To avoid overtraining and allow adequate time for rest and recovery, this workout plan involves no more than two training days in a row and no more than two back-to-back rest days. This provides the ideal balance between work and recovery. Try not to change which days you train unless absolutely necessary.
#
Day
Exercise
1
Monday
Squat & accessory exercises
2
Tuesday
Bench press (1) & accessory exercises
3
Wednesday
Rest
4
Thursday
Deadlift & accessory exercises
5
Friday
Rest
6
Saturday
Bench press (2) & accessory exercises
7
Sunday
Rest
Workout 1 – Squat & accessory exercises
#
Exercise
Sets
Reps
Recovery
1
Squat
5
5
3-minutes
2
Paused squat
3
6-8
2-minutes
3
Bulgarian split squat
3
10-12 per leg
60 seconds
4
Leg press
3
10-12
60 seconds
5
Squat jump
3
8-10
90 seconds
Workout 2 – Bench press (1) & accessory exercises
#
Exercise
Sets
Reps
Recovery
1
Bench press
5
5
3-minutes
2
Paused bench press
3
6-8
2-minutes
3
Plyo push-up
3
8-10
90 seconds
4
Triceps pushdown
3
10-12
60 seconds
5
Face pull
3
10-12
60 seconds
Workout 3 – Deadlift & accessory exercises
#
Exercise
Sets
Reps
Recovery
1
Deadlift
5
5
3-minutes
2
Paused deadlift
3
6-8
2-minutes
3
Romanian deadlift
3
6-8
2-minutes
4
Hip thrust
3
10-12
90 seconds
5
Ab wheel rollout
3
12-15
60 seconds
Workout 4 – Bench press (2) & accessory exercises
#
Exercise
Sets
Reps
Recovery
1
Close grip bench press
5
5
3-minutes
2
Wide grip bench press
3
6-8
2-minutes
3
Floor press
3
8-10
90 seconds
4
Seated cable row
3
10-12
60 seconds
5
EZ bar skull crusher
3
10-12
60 seconds
FAQs
Do you have a question about the best powerlifting exercises or our workout? No problem, because we’ve got the answers!
1. What weight should I use for these exercises?
The one thing we can’t tell you is how much weight to use for these exercises and workouts. After all, strength is determined by many factors, including age, gender, experience, and genetics.
So, spend your first week of training estimating your training weights. If an exercise calls for 6-8 reps, increase your weight over several sets until you feel you will get close to failure within the specified range. Use your final weight the next time you repeat that workout.
Use this process for all the exercises.
Then, week by week, work at increasing the loads, even if it’s only by 2.5 to 5.0 pounds. These small but gradual increases are the key to getting stronger. This is called progressive overload.
2. How long can I follow this workout plan?
Stick with our powerlifting workout plan until you notice your big three progress starting to slow. This could be 4-8 weeks or several months. Then, as the workout loses some of its, take a one-week deload (easy training week) and try and squeeze a couple more weeks of progress out of your training.
Then, when your progress grinds almost to a halt, quit this plan and start another one.
Check out our library of powerlifting programs here.
3. What diet should I follow with this workout plan?
Training to get stronger invariably means training to build muscle mass. Yes, some strength gains are neurological and not the result of muscle growth. However, a bigger muscle is a stronger muscle. It’s no coincidence that powerlifters are big and muscular.
To build muscle, you need a calorie surplus and at least one gram of protein per pound of body weight. Use this protein calculator to determine your precise protein needs. You also need to consume plenty of carbohydrates for energy and unprocessed fats for hormonal balance and general health.
Ideally, your meals should contain plenty of unrefined foods, including vegetables, whole grains, and other natural ingredients. While the occasional junk food treat probably won’t harm you, the healthier your diet is, the healthier you will be. After all, you are what you eat.
As such, there is no standard powerlifting diet, and you can follow any meal plan that meets your needs.
4. How do I get big like a bodybuilder but strong like a powerlifter?
While powerlifters are strong, bodybuilders are often bigger and are almost always leaner with more aesthetic physiques. Because of this, and depending on their goals, most people choose to follow either a powerlifting plan or a bodybuilding plan.
However, if you want the best of both worlds, you may want to consider powerbuilding. A powerbuilding approach builds muscle mass and strength in equal measure and uses training methods from both types of workout.
You can read more about powerbuilding here.
5. Can I make changes to any of the workouts?
You certainly can, but make sure you avoid changing the exercises too much. For example, while switching barbell for dumbbell floor presses would be fine, hitting the pec deck instead of the bench press would not as the exercises are too dissimilar.
So, look at the muscles involved in the exercise you want to replace and choose a similar alternative. And don’t replace an exercise just because it’s hard – it’s those challenging exercises that are responsible for your strength gains.
6. Can I train for powerlifting even if I don’t want to compete?
While powerlifting competitions are a lot of fun and can be very rewarding, training for one requires a lot of time and dedication.
Your training will need to peak at the right time, and you may also have to lose or gain weight to qualify for your chosen class. You’ll also need to decide whether you will compete equipped or raw and in which federation. There is a risk of injury as you train with ever more weight, and you may have to take time off work and travel to find a suitable meet.
Because of these details, many people follow a powerlifting program with no intention of ever stepping into the limelight and competing. They just enjoy lifting heavy weights and getting stronger, which, for them, is rewarding enough.
The good news is that you can always compare your performance against other lifters in your demographic and compete against your previous best lifts by tracking your one-repetition maximums in the squat, bench press, and deadlift. You can also use the Wilks calculator to compare your strength against other lifters, irrespective of weight and gender.
7. Is powerlifting safe?
Like all sports, powerlifting has some inherent risks. Lifting very heavy weights, failed reps, poor form, and simple accidents can all lead to mild to severe injuries. However, using the proper equipment and correct technique, respecting your body’s need for rest, staying within your limitations, and training hard but smart will mitigate many of these risks.
In reality, powerlifting is no more dangerous than basketball, soccer, football, etc. However, there ARE safer workouts, so if you are only training for general strength and health, you should probably consider something less risky, like progressive calisthenics or general strength training.
Closing Thoughts
Powerlifting is a very accessible strength sport. Unlike competitive strongman, you don’t need lots of specialist equipment, and you can train for powerlifting in almost any commercial gym.
Based on three common gym exercises – the squat, bench press, and deadlift – powerlifting is relatively easy to learn and much less difficult to get into than Olympic lifting. Buy a squat rack, bench, barbell, and weights, and you can even do powerlifting at home.
If you are looking for a way to build muscle and get super-strong, powerlifting is a great choice. More functional than bodybuilding, powerlifting is an excellent standalone activity and compatible with many other sports.
Use the exercises and workouts in this article to get stronger than ever before!
Beginner Deadlift Program – 1 and 2 Workouts a Week
There aren’t many exercises that build muscle mass and strength like deadlifts. Working almost every muscle in your body, deadlifts are arguably the most productive thing you can do with a weighted barbell.
Deadlifts are highly functional, teaching you how to bend and lift heavy objects off the floor safely, i.e., using your legs and back together and without rounding your lumbar spine.
Regardless of what you’re training for, you’ll probably reach your goals sooner if you include deadlifts in your workouts.
All that said, deadlifts can also be intimidating, and many beginners are reticent to try them. Some so-called fitness experts make matters worse by labeling the deadlift as dangerous, stating that they cause back injuries.
The truth is that any exercise can cause injuries when performed incorrectly. Deadlifts are actually pretty safe when done properly and with an appropriate load. So, by all means, respect the deadlift but don’t fear it.
The programs in this article are designed to help you go from zero to certified deadlifting hero!
Deadlifting Form Basics
A correctly performed deadlift is a thing of beauty. With all your joints and muscles working in synergy, even heavy weights come off the floor relatively smoothly. However, while a well-performed deadlift is one of the best back-building exercises around, an ugly deadlift can expose you to a whole world of hurt.
So, it makes sense to start this article with an overview of how to deadlift. Follow these steps to make sure you are deadlifting with good technique. If in doubt, seek out a knowledgeable trainer and get some hands-on coaching.
Read more about mastering the deadlift here and common deadlift technique faults and how to fix them here.
Place your loaded barbell on the floor so it’s about mid-shin height. Officially, the bar should be nine inches off the deck. Using standard-sized Olympic plates means the bar should be at the correct height.
Stand in the center of the bar with your feet about hip-width apart. Keep your feet parallel or turn them slightly outward. The bar should be directly over the middle of your feet and around an inch from your shins.
Lean forward and hold the bar using a shoulder-width double overhand or mixed grip. Wrap your hands tightly around your bar and put your thumb on top of your first two fingers to reinforce your grip and avoid slipping. Use chalk if you’ve got sweaty palms.
Straighten your arms, lift your chest, arch your lower back, and pull your shoulders down and back. Your hips should be below shoulder height. Look at the floor around ten feet in front of you.
Inhale, brace your abs and get ready to lift. Pull the slack out of the bar, so your entire body feels coiled like a spring. Flex your lats and press the bar backward against your legs. It doesn’t have to drag up your shins and thighs but should be in light contact at all times.
Without bending your arms, press your feet into the floor and extend your knees and hips simultaneously. As you break the bar away from the floor, drive your hips forwards, continue extending your knees, and stand up.
Do not allow your hips to rise faster than the bar, as this increases the distance between the weight and your feet/legs, putting unnecessary stress on your lower back.
Your knees and hips should be locked out at the top of the movement, but there is no need to lean backward. Just stand up straight and proud!
Keeping your arms straight, push your hips back, bend your knees, and lower the bar down the front of your legs to the floor. Maintain control of the weight – don’t just drop it – but there is no need to go super-slow.
Let the weight settle on the floor, reset your grip and core, and blast out another rep!
Beginner Deadlift Program – 1 Day a Week
This program is for anyone who knows how to deadlift but doesn’t do it regularly. It’s also a good option for exercisers returning from a training break.
One deadlift workout per week might not sound like a lot, but this exercise is intense and cause severe residual systematic fatigue. Most beginners will soon start to feel overtrained if they deadlift more frequently. This workout also includes some basic deadlift accessory exercises to boost your general strength and deadlift performance.
Finally, make sure you warm up before doing this or any other strenuous workout. Begin with some light cardio followed by dynamic mobility and flexibility exercises for your lower body and back. Finish off with 1-2 sets of light deadlifts for practice and reinforce good technique.
#
Exercise
Sets
Reps
Recovery
1
Deadlift
3
6-8
2-3 minutes
2
Leg curl
2
10-12
90 seconds
3
Hip thrust
2
10-12
90 seconds
4
Romanian deadlift
2
12-15
90 seconds
5
RKC plank
3
20 seconds
90 seconds
Exercise Instructions
You’ll get more from this workout if you perform all the exercises with perfect form. The correct technique is generally safer and more effective, so make sure you follow these instructions.
1. Deadlift
Target muscles: Gluteus maximus, hamstrings, quadriceps, erector spinae, core, latissimus dorsi, trapezius, rhomboids, deltoids, biceps, triceps, and forearms.
What would a deadlift program be without deadlifts? According to Joe Weider’s priority principle, you should always put the most important exercises at the start of your program, which is why you’ll be deadlifting first.
Use a weight that allows you to perform 6-8 clean reps per set. This will take a little experimentation to identify, but you should get it within a workout or two.
Check out the instructions above to ensure you are deadlifting like a boss!
Tips:
Use gym chalk (not lifting straps) to reinforce your grip.
If you use a mixed grip, make sure you switch your hands around set by set.
Do your deadlifts in flat minimalist shoes or barefoot if possible.
2. Leg curl
Target muscles: Hamstrings.
The hamstrings play a big role in deadlifts, working alongside your glutes to extend your hips. Weak hamstrings will severely undermine your deadlift performance, and leg curls are one of the best ways to isolate and strengthen this vital muscle group.
Steps:
Lie on your front of the leg curl machine with your knees in line with the lever arm pivot point. Hold onto the handles and brace your core. Press your hips down onto the bench.
Bend your legs and curl your heels up toward your butt.
Extend your legs and repeat.
Tips:
Do not allow the weights to touch down between reps.
Squeeze rather than jerk the weight up to make this exercise as safe and effective as possible.
Do seated or standing leg curls if preferred.
3. Hip thrust
Target muscles: Gluteus maximus, hamstrings.
The barbell hip thrust is an awesome glute and hamstring exercise that’s also very lower back-friendly. It’s a popular deadlift accessory exercise that targets two vital muscles – the glutes and hammies. In most cases, as you get stronger with hip thrusts, your deadlifts will get stronger, too.
Steps:
Sit on the floor with your upper back against a sturdy bench. Rest and hold a barbell across your hips. Bend your legs and place your feet flat on the floor.
Drive your feet into the floor and lift your hips up so they form a straight line with your shoulders and knees.
Lower your butt back to the floor and repeat.
Tips:
Rest the bar on a squat bar pad or folded mat for comfort.
You can also do this exercise without a bench if more convenient.
Drive your heels into the floor, not your toes, to maximize posterior chain engagement.
4. Romanian deadlift
Target muscles: Gluteus maximus, hamstrings.
Unlike conventional deadlifts, Romanian deadlifts start from standing, and the weight never touches the floor. However, differences aside, this is an excellent posterior chain exercise that will boost your deadlift by improving your lockout strength. It’s also good for your upper back, grip, and hamstring flexibility.
Steps:
Stand with your feet hip-width apart and hold a barbell in front of your thighs. Bend your knees slightly, brace your core, and pull your shoulders down and back.
Hinging from the hips, push your butt back and lean forward, lowering the weight down the front of your legs. Do not round your lower back.
Drive your hips forward and stand back up.
Continue for the desired number of reps.
Tips:
Use a double overhand or mixed grip as preferred.
Lean as far forward as your flexibility allows, but do not round your lower back, as doing so can cause injury.
Use chalk or lifting straps to reinforce your grip as necessary.
Related: Complete Romanian Deadlifts (RDLs) guide.
5. RKC plank
Target muscles: Core.
The core is the collective term for the muscles of your midsection. Encircling your internal organs like a weightlifting belt, the core muscles contract inward when you brace to support your lumbar spine. As such, a strong core is critical for a big, safe deadlift. RKC planks are a very time-effective way to build core strength.
Steps:
Kneel on all fours and then rest your upper body on your forearms, hands parallel. Brace your core and walk your feet out and back so your body is straight.
Tense your legs, glutes, core, chest, shoulders, and arms as hard as possible.
Without holding your breath, maintain this position for 20 seconds.
Relax, rest, and repeat!
Tips:
Clench your fists to generate more full-body tension.
Imagine you are pulling your toes toward your elbows to engage your abs as much as possible.
If you can do this exercise for more than 20 seconds, you probably weren’t tensing your core hard enough!
Beginner Deadlift Program – 2 Days a Week
If you are already a regular deadlifter or have been doing our once-a-week deadlift program for a couple of months, you are probably ready to graduate to deadlifting twice a week.
However, to avoid burnout and injury, you won’t be doing the exact same workout both times. Instead, you’ll alternate between two types of deadlifts and several different accessory exercises.
As always, you must start your workouts with a thorough warm-up to ensure your joints, muscles, and nervous system are ready for what you’re about to do.
Do the following workouts several days apart, e.g., Monday and Thursday, to provide adequate time for rest and recovery. Take an extra rest day between workouts if you still feel tired.
Workout 1
#
Exercise
Sets
Reps
Recovery
1
Deadlift
5*
5
2-3 minutes
2
Snatch grip deadlift
3
6-8
2-3 minutes
3
Leg curl
3
10-12
90 seconds
4
Box jump
3
6-8
90 seconds
5
Stability ball dead bug
3
10-12
90 seconds
*Two moderately-heavy sets and three heavy sets.
Workout 2
#
Exercise
Sets
Reps
Recovery
1
Deficit deadlift
5*
5
2-3 minutes
2
Paused deadlift
3
4-6
2-3 minutes
3
Rack pull
3
4-6
2-3 minutes
4
Kettlebell swing
3
12-15
90 seconds
5
Ab wheel rollout
3
12-15
90 seconds
*Two moderately-heavy sets and three heavy sets.
Workout 1: Exercise Instructions
You’ll get more from these workouts if you perform all the exercises with perfect form, so make sure you follow these instructions:
1. Deadlift
Target muscles: Gluteus maximus, hamstrings, quadriceps, erector spinae, core, latissimus dorsi, trapezius, rhomboids, deltoids, biceps, triceps, and forearms.
The five by five (5 x 5) set and rep scheme is one of the best ways to build muscle mass and strength. It’s been popular for close to a century, and that’s because it works! Do your first two sets with a moderate weight, and then go heavy for your last three efforts. However, don’t go so hard that you cannot maintain that all-important perfect technique.
Tips:
Consider wearing a lifting belt for added lower back support.
When in doubt, rest longer between sets to maximize your performance.
Increase your weights by 2.5 to 5 pounds every week or two.
2. Snatch grip deadlift
Target muscles: Gluteus maximus, hamstrings, quadriceps, erector spinae, core, latissimus dorsi, trapezius, rhomboids, deltoids, biceps, triceps, and forearms.
Snatch grip deadlifts put you into a less biomechanically efficient position at the start of each rep. Making things harder will increase your speed and power off the floor, translating to a bigger deadlift a few months later. Don’t go too heavy too soon with this exercise; it’s harder than it sounds!
Steps:
Stand behind your barbell with your toes under the bar, feet shoulder to hip-width apart.
Reach down and grab the bar using a wider-than-shoulder-width double overhand grip.
Straighten your arms, lift your chest, drop your hips, and brace your abs.
Drive your feet into the floor and, without rounding your lower back, stand up straight.
Lower the weight back to the floor and repeat.
Tips:
Use straps and or chalk if necessary.
Tuck your thumbs under your fingers (hook grip) for a more secure hold on the bar.
The wider you put your hands, the more challenging this exercise becomes, so adjust your grip accordingly.
3. Leg curl
Target muscles: Hamstrings.
If you’ve done our once-a-week program, you’ll have already done leg curls for your hamstrings. If you haven’t, you are sure to appreciate how good this exercise is for isolating and strengthening your hammies. Use the seated leg curl machine if you used the prone model last time, or vice versa.
Check out the instructions above to ensure you are doing leg curls correctly.
4. Box jump
Target muscles: Quadriceps, gluteus maximus, hamstrings, calves.
A good deadlift starts with a powerful extension of the hips and knees. Because of the weight involved, you might move slowly, but you should always try to lift explosively. Box jumps are one of the most accessible lower body power exercises around. They’re also pretty knee-friendly.
Steps:
Stand a couple of feet away from a sturdy knee-high box. Your feet should be roughly hip-width apart. Ideally, use the same stance as you do for deadlifts.
Bend your knees, flex your hips, and swing your arms behind you.
Swing your arms forward and use this momentum to help you jump forward and up.
Land on the box with slightly bent knees to absorb the shock of landing.
Step down, reset your feet, and repeat.
5. Stability ball dead bug
Target muscles: Core, hip flexors.
Your core acts like a natural weightlifting belt during deadlifts, and the stronger it is, the more weight you’ll be able to lift. The stability ball dead bug might look like a simple abs exercise, but it’s actually very intense and one of the best ways to strengthen your anterior and deep core muscles.
Steps:
Lie on your back with your legs bent and knees over your hips. Brace your core and press your lower back into the floor. Hold a stability ball against your knees with both hands.
Extend your right leg and left arm, lowering them down toward the floor. Meanwhile, press your left leg and right hand into the ball.
Return to the starting position and then switch sides.
Continue for the desired number of reps.
Tips:
The more forcefully you push against the ball, the more demanding this exercise becomes.
Use a medium-sized stability ball for this exercise – 45-55cm is ideal.
Press your lower back into the floor throughout to fully engage your abs.
Workout 2: Exercise Instructions
1. Deficit deadlift
Target muscles: Gluteus maximus, hamstrings, quadriceps, erector spinae, core, latissimus dorsi, trapezius, rhomboids, deltoids, biceps, triceps, and forearms.
Deficit deadlifts force you to squat deeper at the start of each rep. This increases the range of motion and reduces your mechanical advantage for lift-off. As such, you’ll need to work harder at the start of each rep. This will make you stronger and faster off the floor.
Steps:
Place your barbell on the floor and place a bumper plate in the center. Stand on it with a narrow stance.
Reach down and grab the bar using a shoulder-width mixed or double overhand grip.
Straighten your arms, lift your chest, drop your hips, and brace your abs.
Drive your feet downward and, without rounding your lower back, stand up straight.
Lower the weight back to the floor and repeat.
Tips:
The thicker the plate you stand on, the more demanding this exercise becomes.
Take care not to round your lower back.
Use less weight than for conventional deadlifts; this exercise is TOUGH!
2. Paused deadlift
Target muscles: Gluteus maximus, hamstrings, quadriceps, erector spinae, core, latissimus dorsi, trapezius, rhomboids, deltoids, biceps, triceps, and forearms.
A lot of people struggle to lock out a heavy deadlift. This is called a sticking point. Paused deadlifts train you how to push past sticking points by stopping precisely where deadlifts are hardest. Incorporating this exercise into your deadlift workouts should mean fewer failed reps.
Steps:
Set up for deadlifts as normal.
Drive your feet into the floor, extend your hips and knees, and stand up. Pause for 2-3 seconds when the bar reaches your knees. Stay tight!
After pausing, push through to lock out and stand up straight.
Lower the bar back to the floor and repeat, pausing midway through every rep.
Tips:
Use 30-40% less weight than for conventional deadlifts.
Pause above and below your knees to see which works best for you.
The longer you pause, the more challenging this exercise becomes.
3. Rack pull
Target muscles: Gluteus maximus, hamstrings, quadriceps, erector spinae, core, latissimus dorsi, trapezius, rhomboids, deltoids, biceps, triceps, and forearms.
Rack pulls are partial deadlifts that start from just above knee height. This reduced range of motion allows you to lift heavier weights and work on your lockout strength. Rack pulls are also an excellent upper back and trap builder. A bigger, more muscular back will enhance your deadlift performance.
Steps:
Using a power rack, raise your barbell just above knee height.
Stand behind the bar and hold it with an overhand or mixed shoulder-width grip.
Hinge forward at the hips, brace your core, and pull your shoulders down and back.
Drive your hips forward and stand up.
Lower the bar back to the rack and repeat.
Tips:
Do not use a deadlift bar for this exercise, as doing so could damage it.
You can also do this exercise by raising the weights on blocks, i.e., block pulls.
It’s okay to use straps for rack pulls, as you could potentially be lifting more weight than you’re used to.
4. Kettlebell swing
Target muscles: Gluteus maximus, hamstrings, quadriceps, erector spinae, core.
Like box jumps in the previous workout, this exercise is designed to improve speed and power. The more explosively you break the bar away from the floor, the more likely you are to blast through your sticking points. Kettlebell swings are a safe, accessible, and effective explosive hip hinge exercise.
Steps:
Hold a kettlebell in front of your thighs and stand with your feet about shoulder-width apart. Brace your core and pull your shoulders back and down.
Bend your knees slightly, push your butt back, and hinge forward at the hips, lowering the weight between your knees.
Drive your hips forward and use this momentum to swing the weight forward and up to shoulder height.
Lower the weight and repeat.
Tips:
Imagine you are jumping forward to properly engage the correct muscles.
Do not swing the weight above shoulder height, as doing so increases the risk of injury.
Take care not to round your lower back or hyperextend your spine at any point.
5. Ab wheel rollout
Target muscles: Core, latissimus dorsi.
Ab wheel rollouts are one of the most effective core exercises. They’re basically a moving plank but also involve your lats and even the long head of your triceps. These are the same muscles you use during deadlifts to keep the barbell close to your legs. As such, the rollout is a very deadlift-specific core exercise.
Steps:
Kneel on the floor and place your wheel/roller in front of your knees. Use a folded exercise mat for comfort.
Hold the handles with an overhand grip. Brace your core and pull your shoulders down and back.
Keeping your arms straight, roll the wheel out in front of you and lower your torso down toward the floor. Do not hyperextend your lower back.
Pull the wheel back up to your knees and repeat.
Tips:
Shorten your range of motion if you feel this exercise in your lower back.
No ab wheel or roller? No problem! You can use a barbell loaded with small plates instead.
If your core is strong, you can do this exercise standing instead of kneeling.
Deadlift Program – FAQs
Do you have any questions about these programs or deadlifts in general? That’s okay because we’ve got the answers!
1. What weight should I use for deadlifts?
Sadly, this is the one question we can’t answer! Lots of things determine how much weight you should use for deadlifts, including your gender, experience level, genetics, and current one-repetition maximum.
The best advice we can give you is to use a weight that allows you to complete the prescribed number of reps, but only just. The last rep or two should feel challenging but not impossible. Leave about 1-3 reps in reserve. Think of this load as quite heavy and not your absolute max.
As you get stronger, gradually increase the weight by 2.5 to 5 pounds, so you continue to improve.
If you get to the end of a set and feel you have more to give, feel free to do an extra rep or two. Then, make a note in your training journal to put more weight on the bar next time.
Put these tips into action, and progress is all but guaranteed.
2. Do I need to wear a belt for deadlifts?
While you don’t have to wear a lifting belt for deadlifts, many people find them helpful. A belt gives you something to brace your abs against, so you can create more intra-abdominal pressure. IAP helps support your lumber spine and prevents it from rounding as you lift.
You should be able to produce plenty of IAP without a belt, but when lifting heavy weights, more support is seldom a bad thing.
If you wear a belt, save it for your heaviest sets so you can practice bracing naturally. Then put on your belt when you need some extra assistance.
3. What’s the difference between a double overhand and mixed grip for deadlifts?
A mixed grip, where one hand faces forward and one faces backward, stops the bar from rolling out of your fingers, making you less likely to drop the weight unexpectedly. Most lifters use a mixed grip for heavy deadlifts.
However, using a mixed grip puts a lot of tension on your supinated biceps and can result in muscle tears. You may also develop muscle imbalances if you always turn your hands the same way.
You can avoid these issues by alternating sides when using a mixed grip and using an overhand grip for your earlier, easier sets. Save your mixed grip for your heaviest sets.
Alternatively, you can just stick with the double overhand grip for all your sets, which is safer and more balanced despite being weaker. However, your grip will probably fail before your legs and back.
Weigh up all the options and decide which is right for you.
4. Are deadlifts dangerous?
All exercises can be dangerous when performed incorrectly, including the deadlift. However, because of the weights, joints, and muscles involved, improper deadlift form can cause serious injury. That said, deadlifts also teach you how to safely lift heavy weights from the floor, i.e., using your legs and lower back together.
Most deadlift injuries are caused by lifting too much weight or sloppy form. Avoid these mistakes, and deadlifts are probably no more dangerous than any other barbell exercise.
5. Can I change any of the exercises in the workouts?
Providing you keep the main exercises the same (deadlifts!), you are free to make alterations to these programs. However, you should select similar movements so as not to change the intended effects of the program. For example, you could do stiff-legged deadlifts instead of Romanian deadlifts. However, doing leg presses instead of leg curls would be a mistake.
Finally, don’t switch out an exercise simply because you find it difficult. It’s the hard exercises that drive most of your fitness and strength increases. Embrace the suck and don’t try and hide from it!
6. How should I incorporate these workouts into my weekly training program?
These deadlift workouts are designed to be part of a weekly split routine. As such, you need to slot them into your training plan. The main thing to remember is that you need to keep your deadlift workouts separate from your leg and back workouts. Training your legs and/or back the day before or after a deadlift workout will be too taxing for most people.
Possible splits include:
Monday – Deadlifts
Tuesday – Chest and Shoulders
Wednesday – Rest
Thursday – Legs (focusing on the quads and calves)
Friday – Back and Arms
Saturday – Rest
Sunday – Rest
Or:
Monday – Deadlifts (1)
Tuesday – Chest and Triceps
Wednesday – Legs (focusing on the quads and calves)
Thursday – Back and Biceps
Friday – Rest
Saturday – Deadlifts (2)
Sunday – Rest
Experiment with a few different training setups to see which you prefer.
7. What is the best diet when training for a bigger deadlift?
Sadly, there is no such thing as an official deadlift diet. Ultimately, your diet needs to match your body composition and performance goals and support your training.
If you want to get stronger and build muscle, the main thing you need is a daily calorie surplus of about 300-500 calories. This will give your body the energy it needs to recover and grow.
However, if you want to lose fat and get leaner, you need a 300-500 per day calorie deficit. This will force your body to burn fat for fuel. That said, you probably won’t build much muscle or get as strong when you are in a deficit.
Adopt the eating plan that best meets your caloric and nutrient goals. However, whether you want to lose or gain weight, make sure you are consuming adequate protein – typically one gram per pound of body weight.
More on Deadlifts:
Wrapping Up
While the occasional deadlift workout can be beneficial, you’ll get better results if you follow a more structured training plan. Powerlifters, who are arguably the best deadlifters on the planet, dedicate entire training sessions to this awesome exercise. This approach works for them, and it’ll work for you.
Use our beginner deadlift workouts, and your strength and performance will soon start to improve. However, remember that the deadlift is just one exercise, and your deadlift training should be part of a more-rounded workout plan.
Nick Walker Shares Proven Strategies for Building Huge Quad Muscles Ahead of 2023 Olympia
Two weeks into his 2023 Olympia competition prep, Nick Walker is looking in phenomenal shape. While becoming Mr. Olympia is the primary focus of his life at the moment, Walker took time out to educate his followers about some minute details of leg training.
Nick Walker is an American bodybuilder that competes in the IFBB Pro League’s Men’s Open division. After earning the IFBB Pro card in 2020, Walker quickly rose through the ranks and became a top contender. He is the winner of the 2021 New York Pro and the 2021 Arnold Classic. Both the wins came within a year of The Mutant turning pro and imparted to him an aura of invincibility. The NY Pro win earned the 28-year-old a direct qualification to the 2021 Olympia. He did well at his Olympia debut but had to be satisfied with fifth place when faced with the top crop of the division.
The performance gave Nick Walker a realistic idea about his standing in the bigger picture and he decided to take time off to improve his physique. The off-season efforts showed their effect when Walker dominated the stage at the 2022 Olympia and achieved a third-place finish. He made a quick turnaround and competed at the 2023 Arnold Classic next, finishing second. He will now attempt to win the Mr. Olympia trophy by getting past Derek Lunsford and reigning champ Hadi Choopan.
Nick Walker is officially two weeks into his 2023 Olympia prep. He recently trained legs at the Dragon’s Lair gym to get a step closer to the Olympia version of his physique. So let’s check out how the Mutant trained his legs in the gym and what message he wanted to convey through this session.
Nick Walker goes through a quad-focused leg workout in the gym
The purpose of the training session was to educate the viewers about the reasons behind having smaller legs. Walker did not overload the weight but maintained a good intensity in the exercises. His message through this workout was simple:
“Just because you stack the entire machine and can do it, doesn’t mean you’re strong and going to grow. Drop the ego!” Walker wrote in the video description.
Lying Leg Curls
Walker started the training session with this hamstring isolation exercise although it was a quad-focused leg day. Leg curls are effective in warming up the knee joints without putting too much stress on them. Since knees are involved in most lower body movements, warming them up is essential for avoiding injuries. As a result, Walker did a few sets of this exercise to get things started.
Leg Press
This served as the first heavy compound exercise of the day. Leg press works all the muscles in the lower body like quads, hamstrings and glutes. Walker started out with a warm-up set using three plates on each side. He applied a progressive overload principle to the working sets and moved on to the next exercise after doing the top set with eight plates on each side.
Hack Squats
While this machine exercise has similar benefits as the traditional barbell squat, it varies in a crucial aspect. Barbell squats are a free-weight movement that engages different supporting muscles. However, they can be a little harsh on the lower back. Hack squats remove this drawback and still retain the benefits that you get from a barbell squat. Walker annihilated a few sets of this exercise before taking up a compound bodyweight movement.
Walking Lunges
This movement served as the finisher of Nick Walker’s leg workout. After pushing through some solid sets with controlled movement, Walker finished the workout but sprinkled a little bit of adductor muscle work before leaving the gym.
Machine Hip Adduction
Hip adductors are a group of muscles on the inner side of the thigh. They are responsible for adduction (bringing together) the legs. The Mutant performed a few sets of this exercise on the machine and called it a day in the gym.
Overall, the workout included:
‘Mutant’ gives crucial tips for building huge quads
Walker gave a valuable lesson about leg training during the workout. While concepts like ‘training to failure’, or ‘progressive overload’ come to our mind, Walker’s suggestion is quite different:
“My number one tip that I think will help grow quads, which I think has drastically helped grow mine, is controlling the weight, contracting the muscle as hard as you can, doing some sort of full range of motion. But with that, it’s okay to do partial reps at the end.”
For instance, Walker did two sets with 315 lbs weight on the hack squats. After finishing the second set, he removed two plates from the weight stack and did the lighter set to failure. He employed a partial range of motion and squatted down to a level where his legs were bent at a 90-degree angle, not going all the way down.
“Another one and I think that will help contract the muscle, which in turn will give the muscle a bit of a bigger pump, which in my belief, a bigger pump means bigger muscle. Because now with that bigger pump you’re now gonna go home, feed the nutrients into that direct area where all that blood is and it’s going to grow…” Walker claimed.
The 2021 Arnold Classic winner observed that people usually overload the machines and perform the exercise with poor form and technique. While this can stimulate the muscles to a degree, Walker feels it is never going to produce the results that we hope for.
“You might have a big a**! But your quads didn’t get nothing out of it!” Walker joked.
“So lower the weight, contract the muscle as hard as you can and top trying to ego-lift,” he concluded.
‘You don’t need to use weights on walking lunges’ – Nick Walker explains why
Walker stated that he can contract his muscles really hard doing bodyweight exercises. As a result, his legs were far more pumped after doing lunges than they were after hack squats.
“So again, it’s not about the weight. It’s about control. That’s what grows. If I started with lunges, I might use weights for sure. But towards the end, there is no need for it. Your legs are already fried…”
“In my mind, I could use weight but I don’t really see a need for it, you know. If you’re contracting and training as hard as you are on the other exercises, really shouldn’t feel the need for weight on walking lunges,” Walker stated.
Even if you want to progressively overload, Walker warned that it is not going to help to carry heavy dumbbells on lunges toward the end of the workout.
“You’re not going to feel it and you put yourself at a high risk of injury. It is pointless,” Walker concluded.
Walker listed his learnings about growth and stated that if you know how to control the weight, you will not need high volume. Secondly, training the leg muscles more frequently is extremely beneficial as long as you have a proper way to recover.
Walker gives prep update
Nick Walker gave some important updates about his prep and stated that his weight hasn’t changed too much since starting the 2023 Olympia prep. He is hovering in the 290 to 294 lbs ( kg) territory. The Mutant was hoping to be in the 280 to 285 lbs range. However, he has experienced some noticeable changes in his body composition.
“But overall, things have been going really smooth, really well. Matt’s (Coach Matt Jansen) really happy with how we’re progressing with the training. He’s very happy…” Nick Walker said.
Nick Walker will have a third crack at the Olympia title in November 2023. If he continues to train with the same approach and intensity, he can very well become the next Mr. Olympia.
You can watch the full workout video here, courtesy of Nick Walker’s personal YouTube channel:
Published: 7 July, 2023 | 2:08 PM EDT
Derek Lunsford’s Proven Workout Guide for Swole Arms
Derek Lunsford is busy putting in work as the 2023 Olympia prep has finally started. After spending the off-season making necessary gains, he now works hard to bring the best version of himself to the Olympia stage in November.
Lunsford is an American IFBB Pro bodybuilder that competes in the Men’s Open division. The 30-year-old competed in the 212 division for the vast majority of his career so far and made his pro bodybuilding debut at the 2017 Tampa Pro with an impressive win. He only kept rising in each one of his appearances. Lunsford eventually managed to dethrone former champ Shaun Clarida at the 2021 Olympia and became the 212 Olympia champion. He seemed like a champion primed to dominate the division much like Flex Lewis back in the day.
However, Derek Lunsford was slowly growing out of his 212 physique. At the 2022 Pittsburgh Pro guest posing, Lunsford showed up with a massive physique that looked comparable to the Open division bodybuilders like Nick Walker and Hunter Labrada.
Amid speculations about his future moves, Olympia management accepted Lunsford’s request for a direct invitation to compete in the Open division. The former 212 Olympia champion registered an outstanding performance in his Men’s Open debut at the 2022 Olympia and finished second behind Hadi Choopan. Derek Lunsford is now dedicating his time to improve enough to dethrone Choopan at the 2023 Olympia.
Recently, Lunsford partnered with IFBB Pro bodybuilder Joan Pradells for an arms workout and posted the video of this session on YouTube. The video was shot before Lunsford’s competition prep started. So let’s check out how the former champ pumped weights in the gym.
Derek Lunsford goes through an arms workout
Cable Triceps Kickbacks
Lunsford and Pradells started the training session with this triceps builder to warm-up. They did a couple of warm-up sets and followed them up with two working sets. In addition to stimulating the triceps, kickbacks are a great way to warm up elbows. It is a crucial joint in most of the arms movements. As a result, warming the elbows up is essential for effortless movements and also to avoid injuries.
Crossover Cable Triceps Extensions
Full elbow flexion and stability in the shoulder joint are prerequisites for triceps isolation. However, most triceps exercises, when performed with both arms, considerably limit the range of motion of the elbow and strip it of full flexion. Crossover cable triceps extensions is one unique exercise that offers both of these benefits for optimal triceps growth. The duo took to this exercise next for stimulating the triceps further and pushed through a few arduous sets. While explaining his method to get the most out of each set, Lunsford said:
“I just went as many as I could. So did like 12 (with both arms) then I did three on one arm and three on the other arm… Once I knew I couldn’t lock it out fully a couple of times… that’s when I was like I can’t…”
Smith Machine Close Grip Incline Bench Press
Although Bench press primarily targets the pectoral muscles, it is a compound movement that helps build upper body pushing muscles including triceps. Performing this exercise with a close grip puts more emphasis on the triceps.
Lunsford and Pradells performed a close grip incline bench press on the Smith machine next. The bar on the Smith machine moves along a fixed trajectory that significantly reduces the need to control weights. This reduces the chance of injury and also enables an individual to focus more on the target muscles.
The training partners pushed through a few heavy sets of the exercise and went on to do the final triceps movement next.
Horizontal Cable Triceps Extensions
Working the muscle from different angles helps emphasize different parts of it. This enables complete growth without imbalances. Lunsford took to the horizontal cable triceps extensions next. While the movement is similar to the cross-body cable triceps extensions, the arm moves away from the body at a shoulder level in this variation. Lunsford and Pradells performed a few sets of this exercise unilaterally to work the triceps further and shifted their focus on working the biceps next.
Dumbbell Curls
The duo took to this most basic and effective bicep isolation exercise to start the bicep work. After doing a few sets with incrementally heavier dumbbells, Lunsford and Pradells took to hammer curls next.
Crossbody Dumbbell Hammer Curls
Similar to the standard hammer curls, the crossbody variation works the biceps brachii, brachialis and brachioradialis muscles in the arm. However, the crossbody form puts more emphasis on the long head of the biceps compared to the standard version.
Lunsford and his training partner moved weights for some solid sets of cross-body hammer curls next to build the forearms and biceps before moving on to the next exercise.
Prone Incline EZ Bar Curls
Also known as spider curl, this exercise is very unique from most biceps exercises in terms of set-up. However, it is an effective bicep builder that also works the forearm muscles.
It can also be performed with a straight bar but an EZ bar enables more natural wrist movement. Lunsford and Pradells performed a few grueling sets of prone incline biceps curls next and took to the final exercise of the day.
Cable Biceps Curls
Cable machines put the muscles under tension throughout the range of motion. As a result, they are more effective in inducing hypertrophy which is the primary goal of professional bodybuilders.
Overall, the workout included:
The former champ compares his current off-season progress and competition prep with the previous year
Lunsford stated that he had to travel a lot this off-season. Most bodybuilders would prefer being at home during this time to follow a diet and training routine without lapse. However, the former 212 Olympia champ feels he has still made good progress.
“Believe me when I tell you I’m in a much better starting point this year than last year because right before I started my prep last year, I got sick.”
According to Lunsford, he was infected with a serious skin infection that caused him to lose a lot of weight. Additionally, the uncertainty about the division kept him guessing for a long time. But these factors are no longer impacting Lunsford’s plan of action. As a result, he is able to manage far better progress. At the time of this video’s recording, Lunsford weighed 260 lbs.
Lunsford is hoping to be ‘on point’ at the 2023 Olympia
Lunsford shed light on the problems he faced heading into the 2022 Olympia. As revealed by him, Lunsford’s body was not responding the right way a couple of weeks before the show. His coach Hany Rambod thought it was in Derek’s best interest to pull out.
“But I told him, ‘No man! I have to do the show. I can’t pull out from the Olympia. It’s just not in me.’ I kind of went back to my wrestling mindset where I can’t not do something… I have to finish what I started. I can’t do it. I have to do this and so we did it,” Lunsford said.
Lunsford might not be at a hundred percent heading into the show. But as we all know by now, he brought a worthy physique to the stage. As better as he looked at the show, Lunsford was not sure how he would be placed.
“I thought okay, if I come in looking good, I can be in the top three. I consider that Ramy was the reigning champion from the year before. I thought he would, on paper, come back and be top three and I figured Hadi would also be top three. What would happen in the top three? I didn’t know. So I was thinking maybe third…” He admitted.
Things are way better now and the former 212 Olympia champ is hoping to come in on point at the 2023 Olympia. Given that he is physically in a far better position compared to the last year, the former 212 Olympia champ definitely has the chance to dethrone Hadi Choopan.
You can watch the full workout video here, courtesy of Derek Lunsford’s personal YouTube channel:
Published: 4 July, 2023 | 2:17 PM EDT
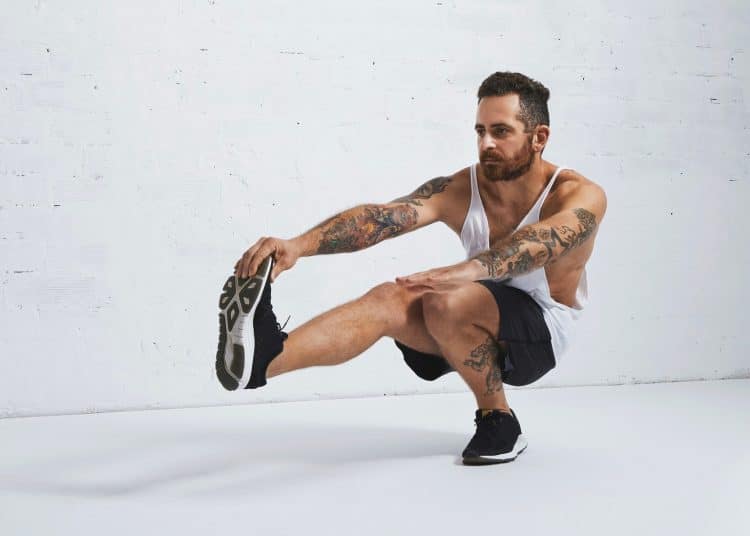
The Best Calisthenic Leg Workout
Friends don’t let friends skip leg day, or so the popular meme says. However, most leg day workouts involve things like squats, deadlifts, hamstring curls, and leg presses – all of which require equipment and various weights to perform.
That’s no problem if you have access and the time to get to a well-equipped gym, but that’s not always practical or possible. For example, you might be on vacation or too busy and unable to find a couple of hours spare to travel and train.
The good news is that you don’t need a large selection of workout equipment or a pile of weights to get a good leg workout. In fact, your body weight is all you really need.
In this article, we share a challenging and effective calisthenic leg workout, so you can train your lower body anywhere and anytime.
What is Calisthenics?
The term “calisthenics” comes from the Greek words for beauty (kállos) and strength (sthenos). It is a form of training that relies on using body weight for resistance and is also known as bodyweight training.
Popular calisthenic exercises include push-ups, pull-ups, sit-ups, unweighted squats and lunges, and gymnastic and functional movements, including rope climbing and handstands.
Calisthenics has always been popular but has become even more so since COVID forced many gyms to close, as most exercises require no equipment and can be performed at home. Bodyweight training is widely used in the military and by amateur and professional athletes, especially martial artists.
You can use calisthenics to achieve almost any fitness goal, including muscle building, gaining strength, fat burning, improving endurance, and increasing general fitness. There are exercises to suit all experience levels, from raw beginners to very advanced.
The Benefits and Advantages of Calisthenics
Many people are skeptical that something as simple as calisthenics can provide a comprehensive workout. Let’s put those fears to rest by examining the benefits and advantages of calisthenic training!
Convenience
While you may need some way to do pull-ups or dips, most calisthenics exercises involve no specialist equipment. As such, you are free to work out almost anywhere and anytime. You can do calisthenics at home, in your garden, at a local park or playground, or in your hotel room.
Also, because you can do calisthenics anywhere you have enough space to move, you won’t have to waste time traveling to the gym to work out. A 45-minute calisthenic training session will only take 45 minutes, and not the couple of hours that traveling to and from a gym so often takes.
Lack of time and facilities can be a real barrier to exercise participation, but with calisthenics, these barriers are removed.
Economical
With no gym fees to pay and no training equipment to buy, calisthenics training is very easy on your pocket. In fact, you don’t need to spend a single cent to start working out with your body weight.
If you train at home, you don’t even need to buy specialist workout clothes – any old T-shirt and loose-fitting pants will suffice.
That said, a few relatively cheap items can add a lot to your calisthenic training, such as pull-up and dip bars, exercise mats, gymnastic rings, and parallettes. However, these tools are optional extras and not essentials.
Joint-friendly
While some calisthenic exercises are extremely tough, others are more straightforward and easy on your joints. Calisthenic exercisers often mirror everyday activities, so they’re easy to learn, and many will already be familiar to you, as things like push-ups, jump jacks, sit-ups, and squats are often part of high school physical education classes.
Most calisthenic exercises can be modified to suit not only your fitness but your height, weight, and limb length. For example, you can move your hands or feet in or outward to make your chosen exercise as comfortable as possible. Try doing that with leg extensions or the pec deck!
This all adds up to a workout that is usually very joint-friendly. Providing you don’t try to progress too quickly, calisthenic training does not typically lead to injuries.
Improve athleticism and functionality
With no machines to guide your movements or support your body, calisthenic training is not only good for your muscles but your nervous system too. Doing calisthenic exercises will improve your balance, mobility, coordination, proprioception, athleticism, and functional fitness and strength.
In other words, the fitness you develop through calisthenics will transfer seamlessly to your life outside of training.
This helps explain why calisthenics is so popular with sportspeople and the military – it improves real-world fitness, so you’ll not only look in shape but will actually BE in shape, too.
Versatility
Contrary to what you might think, calisthenics can be adapted to meet almost any training goal, from fat burning to muscle building to improving your general health and well-being. It all comes down to your choice of exercises and how they’re programmed and performed.
For example, you could superset (perform in pairs) high-rep push-ups and squat jumps to get a great fat-burning cardio workout. Alternatively, you could do low-rep pull-ups and single-leg pistol squats to build muscle mass and strength.
So, whatever you are training for, you can probably achieve it with calisthenics.
Related: Calisthenics vs. Weight Training – Which is Best?
Calisthenics Disadvantages and Drawbacks
While calisthenics training is mostly safe and effective, there are a couple of disadvantages and drawbacks to consider, too. These include:
Difficulty isolating muscles
Bodybuilders use single-joint or isolation exercises to target individual muscles and maximize hypertrophy or growth. This is usually not possible with calisthenic training. In contrast, most calisthenic exercises are compound or multi-joint and train several muscles at once.
While compound exercises are excellent for building strength and burning calories, some lifters enjoy doing isolation exercises, using them to target individual muscles, such as the biceps, triceps, or deltoids.
For this reason, some people like to combine compound calisthenic exercises with resistance band or isometric isolation exercises.
Limited progression options
While you can progress some calisthenic exercises by modifying them to make them more challenging, the primary source of progression is doing more reps. That’s okay when you’re starting out, but as you get fitter and stronger, you may find yourself doing 50, 80, or even 100 reps of some calisthenic exercises. This can be time-consuming and boring.
In contrast, with conventional strength training, you can simply up the weight to maintain your progress.
Your body weight may be a limiting factor
Some calisthenic exercises may be too hard or even impossible if you are heavy and/or a beginner. For example, push-ups and pull-ups can be especially challenging for larger people.
This is usually less of an issue with conventional strength training, where the load can be modified more easily.
It could be too convenient
Convenience can be a double-edged sword. On the one hand, it means you can work out anywhere and anytime. However, this can also create a lack of urgency, meaning you put your workout off until later, and may even skip it entirely. “I’ll do it later” can quickly turn into “I’ll do it tomorrow,” and, as the saying goes, tomorrow never comes.
One way around this is to plan your workouts in advance and have a set time to train, e.g., on rising or before dinner. Working out on the same days and at the same time makes it easier to be consistent.
The Best Calisthenic Leg Workout – Overview
The following workout is designed to be performed as part of a split routine, where you train different muscles on different days, for example:
Monday
Tuesday
Wednesday
Thursday
Friday
Saturday
Sunday
Legs
Upper body
Rest/cardio
Legs
Upper body
Rest/cardio
Rest
However, before starting any strenuous training, you should prepare your muscles and joints with some light cardio followed by dynamic mobility and flexibility exercises. Warming up will make your workout more comfortable and effective and could also help reduce your risk of injury.
Five to ten minutes is all you need, so don’t be tempted to skip this critical step. While not warming up may save you a few minutes, it could cost you months of lost progress if you pick up an otherwise avoidable injury.
All warmed up and ready to go? Good to hear! Here’s your calisthenic leg workout:
#
Exercise
Sets
Reps
Recovery
1
Reverse Nordic
2-4
Take each set to within 1-3 reps of failure.
60-90 seconds
2
Bulgarian split squat (1½ reps)
2-4
60-90 seconds
3
Glute bridge walkout
2-4
60-90 seconds
4
Single-leg Romanian deadlift
2-4
60-90 seconds
5a
Wall squat hold
2-4
N/A
5b
Squat jump
60-90 seconds
6
Single-leg calf raise
2-4
60-90 seconds
Exercises 5a and 5b are to be performed as a superset. Do the first exercise (wall squat hold), followed immediately by squat jumps. Rest a moment and repeat the pairing for the required number of sets.
The Best Calisthenic Leg Workout – Exercise Instructions
There are two ways to perform most exercises – the right way and the wrong way. The right way is safe and effective, while the wrong way is more likely to cause injuries and probably won’t produce such good results.
Follow these step-by-step instructions to ensure you do all the exercises in this workout correctly.
1. Reverse Nordic
Muscles targeted: Quadriceps, hip flexors, core.
People who train in a gym can do leg extensions to target their quadriceps. Calisthenic practitioners don’t have this option, but that doesn’t mean you can’t hammer your quads and strengthen your thighs. Think of reverse Nordics as natural leg extensions – no equipment required!
Steps:
Kneel on the floor with your toes pointed and the tops of your feet pressed into the floor. Your thighs and torso should be vertical. Brace your core.
Without bending your hips, lean backward and try to touch your calves with your hamstrings.
Drive your feet into the floor and push yourself back into the starting position.
Continue for the desired number of reps.
Tips:
Kneel on a folded gym mat or foam pad for comfort.
Only lean back as far as is comfortable. Increase your range of motion as you get stronger.
Use a resistance band for assistance if necessary:
2. Bulgarian split squat (1½ reps)
Muscles targeted: Quadriceps, hamstrings, gluteus maximus, hip abductors, hip adductors.
After hitting your quads hard with reverse Nordics, it’s time to work them in conjunction with your other lower body muscles with Bulgarian or rear foot elevated split squats. However, to compensate for the lack of external load, you’ll do this exercise using 1½-rep style.
Steps:
Stand with your back to a knee-high step or bench. Bend one leg and place the top of your foot on your platform. Hop forward and into a split stance.
Keeping your torso relatively upright, bend your legs and lower your rear knee down to within an inch of the floor.
Extend your leg and come halfway up.
Lower your knee back down to the floor, and then come all the way up.
That’s one rep – keep going!
Continue for the desired number of reps, and then switch legs.
Tips:
Do this exercise next to a wall and use it for balance if required.
Place a folded exercise mat under your rear knee for comfort.
Lean forward slightly to increase glute and hamstring engagement.
3. Glute bridge walkout
Muscles targeted: Hamstrings, gluteus maximus, core.
With no leg curl machine to use, you may be wondering how you’re going to train your hamstrings. Well, wonder no more – this exercise is the answer! Glute bridge walkouts are a low back-friendly posterior chain exercise that will fry your hamstrings in double-quick time.
Steps:
Lie on your back with your legs bent and feet flat. Press your lower back into the floor and brace your core.
Lift your hips up toward the ceiling.
Without touching your butt to the floor, walk your feet out and away until your legs are straight.
Walk your feet back in and repeat.
Tips:
Keep your core braced and hips up throughout.
Alternate your leading leg rep by rep.
Tale small steps to keep your muscles under tension for longer.
4. Single-leg Romanian deadlift
Muscles targeted: Hamstrings, gluteus maximus, core.
Now your hammies are warmed up and ready to go, it’s time to work them a little harder with single-leg Romanian deadlifts. This exercise will also enhance your balance and mobility, making it a very functional calisthenics move.
Steps:
Stand with your feet together. Shift your weight over onto one leg and brace your core. Bend your supporting knee slightly for balance.
Hinging from your hips, lean forward and reach down the front of your leg to the floor.
Extend your other leg out behind you as a counterbalance.
Stand up straight and repeat.
Continue for the desired number of reps, and then switch legs.
Tips:
Take care not to round your lower back, as doing so could lead to injury.
Do this exercise next to a wall and use it for balance if required.
You can also do this exercise with your non-working foot still on the floor, i.e., a B-stance or kickstand Romanian deadlift.
Related: Why the Single Leg Romanian Deadlift Deserves to Be the Hero of Your Workout
5a. Wall squat hold
Muscles targeted: Quadriceps, gluteus maximus, hamstrings.
Wall squat holds are an isometric lower body exercise. This means your muscles generate force without producing any movement. Don’t let the static nature of this exercise put you off – it’s still a very challenging way to work your quads, glutes, and hamstrings.
Steps:
Stand with your back to a smooth wall. Lean against the wall so your feet are about 24 inches from the baseboard.
Slide down the wall until your thighs are parallel to the floor.
Push your lower back into the wall as hard as possible.
Maintain maximal muscle tension for as long as you can.
Tips:
Descend below parallel to really hit your quads hard.
Take care not to hold your breath.
Do not rest your hands on your legs – keep them out of the way to ensure you can’t cheat and make this exercise easier.
5b. Jump squat
Muscles targeted: Quadriceps, gluteus maximus, hamstrings, gastrocnemius, soleus.
Doing squat jumps immediately after wall squats will set your legs on fire! However, this devilish exercise combo will also build muscle strength, size, and power without having to use a squat rack, leg press machine, or any weights. It’s low-tech but ultra-high-effect!
Steps:
Stand with your feet about shoulder-width apart, toes turned slightly outward.
Bend your legs and squat down until your thighs are roughly parallel to the floor.
Stand up quickly and leap into the air as high as possible.
Land on slightly bent knees to absorb the impact and repeat.
Tips:
Use your arms for added momentum.
End your set when your jump height starts to decrease.
Stand on a mat for a more cushioned landing.
6. Single-leg calf raise
Muscles targeted: Gastrocnemius, soleus.
No calf machine? No problem! You can get a great lower leg exercise with only your body and a sturdy step to stand on. Your calves are a small but often visible muscle group, so it’s important not to neglect them.
Steps:
Stand on a step so the ball of one foot is on the edge. Cross your other foot behind your supporting ankle.
Keeping your leg straight, lower your heel down toward the floor and get a good stretch in your calf.
Push up onto your tiptoes and repeat.
Switch legs and do the same number of reps on the other leg.
Tips:
Pause at the top and bottom of each rep to make this exercise more challenging.
Use your hands for balance as required.
Keep your glutes engaged and your core braced throughout.
Calisthenic Leg Workout – FAQs
Do you have a question about this workout or calisthenic training in general? No problem, because we’ve got the answers!
1. How many times a week should I do this workout?
While you could do this workout just once a week, you’ll get better results if you do it twice, e.g., Monday and Thursday. This provides a good balance between work and rest/recovery.
You could do it three times, but that’ll probably be too much for most people, especially if you push the sets close to failure. Remember to perform it in conjunction with a similar number of upper-body workouts.
2. What does “take each set to within 1-3 reps of failure” mean?
It’s almost impossible to tell you how many reps to do as your body weight and fitness will directly affect your performance and capabilities. So, rather than provide you with a rep range that’s too high or too low, you should simply do as many reps as you can in good form, be that 10, 20, or 30.
Just keep going until your muscles feel good and tired. Strive to do more reps as you get fitter and stronger, but never sacrifice good form for a couple more reps.
3. Is this a cutting or a bulking leg workout?
Your workout doesn’t really determine whether you are cutting or bulking. Instead, it’s your diet. To cut (lose fat), you need to have a dietary calorie deficit which forces your body to burn fat for fuel. A 500-calorie deficit will usually result in losing one pound per week.
In contrast, you need a calorie surplus to build muscle and gain weight. 500 extra calories a day should result in a one-pound weight gain per week.
So, adjust your diet according to your goals, and don’t worry too much about changing your workout for cutting or bulking.
4. Can I change any of the exercises?
Sure you can! However, make sure you use similar exercises that work the same muscle groups as those listed. For example, if you want to replace squat jumps, do something like jumping lunges, which involve all the same muscles. Stay true to the spirit of the program, and you won’t go wrong.
However, avoid swapping out an exercise just because you find it hard. It’s those challenging exercises that invariably produce the best results.
5. Is this workout suitable for beginners?
While a beginner could do this workout, it’s probably a little too challenging for most. It’s pretty long and contains some demanding movements that may be beyond the abilities of less experienced exercisers.
Do a basic calisthenic program for a few months, and then return to this plan when you feel you’re ready. Even then, just do a couple of sets of each exercise and stop before reaching failure. Doing too much too soon will undoubtedly cause severe delayed onset muscle soreness and could even lead to injury.
So, start slowly and build up gradually – getting in shape is a marathon, not a sprint!
Wrapping Up
While exercises like squats, leg presses, and deadlifts are undoubtedly effective, they’re not always practical or convenient. Going to the gym can take time many people don’t have, and gym memberships can be expensive. You COULD set up a home gym, but not everyone has the space or the budget to do so.
The good news is that you can develop a strong, muscular, well-conditioned lower body with calisthenic exercises and workouts. Using nothing except your body weight, you can train anywhere and anytime, and it won’t cost you a cent.
So, there really is no reason to skip leg day ever again. Do the workout in this article a couple of times a week to develop a lower body you can be proud of.
Andrew Jacked Builds Dense Back, Looks Stage-Ready In Physique Update Ahead of Texas Pro
Andrew Jacked is gearing up for earning his second invitation to compete on the Olympia stage and you better believe that the 2023 Texas Pro could very well be a foregone conclusion. Why? Because Andrew Jacked is looking absolutely menacing and stage-ready in his recent physique updates.
Chinedu Andrew Obiekea, better known by his stage name Andrew Jacked, is a Nigerian professional bodybuilder that shot to stardom within a blink of an eye in 2022. He grabbed the attention due to his extremely aesthetic physique in spite of an unusually tall 6ft-1in frame, narrow waist and a perfect v-taper.
Andrew Jacked made the transition to NPC in 2022. He earned the IFBB Pro card with a dominant win at the 2022 Arnold Classic Amateur and then secured a direct invitation to the 2022 Olympia by bringing home the 2022 Texas Pro trophy. The Nigerian also bagged the 2022 Arnold Classic UK title before Olympia.
At this point, bodybuilding experts were intrigued by his chances against the top Men’s Open competitors. It is very rare to see so much hype around someone with so little competitive experience. However, Andrew carried the burden of expectation quite well, finishing eighth at the 2022 Olympia in the process. He last competed at the 2023 Arnold Classic and finished third. He now awaits the opportunity to successfully defend the Texas Pro title in 2023.
As a part of this effort, Andrew Jacked went through a back workout and also posted a physique update for his coaches to get a better understanding of his progress. So let’s check out how much Andrew’s physique has improved since we last saw him.
Andrew Jacked goes through a back workout
Andrew Jacked agrees with the phrase that shows are won from the back. As a result, he is maintaining his focus on improving the thickness, density, and width in the back. Although he has made massive improvements over the last few years, Andrew Jacked believes there is always room for improvement.
The focus of this back workout was to improve back density and the 2022 Texas Pro winner was joined by his friend George, who motivated him to perform this workout.
T-Bar Rows
If you want your back to grow, you’ve gotta row. If you had to choose only one rowing exercise for back building, our team at Fitness Volt would recommend going with T-bar rows for sure. That being said, all rowing exercises have their benefits and deserve a spot in your training routine.
T-bar rows are an ultimate back builder as they work all the pulling muscles in the upper body and contribute towards building muscle and strength. Andrew Jacked pushed through some heavy sets of the exercise with incrementally heavier weights to stimulate the back. Following this, he took to the next compound exercise.
Bent Over Chest Supported Barbell Rows
Andrew Jacked next performed the bent-over chest-supported rows using a cambered bar. Chest Supported Rows eliminate momentum from the play and compel back muscles to pull the weight up without assistance.
After testing his strength with a few solid sets of this compound exercise, the 2022 Texas Pro winner carried his momentum over to perform a superset.
Superset – Reverse Grip Seated Rows and Cable Pullovers
Andrew then went on to perform this superset to increase the aerobic intensity of the workout while trying to get more work done in a shorter period. Reverse grip seated rows primarily target the biceps, lats, lower back, and shoulder muscles.
A cable pullover, which is a severely underappreciated isolation movement, takes the biceps out of the picture and forces the back muscles to do the work. Andrew Jacked performed all the sets within this superset in rapid succession to take on the next exercise.
Vertical Rows
Another variation of seated rows followed next as the Nigerian powerhouse performed vertical rows on a selectorized machine to work the back muscles from a different angle. After cranking out some solid sets to add more stimulus to the back muscles, Andrew Jacked took to the final exercise of the day.
Lat Pulldown
Andrew Jacked wrapped up the back training session with this lat builder. Lat pulldowns are one of the most common and effective vertical pulling movements in gyms around the world. They primarily target the latissimus dorsi muscles and help build a wide back. Andrew Jacked annihilated a few good sets of lat pulldowns to put an end to the workout.
Overall, the workout included:
After wrapping up the workout, Andrew Jacked stated that he didn’t really start the day feeling motivated to hit the gym. But he still managed to get a good day’s work because of his friend.
“That’s the end of the workout today. It’s good that I got a good push here today from my friend here George. Or else I would have just done something like arms bro. There are some days when you just wake up and it just doesn’t feel like doing anything.
It was like that. I challenged myself to come to the gym, spoke to my friend… At the end of the day, it was good though. Nothing crazy but we did something…” Andrew Jacked said about his workout.
Following this, Andrew Jacked headed over to give a physique update check-ins for his coach as the prep is drawing closer. The Nigerian bodybuilder is known for the insane v-taper and narrow midsection. The same is looking more pronounced and well-defined at this stage.
Additionally, Andrew’s quads drew attention because of their fullness. Although there is room for more definition in the back, no one can deny that there is a perfect balance of width and thickness in Andrew’s back.
Andrew Jacked looks primed to defend the Texas Pro title in 2023. It will be interesting to see how he performs at the 2023 Olympia which is drawing closer and closer with each passing day.
You can watch the full video here, courtesy of Andrew Jacked’s personal YouTube channel:
Published: 30 June, 2023 | 6:40 PM EDT

Two Best Love Handle Workouts For Building a Shredded Midriff
Love handles poking through your shirt can be the first sign of trouble. Most people are in denial at first when they start accumulating body fat. They blame their ‘ill-fitting’ shirts for their love handles or consistently tug on their shirts throughout the day to conceal them. Since you’re reading this article, I assume you are guilty of doing at least one of these at some point.
Ignoring these signs can worsen your spare tire situation, and it will require more work in the future to fix. Love handles can be notoriously difficult to lose. These are among the last fat stores to disappear during a fat loss program.
Before we get into the nitty gritty of love handle workouts, let’s get to the basics. Do you know how love handles got their name? I thought so.
Love handles is a colloquial expression that refers to excess fat deposits around the waistline, specifically on the sides of the abdomen and lower back. They got their name as an individual’s partner or loved ones often embrace them around the hips. Furthermore, it is often the body part your partner holds onto during a love-making session. The term ‘love handles’ will never be the same for you from this moment. You’re welcome!
In this article, we go over everything you need to know about love handles, including their causes, the associated risks, the holy grail of losing love handles, the best workouts and exercises, and the best lifestyle tips to see quick results.
What are Love Handles?
Love handles are protruding fat stores that sit above your hip bones and cover your external obliques. They are among the most stubborn areas to lose fat from. “Muffin tops” are a sign of poor physical fitness. Plus, they can hamper your physique aesthetics. The V-taper, characterized by broad shoulders and a narrow waist, is widely regarded as the epitome of aesthetic perfection. Love handles, on the other hand, hamper your shoulder-to-waist ratio.
Genetics, hormonal changes, poor diet, sedentary lifestyle, and overall body composition can influence love handle development. Besides their impact on your overall fitness and aesthetics, love handles can also lead to health conditions, such as cardiovascular disease and diabetes.
Contrary to what most people think, performing a few exercises in the transverse (axial) plane isn’t enough to shed the spare tire. Additionally, you cannot spot-reduce your love handles. You must follow a balanced diet and exercise regimen to achieve overall fat loss.
The love handles can be a tricky area to target with exercises. Performing the exercises with a picture-perfect form is crucial to achieving the desired results. You must also make mindful lifestyle choices to lose the love handles and keep them off.
Causes of Love Handles
Love handles develop as a consequence of weight gain. You gain weight when you are in a calorie surplus for a prolonged period, which includes consuming more calories daily than you expend. Your body converts the food into glycogen to use as fuel. However, your body stores excess glycogen as fat. Love handles tend to be the primary area where surplus fat accumulates in the body.
Besides a calorie surplus, here are the other factors that can cause weight gain — and love handles:
Genetical predisposition
Sedentary lifestyle
Hormonal changes
Age
Gender
Stress
Lack of sleep
Medication
Certain health conditions
Risks of Love Handles
While some may perceive muffin tops as endearing and dismiss them, it is important to acknowledge that love handles can have significant health implications. Here are some potential risks associated with love handles: [1]
Obesity
Increased risk of chronic diseases
Higher chances of contracting cardiovascular diseases
Insulin resistance and diabetes
Metabolic syndrome
Body image and psychological well-being
Kidney disease
The Secret To Losing Love Handles
If eating more calories daily than you can burn leads to excess fat accumulation and love handle development, guess how you can lose the spare tire? Right, by burning more calories in a day than you consume. It is known as a calorie deficit.
Many people believe they can trim their belly fat by doing abdominal exercises and do not need to change their diet. Unsurprisingly, most of these folks never achieve their weight loss goals and end up shopping for new pants and loose-fitting shirts to hide their body fat.
Weight loss ultimately comes down to calories in versus calories out. You can enter a calorie deficit by cutting your calorie intake or burning more calories through exercise. Using a combination of the two will get you the fastest results.
Two Best Workouts To Lose Love Handles
There are two popular ways of training your core. You could do it after a strength training workout to tone your midsection and develop a six-pack. The other method involves performing a high-intensity full-body workout to burn calories and increase fat loss. The HIIT workout is more prevalent among people that want to focus on losing weight, whereas the first type of core workout is favored by lifters that want to build muscle mass and strength.
Core-Strengthening Workout To Lose Love Handles
This type of workout consists of three to four exercises and is done after a resistance training session. Focus on your breathing pattern and contracting your target muscle group with each rep to get the best bang for your buck.
Here is how to perform each exercise in this workout:
Russian Twist
Sit on the floor with an upright torso, your knees bent, and heels on the ground. Lean back until your torso is at a 45-degree angle with the floor. Lift your feet off the floor and extend your arms so they are parallel to the floor and over your knees. Turn to your right side while breathing out. Contract your abs and obliques at the isometric contraction point. Return to the starting point and repeat on the other side. Alternate between sides for recommended reps. Advanced exercisers can hold onto a weight plate to make this exercise more challenging.
Woodchopper
Stand upright with a hip-width stance while holding a dumbbell with both hands in front of your hips. Interlace your fingers around the dumbbell’s handle for a firm grip. Lift the dumbbell across your body and over your right shoulder. Twist your left foot slightly during the upward motion and fix your eyes on the dumbbell. Bring down the dumbbell diagonally across your body so it is at the side of your left knee. Pause and contract your core during the downward motion. Repeat for recommended reps before switching sides.
Bicycle Crunch
Lie on your back on the floor. Hold your hands next to your ears and lift your legs so your thighs are perpendicular to the floor. Bring your left knee toward your chest while reaching across with your right elbow. Pause and contract your core. Return to the starting position and repeat on the other side.
Side Plank
Lie on your side on the floor. Place your elbow under your shoulder and stack your hips and legs. Plant your forearm on the floor so it is perpendicular to your body. Lift your hips off the floor; your body should be in a straight line from head to toe. Place your top hand on your hip. Hold this position for a minute. Without stopping for rest, repeat on the other side.
HIIT Workout To Burn Calories, Boost Fat Loss, and Get Rid of Love Handles
Given below is a full-body high-intensity interval training (HIIT) workout that will spike your heart and metabolic rate. This 17-minute HIIT workout will help you shed excess fat and build a shredded core. Perform two rounds of these exercises and limit rest duration between exercises to 30 seconds. You are allowed a two-minute breathing time after completing the first circuit. Also, do not stop for rest while changing sides in the side plank pulse.
Given below are step-by-step guides to performing these exercises:
High Knees
Stand upright with a shoulder-wide stance and place your hands on your hips. Brace your core, bend one leg, and lift your knee until your thigh is roughly level with the floor. Return the leg to the ground and repeat on the other side. Establish a steady rhythm.
Mountain Climber
Assume the push-up position; your hands should be under your shoulders and legs extended behind you. Your body should be in a straight line from head to toe. Lift one foot off the floor, bend at the knee, and bring it toward your chest. Return it to the start position and repeat on the other side. Alternate between sides in a rhythm.
Plank Jack
Get into the high plank position. Place your hands on the floor under your shoulders. Extend your legs behind you and place your feet together. Maintaining the high plank, jump and place your feet wider than shoulder-width apart. Jump and return to the starting position. Repeat in a rhythm.
Side Plank Pulses
Get into the side plank position so your body is in a straight line from head to toe. Lower your hips to the floor and return to the starting position. Repeat for the recommended reps before switching sides.
Sledgehammer Overhead Strikes
Grab a sledgehammer in front of your body with your left hand at the bottom of the handle and your right hand just above it. Swing the hammer around your right side and behind and over your head. Smash the tire in the center with full force. Switch hands and return the hammer to the overhead position while swinging the hammer around your left side. Repeat for recommended reps.
Cross-Body Mountain Climber
Get into the high plank position. Maintaining your body in a straight line from head to toe, lift one foot off the floor, bend your knee, and bring it toward the opposite shoulder. Contract your core at the top. Return to the start position and repeat on the other side. Perform this exercise using a steady rhythm.
Sit-Up Twist
Lie on your back on the floor, bend your knees, and plant your feet on the ground. Hold your hands next to your ears. Contract your abs and lift your torso off the floor. Turn to your side and bring your left elbow to your right knee during the upward motion. Return to the start position and repeat on the other side.
Most Effective Love Handle Exercises
Sticking to the same exercises can get really boring, really fast. If you dread doing the same movements in every workout, we have got you covered. Below is an exhaustive list of additional exercises that will help tone your love handles. Add these movements to your exercise arsenal to keep your workouts exciting.
Standing Dumbbell Side Bend
Stand upright with a hip-width stance while holding a dumbbell in each hand at your sides. Keeping your elbows locked, brace your core, and slowly lower the right dumbbell as low toward the floor as possible. It should at least be at your knee level at the bottom. Return to the start position. Complete the recommended reps on one side before switching to the other side. Read more about standing dumbbell side bend here.
Oblique V-Ups
Lie on your right side on the floor. Stack your legs while maintaining a slight bend in your knees. Place your right arm on the floor so it is perpendicular to your torso. Hold your left hand behind your head. Lower your head and left arm to the floor behind you; this will be your starting position. In a single motion, lift your legs off the floor and raise your knees toward the ceiling while bringing your left elbow to your knees.
Cable Side Crunch
Set a cable pulley at the highest setting and attach a D-handle bar. Grab the handle with a neutral (palm facing inward) grip and take a big step away from the pulley. Place your other hand on your hip. Holding the handle to your ear, perform a side crunch. Contract your core at the bottom of the movement. Repeat for reps before switching sides.
Read more about cable side crunch.
Side Jackknives
Lie on your left side on the floor; your hips and legs should be stacked. Place your left upper arm on the floor in front of your body so it is perpendicular to your torso. Keep your right hand on your right hip. Lift your right foot toward the ceiling while performing a side crunch. Pause and contract your obliques at the top. Rinse and repeat.
Read more about side jackknives.
Side Plank Twist
Get into the side plank position. Place your top hand behind your head. Your top elbow should be in line with your shoulders at the starting position. Bring your top elbow to the floor under your shoulders while keeping your legs stacked. Contract your core during the lowering movement and hold for a two-count at the bottom. Repeat for recommended reps before switching sides.
Standing Torso Twist
Stand upright with a hip-width stance. Extend your arms in front of your body so they are parallel to the floor. Interlace your fingers and turn to your right side as far as possible without bending your elbows. Twist your left leg during the turn for optimal range of motion and contract your abs and obliques. Return to the starting position and repeat on the other side. Experienced exercisers can hold onto a dumbbell or kettlebell to make this exercise more challenging.
Flutter Kicks
Lie supine on the floor with your legs extended. Place your hands under your hips for leverage. Brace your core and lift your feet a few inches off the floor. Raise your head off the floor. Without bending your knee, lift your right leg toward the ceiling while keeping your left leg in place. Return the right leg to the starting position while lifting the left leg toward the roof. Maintain a steady tempo for recommended reps. More on flutter kicks here.
Side Plank Knee Tucks
Get into the side plank position. Place your top hand next to your ear. Simultaneously, elevate your upper leg towards your chest while bringing your elbow to your knee, all in one fluid motion. Breathe out and contract your abs throughout the range of motion. Return to the start position and repeat for recommended reps before switching sides.
Standing Side Leg Lifts
Stand with your left side facing a sturdy elevated surface like a cable pulley machine. Hold on to the pulley machine with your hand. Hold your right leg slightly in front of your body. Bring the right leg toward the pulley while keeping your knee locked. Raise the leg out to your side as high as possible. Return to the starting position and repeat for recommended reps. You could also perform an oblique crunch during the concentric motion for better muscle contraction.
Side-to-Side Medicine Ball Slams
Place a medicine ball on the floor. Stand upright with a shoulder-width stance so the medicine ball is at your left foot’s side. Bend over and lift the ball off the floor. In a sweeping motion, lift the ball over your head. Raise onto the balls of your feet and slam the ball on your right side as hard as possible. Bend over and lift the ball. Alternate between sides for reps. Learn more about side-to-side medicine ball slams here.
Lateral Band Walk
Wear a loop resistance band around the bottom of your thighs. Take a wide stance so that band is engaged. Bend your knees slightly and hinge at your hips. Hold your hands in front of your chest. Take a wide step to your right side. Walk 10 steps to your right side and return to the starting position. Start with the opposite leg on the subsequent set.
Side Plank with Leg Lift
Get into the side plank position. Raise your top leg as high toward the ceiling as possible. Exhale and contract your core during the upward motion. Hold the position for a two-count. Slowly lower the leg to the starting. Repeat for recommended reps before switching sides. Experienced exercisers can wear ankle weights while performing this exercise for optimal oblique engagement. Also, perform a side crunch to target your love handles.
Side Plank Reach-Throughs
Assume the side plank position. Raise the top arm toward the ceiling so it is perpendicular to the floor; this will be your starting position. Lower your arm toward the floor and thread it between your body and the floor. Breathe out and contract your abs during this lowering motion. Repeat for reps and switch sides.
Clamshell
Lie on the floor on your side. Bend your knees while keeping your hips and legs tacked. Place your bottom arm under your head for support. Place the hand of your top arm on the floor for support. Keeping your ankles stacked, lift your top leg toward the ceiling as high as possible. Hold the contraction for two seconds. Tie a resistance band around your knees for better glute engagement.
Seated Side Bend with Dumbbell
Sit upright on an elevated surface, such as a flat bench, while holding a dumbbell in each hand. Place your feet on the floor wider than shoulder-width apart for better stability. While breathing out, lower the right dumbbell to the floor. Explode back to the starting position. Repeat for recommended reps before switching sides.
More Love Handle Exercises
Here are a few more love handle exercises that will help burn off the spare tire and give you the coveted sex lines:
Cable Woodchoppers
Stability Ball Side Bend
Side Lunge with Twist
Plank with Knee Tucks
Side Plank with Arm Reach
Crunch and Twist on Stability Ball
Side Plank Clamshells
Side Plank with Dumbbell Row
Kettlebell Windmill
Standing Side Bend with Resistance Bands
Heavy Farmer Walk
Single-Arm Dumbbell Row
Box Jump
Floor Wipers
Hanging Windshield Wiper
Tips For Losing Love Handles
Here are a few tips to speed up your fat loss and build a shredded six-pack:
Follow a Balanced and Healthy Diet
Folks serious about losing the spare tire must avoid following a cookie-cutter diet plan. You must follow a personalized diet plan that helps you lose 1-2 pounds weekly. According to the CDC, you must maintain a daily 500-1,000 calorie deficit to achieve this goal. [2]
Use this total daily calorie expenditure (TDEE) calculator to determine your goal daily calorie intake. Then, break it down into a suitable macronutrient split to lose fat and build muscle mass simultaneously.
Exercise
Although training is not mandatory on a weight loss program, it can help speed up your progress. Perform two daily cardio training sessions for optimal results — one HIIT and another low-intensity steady state (LISS).
Seeking professional help can help beginners save time and effort. A personal trainer can give you a customized training program and will teach you the correct exercise form. On the other hand, a registered nutritionist will ensure you are hitting your daily macro and micronutrient goals.
Make Healthy Lifestyle Choices
Losing weight and love handles and keeping them off might require a complete lifestyle change. Folks with desk jobs must add more physical activity to their days. You must choose the stairs over the elevator and bike to work when possible.
Start with a goal of walking 5,000 steps daily and slowly make your way up until you are logging 10,000 daily steps. Staying physically active will help burn calories throughout the day and keep your metabolic rate high.
Stay Hydrated
Drinking water at regular intervals can keep you satiated. Furthermore, it can help curb cravings. Drink at least a gallon of water daily to ensure optimal body functioning and overall well-being. Switch calorie-laden sugary drinks and sodas with plain water to speed up your weight loss.
Adequate hydration can also boost your metabolism. Your body is more effective at metabolizing stored fat and converting it into energy when you are hydrated. It can help improve your fat-burning process. Staying hydrated also enhances digestion and nutrient absorption, supporting your overall weight loss efforts.
Rest
Many people tend to overexert themselves while trying to lose weight and love handles, which can be counterproductive. Remember, you lose weight while you are asleep, and you must give your body enough to recover. Sleep at least seven to eight hours each night for optimal results.
Also, learn to listen to your body. If you are very sore after a workout, it is best to skip a training session and allow your body time to recuperate. Pushing too hard in the gym can lead to overtraining, which can negatively impact your central nervous system.
Avoid Stress
Your cortisol levels rise when you are under stress, which can increase your appetite, slow down your metabolism, and increase fat storage. Chronic stress can lead to greater inflammation, emotional eating, and impaired sleep.
Elevated cortisol levels can make it more challenging to lose weight, even when you are following a balanced diet and training program. Meditation, yoga, and journaling can help deal with chronic stress. However, you must consult a healthcare professional if these three methods don’t work for you.
Set a Goal and Track Your Progress
Starting your transformation journey with a specific, measurable, attainable, relevant, and time-bound goal can increase your chances of success. Having a deadline will also motivate you to stick to your fitness regimen.
You must have long-term and weekly goals. Track your progress every week to ensure you are on the right path. Stick to your regimen if the progress is favorable. Conversely, make necessary adjustments if the needle is not budging in the right direction.
Stay Consistent and Dedicated
Love handles can be a stubborn muscle group. Depending on your current and goal physique, it might take you weeks, if not months, to achieve your objective. Nonetheless, you must stick to your fitness regimen with military discipline and ensure you never miss a training session or meal.
You must also consistently challenge yourself by increasing your training intensity and volume to avoid hitting a plateau. Establishing healthy habits will reduce the friction in your training regimen and help you stick to the fit lifestyle for the long term.
FAQs
Can I lose love handles without exercise?Yes. The love handles vanish when there is a reduction in your overall body fat, which requires you to be in a calorie deficit. You can lose your love handles by limiting your calorie intake. That said, adding exercise to your fitness regime can help speed up your results.
Is it possible to have a flat stomach and love handles simultaneously?Some skinny individuals can also develop love handles, known as skinny fat. Skinny fat can result from several factors, including genetics, sedentary lifestyles, medication, or certain health conditions.
How much time will it take for me to lose my love handles?It will depend on your starting physique and ultimate objective. You cannot spot-reduce your love handles and must work toward overall body fat loss. A 500-1,000 daily calorie deficit can help you lose 1-2 pounds weekly.
Note: The content on Fitness Volt is for informative purposes only. Do not take it as medical advice to diagnose, prevent, or treat health problems. If you’re suffering from a health issue, are pregnant, or are under 18 years old, you should consult your physician before starting any new supplement, nutrition, or fitness routine.
Wrapping Up
Love handles can be stubborn, requiring dedication, determination, and consistency to burn them off. Avoid falling into the spot-reduction trap and focus on reducing your overall body fat to see quick, favorable results.
This article has two highly effective workout routines specifically designed for strength trainers and those engaged in full-body HIIT exercises to effectively target and eliminate love handles. So, what are you waiting for? Lace-up your shoes and get moving. Best of luck!
References
Patel P, Abate N. Body fat distribution and insulin resistance. Nutrients. 2013 Jun 5;5(6):2019-27. doi: 10.3390/nu5062019. PMID: 23739143; PMCID: PMC3725490.
Centers for Disease Control and Prevention. (2021). Losing Weight. Retrieved from https://www.cdc.gov/healthyweight/losing_weight/index.html
The Best Over 40 Training Tips and Workout Plan for Men
I’ve been lifting weights since I was 15 years old – I’m now 55. During that time, I’ve kept meticulous records, and looking back over my training diaries it’s interesting to see how much my workouts have changed.
Some of these changes were due to my goals at the time. I’ve trained for bodybuilding, powerlifting, and to complement whatever sport I was into, all of which required different workout approaches.
Other changes are the result of old injuries and, sadly, getting older. Simply put, I can’t train like I did when I was in my 20s and 30s. The mind is willing, but time has taken its toll on my body.
However, as the saying goes, winners never quit, and quitters never win, and I have no intention of giving up training anytime soon.
In fact, my mission in life is to preserve my strength and muscle mass for as long as possible, and I plan on being the strongest, most buff old dude in the retirement home!
So, how do you get and stay in shape in your fourth decade?
In this article, I share my top tips for working out in your 40s and provide you with a tried-and-tested age-appropriate workout to follow.
The Challenges of Working Out in Your 40s and Beyond
Advancing age is NOT a reason to give up working out. In contrast, exercise becomes more important as you get older. Regular workouts can help reduce the risk of:
Age-related muscle loss (sarcopenia)
Age-related bone loss (osteopenia)
Coronary heart disease
Type II diabetes
High blood pressure
Age-related weight gain
Cognitive decline
Some cancers
All-cause mortality
So, while there are no guarantees, getting and staying in shape as you age could help you live longer. And even if you don’t get to celebrate your 100th birthday, you will be able to enjoy a more active, fulfilling, and independent life, making the most of whatever time you have left.
However, getting older is unavoidable, and the changes in your body mean that you probably won’t be able to work out like you did in your 20s and 30s. That’s not to say you have to quit lifting weights and take up tai chi! But you will need to modify your training to make it sustainable and safe.
Some of the challenges facing exercisers in their 40s and beyond include:
Slower recovery between workouts
The older you get, the longer it takes to recover from bouts of intense exercise. As such, you’ll need to pay as much attention to rest and recuperation as you do your workouts. Getting enough sleep is a must, and you should also alternate between intense and less intense workouts.
You’ll also need to accept that there will be days when you’re not firing all cylinders simply because you’re still tired from your last workout. Be prepared to dial things back and take it easy, as pushing on regardless could lead to overtraining and injuries.
You can still train hard in your 40s, but you’ve got to train smart, too.
Joint issues
Like a car with high mileage, older exercisers tend to accumulate wear and tear. Joints are especially prone to aches and pains. Knees, hips, shoulders, elbows, your lower back – it’s not unusual to experience discomfort in some or all of these areas.
The good news is that training can help make these issues less impactful and preserve joint function as you age. However, you may need to make allowances for your joints, replacing high-stress exercises with movements that are more joint-friendly.
Injuries take longer to heal
As a young athlete, I had no problem either training through injuries or taking a week off and coming back healed and ready for more. Nowadays, even a slight strain can take several weeks or even months to heal. Needless to say, this can be VERY frustrating!
With this in mind, a lot of your over-40 training should revolve around preventing injuries in the first place. Warm-ups and prehab are the name of the game if you want to avoid injuries. Plus, you should probably stop chasing new one-repetition maximums and focus on other performance metrics, such as rep records or movement quality.
Mobility and flexibility issues
Muscles tend to shorten and tighten as you get older. This can affect everything from your posture to your squat depth. Trying to force your limbs to bend further than is comfortable is a recipe for injuries which, as you know, will take longer to heal than when you were younger.
As such, you should a) do all that you can to maintain or even improve your mobility and flexibility and b) avoid exercises that take you into extreme ranges of motion. There is no need to treat your body like a fragile antique, but you should do what you can to avoid unnecessary injuries.
Related: The Best Morning Stretches for Men
Hormonal changes
Testosterone and human growth hormone levels peak in your 20s and early 30s. After that, the production of these anabolic or muscle-building hormones gradually decreases.
These hormonal changes can cause reductions in muscle mass and strength, lowered motivation, slower recovery, and less energy. All these things can affect your ability to train and recover from your workouts.
Sure, you could ask your doctor about testosterone replacement or HGH therapy, but there are risks and financial costs associated with these treatments. The good news is that regular exercise and a healthy diet can help boost testosterone and growth hormone naturally.
Lack of time
Life can get pretty hectic when you’re in your 40s. You’ll need to balance your work and home life while finding the time and energy you need for training. In many cases, when time is short, the first casualty will be your workouts.
Initially, you’ll probably plan on rescheduling, but, more likely, you’ll skip more workouts than you complete. Being in your 40s means you can’t shirk your responsibilities to go and train.
Most guys in their 40s don’t have the luxury of hitting the gym for two hours a day, six days a week. Thankfully, you don’t need to train for hours at a time to preserve or gain muscle.
Related: Two Exercise Workouts for Time-Pressed Bodybuilders
These are the realities of training in your 40s. Sure, some fitness influencers and ex-bodybuilders seem to have been able to avoid the effects of aging, but they are in the minority and are probably on TRT. It would be a mistake to judge your progress against such people because there is a massive difference between being natural and boosting your performance with anabolic steroids, even if they have been prescribed by a doctor.
Workout Tips for Men in Their 40s
Avoid the pitfalls and problems that could derail your training with these tried-and-tested workout and fitness tips for men in their 40s:
Warm up like a boss
Warm-up Exercise Bike
Warming up is important whatever your age, but the older you are, the more critical it becomes. Older bodies tend to be stiffer, more immobile, more damaged than younger ones, and more prone to injury, too.
Make your workout as enjoyable, safe, and comfortable as possible by warming up thoroughly before you begin. Extra time spent on your warm-up will pay dividends in the future.
Related: How to Warm Up for Strength Training
Train with lighter weights and higher reps
Younger men tend to put a lot of stock in how much weight they can lift. Plates on the bar equal bragging rights, and, as the saying goes, if the bar ain’t bending, you’re just pretending!
However, injuries are more common when you lift heavy loads. They stress not only your muscles but your joints too.
Avoid injuries and unnecessary wear and tear by training with lighter weights and higher reps. Contrary to what many lifters believe, you can still build strength and muscle mass with weights below 50% of your 1RM (1).
This means you no longer have to feel trapped by the 6-12 rep range and can do as many as 25-30 reps per set. Needless to say, this will be far less stressful for your already hard-worn joints. Muscle strains are also less of a risk.
Do fewer sets
With your somewhat compromised recovery ability, doing high-volume workouts could lead to overtraining. So, instead of seeing how many sets per muscle group you can tolerate, try to find out how few you need to do to get the results you want.
You’ll probably find it’s not as many as you first thought.
Try keeping your workout volume down to about 8-12 sets per muscle group per week. This is significantly less than most bodybuilding programs recommend but more than enough to build muscle and strength. Focus more on training quality than quantity; make every exercise, rep, and set count!
Do each exercise with perfect form
There are two ways to do any exercise – the right way and the wrong way. The wrong way may allow you to lift more weight or do more reps, but it usually comes with an increased risk of injury while taking work away from the muscles you want to develop.
In contrast, the right way is invariably harder, but it’s also safer and usually more effective.
So, check your ego, dial back the weights, and do every exercise in your program with perfect technique. Try to make your reps as smooth and controlled as possible to take stress off your joints and keep it on your muscles. Lift and lower with purpose.
Choose low-risk exercises
While training is good for everybody’s body, some exercises are riskier than others. As injuries tend to take longer to heal when you’re in your 40s and beyond, you should build your workouts around the safest exercises.
For example, you could do push-ups instead of bench presses, goblet squats instead of back squats, or box jumps instead of power cleans.
So, think about what you want from your workout, then choose the safest exercises for that goal. If the risks outweigh the benefits, you should think twice about doing that exercise.
It’s better to play it safe and be able to continue training than do a dangerous exercise, get hurt, and spend the next two months waiting to heal.
Make flexibility and mobility a training priority
While mobility and flexibility training are far from exciting, the older you get, the more critical they become. Older muscles and joints tend to be less elastic and mobile than their younger counterparts. Previous injuries can also take their toll.
Mobility and flexibility tend to be worse the more sedentary you are. Most older men have relatively inactive jobs and lifestyles, so they’re even more likely to be tight and immobile.
Complement your workouts with daily mobility and flexibility training to keep you supple and flexible. Just because you are in your 40s doesn’t mean you have to be as stiff as a proverbial board!
Related: How Sitting is Bad For You and What To Do About It
Strengthen your core
A large and growing number of men suffer from lower back pain, and the risk of back pain increase with age. Some types of back pain are unavoidable and are linked to things like disc degeneration and general wear and tear. However, other types of back pain can be attributed to weak core muscles.
Core is the collective term for the muscles of your midsection, including the rectus abdominis, obliques, and transverse abdominis. These muscles contract inward to create intra-abdominal pressure and support your lumbar spine from within.
Spending a lot of time sitting in a chair can weaken your core muscles, increasing your risk of suffering back pain. So, make sure you include core and anti-core exercises in your workout routine to keep the risk of back pain to a minimum.
Include unilateral exercises in your workouts
Unilateral or single-limb exercises are a godsend for older exercisers. For starters, they’re great for preserving your balance, which often declines with age. Secondly, they let you train hard without resorting to bone-crushing weights. For example, single-leg Romanian deadlifts are MUCH more lower back-friendly than regular RDLs.
While there is nothing wrong with bilateral or two-limbed movements, every over-40s exerciser should include unilateral exercises in their workouts.
Get your body composition under control
Younger lifters often want to get bigger and stronger, which they usually achieve through bulking. Bulking involves strategic overeating to create a significant calorie surplus. These extra calories go to fuel muscle growth but also lead to fat gain.
Older exercisers often experience fat gain, too, but not because they’re bulking. Instead, gaining weight gain in your 40s is usually the fault of moving less and eating more. This weight gain even has a name – middle-aged spread.
Gaining weight as you age can increase your risk of heart disease, diabetes, and other insidious illnesses. Being overweight when you’re young is dangerous, but it can be fatal in your 40s and beyond.
Now is the time to get your weight under control and lose the fat you’ve been accumulating since high school. There is no need to crash diet or try to lose it in a month; such intense interventions are seldom successful.
Instead, aim to lose half to one pound a week for the next few months. This time next year, you could be a whole new man.
Do your cardio
Younger lifters are all about getting buffed and ripped. They want big veiny biceps and cannonball delts. They aren’t thinking about the future – just looking their best on the beach.
As a man in your 40s, your risk of heart disease is considerably higher, so you must start doing more cardio to keep your heart and circulatory system in tip-top shape.
We’re not saying you need to quit lifting and take up jogging. However, you do need to complement your strength training workouts with more cardio. Aim to do at least three 20-minute cardio workouts per week to keep the old ticker fit and strong.
Big biceps are great, but you need a healthy heart if you want to keep on truckin’.
Make sure your diet supports your training
As a younger man, you could probably eat whatever you wanted and still feel fine; cold pizza for breakfast, a takeout burger for lunch, and beer and cereal for dinner. Now you’re in your 40s, the expression, “You are what you eat,” has never been truer, and if you fill up on junk food, that’s exactly how you’ll feel.
If you want to look and perform at your best, your diet needs to not only support your training but it also needs to be healthy. So, make friends with fruit and vegetables, eat more heart-friendly whole grains, pump up the lean protein, and enjoy some healthy fats.
In short, now you are in your 40s, it’s time to eat like an adult and not the kid you once were.
Related: Fix Your Diet in Six Weeks
Respect your body’s need for rest and recovery
It’s time to pay as much attention to rest and recovery as you do your workouts and diet. Training takes a lot out of your body, and now you are in your 40s, it’ll be longer before you can do it all again.
So, make sure you get plenty of sleep, preferably 7-9 hours a night, and use these recovery strategies to put back into your body what your workouts take out.
Finally, recognize then an extra rest day might be more beneficial than a workout. It’s usually best to train consistently, but if you are still tired from your last workout, a day off might do you more good.
Forget what you used to do and focus on what you can do
I used to be a powerlifter and have pulled three times my bodyweight in competition, and my squat wasn’t far behind. However, that’s what I used to do, and it has no bearing on my training now I’m in my 50s.
Nowadays, I rarely use barbells or dumbbells, and I find bodyweight and isometric exercises are better for my battered joints. I’m still in shape and probably fitter than I was 20 years ago. However, my entire training outlook has changed over the last decade, and so should yours. Trying to relive or hold onto your glory years is an exercise in futility.
It doesn’t matter that you used to be a football player in college or a bodybuilder in your late 20s. It’s what you do now that matters.
So, don’t judge today’s you on what you achieved in the past. As a man in your 40s, your body has changed, and training like you did as a younger man is a recipe for disaster. It’s time to start training for the future and not the past.
Set yourself goals based on where you want to be in five, ten, or 20 years. Look forward, and not back. Be proud of your achievements, but don’t dwell on them or let them determine your current or future workouts.
The Best Over 40 Workout Plan for Men
You’ve now got all the information to design your very own workout plan for men over 40. But, to save time, we’ve written one for you.
This plan involves four workouts per week – two upper body and two lower body – which provides a good balance between training and recovery. It also leaves some time for cardio and mobility training, which, as you know, are critical for men in their 40s.
Try to avoid lifting weights more than two days in a row, and also avoid resting more than two days in a row. While that might sound like a logic problem, it’s actually pretty easy if you structure your workout week like this:
Monday
Tuesday
Wednesday
Thursday
Friday
Saturday
Sunday
Workout 1
Workout 2
Rest/cardio
Workout 3
Rest/cardio
Workout 4
Rest/cardio
Remember, though, before you lift, you need to warm up, as failing to do so could lead to injury or, at least, a low-quality training session. That 10-15 minutes spent warming up could save you from spending months on the injured list and unable to train.
Workout 1 – Upper Body
We kick off our over-40s workout plan with an upper-body workout emphasizing the horizontal plane, i.e., chest and upper back. Dividing your body into planes rather than individual muscle groups makes it easier to develop structural balance, which is critical for functionality and joint health.
#
Exercises
Sets
Reps
Recovery
1
Incline dumbbell bench press
2-4
12-20
60-90 seconds
2
Single-arm dumbbell row
2-4
12-20
60-90 seconds
3
Push-up
2-4
AMRAP*
60-90 seconds
4
Face pull
2-4
12-20
60-90 seconds
5
Cable crossover
2-4
12-20
60-90 seconds
6
Reverse cable fly
2-4
12-20
60-90 seconds
7
EZ bar biceps curl
2-4
12-20
60-90 seconds
8
Dumbbell concentration curl
2-4
12-20
60-90 seconds
*AMRAP = As Many Reps as Possible – just rep out to failure, regardless of how many you can do.
Workout 2 – Lower Body
Friends don’t let friends skip leg day, even if they’re in their 40s! Strong legs are critical, as they’re the engines that carry and support the rest of your body. Losing leg strength can have a profound effect on your mobility and stability. This leg workout is quads-centric, emphasizing your knee extensors. There is also some core work toward the end of the program.
#
Exercises
Sets
Reps
Recovery
1
Goblet box squat
2-4
12-20
60-90 seconds
2
Rear foot elevated split squat
2-4
12-20
60-90 seconds
3
Leg extension
2-4
12-20
60-90 seconds
4
Standing calf raise
2-4
12-20
60-90 seconds
5
Pallof press
2-4
12-20
60-90 seconds
6
Kneeling cable crunch
2-4
12-20
60-90 seconds
Workout 3 – Upper Body
Workout three takes us back to the upper body. However, this time you’ll be working in the vertical plane, emphasizing your shoulders and lats. The workout ends with a couple of exercises for your triceps. After all, even guys in their 40s deserve a ticket to the gun show!
#
Exercises
Sets
Reps
Recovery
1
Pull-up/Chin-up*
2-4
AMRAP**
60-90 seconds
2
Standing barbell press
2-4
12-20
60-90 seconds
3
Lat pulldown
2-4
12-20
60-90 seconds
4
Seated dumbbell press
2-4
12-20
60-90 seconds
5
Straight arm pulldown
2-4
12-20
60-90 seconds
6
Cable lateral raise
2-4
12-20
60-90 seconds
7
Dumbbell skull crusher
2-4
12-20
60-90 seconds
8
Cable triceps pushdown
2-4
12-20
60-90 seconds
*Do band or machine-assisted pull-ups/chin-ups if necessary.
**AMRAP = As Many Reps as Possible – just rep out to failure, regardless of how many you can do.
Workout 4 – Lower Body
Your final workout is another leg session. However, this time, you’ll be working mainly on your glutes and hamstrings. But, as before, there are also a couple of core exercises toward the end of the program.
#
Exercises
Sets
Reps
Recovery
1
Rack pull
2-4
12-20
60-90 seconds
2
Single-leg Romanian deadlift
2-4
12-20
60-90 seconds
3
Leg curl
2-4
12-20
60-90 seconds
4
Seated calf raise
2-4
12-20
60-90 seconds
5
Side plank leg lift
2-4
12-20
60-90 seconds
6
Reverse crunch
2-4
12-20
60-90 seconds
Over 40 Training – FAQs
Do you have a question about working out in your 40s and beyond? No problem, because we’ve got the answers!
1. I’m 39. Are you saying I have to change my workouts after my next birthday?
Aging is a gradual process – the changes discussed in this article don’t happen overnight. So, changing your workouts does not have to coincide with celebrating your 40th birthday.
However, as you move into your mid-40s and beyond, you’ll invariably see and feel your body start to change, and you need to make allowances. Driving on regardless could bring your training to a crashing halt.
So, listen to your body, and adjust your workouts as and when you need to. This could be in your mid to late 40s, your 50s, or even your 30s – it all depends on you.
2. Can a man in his 40s still gain muscle?
You can gain muscle at almost any age – even in your 80s. However, how much depends on how far you are from your genetic potential and your current level of muscularity. For example, if you are in your 40s and have never trained before, you have the most potential for muscle growth.
However, if you’ve been training for 20 years and are already pretty muscular, you probably won’t gain much more muscle, although some increases should still be possible.
Finally, rates of muscle gain tend to be slower once you’re in your 40s and beyond, so don’t expect to pack on ten pounds in a month. That sort of progress only really happens when you’re in your 20s.
3. I’m in my 40s and have trained all my life; do I need to change my workouts?
If your current training plan works for you, there is no compelling reason to change your workouts, even if you are in your 40s.
However, if you are experiencing more aches and pains than usual, are finding it hard to recover from training, or aren’t enjoying your workouts as much as you used to, it may be time to think about making some changes.
Clinging to your old workouts when they no longer suit your aging body is a mistake. However, a few minor changes could be all you need to keep on training well into your 50s, 60s, and 70s.
4. What is the best diet for men in their 40s?
The best diet is the one that a) supports your training, b) is healthy, and c) you enjoy and can stick to. For some, this will be something like intermittent fasting or paleo. However, arguably the healthiest and tastiest diet comes from countries like Greece, Italy, and France – the Mediterranean diet.
Built around vegetables, fruits, lean proteins, whole grains, and healthy fats, this diet is good for your heart, brain, and waistline. The Mediterranean diet is considered by many to be the most nutritious eating plan in the world.
Read more about the Mediterranean diet in this article.
5. I’m 40 and out of shape – is this workout suitable for me?
While this program is designed for men in their 40s, it assumes you are currently exercising and in reasonable shape. Some of the exercises are pretty challenging, and the volume and frequency are moderately high. As such, it’s probably too much for someone who is out of shape or a beginner.
If it’s been a year or more since you exercised regularly, you should start getting back in shape with a basic full-body training plan and regular cardio. This will create a solid foundation for more demanding workouts in the future.
Then, after 6-9 months, of consistent training, you’ll be ready to start this workout plan.
6. What weights should I use for these workouts?
Unfortunately, this is the one question we can’t answer. After all, we have no way of knowing how strong you are.
So, instead, pick a light to moderate weight and rep out to within 1-3 reps of failure. If you can’t do 12 reps, your chosen load is too heavy. Conversely, the weight is too light if you can do more than 20 reps. Adjust the load until you’re in the sweet spot of 12 to 20 reps.
Remember, though, you must also try to make your subsequent workouts more demanding. You can do this by performing more reps or lifting slightly heavier weights. This is called progressive overload, one of the keys to successful strength training.
7. Can I make changes to the workout plan?
The exercises selected offer the best results with the lowest risk of injury. This is based on over 30 years of training and coaching experience. However, if you want to change any of the movements, you are welcome to do so.
That said, make sure you choose similar exercises so you stay true to the spirit of the program. For example, while doing trap bar deadlifts instead of rack pulls is an acceptable change, doing cable hip abductions is not, as they’re very different exercises.
Closing Thoughts
A lot of men think that, when they hit their 40s, their best years are behind them and that middle-aged spread and muscle loss are compulsory. This is not necessarily the case!
While you may not be able to train as you did in your 20s and early 30s, you can still get and stay in great shape when you’re in your 40s, 50s, and beyond.
While your progress might not be as dramatic, and you’ll need to pay more attention to your diet, rest, and recovery, you can still build muscle and get fit and lean.
Age does not have to be an unbreakable barrier.
Use the tips and program to get in the best shape of your life, even if you are a man in his 40s.
References:
Lasevicius T, Ugrinowitsch C, Schoenfeld BJ, Roschel H, Tavares LD, De Souza EO, Laurentino G, Tricoli V. Effects of different intensities of resistance training with equated volume load on muscle strength and hypertrophy. Eur J Sport Sci. 2018 Jul;18(6):772-780. doi: 10.1080/17461391.2018.1450898. Epub 2018 Mar 22. PMID: 29564973. https://pubmed.ncbi.nlm.nih.gov/29564973/

Chris Bumstead Builds Girthy Legs With This Off-season Workout
Chris Bumstead is inching towards the fifth Classic Physique Olympia title slowly but surely. The reigning champ went through an off-season leg workout to add strength and size to his already impressive physique.
Bumstead is one of the most famous active bodybuilders and a global superstar. He is the posterboy for the Canadian bodybuilding community and has proven his worth by establishing dominance over the IFBB Pro League’s Classic Physique division. His resume includes a whopping four Classic Physique Olympia titles. After snatching it from the former champ Breon Ansley at the 2019 Olympia, Bumstead has defended the Classic Physique Olympia title at the 2020, 2021 and the 2022 Olympia.
Having reigned supreme over the division for a long time, the 28-year-old bodybuilder intends to defend the strap a few more times before calling it a career. Olympia is Bumstead’s primary focus and he is not keen on competing at other Pro shows. Having recovered from the bicep tear he suffered ahead of the 2022 Olympia, Bumstead has eased his way back into training. He recently unveiled a private gym in-the-making and shed light on the 2023 Olympia diet.
Bumstead is on the mission to win his fifth Classic Physique Olympia title in 2023. He went through a leg training session as a step in the direction of achieving the goal and posted the video on his YouTube channel. So let’s delve into the champ’s workout and see how he is building the tree-trunk legs this off-season.
Chris Bumstead goes through a full leg workout
CBum targeted all the major muscles – quadriceps, hamstrings, glutes and calves as well as the adductor group of muscles with this training session for overall leg development. He admitted that bringing big adductors is one of the goals of his preparation this year. As a result he is putting emphasis on working the adductor muscles.
Leg Extensions
This quad isolation movement served as the beginner to the training session. Knees are without a doubt the most crucial joint for most of the lower body movements. Therefore, it is essential to maintain healthy knees to avoid subsequent derailment of your training journey. Sufficiently warming the knees up before heavy workout is one of the key elements of staying injury free.
Apart from building the quads, leg extensions are an excellent way to warm up the knee joints. However, this exercise can also be harsh on the knees if done with heavier weights without caution. CBum performed three sets of 12 reps of leg extensions to get the party started and took to the next exercise.
Hack Squats
This compound movement followed up the leg extensions in Bumstead’s leg workout. He performed hack squats on the Cybex hack squats machine. Hack squats target the same primary muscle group that the traditional barbell squats do. While quadriceps are the main target muscle of the movement, the posterior chain of muscles are heavily involved in the movement. But what separates hack squats from barbell squats is the fact that it is generally a lot safer for most people to perform as it puts far less stress on the lower back due to the angle of movement as well as the set-up.
Hack squats are not a replacement to the barbell squat but a great addition to the leg training routine. The Classic Physique king annihilated three sets of the exercise maintaining a 12 to 15 rep range and took to the next exercise.
Leg Press
To stimulate the quads and other leg muscles further, the 28-year-old phenom performed the leg press next. One of the most effective ways to build muscle and strength in the lower body, leg press compliments primary leg exercises like barbell squats really well. This compound movement targets the quads as well as hamstrings, glutes, adductors and abductors.
Leg press offers increased safety compared to free weight exercises and its variations can help emphasize different parts of the muscles. CBum cranked out three working sets of the exercises and wrapped up after doing a double drop set to failure.
Walking Lunges
This walking variation of the static lunges helps strengthen the leg muscles as well as core, hips and glutes. Additionally, this exercise can help increase the range of motion by increasing flexibility in the glutes and hamstrings. It also improves functional strength as the movement pattern resembles everyday movements like walking, sitting down, ducking down to pick an object etc.
Bumstead pushed through two sets of the exercise and shifted his focus to working the calves next.
Seated Calf Raises
While the standing calf raises work the gastrocnemius muscles in the calf region, the seated variation of the exercise works the soleus muscle which lies underneath it. CBum performed two sets of seated calf raises to failure and took to the final exercise of the day.
Hip Adduction Machine
Adductors are a group of muscles that lie on the inner side of the thigh that helps adduct (bring together) the legs. Bumstead did two sets of hip adduction on the machine to work these muscles and called it a day in the gym.
Overall, the workout included:
Chris Bumstead has fended off the competition successfully so far. While experts within the bodybuilding community predict that he can have a great run in the Men’s Open division, Bumstead does not see it as an effort that is worth making. It will be interesting to see how the remainder of his career unfolds.
You can watch the full workout video here, courtesy of Chris Bumstead’s personal YouTube channel:
Published: 21 June, 2023 | 10:33 AM EDT
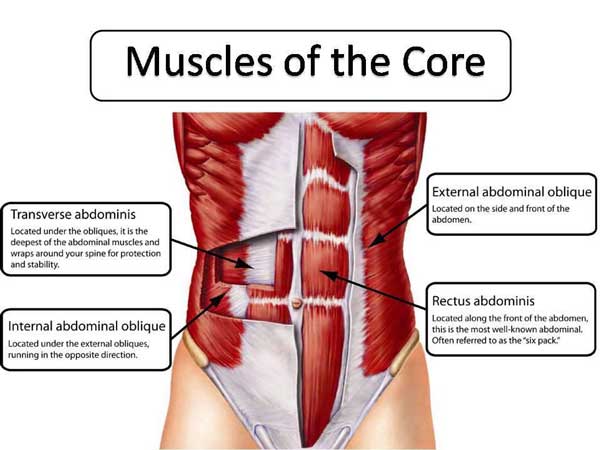
The 17 Best Standing Abs Exercises for All Fitness Levels
We love floor-based abs exercises as much as the next guy, but sometimes it’s nice not to have to lie on a sweaty gym mat or dirty floor to bust out some sit-ups or crunches.
Also, floor-based abs exercises are not exactly functional. After all, apart from sitting up in bed, when was the last time you used your abs to pull your torso upright? Floor abs exercises are often hard to load, too. You’ve got to rely on the weight of your upper body or legs to hit your abs. Depending on your body size and strength, this may be too much or too little weight to work your abs.
The good news is that there are LOTS of great abs exercises you can do while standing. Some are easy and ideal for beginners, while others are hardcore and perfect for more advanced exercisers.
In this article, we reveal the 17 best standing abs exercises for all fitness levels.
Abs Anatomy 101
When most exercisers talk about abs, they actually mean their core. The core is the collective term for all the muscles of the midsection. Some functional fitness experts also like to include additional muscles in their core collective, including the lats and glutes. However, that just complicates an already complex subject!
So, for the purposes of this article, when we say abs, we actually mean the core, and that covers the following muscles:
Core Muscles Anatomy
Rectus abdominus
The rectus abdominis is the long, flat muscle on the front of your stomach. It’s divided into vertical halves and horizontal sections by lines of ligamentous tissue, giving it that famous six-pack appearance.
However, you’ll need to be pretty lean to see these lines, typically below ten-percent body fat for men and under 15 percent for women.
The functions of the rectus abdominis are flexion and lateral flexion of the spine.
Obliques
The obliques are basically your waist muscles, and there are two sets – the internal and the external obliques. These muscles rotate and laterally flex your spine. However, when both sides co-contract, they also play a part in flexion and work alongside your rectus abdominis.
Transverse abdominis
Known as the TVA for short, this muscle encircles your midsection like a weightlifting belt. When you brace your abs, it contracts inward and compresses your internal organs. This creates intra-abdominal pressure, which helps to support your lumbar spine.
So, while you won’t be able to see your TVA working, you will be able to feel it. The TVA is involved in all standing abs exercises.
Erector spinae
The erector spinae is a group of three muscles, each of which is divided into three sections. These muscles run up either side of your spine and are involved in extension and lateral flexion. Many standing core exercises also involve the erector spinae, despite the fact they’re technically back muscles. In most cases, the erector spinae act as stabilizers.
All standing abs exercises involve all of these muscles. However, depending on the movement performed, some will be working harder than others. Therefore, in the exercise descriptions, we’ll list the muscles in order of which are doing most of the work.
The Benefits of Standing Abs Exercises
While there is nothing wrong with floor-based abs exercises, standing abs exercises offer some noteworthy advantages and benefits. These include:
Increased functionality
Your core plays a critical role in most human movements. In some situations, it acts as a stabilizer to prevent unwanted movement of your spine. In others, the core is responsible for generating force, e.g., pushing, pulling, and throwing.
Regardless of what they are doing, most of these activities occur when you’re on one or two legs and not lying on your back. Therefore, standing abs exercises are often more functional than their supine counterparts.
Comfort
Standing abs exercises are often more comfortable than similar exercises performed lying on the floor. An exercise mat will help, but one may not be available. With no pressure on your lower back, standing abs exercises are usually more comfortable than floor-based movements.
Convenience
Not everyone trains in a well-equipped gym. Some people prefer to work out in playgrounds, parks, or other large open spaces. Sure, you COULD take a mat with you for abs exercises, but that’s unnecessary if you do standing abs exercises.
With no mat required and often very little equipment, you can do some standing exercises anywhere and anytime, making them the perfect excuse-free workout.
No more mobility issues
Older exercises and people with mobility issues may find getting down on the floor to do sit-ups, crunches, etc., awkward. Getting back up may present an even more significant challenge. Many standing abs exercises are ideal for older exercises and anyone who finds getting down to floor level difficult.
Standing Abs Exercise Drawbacks
Standing abs exercises are generally safe and effective. However, there are a couple of drawbacks to consider, too:
Limited loading
While there are numerous standing abs exercises that utilize an external load, other movements rely on your body weight for resistance. Because of the direction of gravity, this may mean there is very little tension on the muscles you’re training.
You can contract the target muscles harder to get a better training effect, but, even then, some exercises will be too easy if you already have a well-conditioned core.
Lack of understanding
Standing abs exercises are a trending topic right now (#standingabs). Unfortunately, this means a lot of wannabe fitness experts are posting standing abs exercises with little understanding of how the core muscles work.
For example, holding a weight in your hands and then twisting your torso does NOT load your obliques. The force is vertical, whereas the obliques work in the transverse plane, i.e., horizontally. In essence, there is no resistance to rotation.
It doesn’t matter if you hold a 20-pound weight or a 100-pounder; twisting with a weight in your hands won’t challenge your obliques. However, your arms will probably get a good workout!
Similarly, doing standing crunches are all but pointless, as the weight (your upper body) is pulling your spine into flexion – your abs aren’t doing much, if any, of the work.
So, don’t make poor exercise choices. Remember that some self-certified fitness influencers are nothing but a pretty face with a six-pack and a loud voice and don’t actually know what they’re talking about.
Instead, think about the function of the muscles you want to engage, perform movements that work that muscle, and then apply a load, if necessary, to make that movement more challenging.
The 17 Best Standing Abs Exercises
Now you know the pros and cons of standing abs exercises and the muscles these movements work. So, it’s time to reveal the 17 best standing abs exercises for all fitness levels!
1. Standing cable crunch
Muscles targeted: Rectus abdominis, transverse abdominis.
The key to an effective crunch is shortening the distance between your sternum and pelvis. Making a discernable C-shape with your spine ensures that your abs do the work, not your hip flexors. If you can’t feel this exercise in the front of your abdomen, there is a good chance you are flexing your hips more than your spine.
Steps:
Fix a rope handle to a high cable pulley machine. Take one end in each hand and take a step backward to tension the cable.
Pull the handles down so your hands are in front of your shoulders.
Stand with your knees slightly bent, feet shoulder-width apart.
Flex your spine and draw your sternum down toward your pelvis.
Lift your chest to get a stretch in your abs, and repeat.
Benefits:
Easy to scale by reducing or increasing the load.
More effective than the kneeling variation of this exercise.
A very lower back-friendly core exercise.
Tips:
Exhale as you contract your abs to increase muscle engagement.
Hold the handles in one hand only to work the obliques more.
You can also do this exercise with a resistance band:
2. Pallof press
Muscles targeted: Obliques, rectus abdominis, transverse abdominis.
The Pallof press was invented by Bostonian physical therapist John Pallof. This is an anti-core exercise, meaning you’ll be using your midsection to prevent unwanted movement. This is how your core often has to work in nature, making Pallof presses a very functional abs exercise.
Steps:
Attach a D-shaped handle to a cable machine set to mid-chest height.
Stand side-on to the pulley with the handle in both hands. Your feet should be about shoulder-width apart, knees slightly bent. Brace your core.
Pull your hands into your chest and step away from the machine.
Without moving your hips or shoulders, extend your arms out in front of you.
Bend your arms and return your hands to your chest.
Repeat for the required number of reps and then switch sides.
Benefits:
Minimal lower back stress.
Very scalable – just add or subtract weight according to your needs.
An excellent exercise for integrating the upper and lower body with the core.
Tips:
The narrower your stance, the more challenging this exercise becomes.
Vary the height of your arms to work your core from different angles.
Do this exercise with a resistance band for home workouts.
3. Overhead Pallof press
Muscles targeted: Rectus abdominis, transverse abdominis.
Where regular Pallof presses are an anti-rotation exercise, this version is an anti-extension exercise, so it hits your anterior abs more than your obliques. This challenging exercise is basically a standing, moving plank.
Steps:
Attach a rope handle to a high pulley. Grab the handle and then turn your back to the machine. Hold your hands at shoulder height and brace your core. Adopt a split stance for balance.
Without leaning forward or backward, press your arms above your head.
Return your hands to your shoulders and repeat.
Benefits:
A full-body standing abs exercise.
Good for increasing core and upper body stability.
Can be made as hard or as easy as required by adjusting the weight
Tips:
You can also do this exercise with a resistance band.
The closer/narrower your feet, the more challenging this exercise will be.
Exhale as you raise your arms to increase core engagement.
4. Dumbbell side bend
Muscles targeted: Obliques, rectus abdominis, transverse abdominis.
Many people do this exercise with a dumbbell in each hand – don’t be one of them. Using two weights means one dumbbell counterbalances the other, rendering the exercise useless. Use one dumbbell only, and you’ll get a much better core workout.
Steps:
Hold a dumbbell in one hand, arm by your side. Stand with your feet about shoulder-width apart, knees slightly bent. Brace your core and pull your shoulders down and back.
Lean to the side and lower the weight down the outside of your leg.
Stand upright and repeat.
Benefits:
An effective dynamic oblique exercise.
Good for increasing lateral mobility.
A useful forearm and grip strengthening exercise.
Tips:
Keep your hips and shoulders squared – no twisting.
Use a kettlebell instead of a dumbbell if you wish.
Hold a weight in one hand only!
5. Landmine full-contact twists
Muscles targeted: Rectus abdominis, obliques, transverse abdominis.
A landmine is a simple device that turns a barbell into a functional workout machine. You can do many exercises with a landmine, and they’re all excellent. No landmine? No problem! Just wedge the end of your barbell into a corner or against the bottom of a squat rack. Full contact twists are an excellent standing core exercise.
Steps:
Place one end of your barbell in the landmine, and grab the other in both hands.
Lift the bar and hold it above your head with your hands close together, palms facing inward.
Brace your core and pull your shoulders down and back. Press the bar forward and down into the landmine.
Maintaining your core tension, rotate your shoulders and arms and lower the bar down to one side. Turn your hips in the same direction as your arms.
Lift the weight back to the center and repeat on the opposite side.
Continue alternating sides for the duration of your set, driving your arms forward and down throughout.
Benefits:
An excellent exercise for athletes.
Can be performed with heavy weights to develop a strong, powerful core.
A full-body, functional, total core strength exercise.
Tips:
Raise the weight explosively but lower it slowly to make this exercise as effective as possible.
Don’t just use your arms for this exercise; put your entire body into each rep.
Keep flexing your abs throughout.
6. Saxon side bend
Muscles targeted: Obliques, rectus abdominis, transverse abdominis.
The Saxon side bend is named after old-school professional strongman Arthur Saxon. As a strongman performer, Saxon did incredible feats of strength live onstage, often in front of enormous crowds. The Saxon side bend was one of his favorite exercises for developing core strength.
Steps:
Stand with your feet about shoulder-width apart, knees slightly bent. Hold and raise a weight above your head, e.g., a medicine ball or a single dumbbell.
Without twisting your shoulders or hips, lean from one side to the other to challenge your core.
Adjust your range of motion according to your flexibility and mobility.
Benefits:
You don’t need heavy weights for this exercise; a little goes a long way.
Good for improving lumbar spine lateral mobility.
An effective shoulder stability exercise.
Tips:
Don’t go too heavy too soon – this exercise is more strenuous than it looks!
Hold the weight in front of your chest to shorten the lever and make this exercise easier.
Do not allow your hips or shoulders to twist, as doing so makes this exercise less effective.
7. Cable high-to-low woodchop
Muscles targeted: Obliques, rectus abdominis, transverse abdominis.
This exercise is so-called because, when you do it, you look a little like you are chopping wood. The cable woodchop is an effective oblique strengthener and teaches you how to integrate your upper and lower body with your core.
Steps:
Attach a D-shaped handle to a high cable machine. Hold the handle in both hands and then stand sideways onto the pulley. Take 1-2 steps away to tension the cable.
Stand with your feet about shoulder-width apart, knees slightly bent.
Keeping your arms straight, turn your upper body through 180 degrees so your hands travel diagonally downward to hip height.
Return to the starting position and repeat.
Do the same number of reps on each side.
Benefits:
Easy to modify for all levels of exerciser.
Teaches you how to brace your core while using your upper and lower body.
A very lower back-friendly exercise.
Tips:
You can also do this exercise with horizontal arms or working from low to high.
Try shifting your weight from one leg to the other as you rotate your upper body.
No cable machine? Do this exercise with a resistance band attached to a sturdy anchor.
8. Standing oblique crunch
Muscles targeted: Obliques, rectus abdominis, transverse abdominis.
Not all standing abs exercises use cables or weights to strengthen your core. This movement might not be overly challenging, but it provides your abs and obliques with a pleasant workout. Best of all, you can do it anywhere and anytime, as no equipment is involved.
Steps:
Stand with your feet about shoulder-width apart. Clasp your hands behind your head and press your elbows out and back to open your chest. Brace your core.
Bend one leg and lift your knee out and up. Simultaneously lean sideways and lower your elbow down toward your need.
Lower your leg, stand back up, and repeat.
Do the required number of reps and then switch sides.
Benefits:
A standing, equipment-free abs exercise you can do anywhere and anytime.
Ideal for beginners.
A good way to mobilize your hips and lower back as you work your abs.
Tips:
Do this exercise with an alternating action if preferred.
Make this exercise harder by wearing ankle weights.
Pause at the mid-point of each rep to maximally contract your abs and make this exercise more effective.
9. Standing bicycle crunch
Muscles targeted: Rectus abdominis, obliques, transverse abdominis.
Regular bicycle crunches are an excellent, if highly challenging, abs exercise. This standing version is far more accessible, making it ideal for beginners. It’s also a useful teaching exercise before attempting full bicycle crunches and can also be used as a warm-up. However, the overload on your abs is pretty low, so make sure you contract your muscles hard to gain any benefits.
Steps:
Stand with your feet together, knees slightly bent for balance. Place your hands on your temples. Brace your abs.
Bend one leg and lift your knee up and across the front of your body. Simultaneously lean forward and lower your opposite knee to your elbow.
Stand up straight, lower your foot to the floor, and then repeat on the other side.
Continue alternating sides for the duration of your set.
Benefits:
A good standing abs exercise for beginners.
An excellent hip and spine mobility exercise.
A good move to prepare you for full bicycle crunches.
Tips:
Do not clasp your hands behind your neck, as you are more likely to pull with your arms if you do.
Pause at the midpoint of each rep for maximum effectiveness.
Drive your supporting foot into the floor to make balancing on one leg easier.
10. Single-arm dumbbell press
Muscles targeted: Obliques, rectus abdominis, transverse abdominis.
While dumbbell presses are usually viewed as an upper-body exercise, they also provide an effective abs workout. Done standing, the single-arm dumbbell press is as good for your abs as it is for your shoulders.
Steps:
Hold a dumbbell in one hand at shoulder height. Stand with your feet about shoulder-width apart, knees slightly bent. Brace your core.
Without leaning sideways, press your weight up and overhead to arm’s length.
Lower the weight back to your shoulder and repeat.
On completion of your set, swap sides and repeat.
Benefits:
An effective and accessible lateral core exercise.
A great time-saver – work your core, deltoids, and triceps simultaneously.
An excellent way to integrate your core with your upper body.
Tips:
Do the same number of reps on both sides.
Stand with your feet closer together to make this exercise harder.
You can also do this exercise with a barbell instead of a dumbbell:
11. Suitcase deadlift
Muscles targeted: Obliques, rectus abdominis, transverse abdominis.
When most people do deadlifts, they do them to build full-body strength or a bigger, more muscular back. However, this variation is a very effective if challenging standing abs exercise. You’ll need to use all your core muscles to maintain a neutral spine, so your abs will be acting as stabilizers. This is how your core usually works in nature, so this is a very functional movement.
Steps:
Place a kettlebell or dumbbell on the floor and stand next to it so the handle is parallel to your feet.
Bend down and hold the handle with a neutral or palms-in grip.
Pull your shoulders down and back, brace your core, and look straight ahead.
Drive your feet into the floor and stand up straight. Do not lean sideways or round your back.
Lower the weight back to the floor, allow it to settle for 1-2 seconds, and repeat.
Turn around and do the same number of reps on the opposite side.
Benefits:
A very functional exercise.
Teaches you how to safely lift heavy objects off the ground.
Helps identify and fix left-to-right strength imbalances.
Tips:
Use gym chalk to prevent your hands from slipping.
Perform this exercise in front of a mirror to ensure you don’t lean to the side.
You can also do this exercise with a barbell.
12. Single-arm farmer’s walk
Muscles targeted: Obliques, rectus abdominis, transverse abdominis.
This is another standing core exercise that many people do for an entirely different reason. Farmer’s walks are a well-known grip and general conditioning exercise. However, when performed using just one weight, it quickly becomes a very challenging abs workout.
Steps:
Hold a heavy dumbbell or kettlebell in one hand with your arm by your side. Brace your core and set your hips and shoulders so they are level.
Without leaning to either side, walk around your training area.
Having completed the required distance, lower the weight to the floor, swap hands, and repeat.
Benefits:
A very functional standing abs exercise.
An excellent way to spot and fix left-to-right strength imbalances.
A challenging grip-building exercise.
Tips:
Use chalk to stop your hands from slipping.
Keep your shoulders down and back throughout.
Lower the weight to the floor as you feel your grip starting to give out. Don’t drop the weight.
13. Standing ab wheel rollout
Muscles targeted: Rectus abdominis, transverse abdominis.
Standing abs exercises don’t come much more challenging than the infamous rollout. This exercise combines extended planks with a pull-over arm action, making it one of the most brutal core exercises around. Only attempt this move if you have mastered the kneeling ab wheel rollout.
Steps:
Stand with your feet about shoulder-width apart. Hold your ab wheel with an overhand grip.
Brace your core, bend your knees slightly, and lean forward to place the ab wheel on the floor in front of your feet.
Keeping your arms straight, push the roller out and away, lowering your body toward the floor. Extend your arms as far as you can without losing core tension.
Pull the wheel back toward your feet, lifting your hips up as you do so.
Continue for the prescribed number of reps.
Benefits:
Probably the most challenging standing abs exercise.
Provides an effective lat-building workout.
An ideal exercise for home workouts.
Tips:
Do this exercise facing a wall to prevent the wheel from rolling too far.
Only extend your arms as far as comfortable to avoid injuring your lower back.
Rest on your knees to make this exercise easier.
14. TRX Hip drops
Muscles targeted: Obliques, rectus abdominis, transverse abdominis.
The TRX was invented by a Navy SEAL who wanted a portable training device he could take on deployment. TRXs can be used to replicate many machine and dumbbell exercises, and there are several unique bodyweight movements you can do with this type of suspension trainer. TRX hip drops are an especially challenging lateral core exercise.
Steps:
Attach your TRX to a high anchor point. Hold the handles on both hands and raise your arms above your head so your body is straight.
Lean your hips out to the side so your body forms a distinct C shape.
Pull your hips back to the center and repeat.
Continue for the prescribed number of reps and then switch sides.
Benefits:
An excellent exercise for home workouts.
A very functional, challenging standing abs exercise.
Easy to change the difficulty by varying your range of motion.
Tips:
Place your feet closer together to make this exercise harder.
The longer the straps, the more challenging this exercise becomes.
You can also do this exercise with gymnastic rings and other types of suspension trainer.
15. Single-arm cable chest press
Muscles targeted: Rectus abdominis, obliques, transverse abdominis.
No, we haven’t included this exercise by mistake. Despite its name, the single-arm chest press is actually a terrific standing abs exercise. You’ll need to use all your core muscles to stabilize your midsection as you extend and bend your arm. But yes, it’s also a great chest exercise!
Steps:
Attach a single handle to a chest-high cable machine. Hold the handle and turn your back on the pulley so the wire runs outside or under your arm.
Step forward into a split stance for balance. Brace your core.
With your hips and shoulders still, press your arm forward and out to full extension.
Return the handle to the side of your chest, and repeat.
Switch sides and do the same number of reps with the opposite arm.
Benefits:
Teaches you how to stabilize your spine while moving your arms.
An excellent exercise for athletes.
An easy exercise to modify for all fitness levels.
Tips:
Bring your feet closer together to make this exercise more challenging.
Use your core to make sure your torso doesn’t twist.
Pair with single-arm cable rows to work your abs from the front and back.
16. Single-leg Romanian deadlift
Muscles targeted: Obliques, rectus abdominis, transverse abdominis.
Single-leg Romanian deadlifts are an excellent exercise for your glutes and hamstrings. However, you’ll also need to use your core to stabilize your spine and prevent your upper body from twisting. As such, it’s also a great standing abs exercise.
Steps:
Stand with your feet together and a dumbbell or kettlebell in your left hand. Shift your weight onto your right foot. Brace your core and pull your shoulders down and back.
Hinging from your hips, bend forward and lower the weight down the front of your leg. Lift your left leg out behind you for balance.
Stand back up and repeat.
Rest a moment and then change legs, remembering to switch hands, too.
Benefits:
Teaches you how to integrate your core with your upper and lower body.
A very lower back-friendly exercise.
An excellent balance-building workout.
Tips:
Do this exercise next to a wall and use your free hand for balance if required.
You can also keep your non-supporting foot resting lightly on the floor for balance, i.e., a kickstand or B-stance Romanian deadlift.
Keep your supporting knee slightly bent throughout.
17. Kettlebell around the world
Muscles targeted: Obliques, rectus abdominis, transverse abdominis.
Many of the best standing core exercises work one side of your abs at a time. This one is slightly different as it works your entire core in one straightforward movement. Done with light weights, this exercise is an excellent warm-up for your whole midsection. But, done with greater loads, it’s a challenging yet fun total abs exercise.
Steps:
Stand with your feet about shoulder-width apart, knees slightly bent for balance. Brace your abs. Hold a kettlebell in front of your hips.
Swing the weight around your waist, transferring from one hand to the other behind your back and in front of your hips.
Use your core muscles to resist being pulled toward the weight.
Continue for the desired number of reps, rest a moment, and then switch directions.
Benefits:
A very time-efficient exercise.
Very little lower back stress.
An excellent way to mobilize your shoulders and activate your deep core muscles before more demanding exercises.
Tips:
Keep your feet planted firmly on the floor to maintain your balance.
Lift your chest and set your shoulders down and back throughout.
Use gym chalk to stop the kettlebell handle from slipping out of your hands.
Standing Abs Exercises – FAQs
Do you have a question about standing abs exercises or core training in general? That’s okay because we’ve got the answers!
1. Will these standing abs exercises give me a six-pack?
While many of these exercises involve your six-pack muscle – the rectus abdominis – there is no guarantee that doing them will give you six-pack abs. That’s because, for the contours of your abs to be visible, you need to have a low body fat percentage. This is typically ten percent or less for men and below 15 percent for women.
It’s entirely possible to have well-develop abs but for them not to be visible because they’re hidden under a layer of fat.
So, while these standing abs exercises COULD lead to a six-pack, your results hinge on your diet as much as your workouts.
2. How many reps and sets should I do of these exercises?
You can do anywhere from 5 to 30 reps to train your abs. Low reps with heavy weights are best for building brute strength, while higher reps and lighter loads are better for endurance, hypertrophy, and general fitness.
However, some exercises lend themselves to higher or lower reps. For example, suitcase deadlifts work well with bigger loads, while standing bicycle crunches are more suitable for higher reps.
Very high reps, i.e., more than 30, are not recommended as they are largely a waste of time and not challenging enough to be effective.
Regardless, you should take each set to within a couple of reps of failure. Easy sets won’t have much of an effect on the condition of your abs.
Regarding the number of sets, 2-4 should be sufficient for most people. If you feel you need to do more than this, you probably aren’t training close enough to failure, or you are resting too long between sets.
3. XYZ exercise hurts my back – what gives?
While the majority of these standing abs exercises are very lower back-friendly, some will put a strain on your lumbar spine. Others can cause back pain when performed incorrectly or with too much weight.
So, if any of these exercises hurt your back, firstly, make sure you are performing them correctly. Perfect form is critical for a safe and pain-free workout. Then dial back the weight a little to see if that helps.
If you still feel your lower back, skip that movement and do something else. It could be that the exercise in question just doesn’t suit you.
4. Are standing abs exercises better than those performed lying down?
While standing abs exercises offer several advantages, that doesn’t mean they’re better than more traditional lying abs exercises. Ultimately, the best exercises for you are the ones you like, and that meet your workout needs.
If you want to isolate your abs, lying exercises are often best, as they don’t involve many additional muscle groups. But, if you want a more functional workout, standing exercises are arguably the better choice.
Or, you could just combine standing and lying abs exercises and enjoy all the benefits these two different types of training provide. There is no need to choose between them.
5. Will these exercises burn belly fat?
Many people think that doing lots of abs exercises will burn belly fat. Sadly, this is nothing but an old exercise myth. Your body stores and then burns fat from all over your body, not just from the areas you train. As such, if you want to burn fat and get lean, you need to work your entire body and not just where you want to lose the fat from.
So, sorry, these exercises will NOT burn belly fat.
Closing Thoughts
There is no need to head straight to the floor to train your abs. In fact, there are plenty of standing abs exercises that are every bit as effective as the ubiquitous crunches, sit-ups, and leg raises.
Movements like cable high-to-low woodchops, Saxon side bends, standing cable crunches, and standing bicycle crunches are ideal for those times when you don’t want to lie down or just want to hit your abs from a different, more functional angle.
Are standing abs exercises better than ab exercises done on the floor? Not necessarily. However, they may be more suitable for some exercisers and are worth including in any well-balanced core workout plan.